Thank you!
What are you planning to make, when your laser is “ready”?
I have the same machine…
1 Like
Oh my goshhhhhhh!!! I am in LOVE with these!! I want to move there! Haha!
Wow! Absolutely Incredible work! Do you post these elsewhere online? I want to follow. ![]()
![]()
1 Like
Thanks, Billie!
I’m on Instagram @tinyroomstherapy and have shops…
![]()
1 Like


I carved a cribbage board on an x-carve and laser a set of cards on it
![image|375x500]
!(upload://81OirZFUvbLP0IDYRl4CBN9mUTo.jpeg)
both done with foxailen 20watt laser
3 Likes
Very cool stuff. I’m planning on trying out some Steampunk stuff.
1 Like
I love that game board!!! That would be a great way to do a chore chart too!
This post is about sharing creations, it’s best you make a new post in the Community Laser Talk category, as your enquiry isn’t related to LightBurn itself. That’s the best place to ask for this kind of help. ![]()
Thank I appreciate the feedback, I am knew to all of this so I really didn’t know where to reach out to or how to, my apologies hope I didn’t offend anyone. Beautiful work by the way to those who have posted.
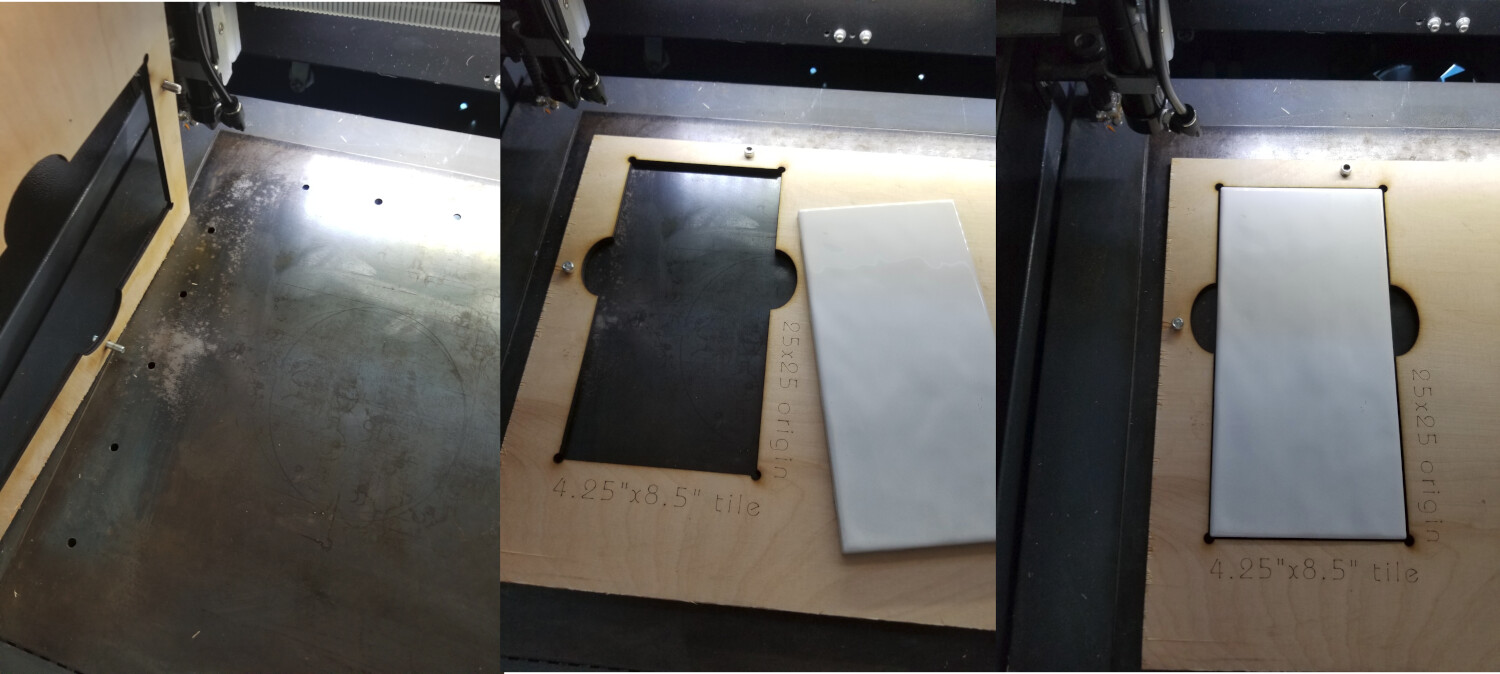
Love it, these are so detailed. Do you have anything to help show scale?
I can’t wait to see what all you make once you are really rolling with it. Having a good printer is so useful to getting things done. Wait till you have fun creating projects that use both 3DP and laser, it’s so much fun.
Will it ever truly be ready? Now I want to mount the laser from my old 2.5W diode onto the head as well, for a dual-laser setup ![]()
I have simple plans: make whatever I think of, and don’t try to “productise” anything. I always seem to end up thinking “I could sell these!” then getting excited, setting up a store, getting orders, getting annoyed at fulfilling them, shutting it all down again. Not this time! This is for fun!
I’m a bit obsessed by home/workshop organisation at the moment (if you haven’t, check out the excellent video @BillieRuben made on the topic. (Sorry, I can’t find a link… Billie? Was it the workshop tour? You made a point about having “one pair of scissors” which I think about every time I can’t find any of my tape measures…))
I’ve made a few handy things. The ones that come to mind are a 5-section drawer divider for my wife’s top drawer, to stop the undies encroaching on the socks. I will not be providing a photo because I would be excommunicated, but you can see a screenshot of the design in FreeCAD — the long parts juuuuust fit diagonally across the 500x700mm laser bed:
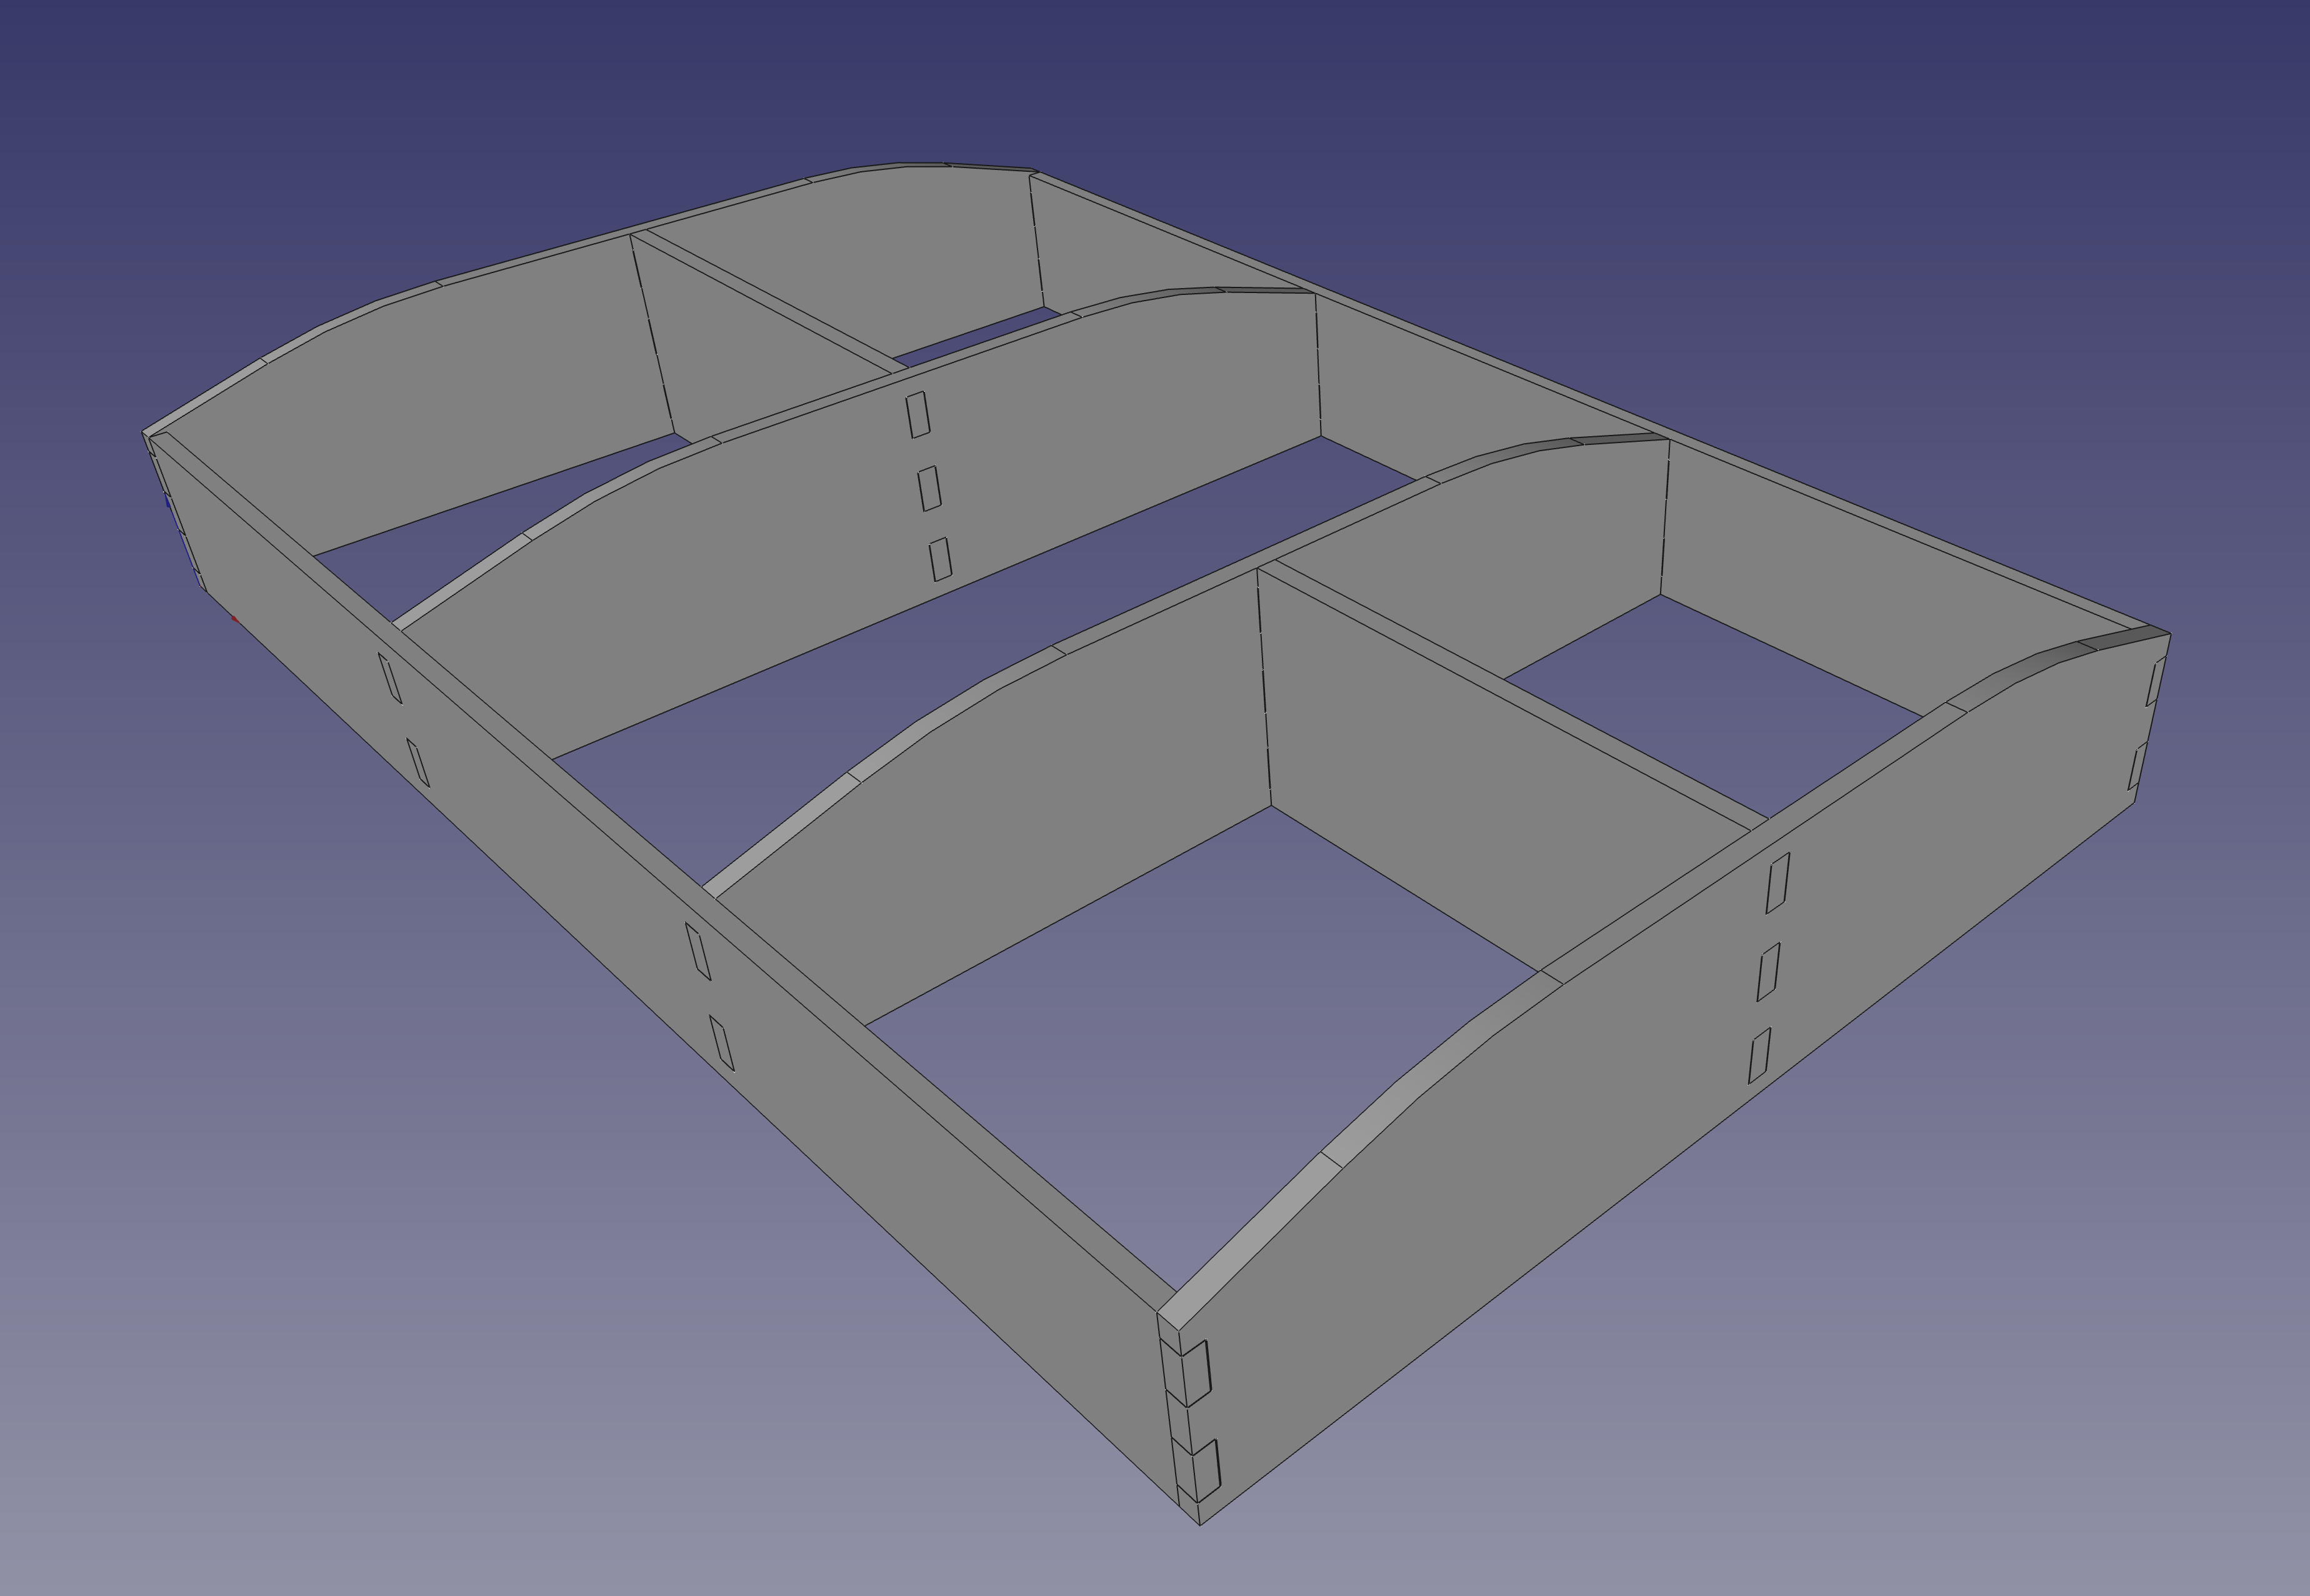
It slotted together firmly and didn’t need glue, which was a bonus! 6mm wood, possibly pine, made from some old shelves. Clear lacquer to protect the clothes from the burnt wood smell (should it smell? Or is that a sign that I’m burning instead of cutting? I imagine it should smell.)
I’ve made a bunch of sparkly cut-out stickers for the kids (3 and 5) — mostly T-Rexes and Unicorns — from some thin, glittery, self-adhesive EVA foam. I also made them some colouring stencils from some PET overhead projector sheets, again, dinosaurs and unicorns. Those didn’t work so well because when they leave them on the floor they’re very slippery and extremely invisible ![]() They do love them though! Next time I’ll use thin acrylic or something, but I’m a bit concerned it might be too brittle. Maybe I could flatten some Sprite bottles into sheets or something. I believe PET is OK to cut (I’m finding it impossible to find authoritative data about laser-cutting plastics other than acrylic (yes!) and PVC (NO!))
They do love them though! Next time I’ll use thin acrylic or something, but I’m a bit concerned it might be too brittle. Maybe I could flatten some Sprite bottles into sheets or something. I believe PET is OK to cut (I’m finding it impossible to find authoritative data about laser-cutting plastics other than acrylic (yes!) and PVC (NO!))
I have a design for a 3-unit network rack that I’d like to make from ply or MDF. It has a bit of a weird shape because it’s intended to hang vertically off the side of an IKEA Kallax storage unit:
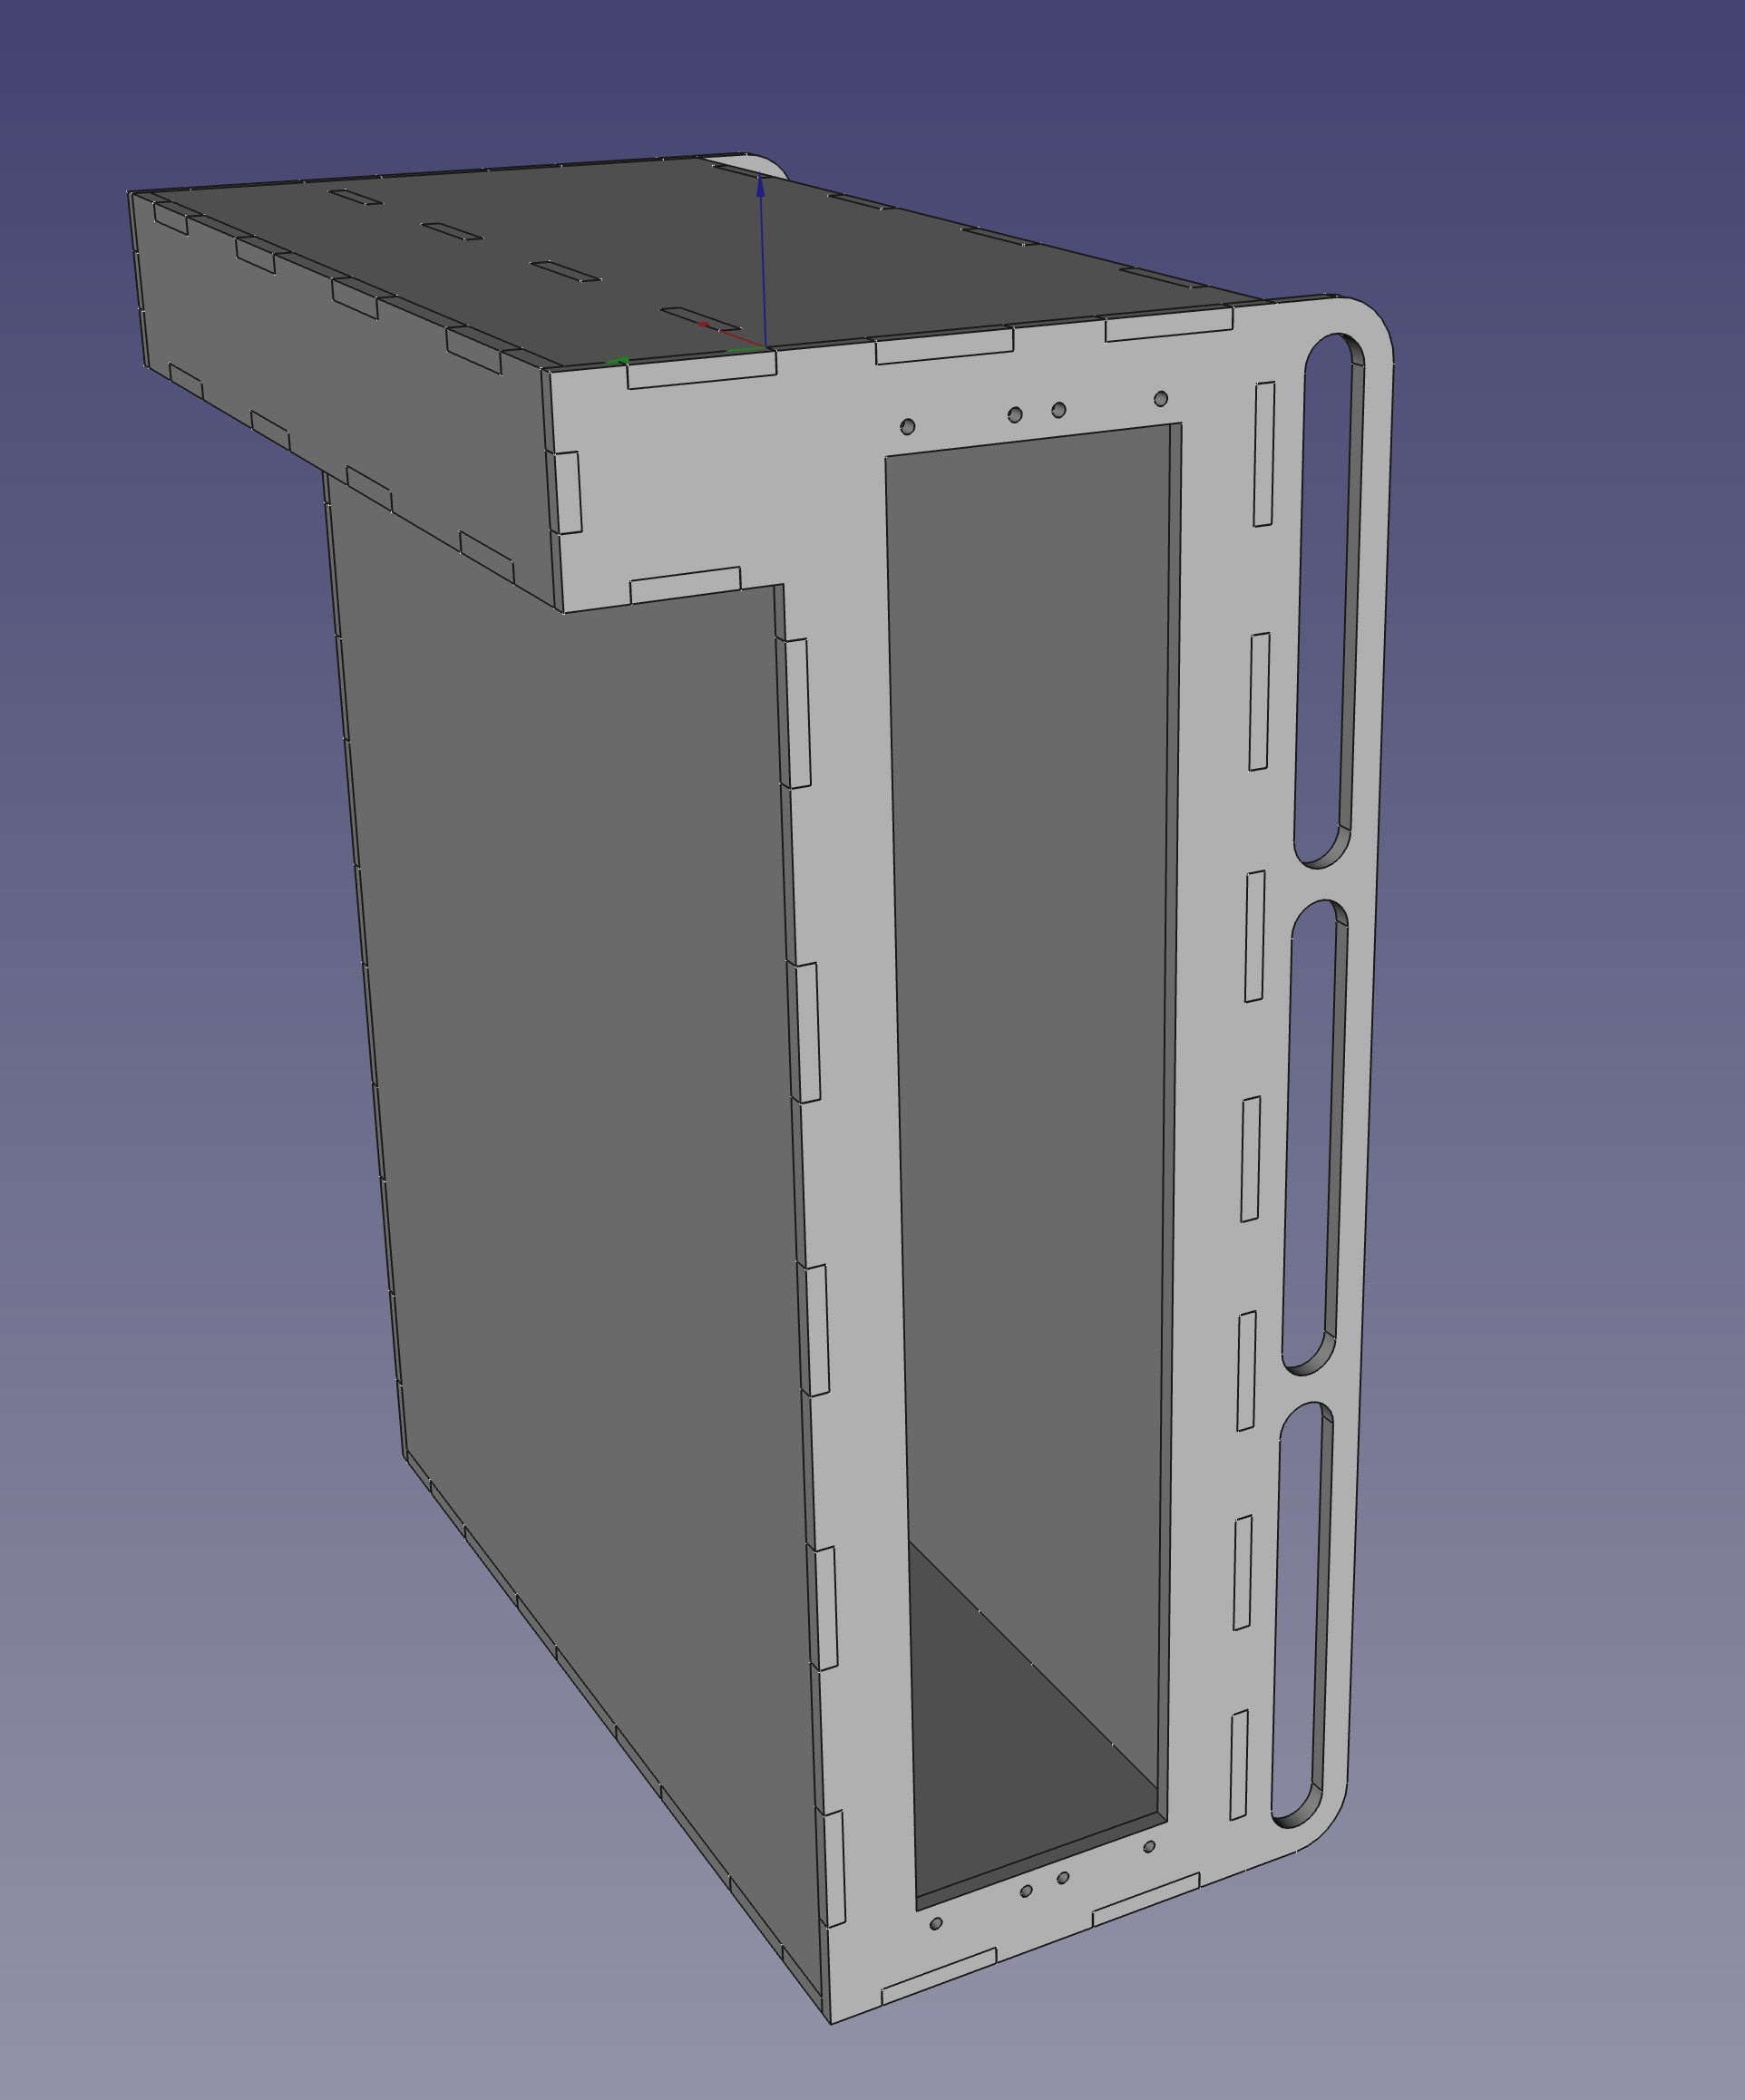
Cooling and cables at the back! screenshots show 2U because it’s parametric and because I haven’t actually decided whether or not to buy an extra network switch yet. (Do the kids need gigabit??)

I have some cheap-from-Bunnings storage cases (fantastic for $10 each!) in the workshop, which I use for screws, components, Dremel stuff, etc. The compartments are huge for the smaller things, so I am trying out some “sub-compartment” ideas, currently cut from some dodgy 3mm ply I found somewhere. The concept works, I just need to tweak the dimensions a bit and make a lot more of them:
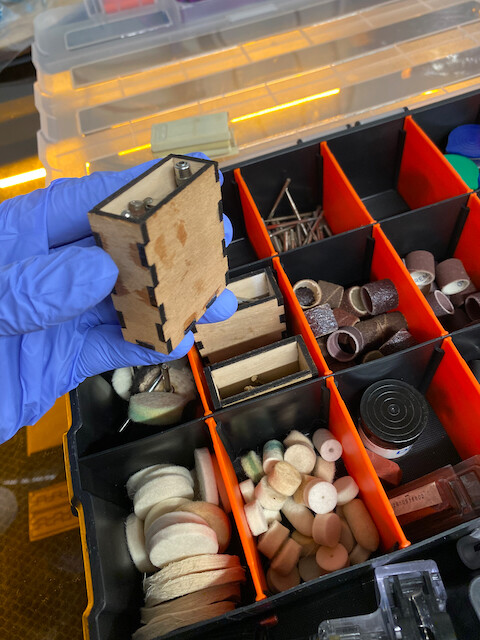
(very poor glue-work… a new type of tube and it went everywhere)

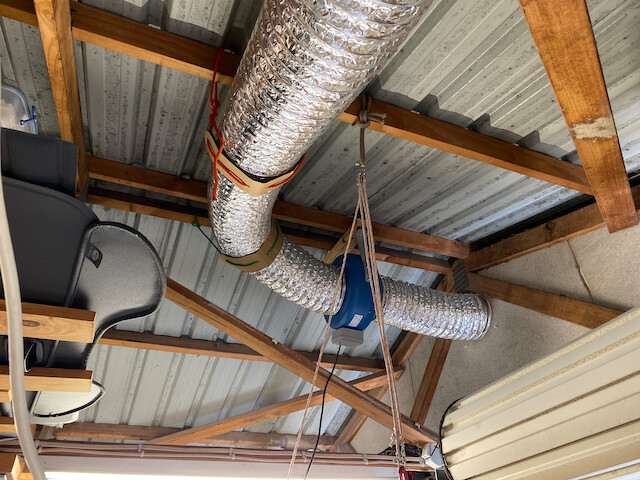
One last thing before I stop this monologue: hangers for the ventilation duct. Laser-cut cardboard and old rope FTW:
So yeah. I suppose I’m using it like a general tool rather than an artistic outlet at the moment, and loving every second. Although… Now I need a new lathe to make spacers for the laser head, and naturally I’ll need a welder to make the bench for the lathe… and on we go ![]()
1 Like
Agreed, combining hobbies is the best!
Metalwork and 3D printing are already improving the laser itself, so in a way I kind of am already! Too many ideas, too little time…!
Sounds fun. But lightburn cant do the things i need to do. Its cute though
Ok, I’ll bite, umm like what Anthony? ![]()
Did you get this accomplished? This is a Russ Sadler designed head, probably who designed the Cloud Ray…
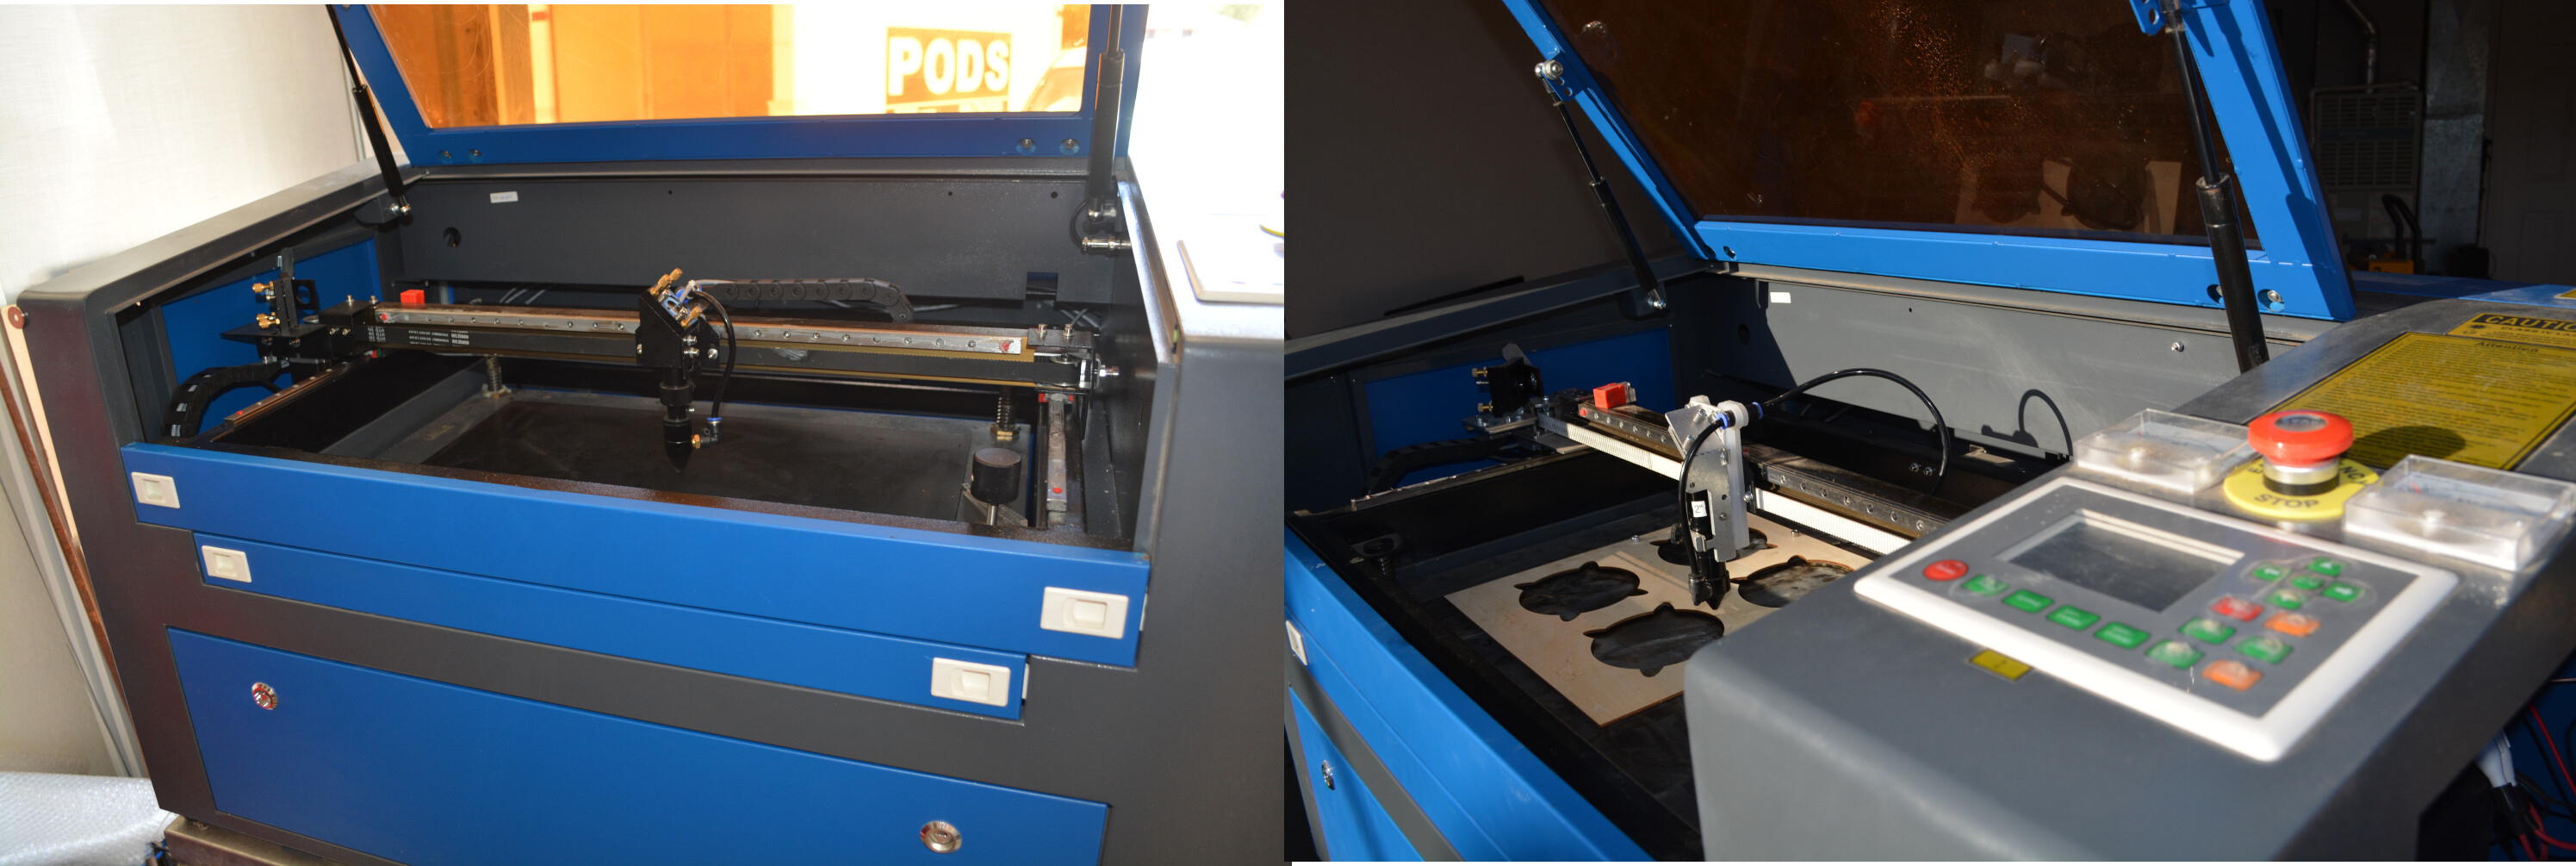
This is an external view, before and relatively current… I had removed the honeycomb and replaced it with a rolled steel plate… I have alignment holes in it for jigs.
Wonder why you need to raise the head up… that much spacer is going to have a lever/pendulum effect… I would think it would be real close without any kind of adjustments…
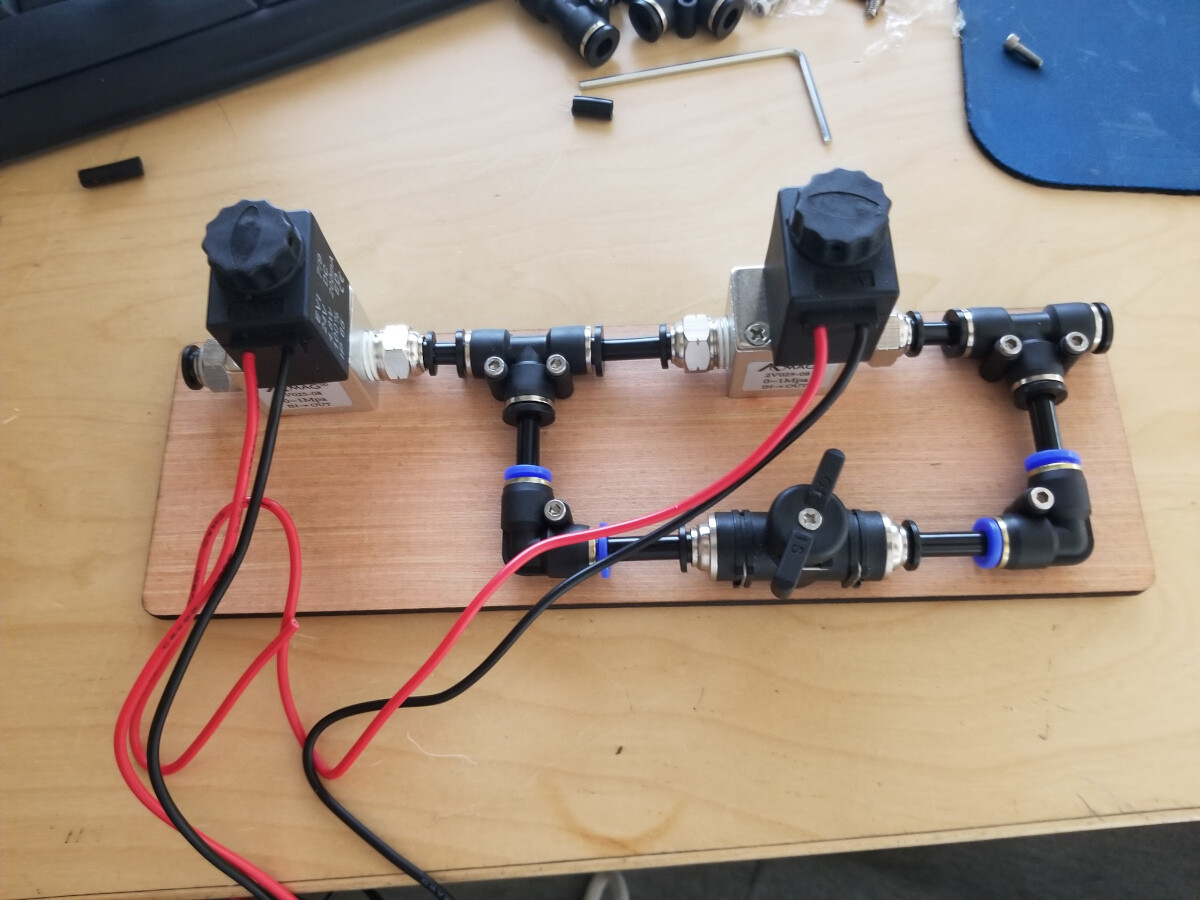
I took a slightly different tact with the air assist… Left solenoid allows high pressure air into the system. It flows through the restrictor. When a layer executes, with air assist enable, the right solenoid bypasses the restrictor, giving full pressure… do you have snubber diodes on this somewhere?
There is no direct way to drive an led (dpssl) module with the Ruida… You will have to use some kind of external logic in order to fire the laser at the right time… The Ruida uses two signals to control an lps… the led only uses one.
A lot of what you gain with this other head, is less mass… you can increase the acceleration… and lower job times… if you add an led, just the opposite occurs… of course if it’s for fun and education… great ![]()
Good luck
![]()
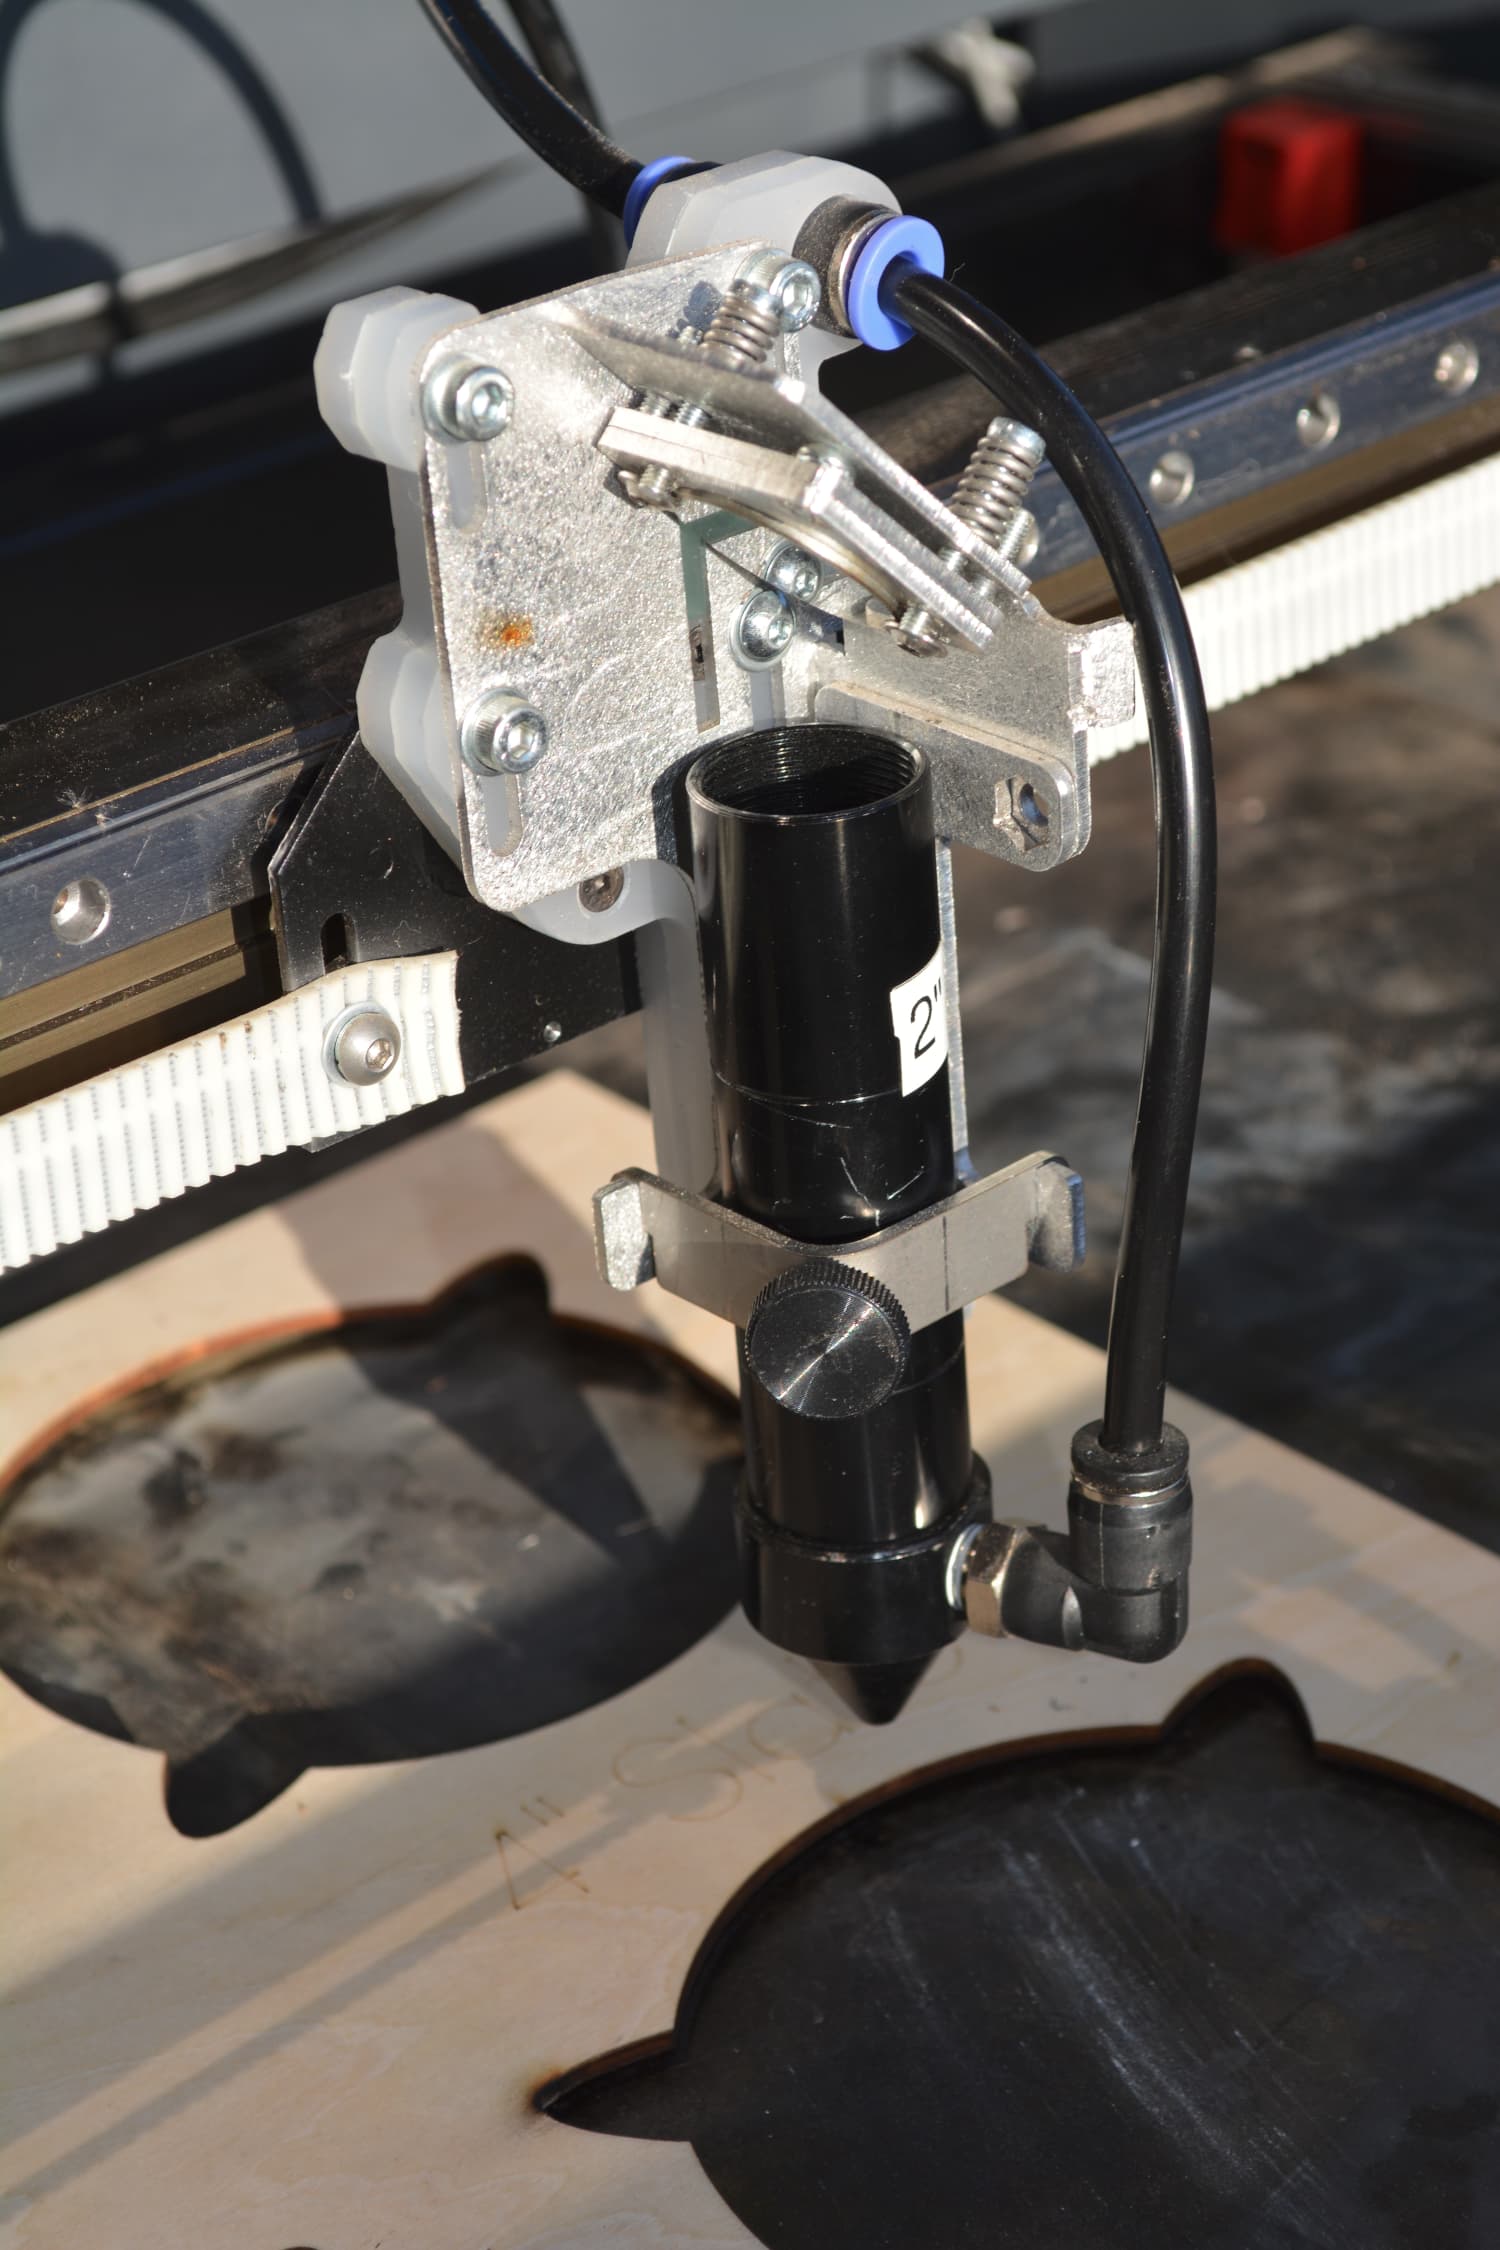
I did! It’s not the prettiest, but I’m telling myself it’s a prototype. I built it with the scrap I had available. T-section would have been better, but I had a few bits of 90° extrusion on hand. The spacers were made from an old tap wrench handle ![]()

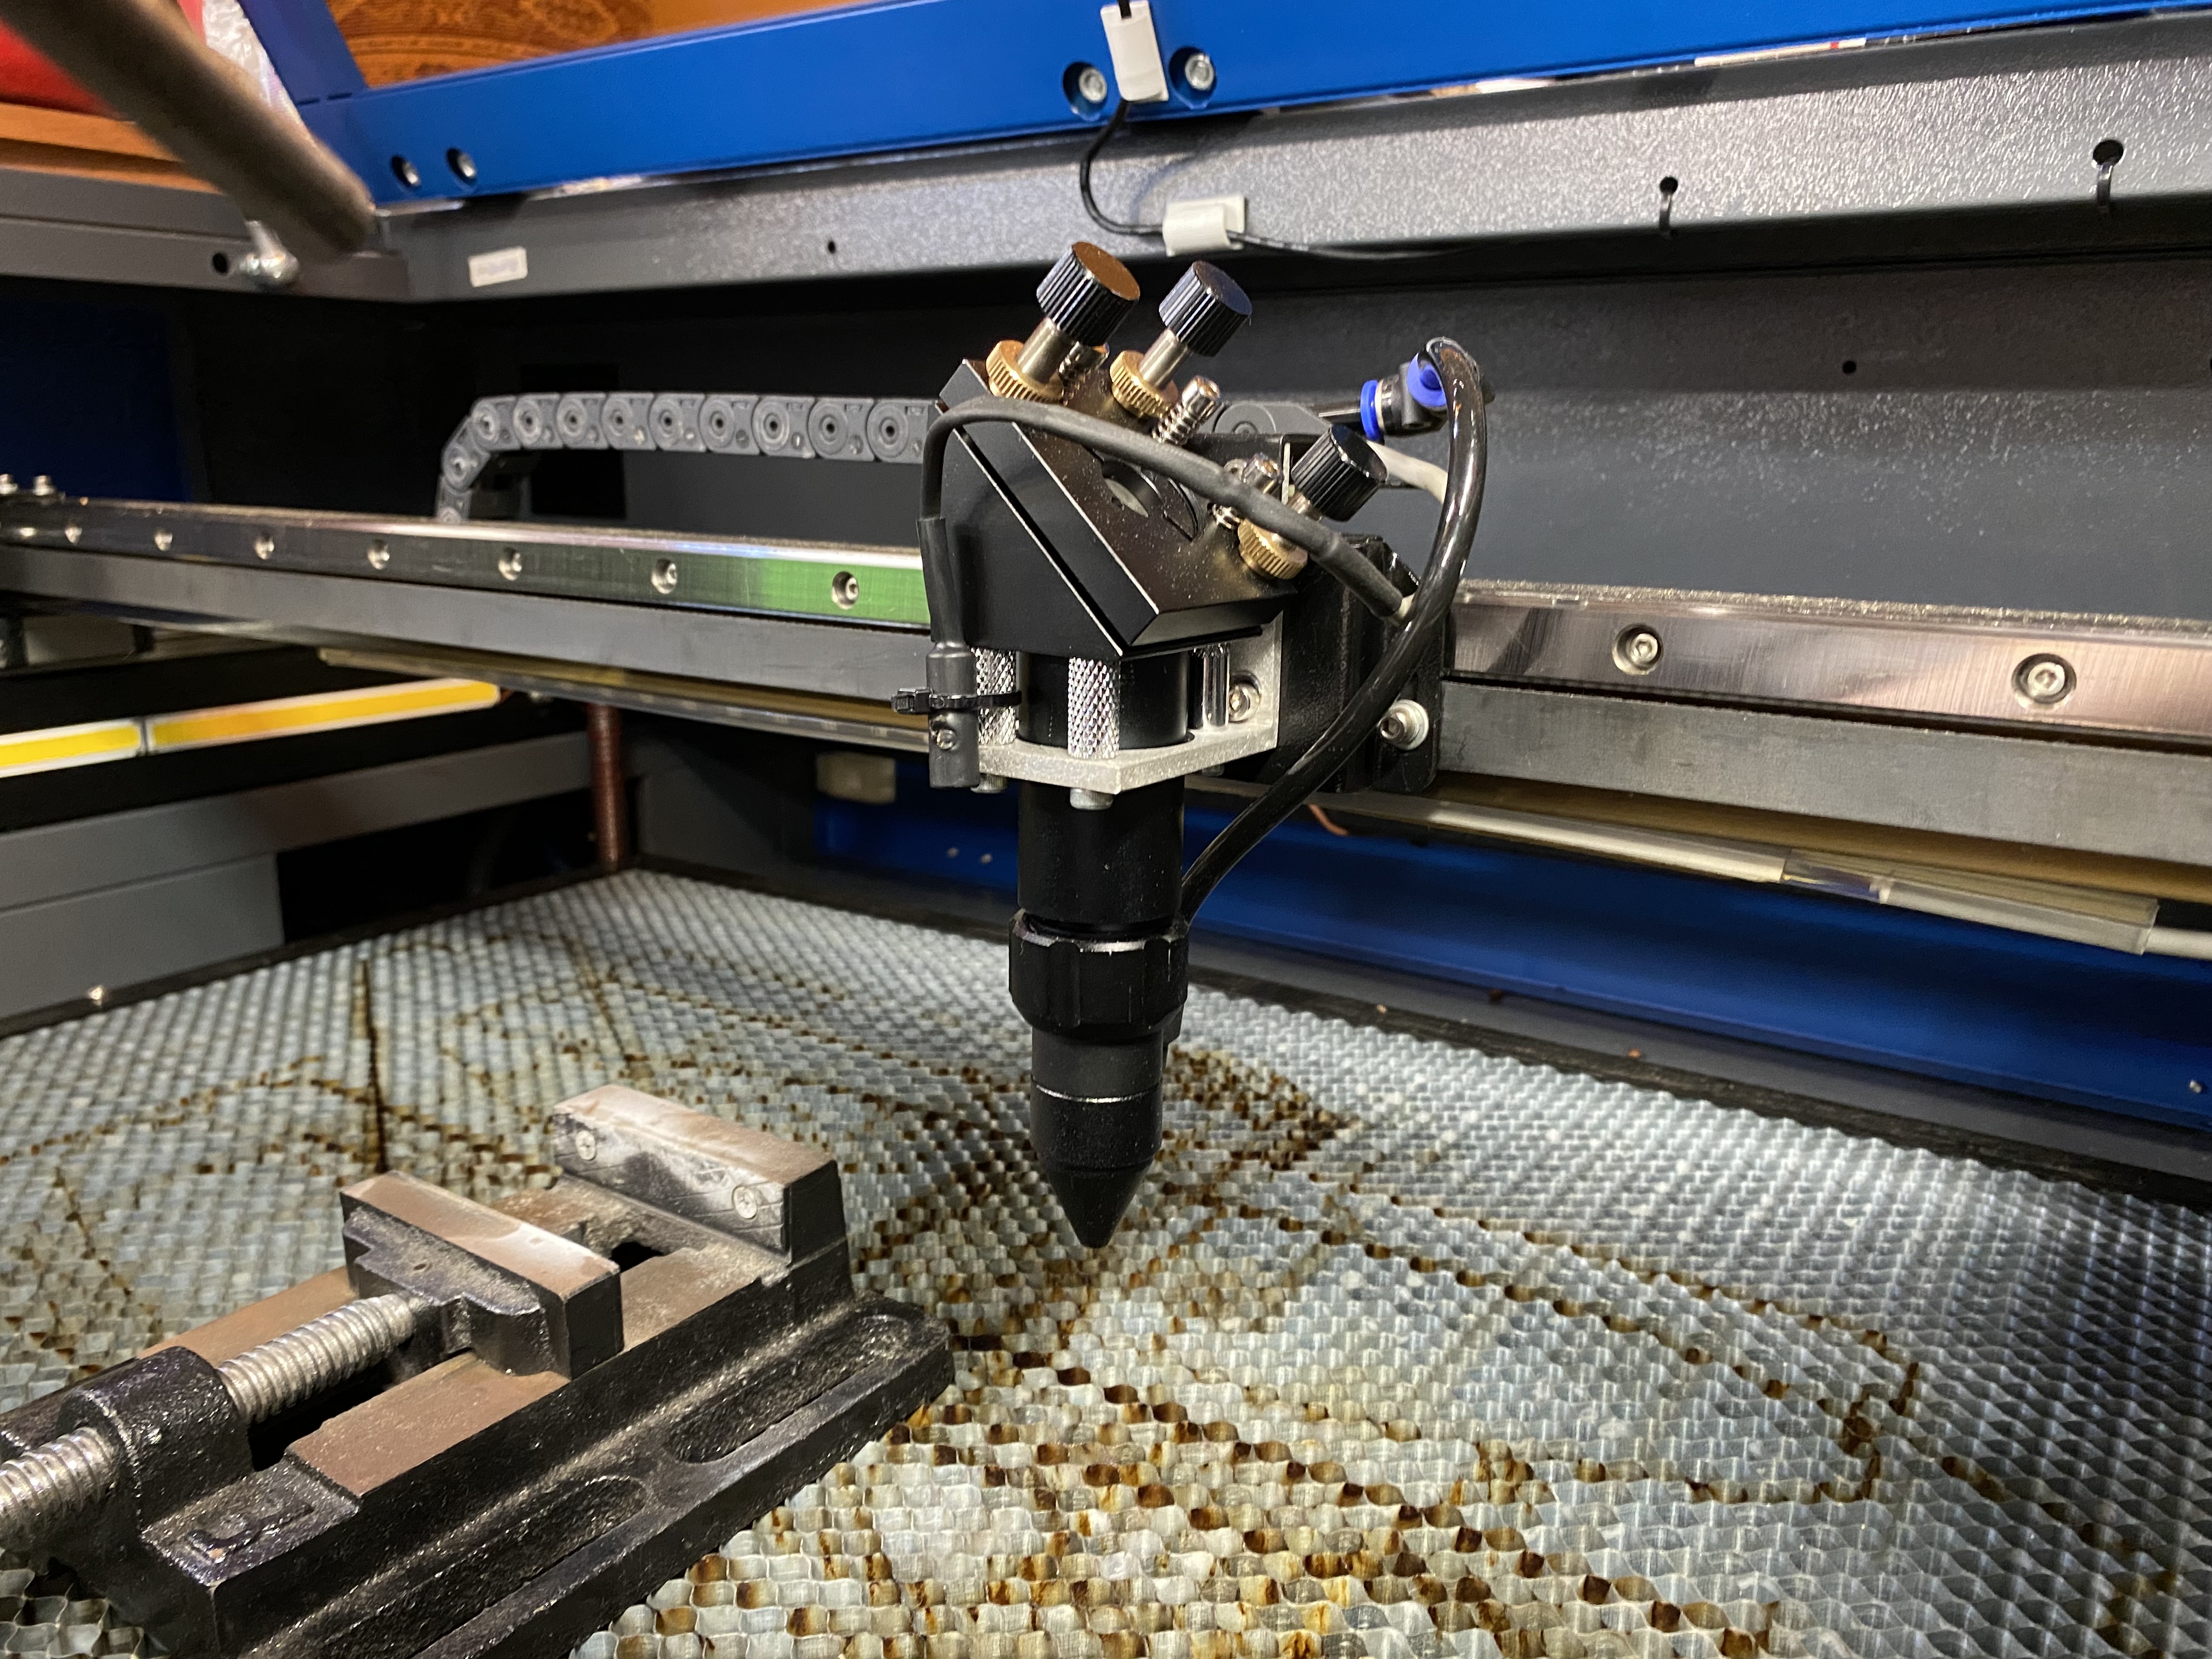
The red dot laser is just zip tied on to stop it flapping around. I’m debating whether or not I want to keep it.
I have a camera on the lid which was working well, then switched my OS to NixOS and now basic stuff is a major hassle. (Strongly considering Windows instead!! I like messing with NixOS but this machine’s meant to be for using; not a metahobby!)
Edit to add: yes, I have snubber diodes on both solenoids. I still like the idea of adding a diode laser but haven’t yet — it will be nice for low-power engraving, marking metal, etc. not fussed about the impact on speed (I might make it removable). Your build looks great!
I think it’s kind of neat addition also… You will have to get power out there and add some logic to deal with the Ruida having a laser enable to fire the laser, the pwm on the Ruida runs the whole time the layer is executing… So the pwm by itself can’t be used. It would have to be gated by the L-On signal of the Ruida.
I dumped the drag chain and all of that off mine… The pointer was always pointed at the wrong place and it was very difficult to adjust… I have 4 lenses, so it was more of a hassle than I wanted to deal with. I use alignment jig with good success…
Replaced my honeycomb with a rolled steel sheet with locating holes in it… Much easier to clean than a honeycomb. Removes the #1 cause of co2 fires…
Good luck
![]()
Congratulations on your nozzle holder. To me it looks nice and practical.
Regarding the little positioning diode (red pointer), I like to “see” where my CO2 laser is going to cut. I first had my little holder in a self-made version in acrylic, but later found this one here on the web, Cloudray makes it in aluminum and sells it for a small amount of money.
There is, for the rest, another very good advantage in using the small diode. When I focus the diode laser on a corner of an “unknown” material, I am always 100% in focus. This of course presupposes that I have set up the diode correctly.

Me too, but it wasn’t right very often without constant adjustments… then change lenses and it’s the same issue…
The fiber has a pair of laser diodes on the galvo head… ok for a single lens, but a bear to adjust and if you change lenses like I do it takes more time to fiddle with them than I care to spend.
There is no pointer on my co2 at all, no drag chain, and these focus diodes on my fiber are turned off.
Considering the resolution of these machines, they are always off a bit. Mine is bright and much larger than the laser spot…
Do you have two diodes mounted on there in order to focus them?