Total Newbie here when it comes to Lightburn and the Gweike. I have read all the things posted, watched more videos that I care to admit to and am currently trying to cut my first project. I have 3/4 inch walnut which calculates out to 19.5mm for the material thickness. I entered this into Lightburn and after making adjustments for my project for speed 400 and laser 35% along with my material settings above, I am able to burn the line portion of my project without any issues from what I can tell (other than my Z axis not moving up or down) and then when it comes to the fill portion of my project it begins running into my material?
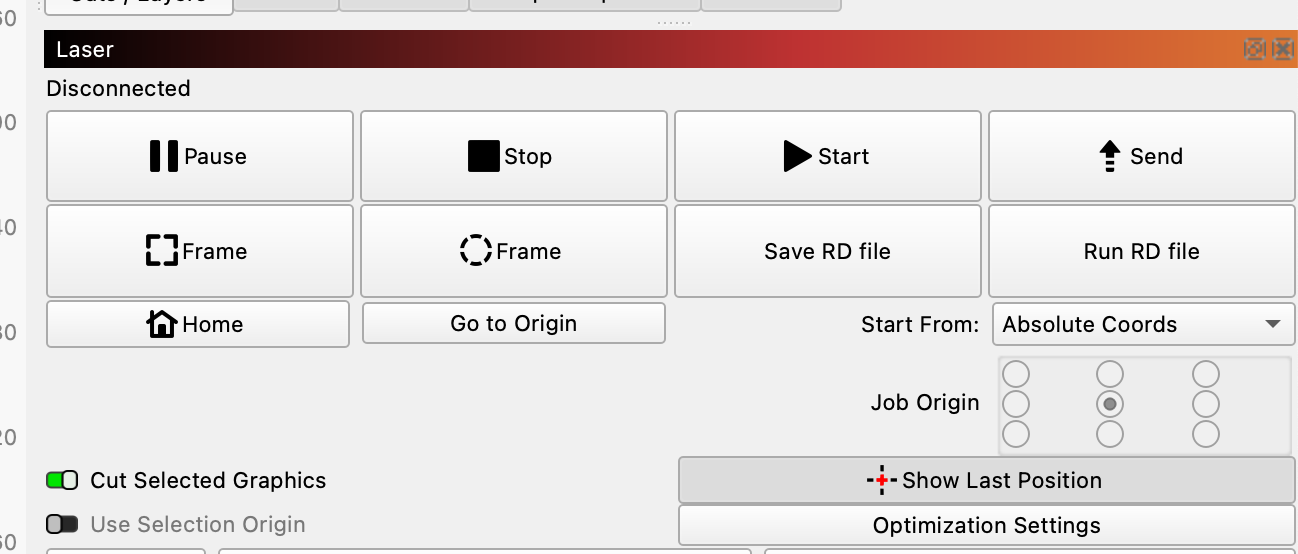
Z control settings are as follows per previous posts (running Lightburn 2.0.04)
Enabled Z control
disabled Relative Z moves Only
disable OMTECH Polar
Enabled Optimized Z moves
@keith2022 and @BillieRuben thanks for the response. I reached out to Gweike and got a response from them as well.
For all who purchased a Gweike Cloud Pro II 50W machine and are confused like I was from all the conflicting information between the 55W version and the 50W version on the interwebs.
The material thickness on top of the honeycomb plate will only support >17mm. If you desire to use thicker materials then you need to get a little creative like I did (see below). Also, note that when you are making calculations in LightBurn…you still need to subtract your material thickness from 17mm and enter it in the cuts/layers tab- material thickness.
That means (as an example) If your material is 3 millimeters thick, you need to input 17-3 = 14mm, and if your material is four millimeters, you need input 17-4 = 13mm. This is still accurate as of today’s date 27 Oct 2025 and Lightburn 2.0.04.
If you desire to use thicker material…you need to know that 51mm is the distance from the material surface to the aluminum base plate inside the machine which, must be greater than 18mm. Materials with a distance less than 31mm must be raised to exceed 30mm.
So based off the above information, removing the honeycomb base plate and using some scrap wood that is 15mm thick sitting on the aluminum base plate. Then putting the actual material you want to cut or engrave on the scrap wood which for this example is 20mm thick. It gives you a measurement of 35mm total, which meats the minimum requirement noted above.
You can then take the 17mm which would represent the honeycomb baseplate, which has been removed, and enter 17mm for your material thickness since it is now exactly the same height as the honeycomb before you removed it.
Essentially your are going to enter the material thickness in the cuts/ Layers tab in LightBurn as 0.0 or 0.1 whichever it will allow you to enter.
Kind of wild how you need to make these adjustments/ calculations but it worked like a charm and was verified by Gweike tech support as well. I hope this helps someone else out so you are not waiting days to get going with your projects!
You shouldn’t need to do the subtract from 17 thing on newer versions of LightBurn. Just enter 0 if you want the height of the honeycomb. 3 if you had 3mm thick stuff sitting on top of the honeycomb, etc.
Greetings…Indeed I have. I followed your step by step to set up my machine initially and was very thankful for the guidance. However, when it came to applying what you posted regarding the latest version of LightBurn, it did not translate across for my project. I would be interested in seeing if there is something I missed or if there is an issue with the newest version of LightBurn?
When I did the 17 minus material thickness calculation the file burned the project without issue. Additionally, when I contacted Gweike tech support, they said the calculation still needed to be done…even with the latest version of Lightburn. Is there something I am missing or that they are not tracking?
You definitely shouldn’t need to do the 17 minus thing on the latest version of LightBurn. I don’t do it on my Gweike Pro. Are you running 2.0.04? Have you tried just entering the thickness?
I have tried it both ways and currently without doing the 17 minus the material thickness the head of the laser hits the top of the material. I am running 2.0.04 currently as well.
Got a little tied up with work, made the suggested change this evening with no positive results. No noticeable change at all with Optimize Z moves Off.
So after hours and hours of combing through settings, LightBurn videos, and chatting with Gweike support I think I have solved this problem set at least partially. I was never able to figure out why my Gweike did not accept the preset calculations. After deleting and re-installing the pro version of the software a third time, it worked perfectly for materials 17mm or less (rather weird).
I can now confirm the latest version of LightBurn does in fact work on the Gweike Cloud Pro II 50w without calculating the material thickness, as long as your material is no more than 17mm thick.
If your material is greater than 17mm then you will need to do some calculations as stated in my first message in this thread to ensure you fall within the machine parameters. If you have risers for your Gweike/ remove the honeycomb/ metal tray at the bottom, then you will want to ensure you workout your calculations based off the measurements I previously listed.
I regularly have material 3/4 inch or 19.05 mm thick and this creates a bit of an issue for the Gweike unless you get creative. I have yet to run the rotary component and am curious what changes if any need to be made within LightBurn to have success?
17mm is the limit of the machine hardware (according to Gweike), I would not use a higher value than that, but instead remove the honeycomb and jig it to the correct height.
I never had much luck with the rotary. I got it working with LightBurn fine, but objects would slip on the rollers (no matter which size I used) and I gave up fiddling with it after a time, resigning myself to the knowledge that what I wanted to do probably requires a chuck-style rotary instead.
I don’t recall having to deviate from the standard rotary setup in our documentation, and I imagine I would have updated this thread had I found anything odd, but it was a while ago now!
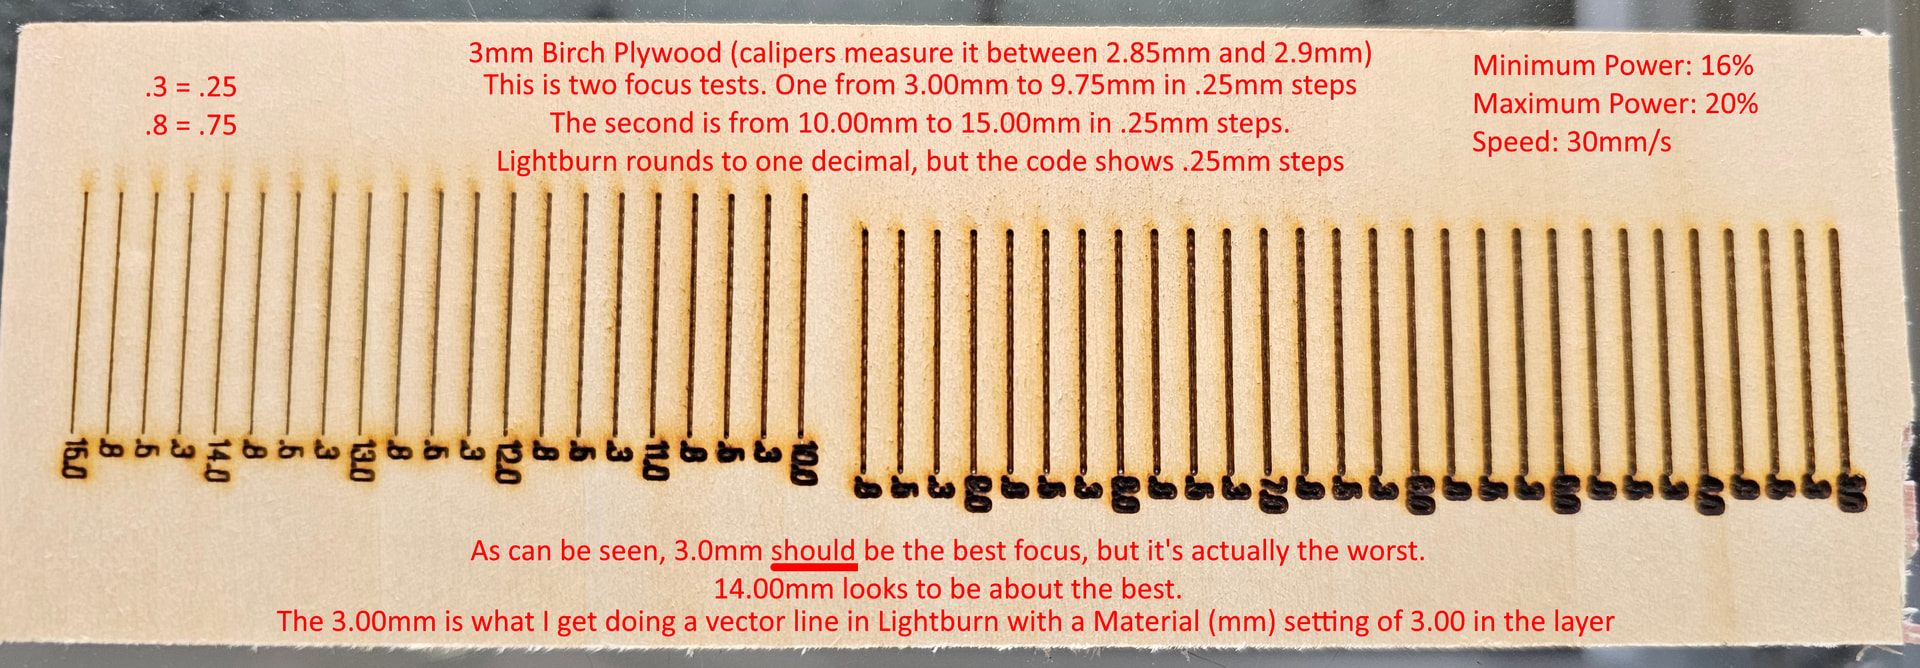
I don’t know if they broke this in version 2.0.04, but after almost a month of frustration, I found this to not work like it’s supposed to. I just did this today (see picture). Please note, when I enter the material height of 3.0 or go even more accurate by using calipers on the material, it looks like what you see in this focus test on the 3.0 side (far right). In these focus tests, I go up to 15.0 in steps of .25 as noted and 14.0 looks about the best. So if it DID work in Lightburn before, it sure as heck isn’t working now and it looks like you still need to do the 17.0 minus material height. I’m going to write tech support to check on this and run an actual project by putting 14.0 in the material field on the layer just to make 100% sure, but that’s where I am now with this.
Again, it’s been an insanely frustrating month as I’ve yet to do a single project with this machine and, until today, I did everything I could to figure out why I couldn’t get a good vector line engrave (or cut) doing all the right things. Also, “autofocus” produced the same as manually entering 3.0mm in the material field. Gweike tech support told me today to manually set it on the move menu, which is absolutely unacceptable to me if I have to put a measuring block in there and click up and down in Lightburn for everything since the machine and the computer are not within arms reach of each other. LOL
EDIT: Just an update. I did a small engraving and set the material to 14.1 (material with calipers was 2.9) and it was perfect. So in Lightburn 2.0.04 you still need to do the 17.0 minus material height math to get a good result.
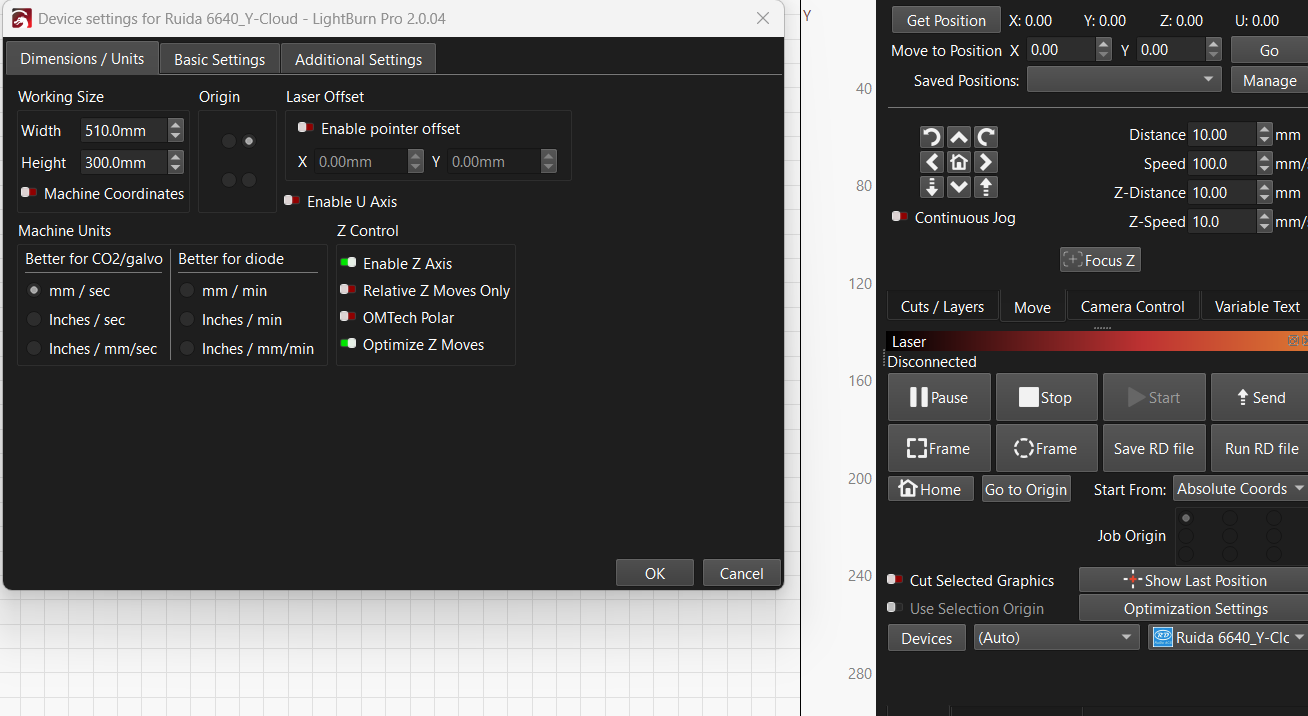
I have the Gweike Cloud Pro II 55w laser which is about 7 weeks old (relevant if they upgraded the controller or anything). For the setup I did a find my laser and it found it fine. It gave me the option of serial or one other one and Gweike support told me which one to pick. I don’t remember which it was, but I believe that was what I found online as well for which type of communication to pick. I didn’t change any settings for the machine or anything. Besides setting my interface from mm/min speeds to mm/s speed, it’s pretty much stock. I upgraded from 1.7.06 to 2.0.04 as far as Lightburn.
I wasn’t able to edit it anymore, but I’m home now. It was the packet driver as opposed to the serial driver. I also used the latest drivers from Gweike’s website for this laser.