Hello Mods, not sure if this is the best place for this post but please feel free to move it if you need to.
I am now a paid up user of Lightburn. I had put in on trial for a few days and it was impressive in its scope, rational approach and user adjusted parameters. I have been struggling a bit with the software supplied by Snapmaker and I did not realise (as a new user of 3D printing/CNC and laser) that I could use whatever software I wanted to hook up to my machine.
My trial of Lightburn has impressed me with its simplicity, ease of use and comprehensive control systems. On the snapmaker forum, I have posted my baby steps with Lightburn and possibly there will be some other user of Snapmaker who will come and have a look for themselves.
My initial difficulty was that I could not get it to talk to SM1 and I think it was because I had been given the incorrect baud rate for my controller to talk with Lightburn. Once I found the correct rate, the use of Lightburn could not be simpler.
The link to my discussion about my early Lightburn use is here:
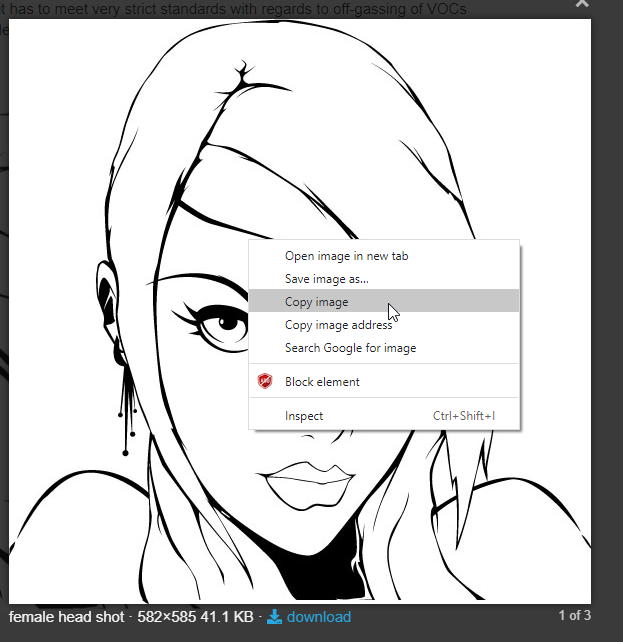
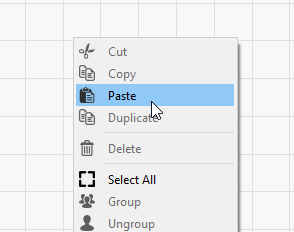
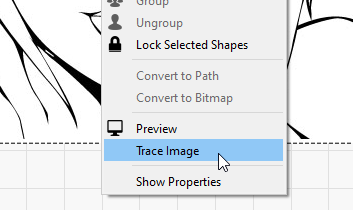
Thank you for posting that on the SnapMaker forum. I’m happy to hear it’s working for you now, and you’re having fun with it. I read through most of that thread, and one thing jumped out early - You can do image tracing in LightBurn too.
Thank you for this great information Oz. I am still very much a beginner with Lightburn. As I become more capable, I guess I will discover more things. I usually like to discover things by myself so that they sit in my mind but attached to the objectives I was trying to achieve.
I have some background in pre-press work so I am familiar with many types of image manipulation software. I have in the past used vector images which included manipulating the .eps and .ai image files, through the good offices of Adobe. I now do all of my image processing work using Affinity editing suites for vectors, pixels and graphical layout. I have a copy of Super Vectorizer but I am sure that wont be any where near as convenient as making the conversion in Lightburn.
Oh goody, I now have something new to try so I expect to have my hands full over the next few days. Thank you once again. I hope you will forgive my amateur attempt at describing some aspects of the software and that it did not make the software look too bad. It was very well received by some of the Snapmaker users so I hope that they will develop some curiosity and get themselves a trial copy.
I am still having issues getting the software to work with my SM1. I can connect, but the different aspects of the program do nothing. I try to use the home icon, the frame icon, but neither do anything with the SM1.
Do you see any output in the console when you try these? If you got an error message from the controller, that should tell you what’s wrong.
Home just sends the homing command to the controller, and it runs its homing cycle. Frame will trace the laser around the bounds of the job, but there are a number of ways that could go wrong, depending on your settings, origin mode, etc.
I didn’t see any messages that I recall. I can connect to the laser without any problems, but I can’t do anything else. Nothing works, when I try to print it only runs a couple of lines and stops, like I’m not getting the entire picture in gcode???
This may be stating the obvious but whatever operation you want to run has to have a target. I cannot get the software to carry out (for example) a preview operation on a piece of work, if my work is not selected first. I expect that as a specific behaviour from a piece of software… that it has to know what aspect of your design you want it to carry out an operation on.
To illustrate my SM1 running Lightburn in preview mode on a .svg file of an owl.
Immediately under that video is another one showing the SM1 working quite happily producing the owl.
It may have been stating the obvious, but I still missed it. I’m used to the snapmakerjs where you have to generate gcode, then load gcode. Didn’t realize until earlier that I have to select the object I want to etch. Thank you for the response.
That’s only because you have “cut selected graphics” toggled on. You might also need to turn off the setting (in the settings) to discard out of bound shapes.
Absolutely! I have tried to interest the Snapmaker development team in scrapping Luban and rewriting it from the ground up or buying in the programming skills. They have been happy to have runaway hardware sales for the last four to five years and have neglected the importance of software support.
I was astonished to find that the CNC component of Luban is alpha software! The rest is barely beta software and I believe this harms the utility value of the interesting hardware. The Snapamaker team would frequently point people to Fusion 360, when Luban was found wanting, but that is far too much of a learning curve for someone who is just trying to learn the basics. As it is the Autodesk Fusion 360 company are now making changes that may leave many makers without its benefits.
What is immediately obvious when you start to use Lightburn is the well thought out, logical, professional interface and comprehensive functionality. It represents the best value for money I have obtained this year. I like it and have recommended it to anyone who will listen.
So I used the software with my SM1 following the youtube video with the picture of the Hulk. It was coming out okay until the last 1/4 section where I got a shift. I don’t see how this could be a machine issue, but maybe I’m wrong. Any ideas what cause this?
Hi James. That is a pity after all of the effort.How long was that burn in total? What is the size and type of the workpiece. I think Oz has pinpointed the issue. I have had this type of misplaced carve issue while working near the edge of the bed with CNC. Some sort of mechanical inaccuracy in just one stepper or axis lead screw? It appears to be a mechanical problem. I have had difficulty removing chips from the Y axis rail. The displacement looks to be more than 1cm and less than 2cm of the X axis… just looking at the forehead lines in the image and the misplaced dark shadow of the eye on the left. Can you link me to the original image you used?
I would do a slow laborious review of the GCode just to ensure that there was no error. (I am reasonably sure that there will not be from the Lightburn generated code) I take it that you did not apply the the code through Luban but connected Lightburn directly to SM1. If you were to send me the code and the workpiece dimensions, I could try to burn the same image. Did you have the overscanning setting switched on?
Just reconsidering the mechanics of this single error in burn… Can you confirm where your origin was set? My guess is that it was the bottom left. When you get to the first error line, which all subsequent lines followed, is the dark area actually the burn completed… to the left of that light area that should have been the face at the edge of the workpiece? Is the dark area to the left of the head from the fault line onwards what should have appeared on the right hand side of the image?
I would ask what caused the laser to burn so heavily at a point that should have been just slightly discoloured? The laser was running when it should not have been applying so much power. Could the stepper motor be held for the time duration required to create the linear fault then run again as if nothing had happened so that the image would be displaced? Have you tried running the same piece of work at a slower speed, with overscan set (if it was not set in the first image) just to see if that cures it?
I cannot think of anything else without seeing more information.
[quote=“jepho, post:18, topic:22490”]
How long was that burn in total?
[/quote] Approximately 5 hours, give or take. I wasn’t really paying attention to the time.
It was a 4 inch ceramic tile.
It is right at 1cm
Unfortunately I can’t look at the original gcode as my laptop restarted in the middle of the night after updating.
That is correct, straight from lightburn.
I am pretty sure I did, but can’t confirm.
Yes, bottom left.
The section to the left was not burned. picture I used
I will clean off the paint and slow down the machine and make sure the overscan is set and try again. I don’t know how to apply the code through Luban.
OK, I understand most of the process James. What colour tile are you using? What is the paint to which you are referring? I would like to try and replicate the issue. It is a process that I am not familiar with but I would like to try.
One of the most impressive aspects of that image is how clean it looks. I have really struggled to make Luban reproduce anything recognisable. Thanks.


 Happily, the software makes that an enjoyable task