I’m going to have to do some Googling to figure out what you just said. 
1 Like
There’s actually just the slightest amount of white space between the scan lines. Might could have gone just a little bit higher than 254 dpi. I believe these are pretty good results for engraving on birch plywood. I’m using a 60 watt tube. If the lens setup you have is as good as what I’m using I think you should be able to get close to these results even with your 100 watt tube.
Ok I’ll read over your posts Thank you very much. Here are my findings

I started at 2mm and went to 3mm. Let me know what you think of these. Thanks again for the help on this.
Gary
Hard to tell from photos but 7 looks sharpest. What do you think?
Highly suggest you invest in one of these…
So take what you think is your best and use that for your focus setting. A magnifier really helps determine this.
Take one of your photos from above, import it into Lightburn, resize it so that it is 5.6" wide, use whatever speed and power you ran your test at, start off by setting your DPI to 127, go to the shape properties for the photo and set the gamma to .65, enhance radius to 4, and amount to 175. Then run it. Oh, and no air assist or reduce the flow to a bare minimum. You only want enough to create positive pressure in the nozzle and keep smoke from getting to the lens.
Travis, Ok thank you for the help. Yes I agree 2.7 is the best. I’ll try the suggested size and let you know how it turns out I need the photo to be larger & have a faded edge to fit on a piece of live edge basswood 20200428_110149_copy_1024x768|666x500 Can I increase / resample the photo to a higher DPI?
When setting up the photos you said
Gamma .65
Enhance Radius 4
Enhance Amount 175 when I was using my standard 2" lens Rick gave me numbers to use that were
Gamma .8
Enhance Radius 4
Enhance amount of 200
Are your numbers different because those are the numbers you like to use or are they different because of the HR head?
Also now that i have a focus length on the basswood will it be the same for other materials? Typically I mainly use woods ( Basswood, Maple, Walnut, Hickory & Cherry) as well as slate, granite & ceramic tile.
Thank you again
Gary
You only have the 720x960pixels to work with. But if you do it at 127 DPI then you can make it 5.6" wide without any algorithm filling in pixels that aren’t there. As Oz mentioned earlier in a reply to me, you can make it larger and it will create the extra dots but basically it’s an algorithm calculating what dots it think should be there. So, your mileage may vary. But if you understand the concepts and what’s going on, no reason you can’t give it a try. I’d definitely try one of your photos with the settings suggested on some cheap scrap plywood before you do it on the main material. See what the results look like and post back here.
On the photo I was working with earlier I thought the gamma at .65 looked better. It was a fairly dark photo to begin with. I think every photo is different and so what you use for gamma, enhance radius, and amount will vary. After you play with it a while I think you’ll get a feel for the way something looks on screen vs how it will translate to a given material. I can say that you almost always need some amount of enhancement for your average photo. Gamma, maybe or maybe not. Depends on the photo.
Those settings have nothing to do with your HR head. All that head is doing for you is making it such that you can get a smaller dot than you would with a regular 1.5" or 2" lens.
The focus length from the lens or tip of the nozzle TO THE TOP OF THE MATERIAL should always be very close to the same. Wait, are you using an auto focus probe?
Ok thank you. So I’ll try the image at 5.6" & set the DPI at 127 & let the line interval be set automatically. I was under the impression I should match my line interval to my dot size.
Are there any videos that I can watch that show what you are looking for in the photo as you make changes to each setting? So I can learn how to do these?
Will this work? https://www.amazon.com/gp/product/B06WD843ZM/ref=ppx_yo_dt_b_search_asin_title?ie=UTF8&psc=1
With one of these
https://www.amazon.com/gp/product/B07ZF2VV48/ref=ppx_yo_dt_b_search_asin_title?ie=UTF8&psc=1
Thanks
You should indeed match your line interval to your dot size. At 127dpi the line interval will be .2mm which is what it appears your dot size is from the photos you’ve posted so far. Doesn’t hurt to try it at 127dpi to start and see what the result looks like. You can then increase it from there if you have white space between your scan lines.
I’m not sure if there are any videos that cover the gamma, enhance radius, and amount in LB. My understanding is that the enhance radius and amount are simply settings for applying an unsharp mask. So you might search youtube for ‘laser unsharp mask’ and see if you find anything.
As for the electronic microscope and stand, I have one that’s very similar. I don’t use it much for looking at the dots. It’s fiddly to focus and just doesn’t give nearly the clarity that an optical loupe will give you. It certainly is much easier to do a screen shot from the microscope to post here than to take a picture with a phone through a loupe, but using the phone through a loupe is actually much closer to reality than one of the electronic microscopes.
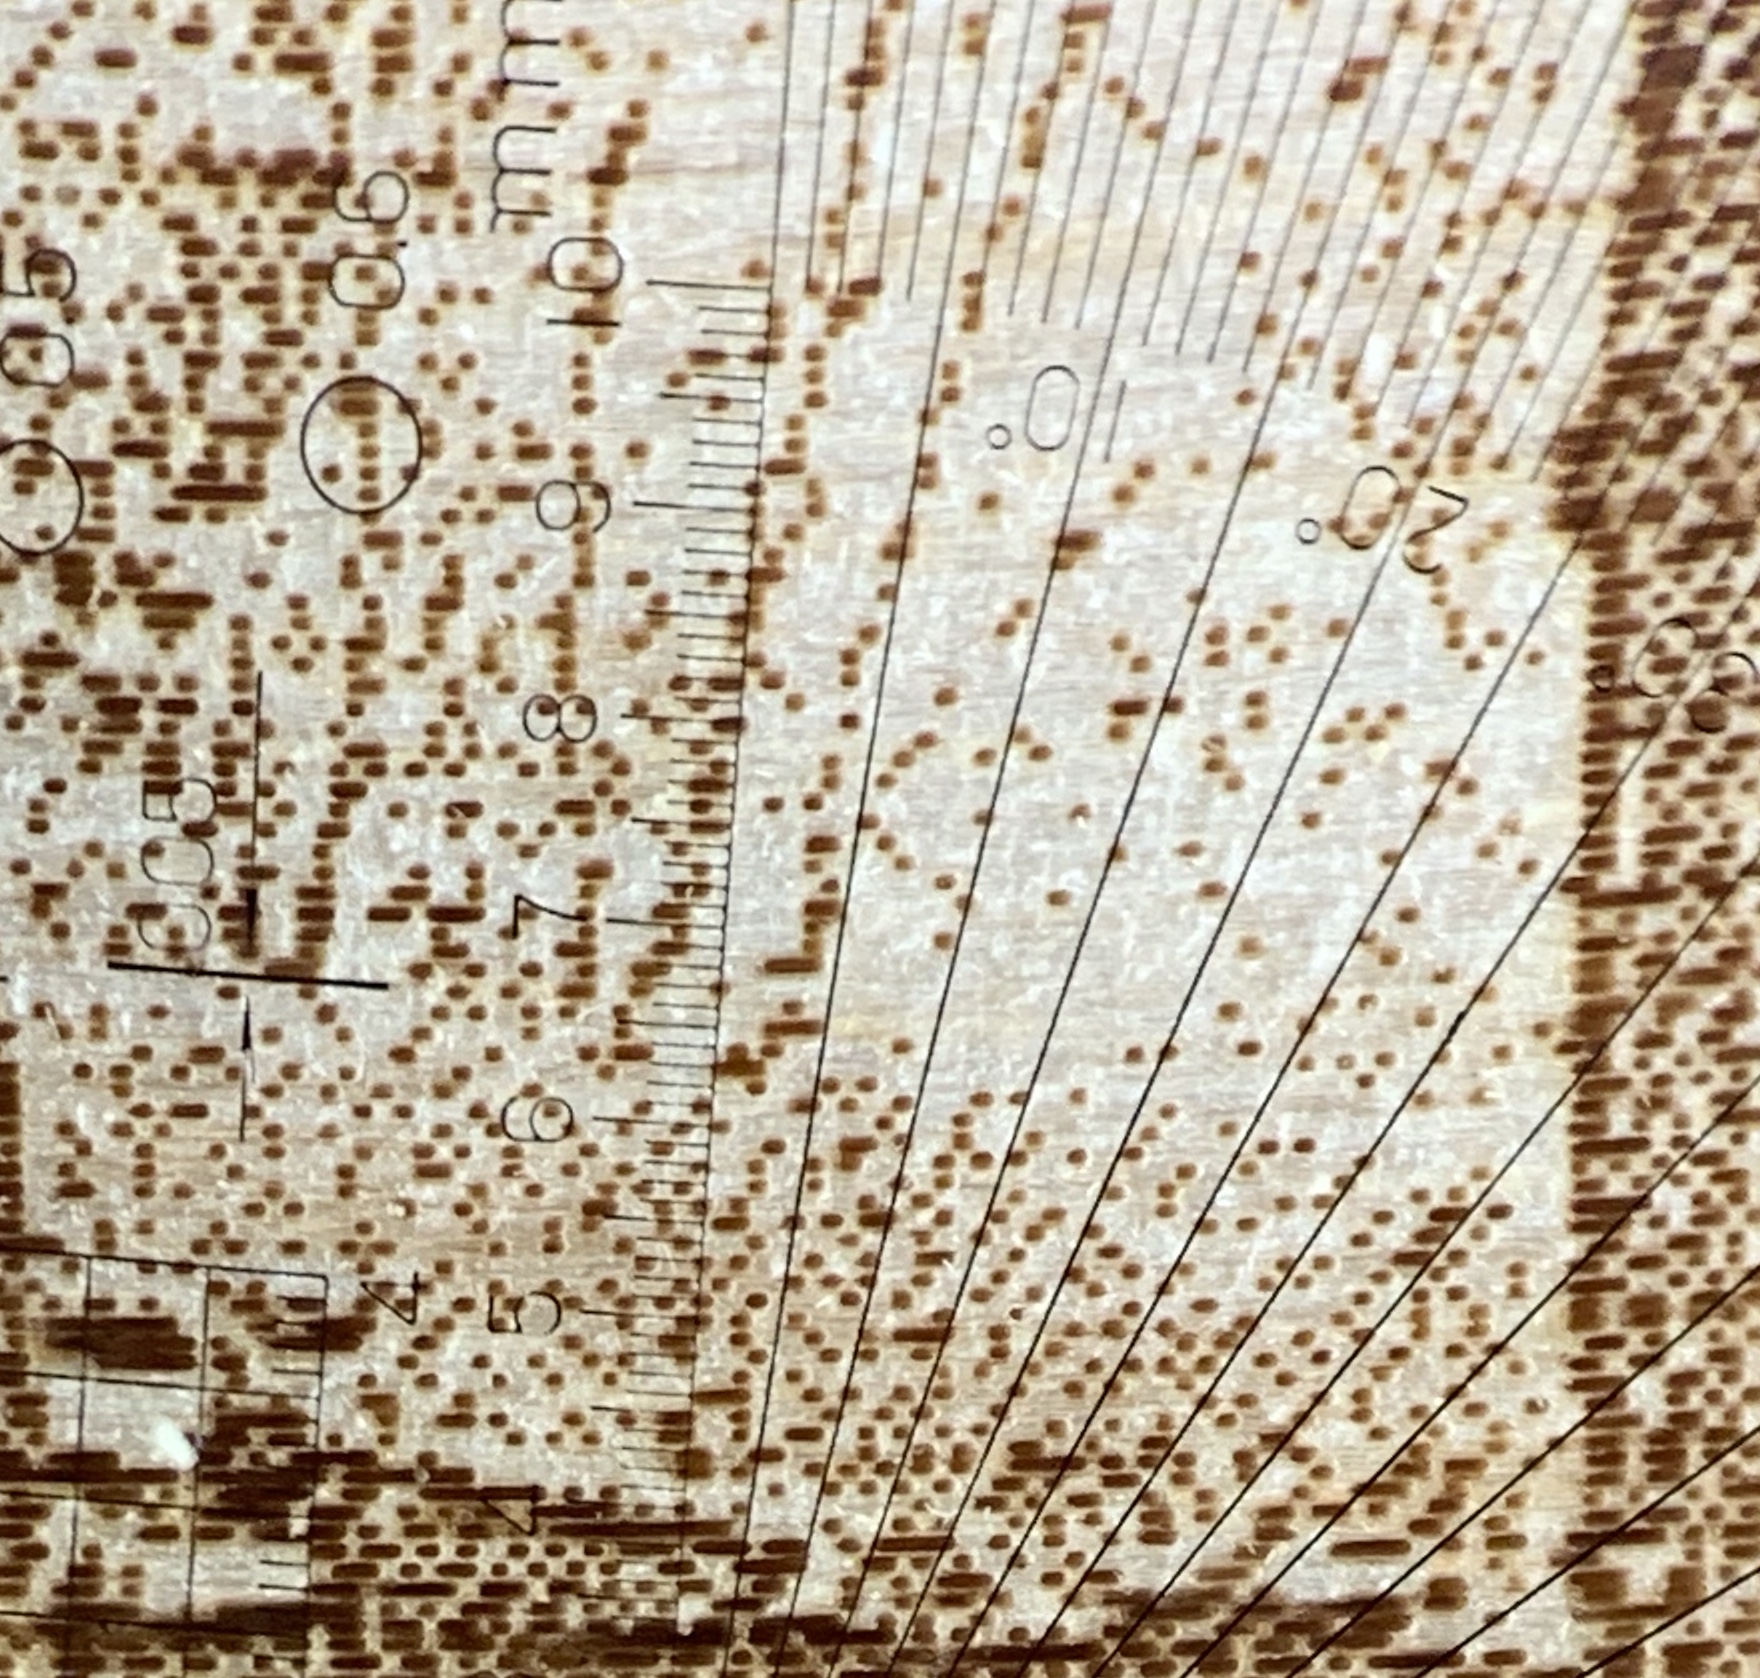
The other big advantage of the optical loupe is that it has a scale in .1mm intervals as well as circles of .1mm diameter through about .6mm diameter which really helps in evaluating what size your dots are.
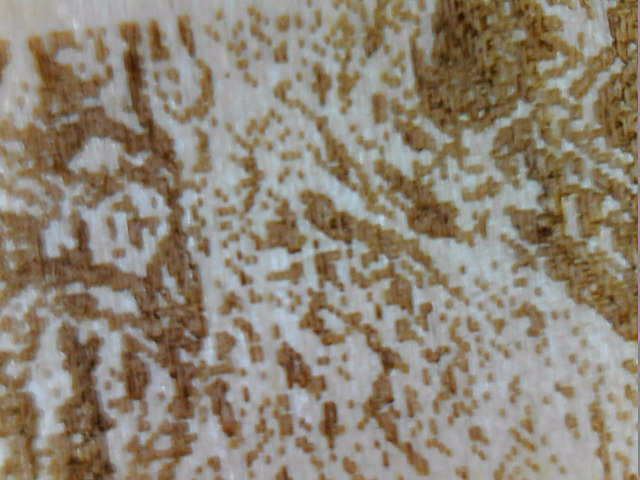
There’s a comparison of using my phone through the loupe vs the digital microscope. Each of those are photos from the engraving I did earlier. Same engraving. Which looks better to you?
1 Like
This topic was automatically closed 30 days after the last reply. New replies are no longer allowed.