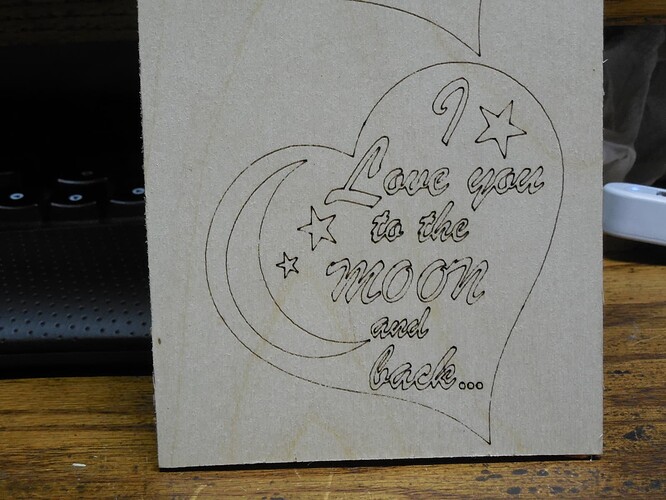
I am converting my CNC table to use a Laser module, Arduino Uno 1.1 GRBL and it will not fire the laser (M4 in the g-code) with Lightburn. I can switch between M3 and M4 in LaserGRBL all works fine. I hope you are not going to tell me I threw my $60 away, because I cannot switch M4 to M3 with your software. Changing constant power on/off does nothing in Lightburn, very simple in LaserGRBL
Might be worth trying to sort out why it’s not firing with M4. M4 is generally preferable to M3 since this allows for variable power. This will allow for more consistent burns during deceleration/acceleration. More on this later.
I’m curious about this because using Constant power should enable M3. What’s the effect when you do this?
Here’s the g-code for a simple rectangle using Constant power. Note the M3.
; LightBurn 1.1.03
; GRBL device profile, absolute coords
; Bounds: X37 Y247 to X242 Y361
G00 G17 G40 G21 G54
G90
M4
; Cut @ 6000 mm/min, 20% power
M8
G0 X37Y247
M3
; Layer C00
G1 Y361S200F6000
G1 X242
G1 Y247
G1 X37
M9
G1 S0
M5
G90
M2
The other option is that you can setup your device as GRBL-M3 rather than GRBL. This will force M3 only.
If you want to investigate why M4 is not working can you run these commands in Console and return results:
$I
$$
thanks I will look at the $I and $$ in the morning, when looking at the report from the $$ I did not see anything that pointed to firing the laser, It may be the GRBL-M3 would be the better solution but I am not sure if the version 1.1 which I am using is better for another reason. I am using pim 13 for laser power and pin 11 for PWM. My etching with LaserGRBL is very good so I am not sure the M4 would make a difference. I find it funny the Lightburn still kept the M3 for laser focus trigger.
Have fun
Tom
Sounds like there’s a disconnect. GRBL-M3 device type in LightBurn exists to allow for legacy versions of GRBL from 1.1e or older. Variable power using M4 was only introduced in 1.1f. The $I command I asked you to run will give version information and other information about options that are compiled into the firmware. If you have 1.1f or newer it should support standard LB GRBL device and M4. The other thing to check is to make sure you’re in fact using GRBL device type.
Click on Devices button in Laser window and check your device type.
Also, if you’re using standard Arduino I see no reason you couldn’t upgrade your firmware to the latest GRBL in any case which you’d probably want to do.
Depending on the type of thing you’re engraving and on what material M4 can make a significant difference. The symptom it addresses is extra burn marks on the edges of a scan engraving or at the corner of a line engraving.
This was actually M4 for a while. It was changed to M3 for the Fire button and framing because due to variable power the laser light would get too dim under certain situations. Using M3 forces a consistent laser light which makes sense for a framing operation.
The biggest $ setting you want to make sure is on for proper functioning of M4 is $32 to enable laser mode. Again, you need to be on 1.1f or newer for this to work. You also want to make sure that the value of $30 (likely either 255 or 1000) is what you have in S Value Max in Device Settings. Change S Value Max to match. This is relevant for both M3 or M4.
Are you using a Shield or any other adapter board?
Pin 11 for PWM is fine. I think the source of your problem may be using pin 13 for power. You need a source of constant 12V (or whatever voltage your laser requires). What laser module have you attached?
Thanks for the reply, I have much experiences with other CNC tables and other software but this is my first with GRBL and Lightburn. I just bought Lightburn and here is the info from the $I you requested and the about from the help dropdown. Looks like 1.1.03 bought March 11,2022.
LightBurn 1.1.03, built Fri 2022-03-11 @ 11:38
Created by LightBurn Software, LLC
[VER:1.2e.20220303:]
[AXS:5:XYZAB]
[OPT:VNMGH,35,255,0]
I am using a Arduino Uno with GRBL from GitHub, the config.h shows this copyright.
Copyright (c) 2012-2016 Sungeun K. Jeon for Gnea Research LLC
Copyright (c) 2009-2011 Simen Svale Skogsrud
I am direct wiring to the pins on the Uno but will change to the screw terminal block breakout shield module for Arduino Uno R3. I have a 5 volt relay driven by pin 13 switching 12 volts to the laser power input. It seems the relay is on in LaserGRBL but off when lightburn is enabled?? When I click on the device it show GRBL Ortur, this may be due to my lack of knowledge in picking that when installing Lightburn (I think) as I also have a Ortur 2 with seems to work fine with lightburn. I am assuming there is another plug in (GRBL-M3) which you talk about. Is that true, if so how do I change that?? The Laser module is a Neje A40640.
This is interesting. Certainly not a “standard” build of GRBL as standard GRBL is at version 1.1h and limited to 3 axes.
That should address the issues with 12V but I’m wondering if pin 13 isn’t activated in your configuration with M4 but it is with M3. I believe normally pin 13 indicates spindle direction so likely only “on” with M3 forward spindle.
Can you try wiring constant 12V to laser module to test M4 functionality?
If this is 2 different columns for each then the device type is GRBL and the name of your device is Ortur. It seems you’re using the same device configuration for both of your lasers?
Yes. When creating or editing a device you can pick GRBL-M3 as device type.
You’d likely want to create a new device by clicking Devices, then either “Find My Laser” or “Create Manually”. Make sure that GRBL-M3 is chosen in that case.
However, I still think you’re better off getting M4 to work with GRBL and your controller should be fully capable of getting this to work. The issue is very likely with pin 13.
Which breakout shield are you using?
Ok I did get to the manually section and did find GRBL-M3 and it works. But could not enable the laser on when framing. And it seem that in line mode it does burn at the change of direction. I have the Electronics-Salon Arduino Screw Terminal Block Breakout Module, for Arduino UNO R3.
but have not connected it yet I am printing a box for the Arduino to fit in with a cooling fan for final assembly.
You say it would be better to correct the Pin 13 problem, If that is done will there be a way to switch constant power on and off. Will the corrections be in the config.H file and a refresh to the Uno??
thanks a bunch for your help with this and if we can get the Pin 13 thing going correctly.
Did you hold shift down as you clicked frame? Or enable “Laser on when framing” in Device Settings? Also, make sure that the power level for the Fire button in Move window is at an appropriate level for framing.
Yes. You can still enable “Constant Power Mode” at the cut settings. This will effectively disable variable power by issuing an M3.
I don’t believe you’ll need to make any configuration changes for this to work. You just won’t need pin 13 at all. I suspect everything is setup already for this to work but because the relay is only coming on with an M3 for pin 13 the controller simply doesn’t have a chance to do what it needs to do.
2 things to validate when you sort out the power side:
- Confirm that GRBL config for laser mode $32 is on ($32=1)
- Make S Value Max in Device Settings equal to $30
With both of these and changing the device type to GRBL you should be good to go.
Question, how are you driving your steppers? I would have thought you would have needed a Shield or similar board with drivers.
Good Morning
Things are working fine, I will install a switch in the laser power line so I can manually power the laser up. I did not have the laser on for framing, funny how thing work when you turn them on. My table is a standard size for Plasma cutting (4X4) and it has both Nema 23 and 34 motors using DM860A and DM642A drivers. These work fine with the 5 volt sign output from the Uno. After calibrating the velocity and acceleration values in the setup for the GRBL I am happy with the performance using the laser as an optional attachment. I have other attachments like Pen Plotter, drag knife, metal scribe, router,plus the Plasma cutter.
I think I will go back to the straight GRBL device which I hope will allow me to use the 3 axis limit switches. You have been a great help and thanks for your time.
Have fun
tom
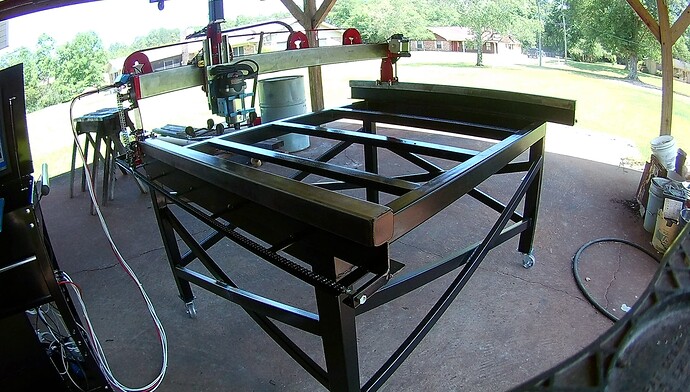
This is what my table looks like.
Awesome build.
This should work fine. But it should also work with GRBL-M3. Z will home first, followed by XY.
6 posts were split to a new topic: Docking windows - Very wide when docked to top of work area
This topic was automatically closed 30 days after the last reply. New replies are no longer allowed.

