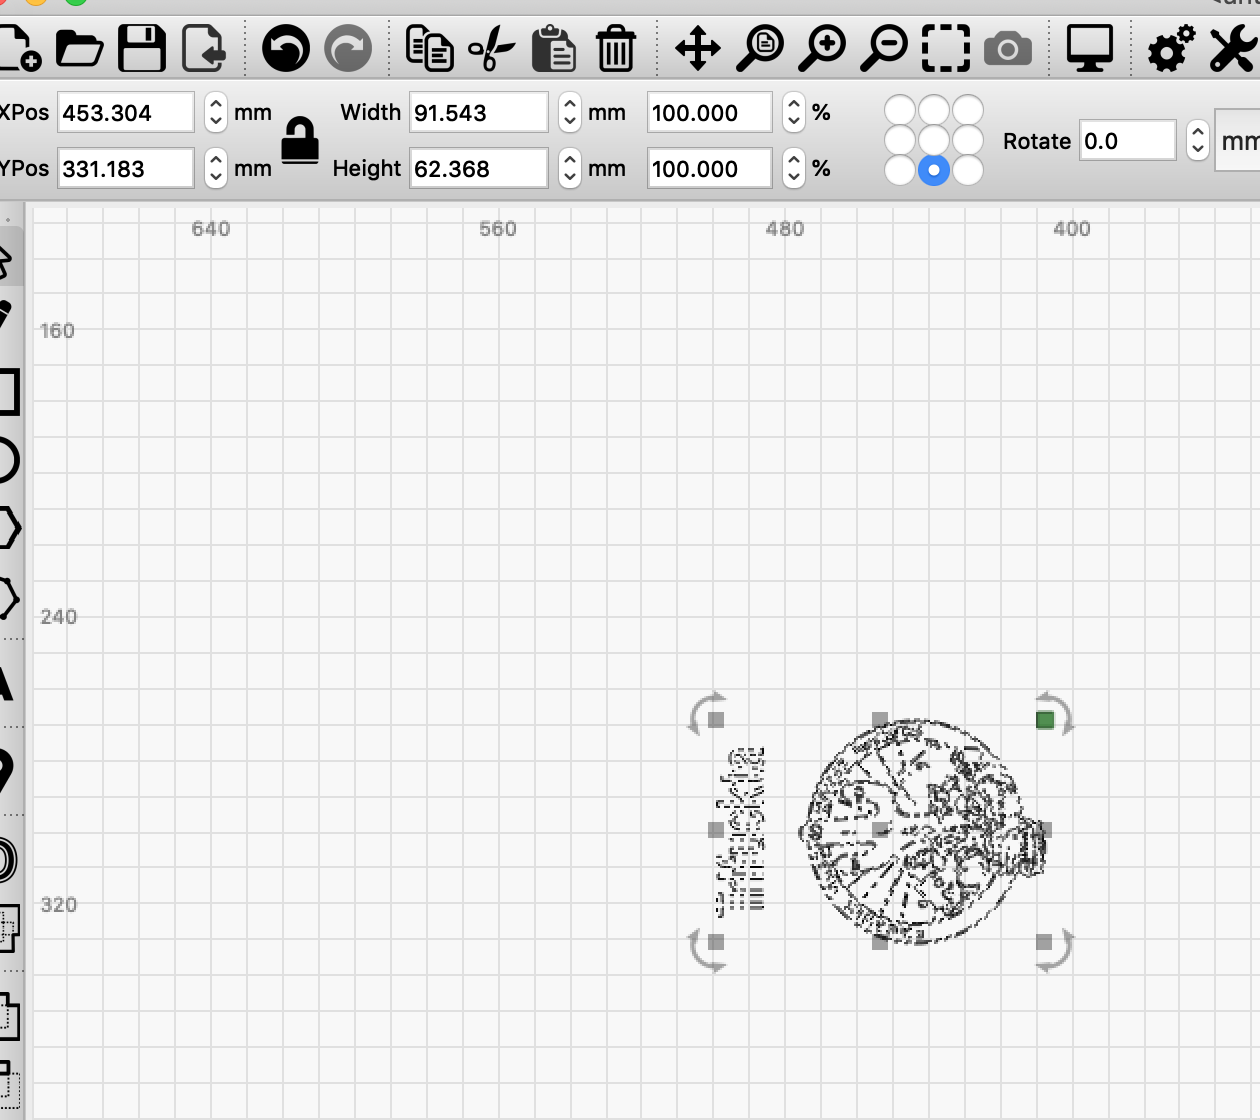
I’m hoping you guys can help me out. I’m using a BOSS LS 2436 and a chuck rotary that I bought with the machine. The images seem to be getting stretched and I can’t figure out why.
I used this video to get the settings.
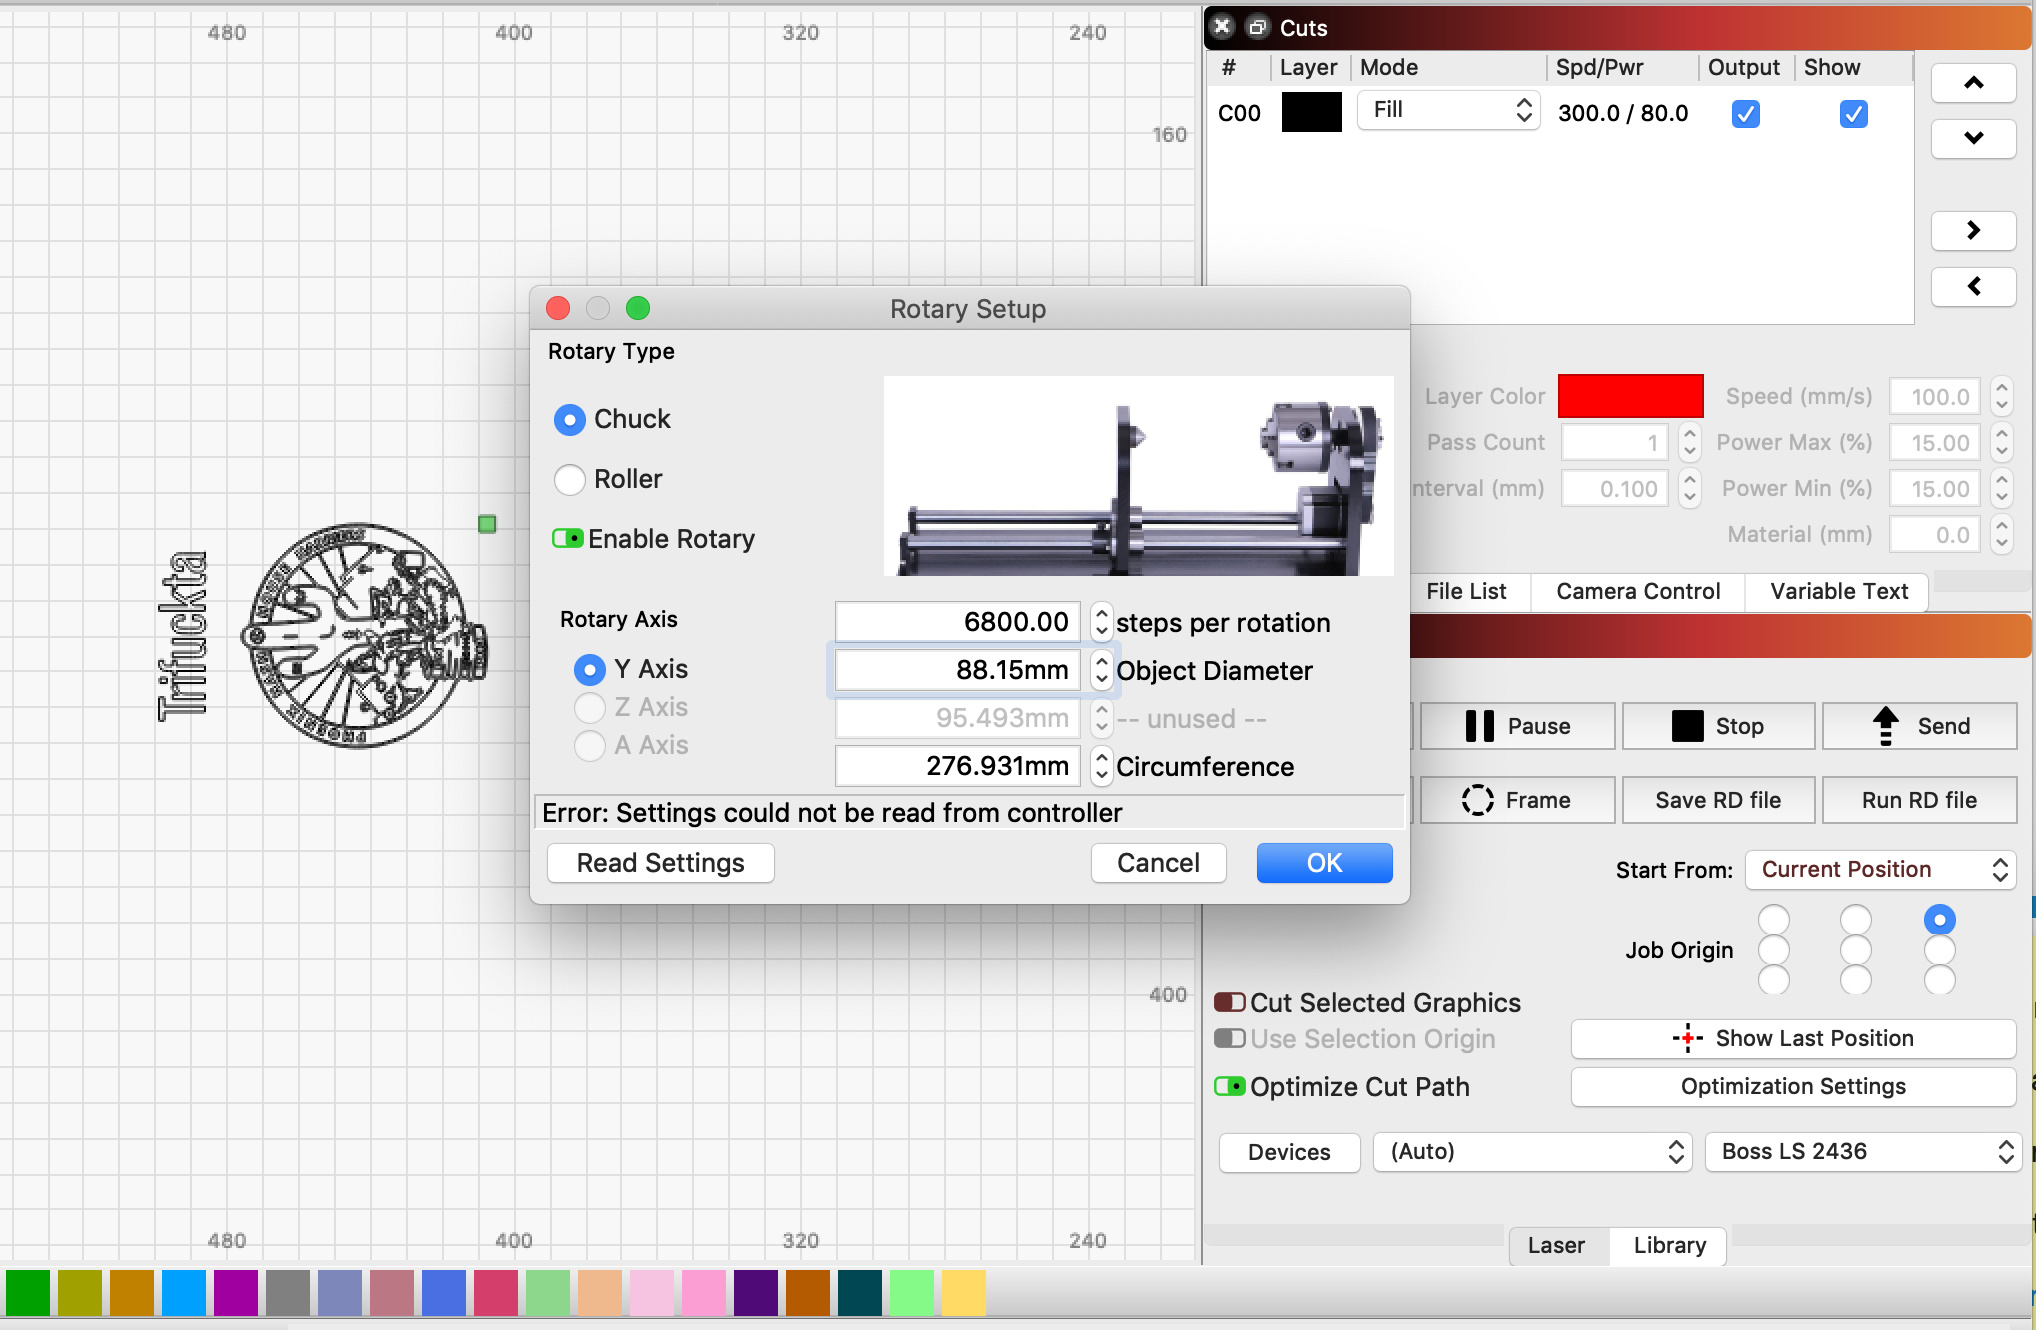
Steps per rotation is set to: 6800
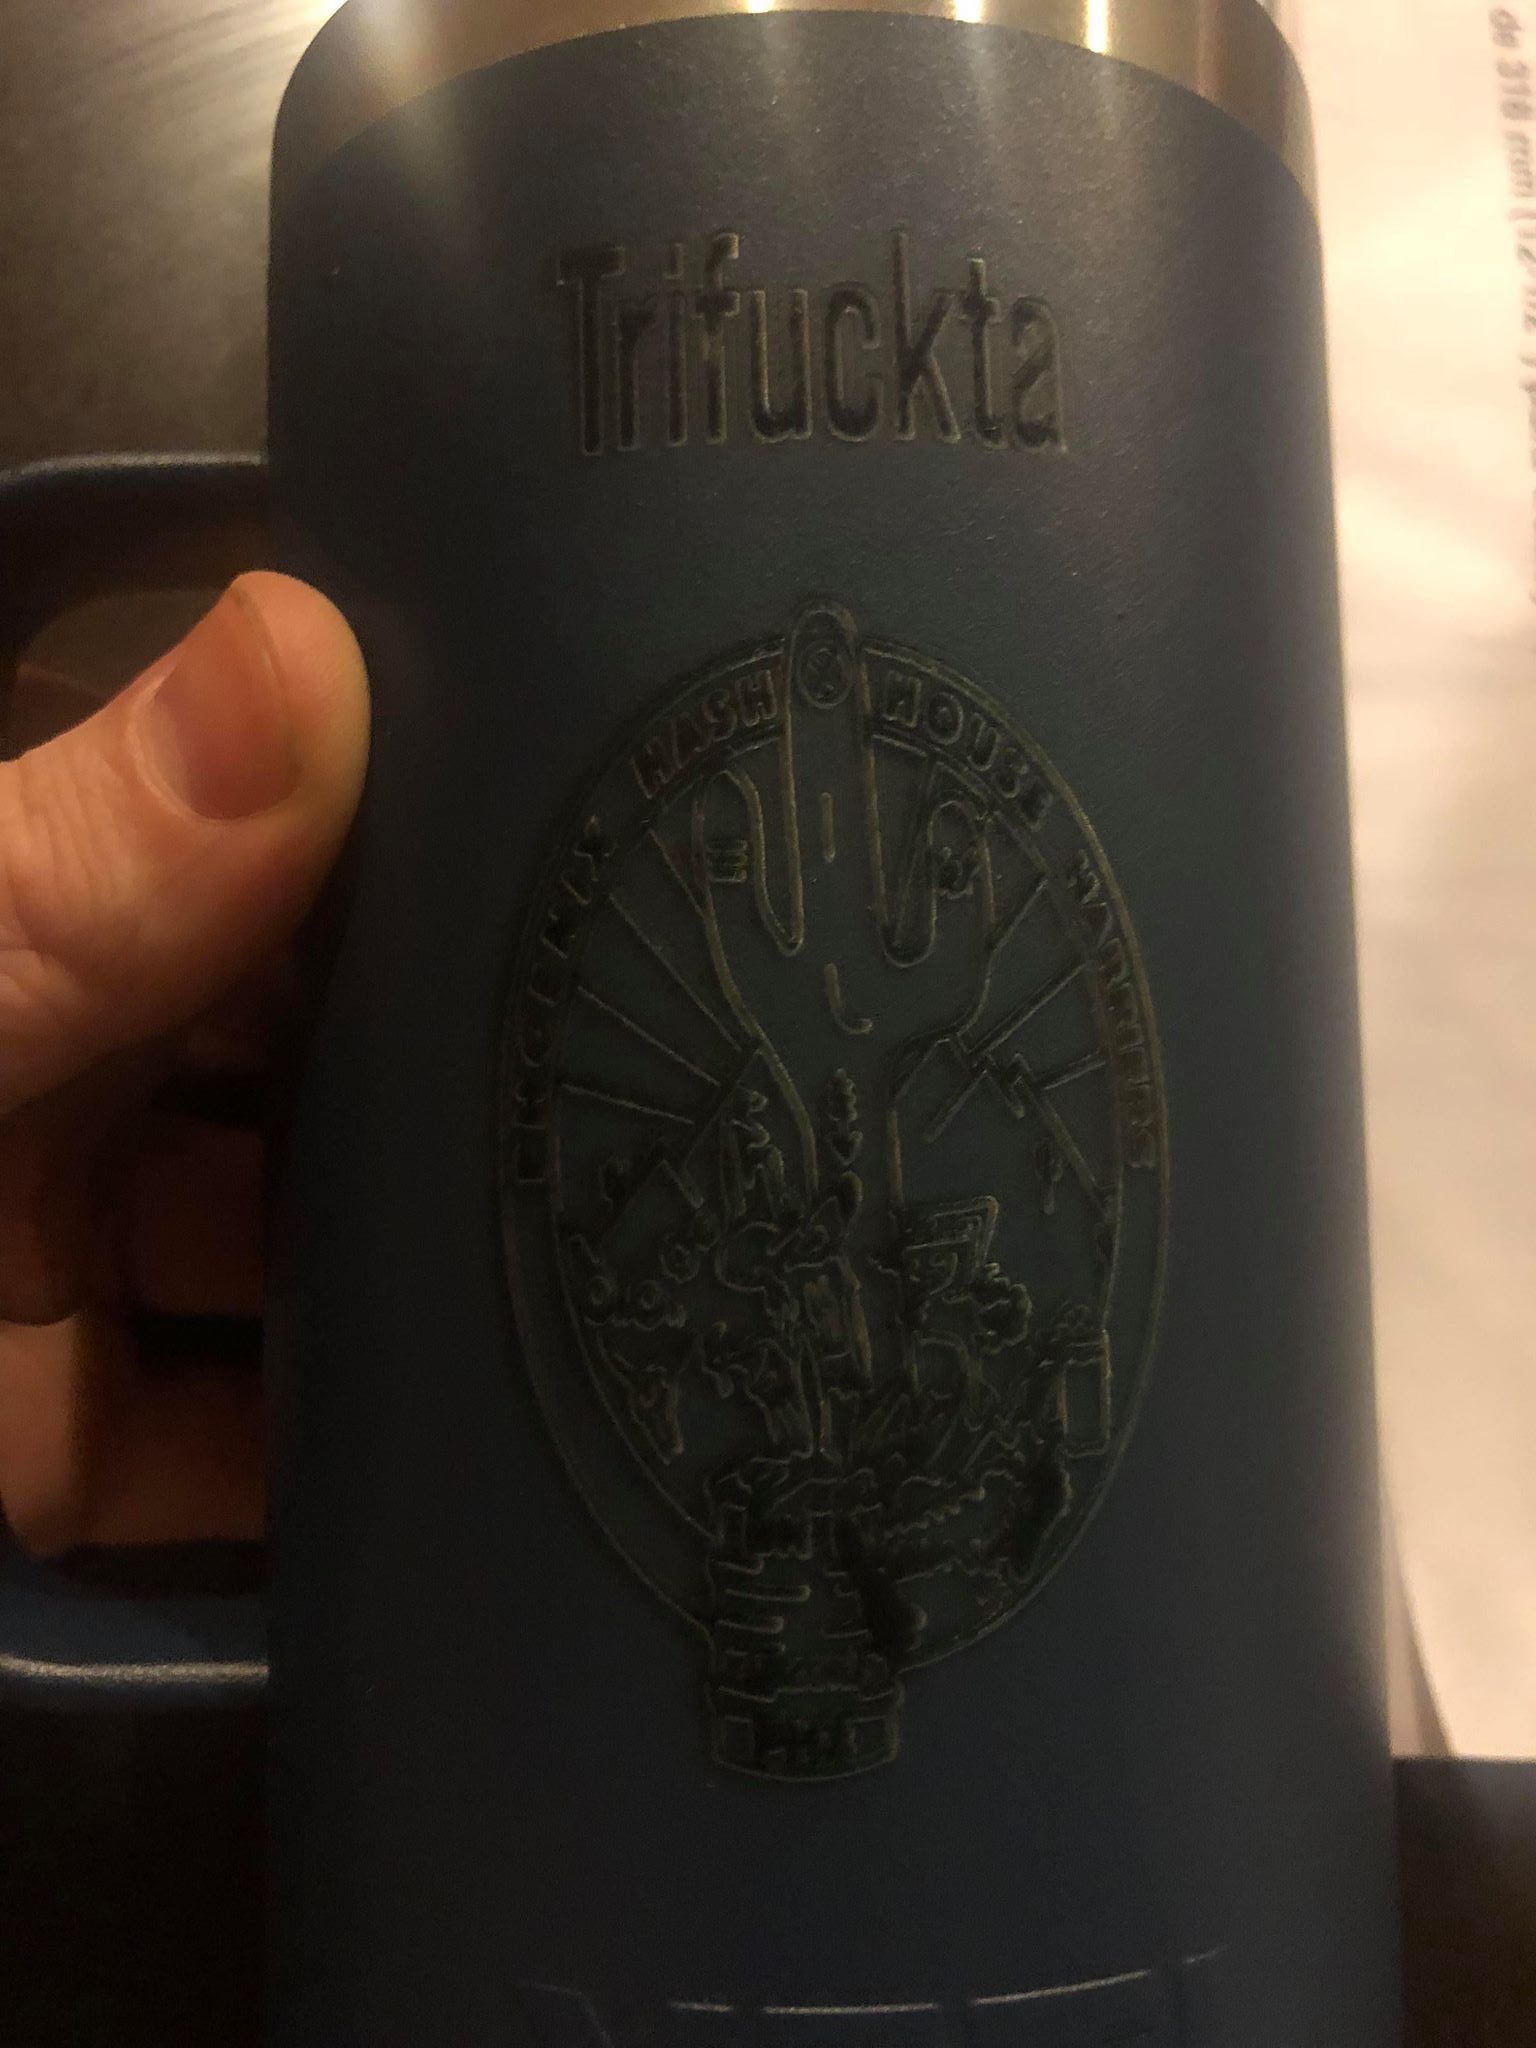
For object diameter I tried both 35 (BOSS says use that regardless of actual object diameter) and I tried the actual object diameter. 35 looked stretched very wide, the actual diameter seemed very narrow.
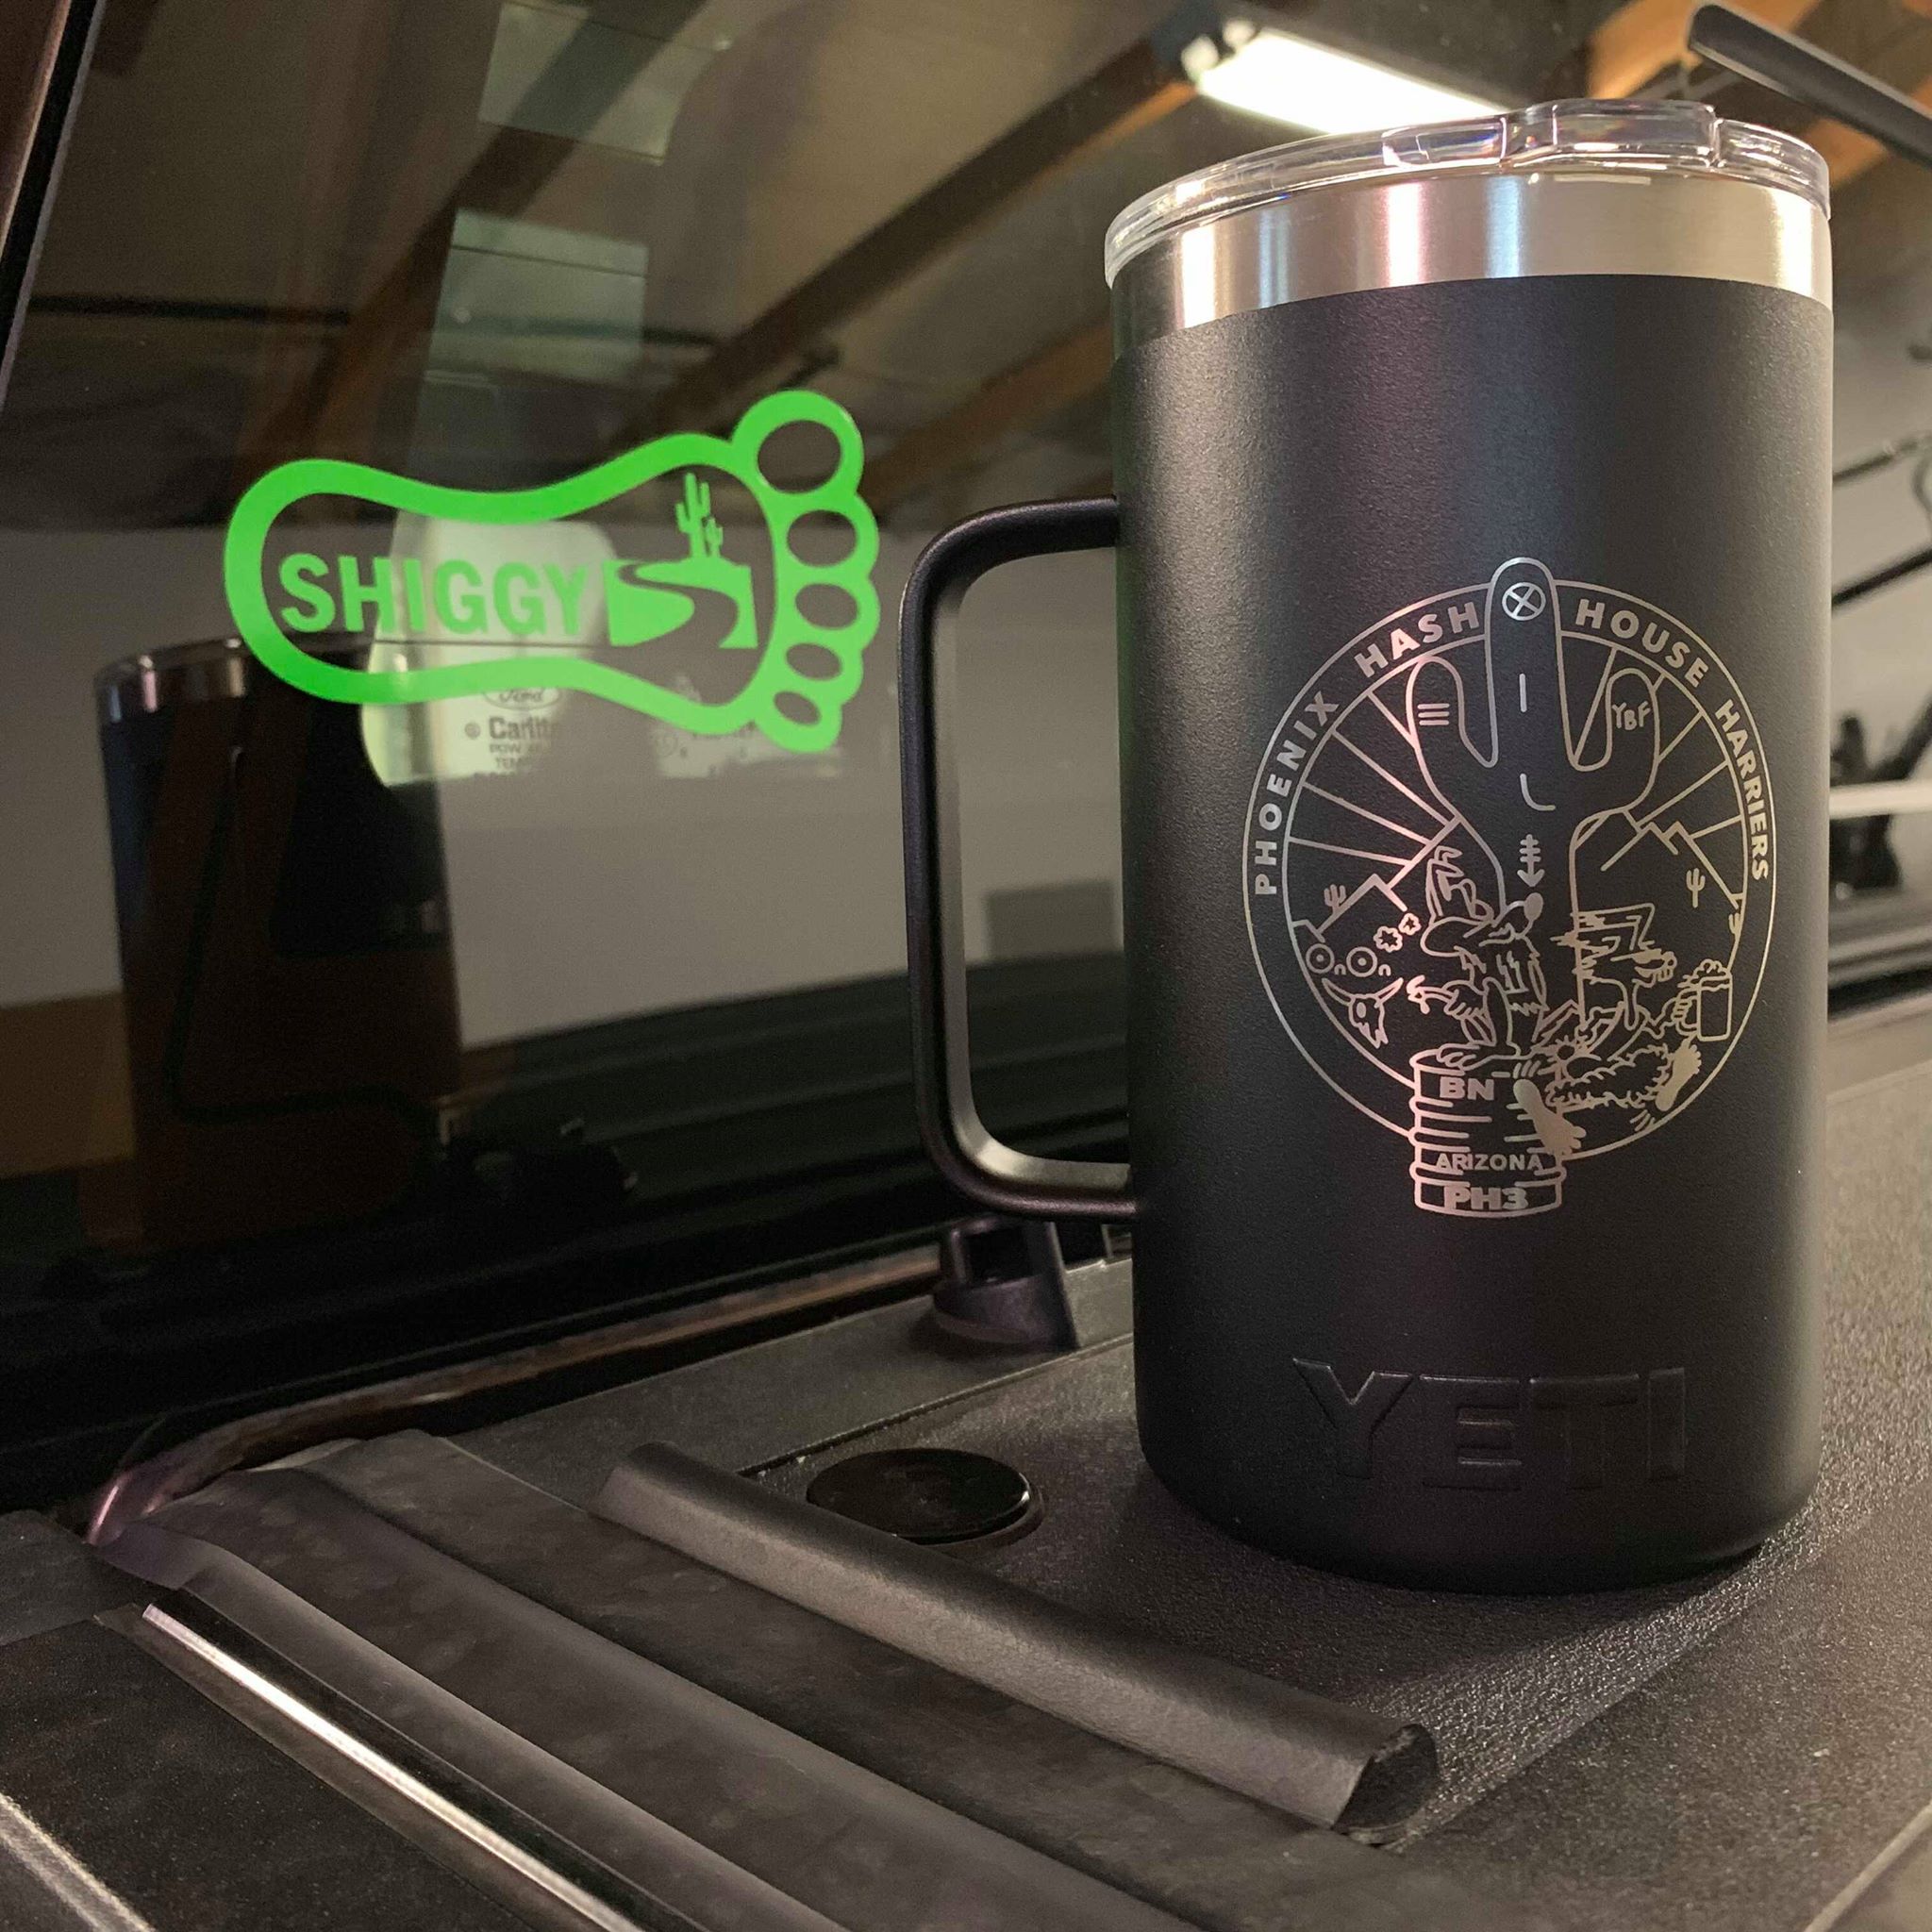
I’ve attached pictures of the two results as well as a picture of what it should look like (I don’t know how it was made, it was done elsewhere.)
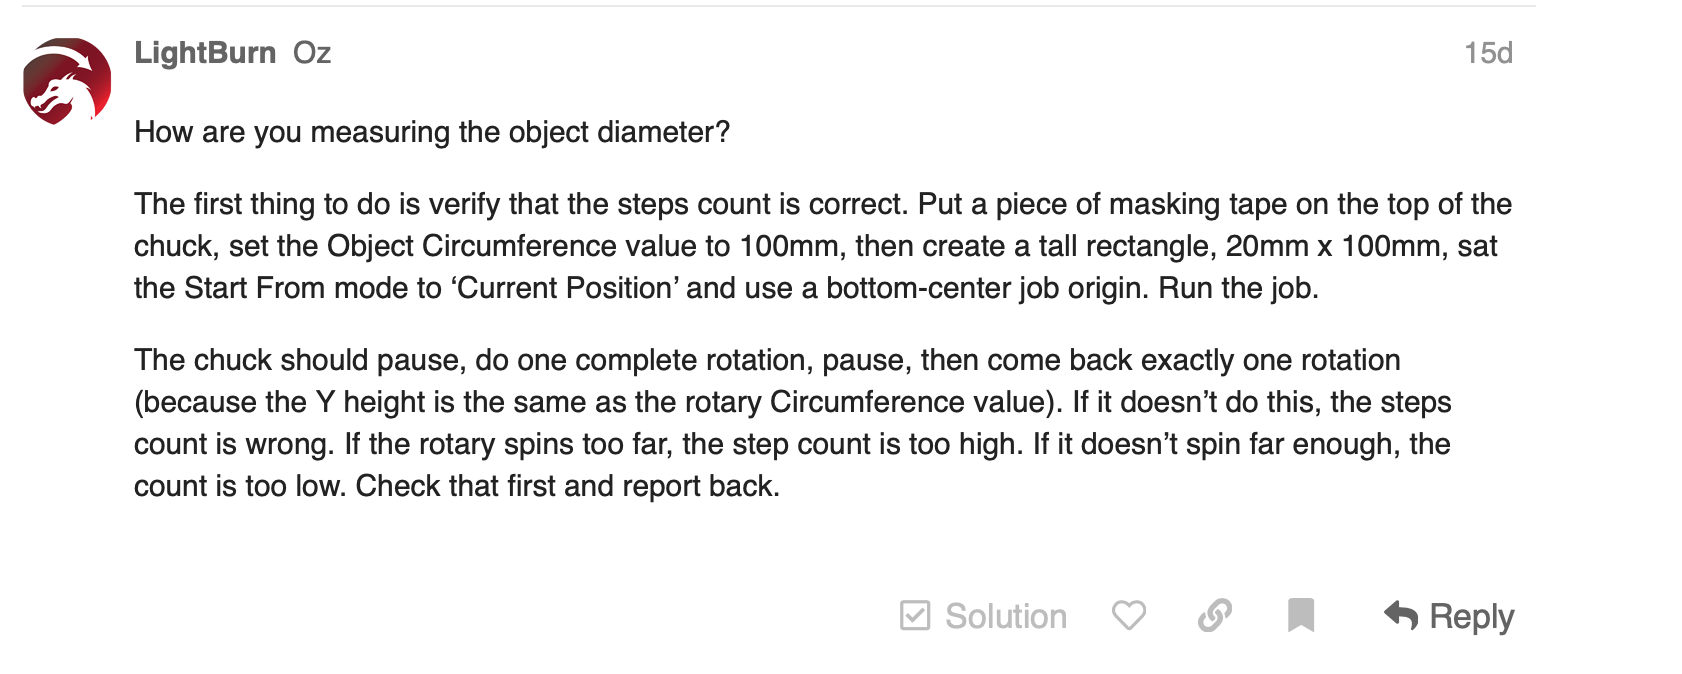
The first thing to do is verify that the steps count is correct. Put a piece of masking tape on the top of the chuck, set the Object Circumference value to 100mm, then create a tall rectangle, 20mm x 100mm, sat the Start From mode to ‘Current Position’ and use a bottom-center job origin. Run the job.
The chuck should pause, do one complete rotation, pause, then come back exactly one rotation (because the Y height is the same as the rotary Circumference value). If it doesn’t do this, the steps count is wrong. If the rotary spins too far, the step count is too high. If it doesn’t spin far enough, the count is too low. Check that first and report back.
Try the 4250 number for steps from their docs as well. The difference is about a factor of 1.6, and just eyeballing it, that looks like roughly the factor that you’re off by.
Well, with that set, you should be able to set the Object Diameter number to the diameter of the cup and that should be all you have to do (and enable the rotary toggle, of course).
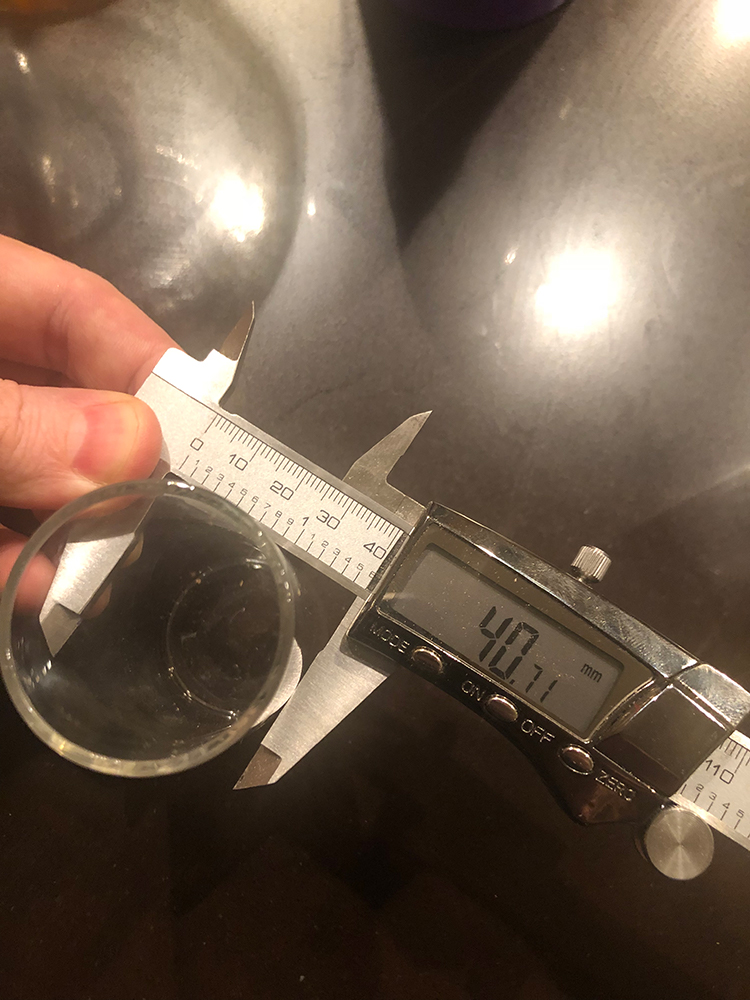
not sure if it’s something in your code that needs fixed but i just did trial and error with the diameter setting til it worked. the actual object diameter was 88.15, but that didn’t work. 61 mm worked. boss says to set it at 35 (not sure why) and that didn’t work. might be coincidence but 61.5 is halfway between 35 and 88.
That implies that you need to double (or halve) the steps per rotation count. You normally adjust that number, not the diameter. The diameter has to be correct for all the speed / accel setting math to keep the speeds accurate. If your micro-step setting on the Y axis motor driver is different, it would double or halve the steps required.
So you say you’re using a chuck rotary and you have chuck rotary selected in your settings but the video you are getting your settings from is for a ROLLER type rotary.
I don’t understand what you mean by “the rotation test”. Having said that, BOTH numbers (the steps value and the diameter value) are used by the controller to figure out how far to move, so if you doubled the diameter AND doubled the step count, the overall amount of rotation would end up the same, but the system would be using the wrong speeds.
i have both. i’m using a chuck. if you watch the video or read their documentation they say use the same settings regardless of if it’s for a roller or chuck.
6800 is the correct steps per rotation based on both your test and what BOSS says to use.
the object diameter is 88.15 using digital calipers. if i set 88.15 it comes out stretched. if i set it at 61, the design comes out as intended on that object. i’m simply sharing that 35 is the setting from BOSS (also stretched but in the other direction). 88.15 is what you say to use. split the difference between those (~61) and it works. that could be coincidence or not. thought you’d want to know in case it was a bug you could track down in your code.
if it’s just coincidence, there’s still an issue with entering the diameter and getting a stretched image. obviously, i can do trial and error to get it right every time, but it would be nice to have it work without that.
Ok, I got interested and dove in a bit, and this is how I interpreted what I have gathered from the BOSS info and in here:
The 35mm they tell you to set regardless of chuck or roller is the ROLLER DIAMETER setting. You can set this regardless of chuck or roller, because chuck doesn’t use that value.
This is unrelated to the object diameter setting. That should always be the object’s diameter, regardless of using chuck or roller.
(When using roller, the diameter is divided by the roller diameter to calculate the number of roller rotations to do a full object rotation. For chuck, a rotation is a rotation, regardless of object diameter.)
The steps settings could be different between chuck and roller too, so if you have both, you may have to note down and change these as necessary.
When you performed the steps Oz suggested did you set the circumference (so NOT the diameter) to 100mm before performing the 20x100mm rectangle test?
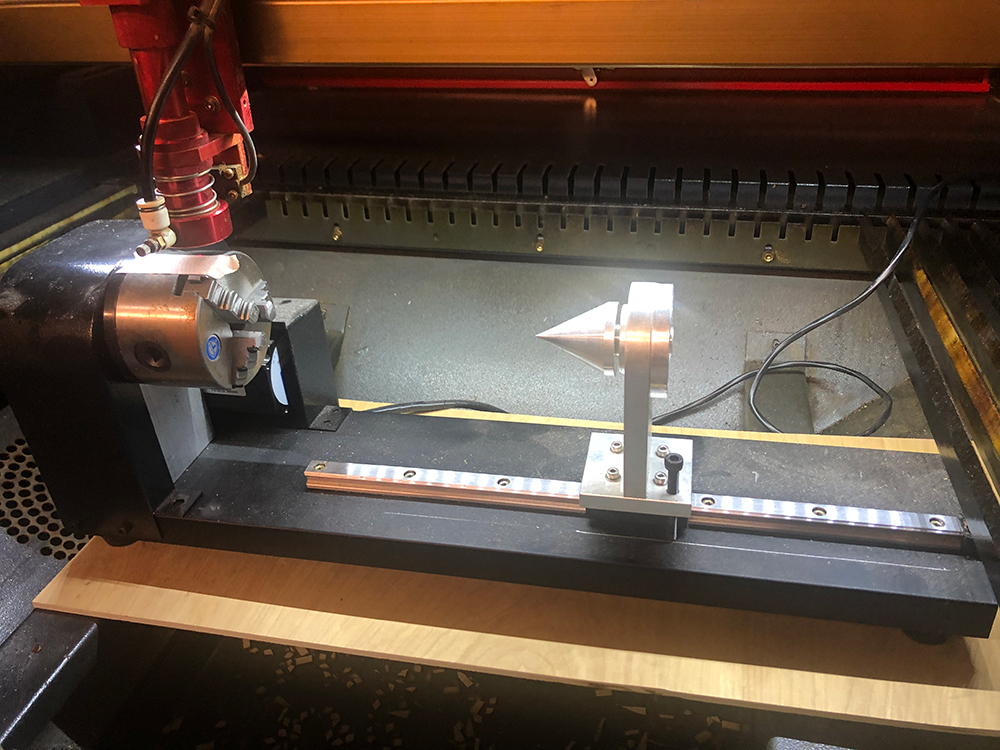
Can you show a picture of your rotary, and how you mounted the cup?
You said, “I have both, I’m using a chuck” so I’m trying to figure out if you have some weird hybrid that gives you both options in a single unit, or you just mean you have both, but are using a chuck at the moment.
What Francesco said is correct. The only thing I can add is that I have a chuck type rotary and when I set the correct diameter of my object to be engraved it comes out right every time, so the software seems to be doing its job just fine.
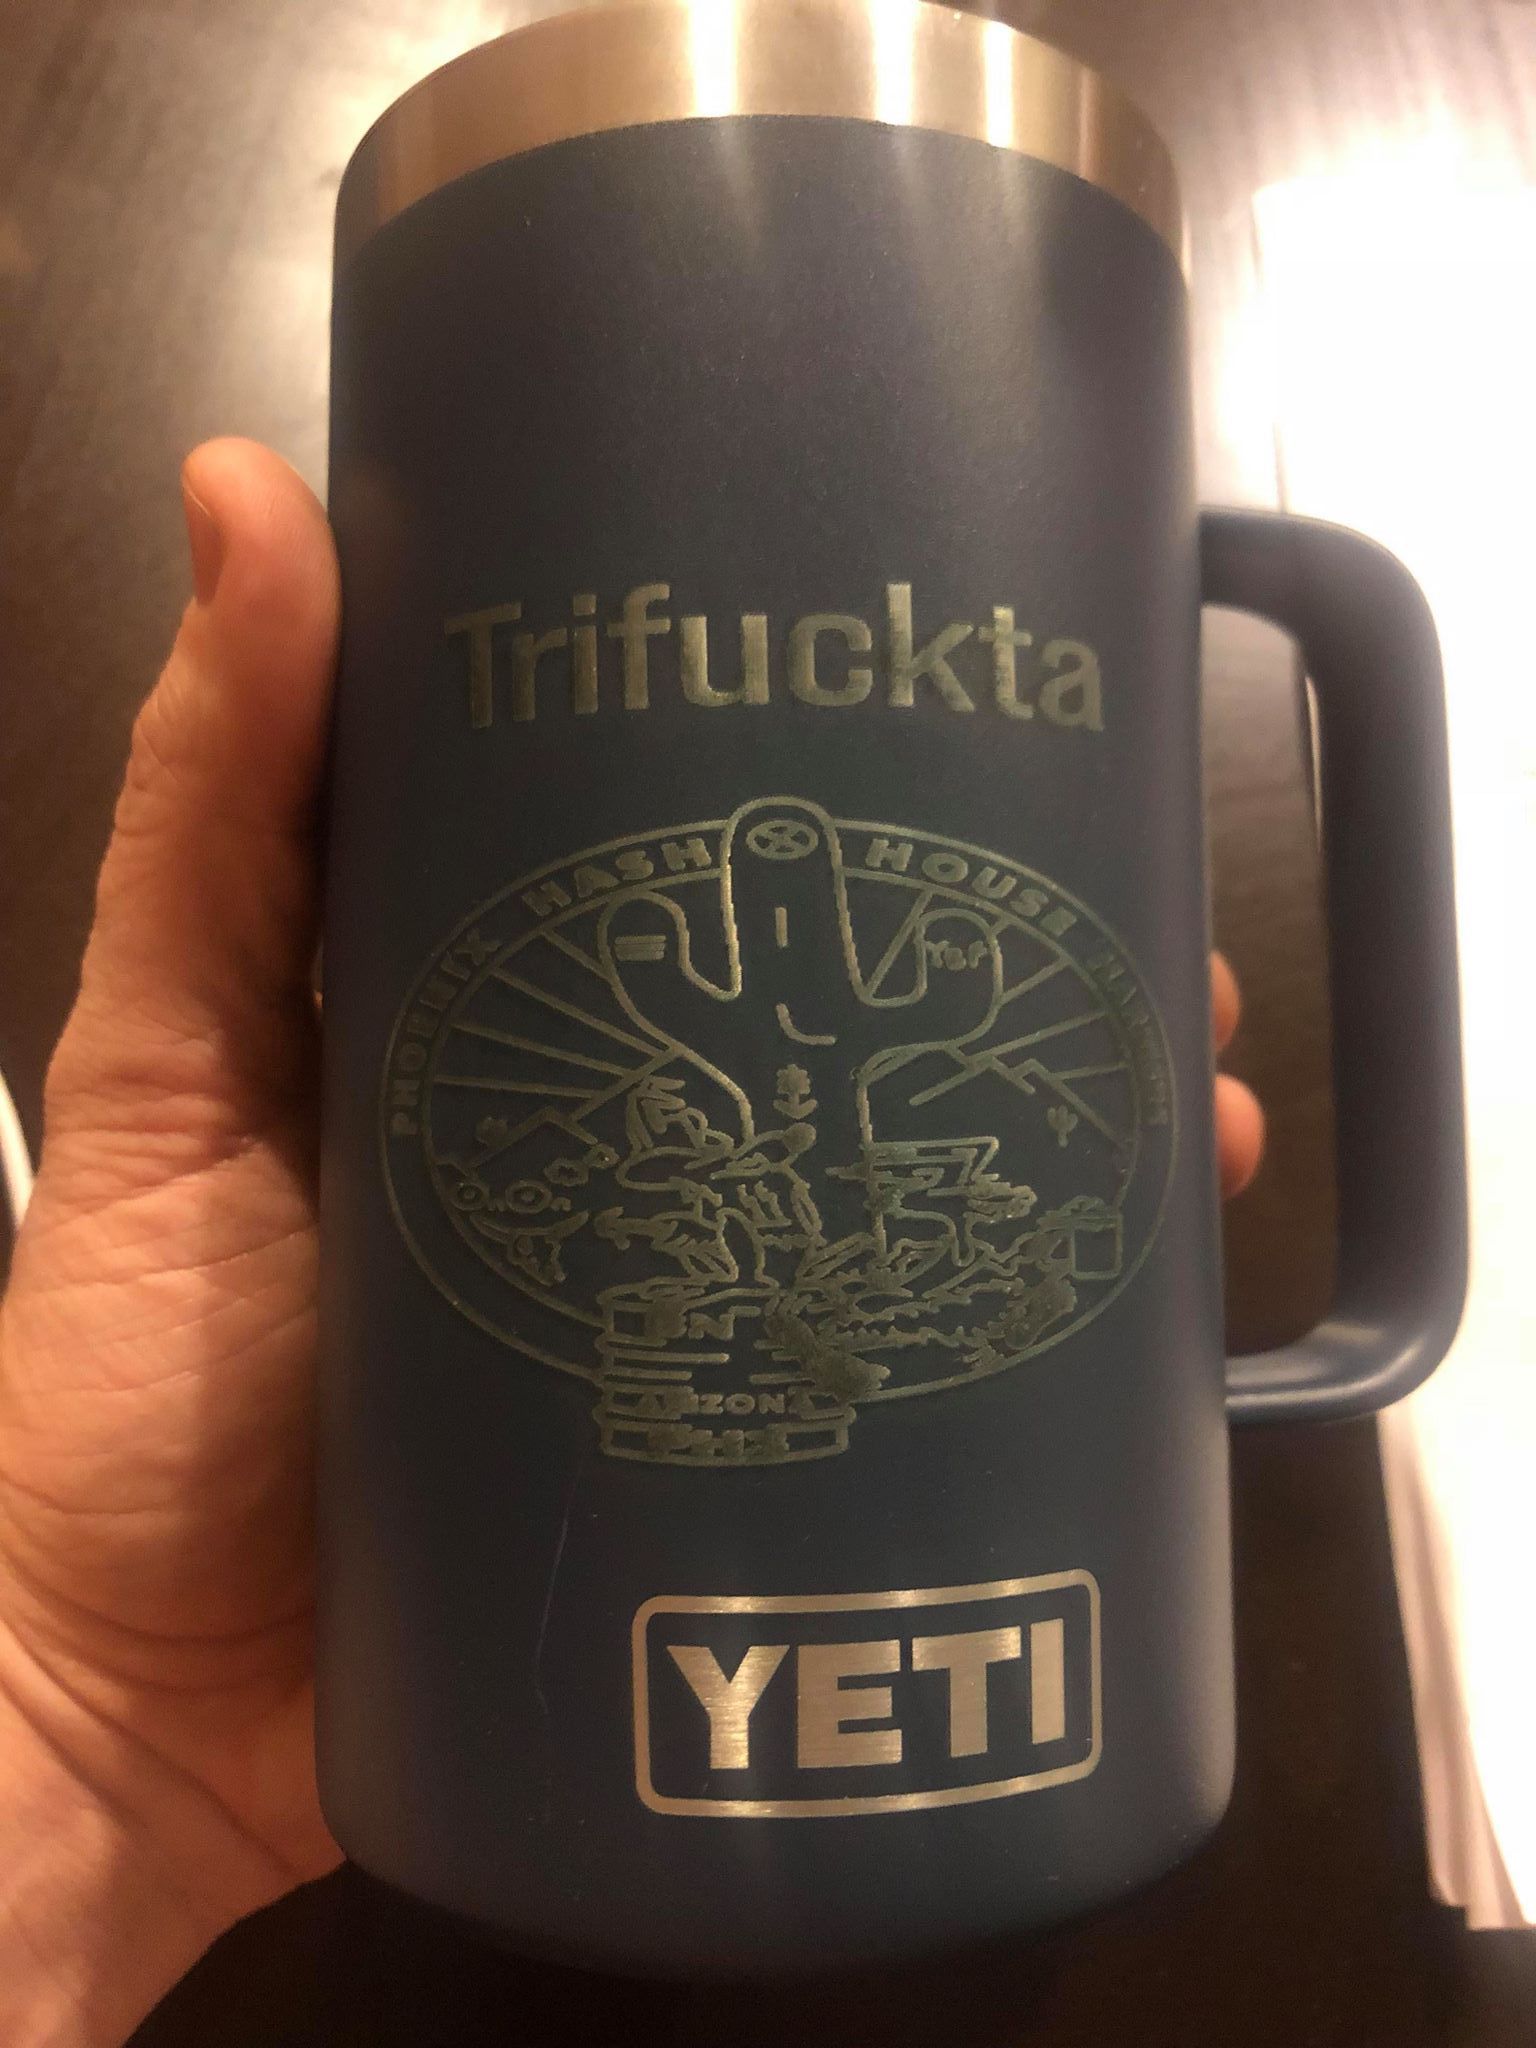
i don’t have it currently setup. but it’s just a standard chuck rotary. i meant i own both since the person asked what type i have. for this project i’m using the chuck though. the setup is just the chuck jaws inside the opening to a yeti mug.
thanks for catching that. i did have the roller diameter and object diameter confused. but ultimately it doesn’t matter since the object diameter comes out stretched at 88.15, and fine at 61. my mistake for confusing the issue with the 35 roller diameter.
yes, i set the circumference to 100. thank you for double checking that i didn’t get confused on that.
started a different project today using the chuck. different diameter object, same issue (images are stretched when using the correct diameter). photo of chuck and diameter setting attached. also took a video of the steps test (20x100 rectangle with a circumference of 100) link is below. for reference the width of the art is correct (for the x direction) it’s the y direction that is too smaller than it should be resulting in a squashed appearance.
note: i ran the job on a roller instead of a chuck and it seemed to work but it was hard to tell because the object kept slipping. there is one little usability issue you may wish to address. the roller diameter field changes to be the object diameter when switching from roller to chuck. doesn’t really make much sense for what was previously the object diameter (in roller mode) to become “unused” and have to retype the object diameter in what was previously the roller diameter field. i think this is where my previous confusion between object and roller diameter occurred. though, to be clear, that has no bearing on the current problem with stretched images. i have double checked all the measurements and settings very carefully.