I am finding that when I try to print a picture in a dithering mode in Lightburn, Snapmaker prints as if it is an inverted picture and I am not sure what setting may be causing this. Anyone else experience this and have a solution?
Maybe Snapmaker and Lightburn could communicate and make nice-nice to solve the issue?
I found this thread on the Lightburn forum, but the solution did not work for me.
Yes, I have already seen the post for setting up the Snapmaker with Lightburn but it is for an older version of Lightburn.
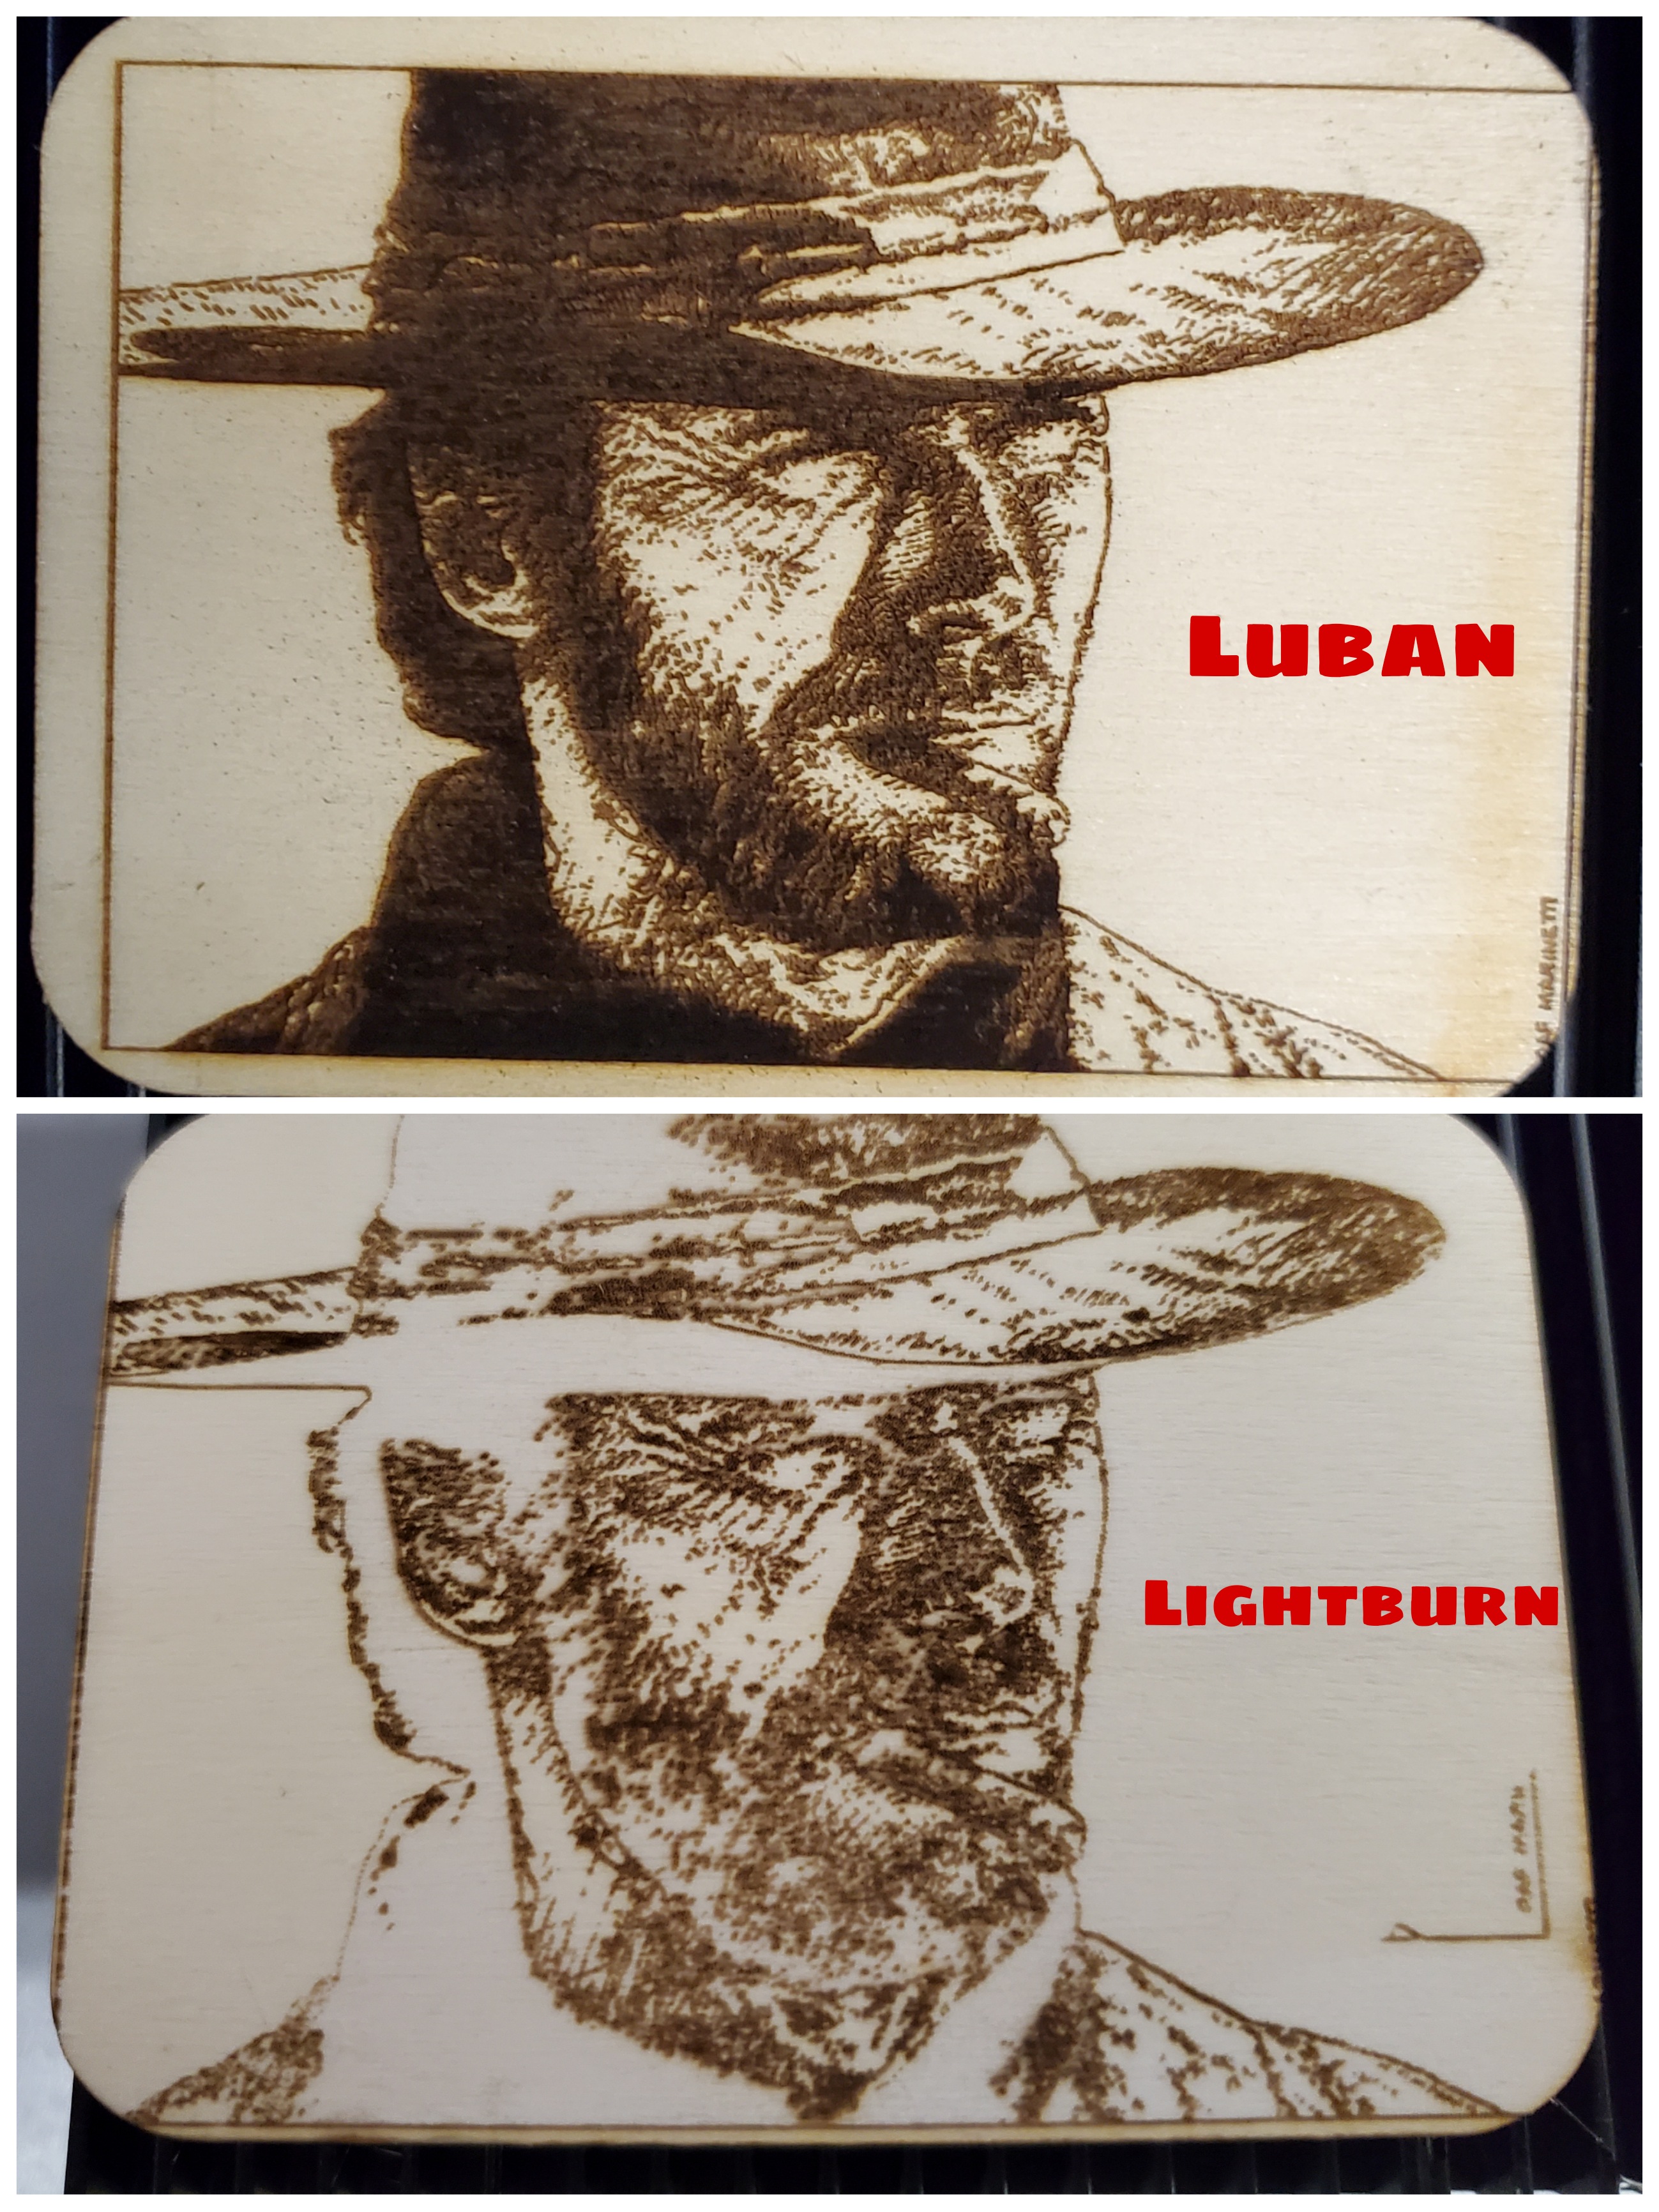
Pictures below Luban (normal), Lightburn (inverted)
This is what my experience has been. We cannot use passthrough. I know that a lot of LB users use Imag-r or Da Big Gimpin’ plug in to pre process the image and when it is loaded into LB you are advised to use passthrough but don’t use those other products because SM does not seem to understand what to do if you use passthrough. In order to get out of the dithering inverted picture issue, I uninstalled LB including deleting the folder in programs and installed version 0.9.16. Newer versions may work as long as you never use passthrough. Before I uninstalled, I cleared out the LB preferences by going to File - Open Prefs folder. Once the folder is open, close out of LB and then delete everything in the folder. Once the folder is empty, then I uninstall. This has worked for me and everything has been good as long as I don’t use passthrough.
Something doesn’t make sense here. I’m generating a G-Code file from Lightburn, how does the way Lightburn processes an image (pass-through) affect the way Snapmaker reads the G-Code it’s given? To my knowlage, I have never used pass-through, yet I still have this issue of no matter what settings I use in Lightburn, the image is always inverted when it’s burned on the machine. It’s reading G-Code generated in Lightburn. I’ve tried Color Image with “Negative Image” on and off, I’ve tried a negative image with Negative Image on and off, I’ve tried Black and White image with Negative Image on and off. Every single one of them comes out burned identically.
Turns out that I had the speed set too high. When I was running my tests I was just trying to burn through as quick as possible, so I had it set to 2500mmps. Seems anything over 2000mmps causes the image to burn inverted. Don’t remember if I had any kind of dwell or anything set, but for whatever reason, the moves were too fast for the switching on and off of the laser. Since slowing down the feedrate, everything burns correctly.
I’ve had this happen to me as well. The cornering algorithm reduces the intensity when the delivered speed is below the commanded speed. It’s tuned to work well on a simple curve at expected speeds but it’s totally out of whack at 60-100 times faster than anticipated.
Without knowing the print or engrave speed allowed in the Snapmaker 2.0 it may be worth testing half speed and half power to see if the washed out spaces are diminished. On Clint’s portrait, the image does not appear to be fully inverted. The light areas are not dark. Some of the dark areas are dark where expected - but those areas seem to be partially dithered. This may be slowing the engrave head or doing something strange with the cornering. The darkest areas may be coming out light because the speed isn’t being recalculated.
Another opportunity to confirm the differences between the commanded speed and the delivered speed of the engraver is in the Simulation Settings. By setting these to match with the expected speeds you can compare the Estimated time in the Preview window to the Elapsed time (stopwatch or Laser Window). Simulation settings are under the Additional Settings tab, behind Basic Settings, under the Edit header.
I think there’s more to explore here if you’re so inclined.