Hi
I have a co2 laser and a ruida board Lightburn V 1.4.01
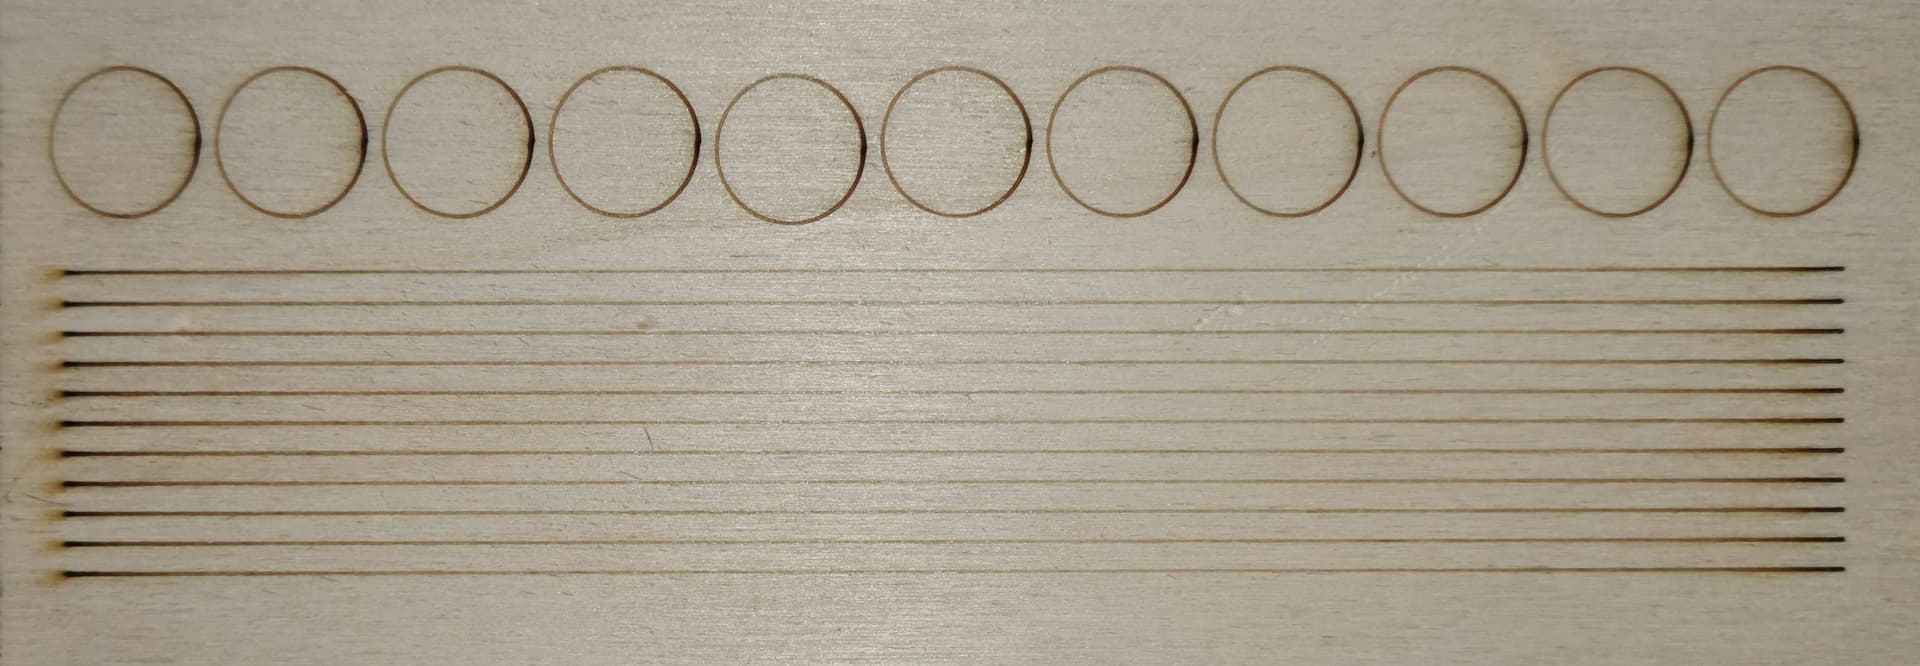
When engraving on wood, some circles produce a relatively uneven image. Firstly, it starts relatively dark. The curves are uneven and end too early (circle not closed). If I make several circles, some circles are perfect and some look like the picture it doesn’t matter whether the circles are engraved at the beginning or at the end of the job
what can i do to get an optimal result (complete and even circles)


This is very interesting.
The Laser Starting dark and fading along the circle looks like a Tube or Laser Power supply behavior. If you’re working around 20% power the tube could be on the edge of firing or not firing.
The third image you offered is Simulation Settings - these only apply to the time estimate in the Preview window. The Cuts / Layers window would tell me the Speed and %Power for the Image and the circular cut.
The Image you have engraved looks very good and the Scanning Offsets seem to be accurate.
I couldn’t find out much about the Fabkit Mk6. I did see Fabkit Mk5 and only a few pictures. Again, very interesting engraver.
yes that is correct with the simulation i read the settings from the controller so you can see how the controller is set if you need more details i will look under the machine settings what can i do to get an optimal result the circle is as line does not engrave as picture
controller is a ruida RDC6445G
Please capture the Cuts / Layers window. I would like to see the engraver speed and % power you’ve selected for the project. I am curious if the power is set at the bottom of the range.
Can I assume that the FabKit Mk 6 is water cooled? How tightly controlled is the temperature?


This isn’t related, just curious why the pwm is set to 1kHz? I’ve tried a bunch of variations here and it wasn’t worth the effort in my opinion. I think it’s purely academic. The default that is usually 20kHz…
I got some rather non standard output with that low of a pwm, especially at high scan speeds.
![]()
for me, the normal engraving is at 1kHz, as in the photo, if I set it to 20 kHz, the whole thing gets a lot darker
if I cut with 20Khz then it chars properly and I can press black
I spent a lot of time with the pwm period… The higher periods (lower frequencies) are passed through and the lower periods seem to produce a smoother control voltage.
I went all over the place with these and I could not change the material like you have with a change in period.
How big is the image?
I’d expect much thinner lines if this is a single line. Is it in focus?
This and the pictured graphic leads to suggest you check alignment starting at m1 for a chance of it not being in TEM00 mode resonance. And follow it though to the table.
Good luck
![]()
What are the power ratings of the Tube and the Power supply?
I am inclined to believe that the 1 kHz pwm frequency may be the source of variability.
Yes, I think I was trying to say that… typical… ![]()
![]()
Tube and power supply both 40W
No idea what you mean???
We are thinking that the resultant change from 1kHz to 20kHz should not have affected it like you describe.
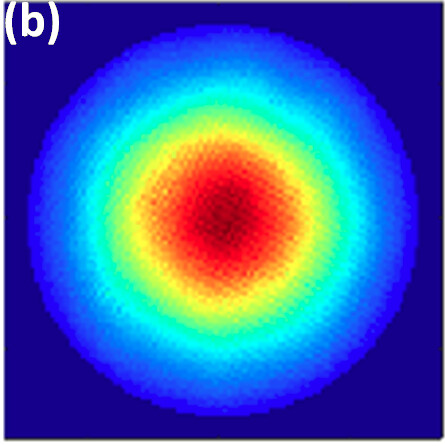
This is tube resonance (mode) or how it’s lasing inside. As the gasses break down, they don’t produce a beam that has a Gaussian power distribution within the beam and it becomes pretty useless and unpredictable. This good state is represented as the TEM00 state.
This is a Gaussian power distribution chart.
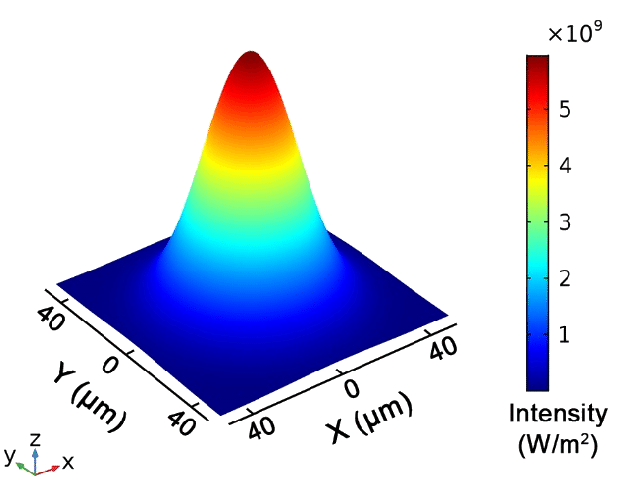
The resultant burn would look more like this distribution. It is the above graph from the Z axes.
I check mine like this… I cut out watercolor paper targets…
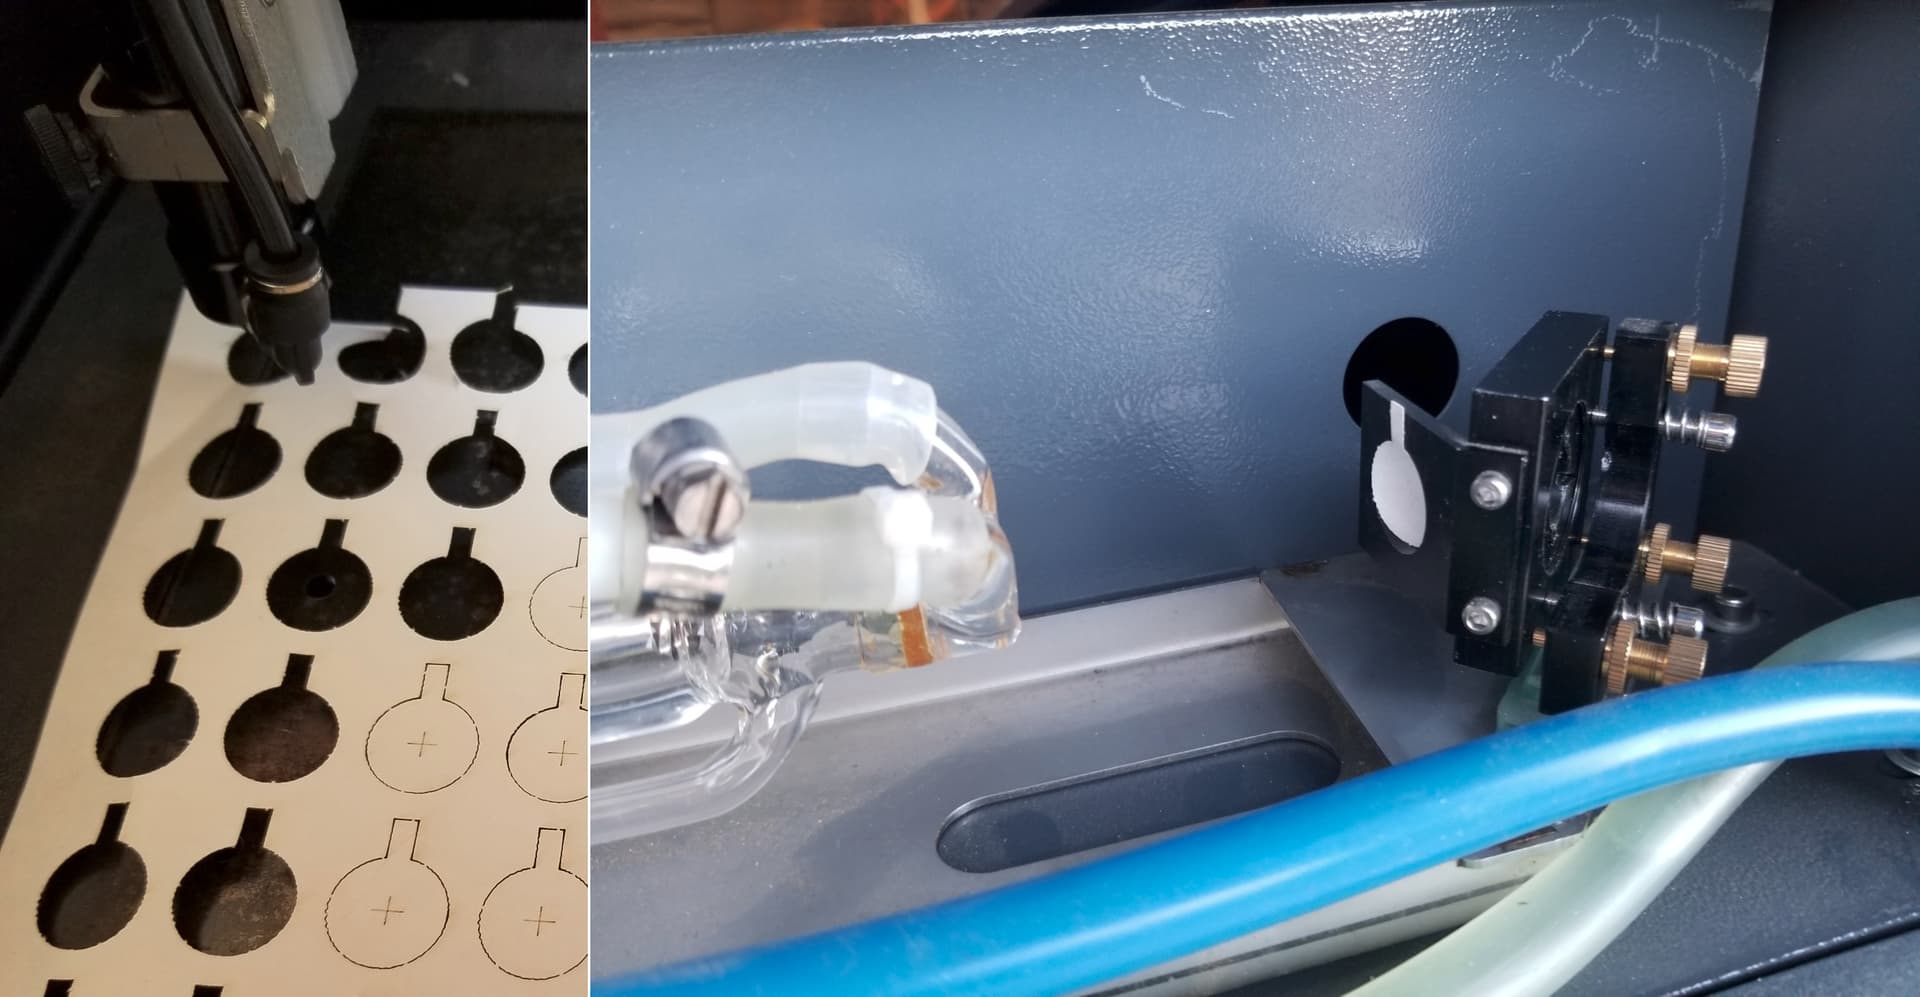
You can’t tell anything from a blown out hole… just enough power to see the darker center radiating outward. I set the power low and the pulse rate to 10mS or somethine… might have to pulse it multiple times.
Make sense?
![]()
I’m sorry I don’t understand anything at the moment
So how can I avoid that my laser cut burns everything?
So how do I adjust the laser optimally?
I’m just confused at the moment
I have observed that there is a difference whether I laser with 1kHz or with 20 kHz
with 1kHz = not burned (normal engraving)
with 20kHz = burned ( I can press black)
In relation to my picture, this means that at the beginning of the line there is a high frequency because it was burned, at the end of the line there is no frequency because it was not lasered
it almost seems that there is a scan offset when filling because the image is ok this does not seem to be the case with the line because the beginning and end of the line is not correct
I have this day often… I feel this. I understand. ![]()
This is an unusual setting. Some people here are experimenting with it for half-tones and softer shades. It pushes the engraver into an intenionally weaker state but the reliability of the engraver (especially starts and stops) can come into question.
This is very common for a CO2 laser engraver. For the 40W tube and power supply you should have a High speed and 30% power available to you that can make the light Brown color immediately and on demand. In the Cuts / Layers window what is the Speed, Percent Power for each operation and what units are applied to the commanded speed?
Without an oscilloscope to verify the input, or the operator adjusting the frequency of the controller output, the cause of the change in laser performance can not be attributed to a change in frequency.
I feel that the low frequency state is causing the unusual behavior.
I agree. This was noted previously as an erratic and occasional behavior.
I would come back to 20 kHz with the laser engraver in all modes and reestablish good speed power settings. The High voltage laser power supply at 20 kHz should be more reliable.
Please select Laser Tools then Material Test and make a grid that is 11 test spaces by 11 test spaces. This will make much nicer round numbers to work from because there are 11 numbers between 10 and 20 (including the 10 and the 20). ![]()
With the correct speed and power values in Material Test, you should be able to develop a diagonal range across a the test and at least two or three different brown colors for engraving.
meanwhile I have quite a lot of different test files for adjusting the hardware
e.g. offsets, acceleration, speed, laser power, hardware movements, placement on the processing surface (camera), and so on
Is there perhaps a single test file with which I can optimally set the entire hardware at once and perhaps a description of how I can optimally set the hardware with the help of this file
is there a kind of error list or maintenance list to optimally adjust lightburn?
I have already done a similar test with the result that with the fill and 20 there is a slightly darker color in the line, however, there is no difference, that means it is darker at the beginning of the line, but I only noticed the large distance at the end of the line now
Frequenztest Linie.lbrn2 (20.5 KB)
how do you set, for example, the optimal acceleration of the axes or the optimal working/moving speed and how can i check this
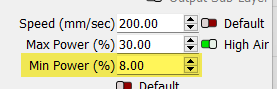
Set your min power to a much lower value to get a more consistent and even burn, e.g. 8%.
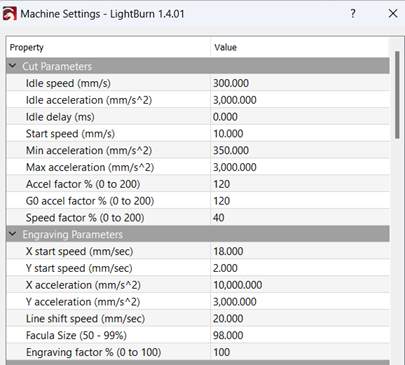
The uneven burn could also be related to acceleration settings being too slow, what do you see in Edit>Machine settings for this area?:
And try setting your PWM to be at least 3Khz, otherwise at higher speeds the burn will be rougher and not as smooth.

That looks better. The maximum speed I have is 200. If it gets faster, I lose steps
It’s still darker at the beginning and end, but not for as long
But I have to say that I don’t understand the logic behind it
Do you maybe also know how to best set the vendor settings because I’m sure they are wrong because the board that is installed there is not original, that means it was originally a mk5 with a sooty board and the ruida board that is now actually belongs to the successor model mk6 the structure is still from the mk5
This is a good indicator there is something wrong with the configuration…
The user should not be able to break the machine… Your artwork should not be able to do this.
![]()
Please go to Edit>Machine Settings and use ‘Save to File’ and upload it here.
Nevermind I see you have PM’d it, I’ll take a look…