Maschieneneinstellungen.lbset (14.3 KB)
Try running this attached test file on any scrap material that will mark (134x104mm) - I’m trying to get a better picture if the extent of the lost steps.
Test.lbrn2 (73.5 KB)
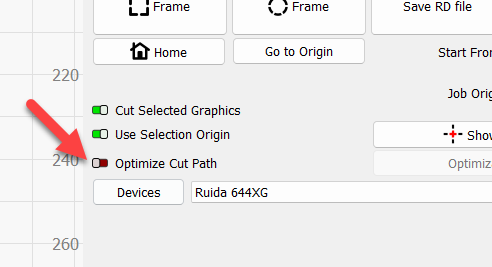
Please turn off ‘Optimize Cut Path’ for the test:
I looked at your machine settings, and these ones seemed unusual to me:
X-axis Max speed (mm/sec): 200
Did you limit this due to lost steps? It is very slow. Specs for your machine say 500 for recommended raster speed so you should be able to set it to at least 500.
X Axis Backlash (mm): 0.07
Why? I would just zero this setting.
Engraving Mode: Special Mode
Not sure why you are using this mode? You could either try reducing the value for ‘Facula Size’ and see if that helps lighten the engravings, or you could just change to ‘Common mode’ which is what everybody usually uses.
X-Axis Max travel(mm): 680
Is that correct? - in one of your pics you have the work area in LightBurn set to 640
Laser 1 frequency (hz):1000
Usually this is 20000.
Did you also check your beam alignment as @jkwilborn suggested?
X-Axis Max. Speed (mm/s): 200
yes, I restricted them because of the lost steps
X-Axis Backlash (mm): 0.07
I did this test once
Engraving mode: special mode
no idea what that means
X-Axis Max. Travel (mm): 680
no 640 is correct
Laser 1 frequency (Hz): 1000
no, that just confused me
BacklashTest.lbrn2 (161.3 KB)
this is a fab kit mk6
I only have the board from that
the rest is from the previous model
I’ve also been trying to operate a rotary via the U ax for some time. I somehow succeeded with the help of the support, however, it was quite complicated and now I can’t do it on my own anymore because I always make some setting wrong I had to do it too already written a few times
You can save the controllers configuration… Then you don’t have to remember anything other than load the new configuration… I have a few, depending on what I am doing…
Be aware about using low power values… It was suggested in the thread to use a minimum of 8%… my co2 will not lase at that low of a value…
Good luck
![]()
What do you mean by that
I would like to understand what my laser is doing and why it is doing what
Min power% is usually set to 7% in Ruida controllers, so the 8% value in LightBurn is already standing on the shoulders of the 7% so will present itself to the power supply as roughly 15%.
Do I understand correctly that the 7%-8% are used to supply the power for the laser power part? The range between 8% -100% is only used for beam generation? that would mean that the beam has 92% available when max power is at 100%?
Interesting…
I have my Ruida minimum power in the configuration set to 9%, Maximum is 100%…
That would indicate at 50% power I should expect ~55% pwm rate?
My scope has the generated LPWM1 signal at 50% exactly…
I understood these to be limits, not where any magic is applied. If I ask for 1%, I’d get 9%… It will be easy to check…
Would that also mean I can’t enter a 1% to manually attempt to fire my laser from it’s console…?
This is how I determined that It would not fire consistently below 9%.
I’m probably just not following you…
No… In order to lase it has to be excited to a higher state. The co2 we are used to are dc excited lasers, meaning the high voltage potential/current causes the lase properties…
Some co2 lasers are rf excited and usually are more expensive, can be refilled and have a faster response time. When one fails, you can have the gas replaced…
The first ruby lasers were excited by a photo flash lights…
Here’s a video by Russ Sadler, it’s on fiber lasers but if you skip into it about 10 minuets he covers how a co2 works… might be worth a watch…
He has lots of good videos on You tube at SabarMultimedia
For a dc excited laser to fire it has to have enough voltage/current to maintain a lase state…
So there are values that are too low for this to occur.
A 100W laser may be good to lase at 10% producing 10W… If your 40W laser does a good engraving at 10%, it’s only using 4W <1/2 power… you will get more detail but less cut ability with a lower power laser…
Good luck
![]()
Does that mean that I can have a better engraving at 10% than at 100%?
but what would result in a lighter color?
how is it then when I cut that doesn’t work with 10% then how does lightburne know that i want to cut and how do i get a lighter color when cutting?
Power and speed are used to determine how much damage you do to the material. Generally speaking, you can half the speed and have the effect of doubling the power… along with a longer job run time. Theoretically anyway…
If at the normal speed, your engraving is fine at 5W and too dark at 6W, with a high power tube, it won’t lase below 10W… You can make some adjustments with speed and power, but you have to deal with a minimum of 10W output for a 100W tube… With a 40W tube, it will lase at 4W so you can do your work.
The only advantage of a high power tube is to cut thicker material… trade off is you lose the low wattage output range that could be desirable in light engraving work…
Some materials don’t take much power to mark them…
Although we say cut and engrave, there is really no difference and the controller and Lightburn don’t know or need to know…
A cut is just a deep engraving… engrave too deep and you’ve cut through… Speed/power combination is what is critical with any machining operation.
Make sense?
![]()
So could one say the min power determines how dark an engraving/cutting becomes?
and
does the speed determine how deep the cut/engrave is?
This leads to the question for me why is the max power required? (perhaps as protection against destruction of the tube?)
watched this video a couple times in the past… I just watched it again. His explanations are great. Very good watch!
1 Like
yes it’s great
I have only the problem
that it’s not in German
and my english is pretty bad
Yes that is correct, should be about 55% for the PWM signal.
These are not limits but book ends for your power scale. One way to check this is to run at test at 20% in LightBurn. Now set your min/max power% in the controller from 9/100 to 9/20, and your power output will drop dramatically since the new output will be only about 12%.
That is correct the max power can be limited to a suitable value so that at 100% power output from LightBurn you will not exceed the max recommended current for your tube. This is why most Ruida controllers in Thunder Lasers are set to 7min and 70max.
ich verstehe nicht wie werden die 12 % berechnet?
Here is the working if your min power % is 9 and your max power % is 20 in the Ruida machine settings, and your power in LightBurn cut settings is 20%
20 max power% - 9 min power % = 11
20% of 11 is 2.2
9+2.2 =11.2
The actual power signal is 11.2%
to what result are you in reviewing mine
Machine Settings.lbset
file came?
what changes should I make there
according to this calculation, my way of calculating (understanding) would be correct?