According to your .lbset file your min power% is 7 and max 98:
This means the power signal going from the controller to the HVPSU will always be within the 7 to 98% power range. In LightBurn cut settings you will still have a 0 to 100% power range which will be scaled so 0 will actually be 7% and 100% will be 98%.
The reason min power % is increased at the controller to 7% is so that you don’t have such a large gap in the power scale in LightBurn - e.g. if the controller had min power set to 0% then you may only be able to start producing a laser burn at 15% power in the LightBurn cut settings (since as the tube has to have a certain amount of power before it can start to lase).
There is not any problem with your Ruida power settings, except that I do not know what your mA current reading will be if you run something at 100% in LightBurn cut settings. If the reading goes above 16mA then you should reduce “Laser 1 maximum power (%)”, in order to get maximum life from your 40W tube.
that means this 16mA should I measure where?
and what can I do so that the ruida reset no longer crashes in the enstops and what should I do so that I get an even laser image?
Are your homing switches making contact and working correctly? The diagnose function accessible via the Ruida control panel will allow you to test they are working (go into that screen and then push the limit switches to see the if the controller picks up the signal);
14-16mA is what I have in my notes, you could look up the tube manufacturers specifications at find out what the max working current is. I would recommend you go under that if you want to get more life out of your laser.
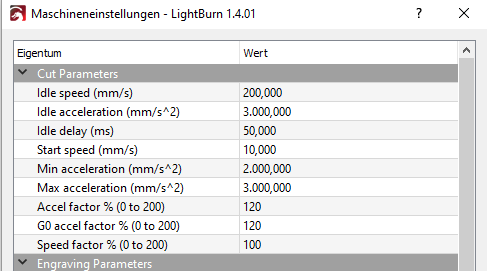
I think acceleration of 200mm/s/s means that 1 second later you will be going 400mm/s, another second and you will be going 600mm/s. Or 1 second and 200mm later you would be going 0mm/s on deceleration. If you were moving at 200mm/s and wanted to stop in 2mm you would need to decelerate 100x faster than that = 20,000.
Change that setting to 0% and then pulse the laser at different power settings until you discover the smallest power setting that will cause a fine etch/burn on a piece of wood at 20mm/s, (you can change the speed on the control panel and hold down pulse and a jog button at the same time).
If that figure is for example 14%, and you have decided that you want to get that same burn using 8% in Cut settings - then you would set your Min Power in Machine Settings to 6% (14-8).
Note: It’s probably best to not match the discovered min burn power % with a power setting less than 5% in LightBurn since you want to be certain that 0% in LightBurn will not lase at all.
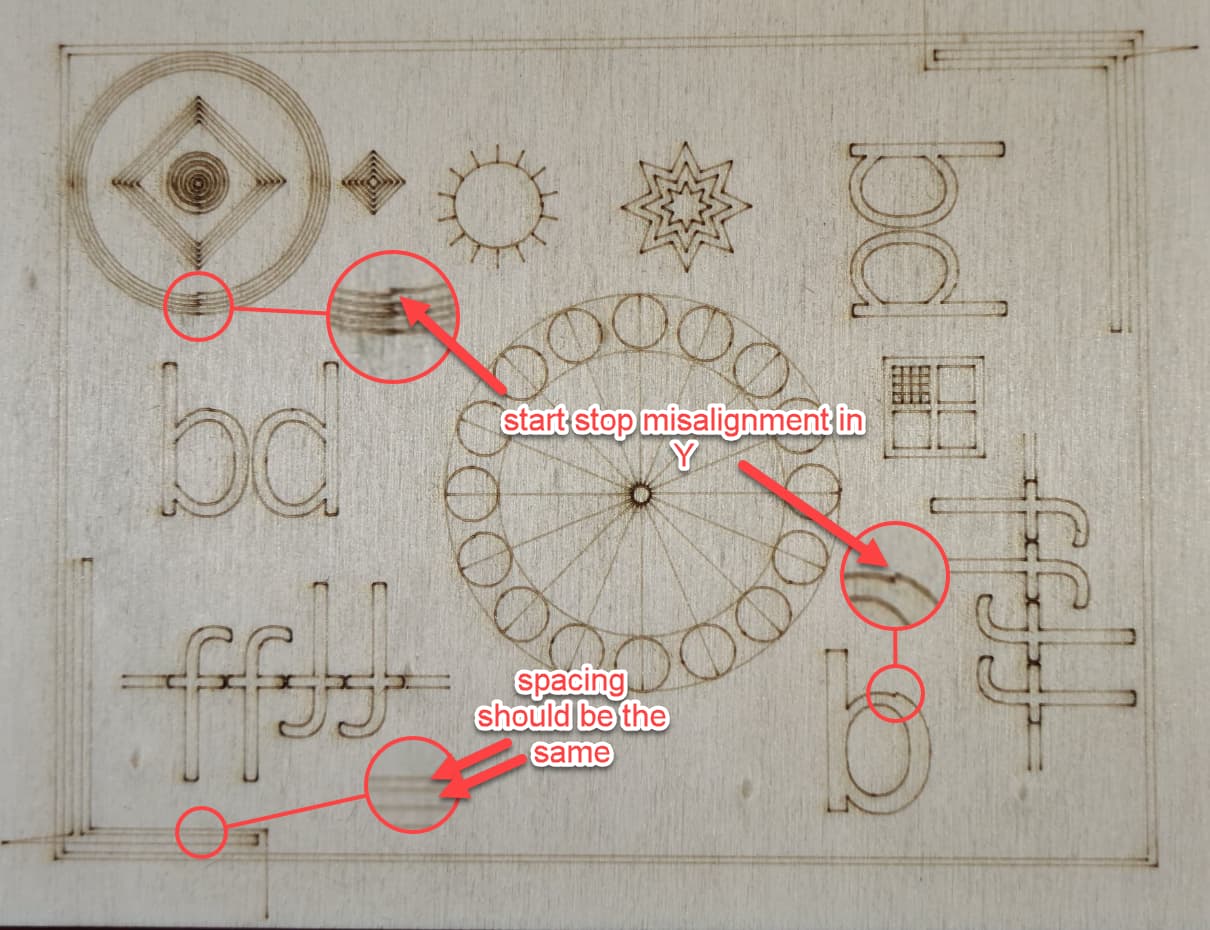
for the Y axis, should I perhaps set the backlash test better?
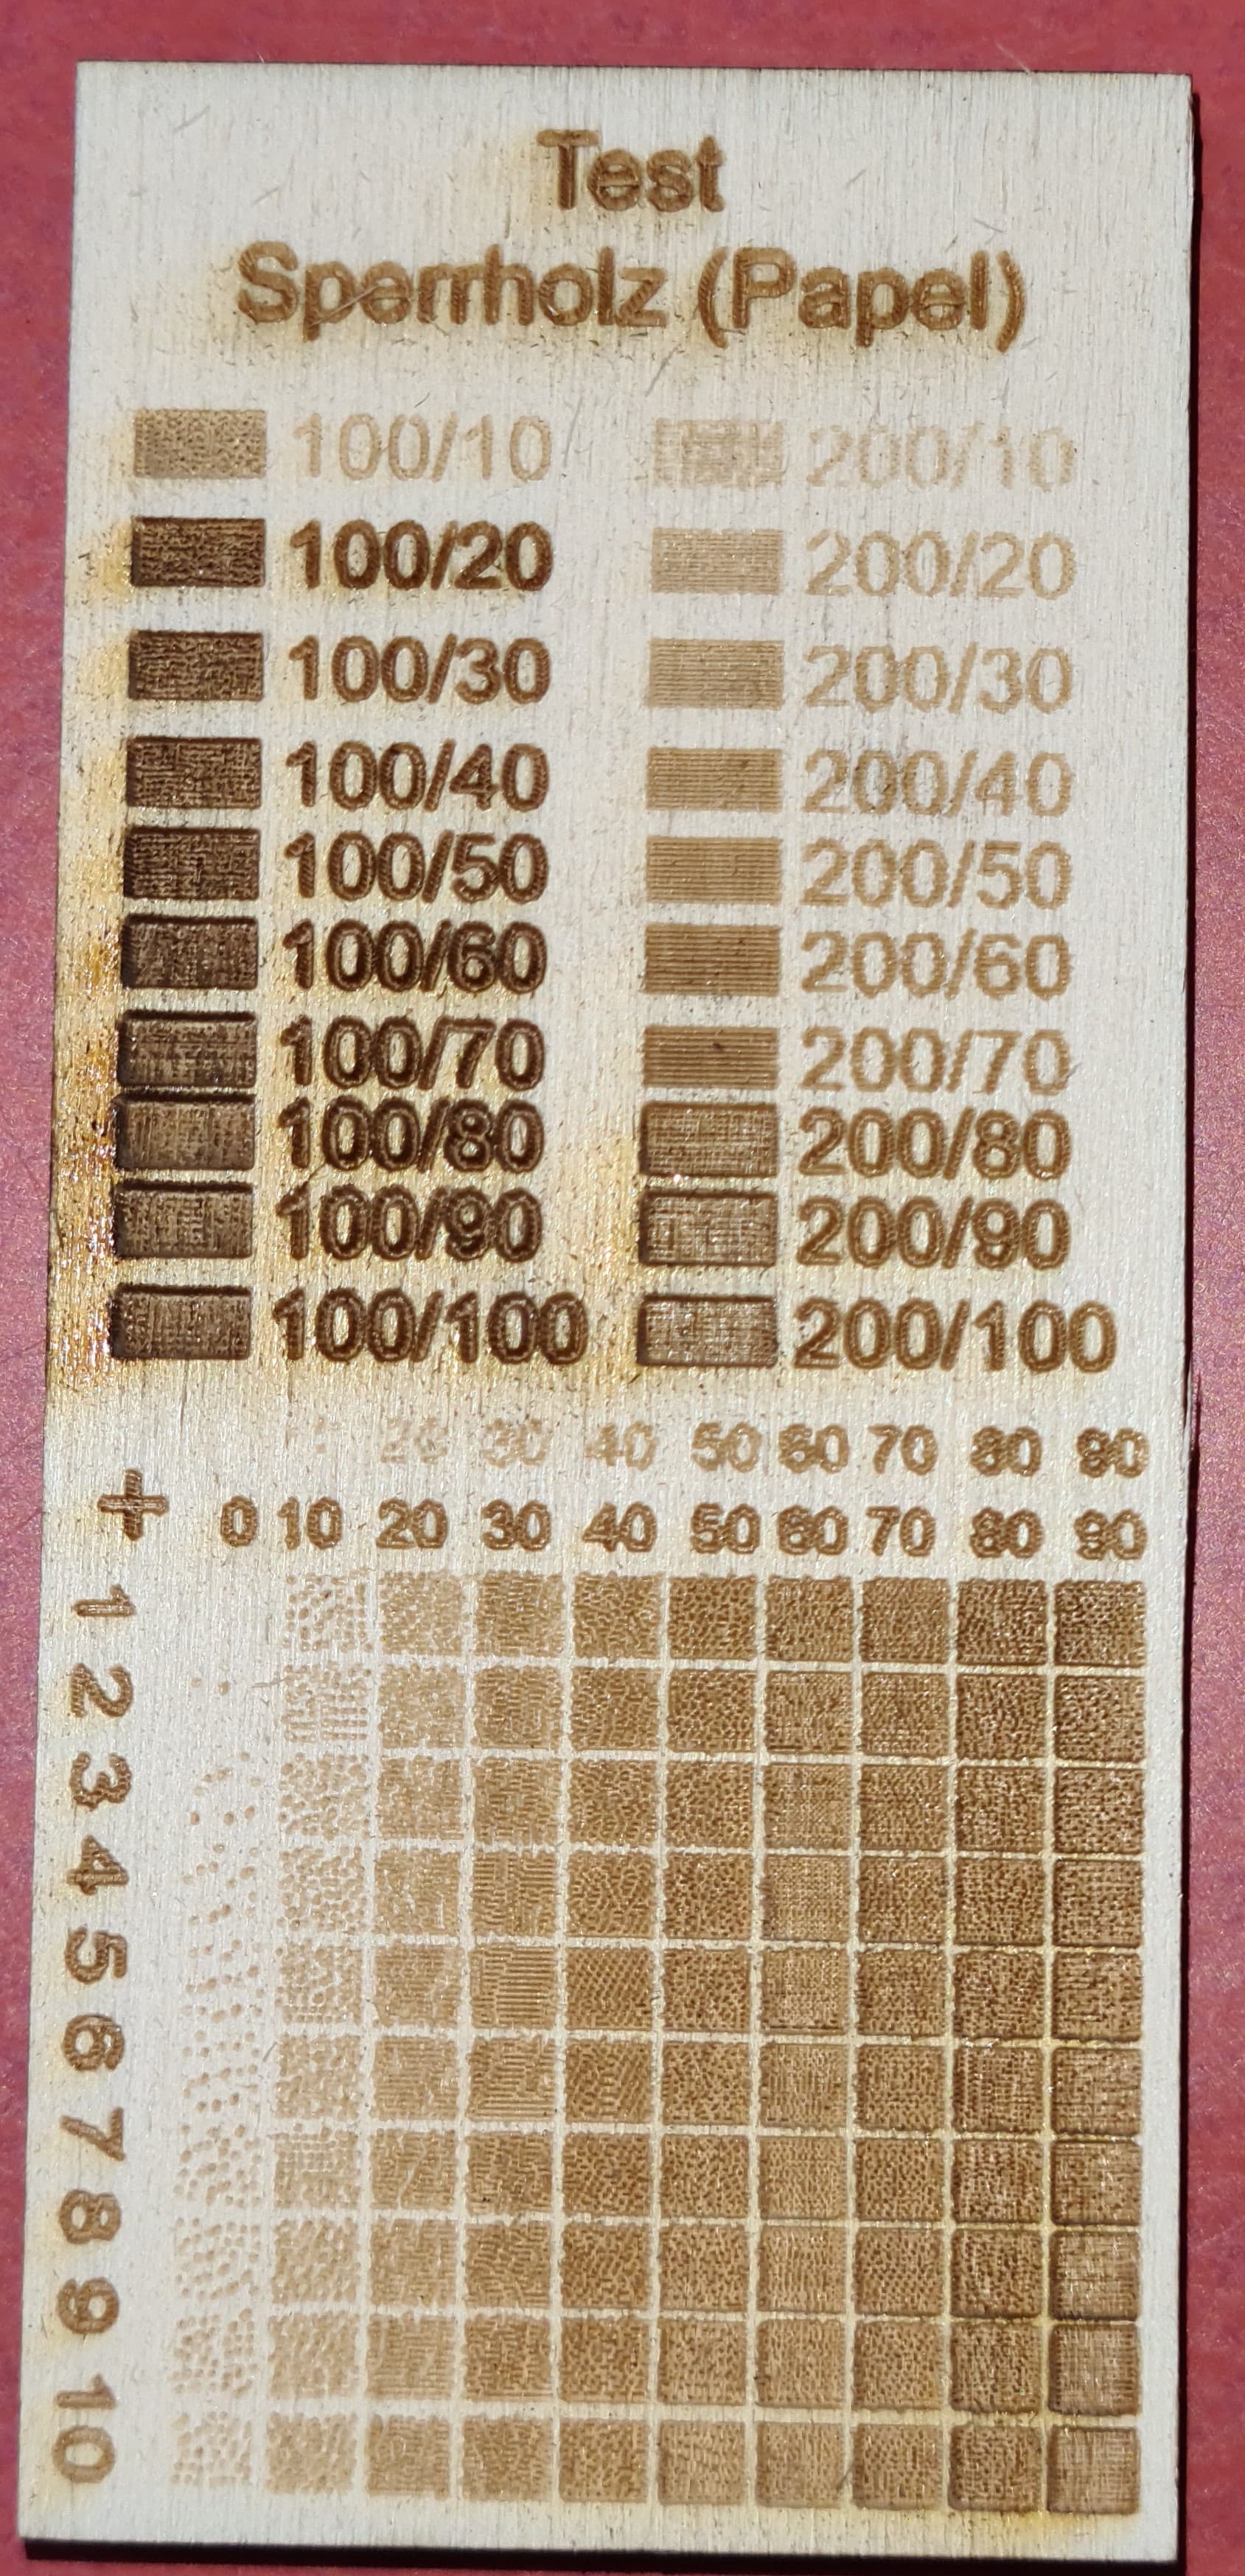
the line test was pretty fast and the edges were sharp
nevertheless he made the beginning, the edges and the ends darker
no idea why
You may be able to reduce this backlash by identifying any slop or play within the drivetrain, and tightening/tensioning where possible according to your machine, however over-tensioning will cause new problems.
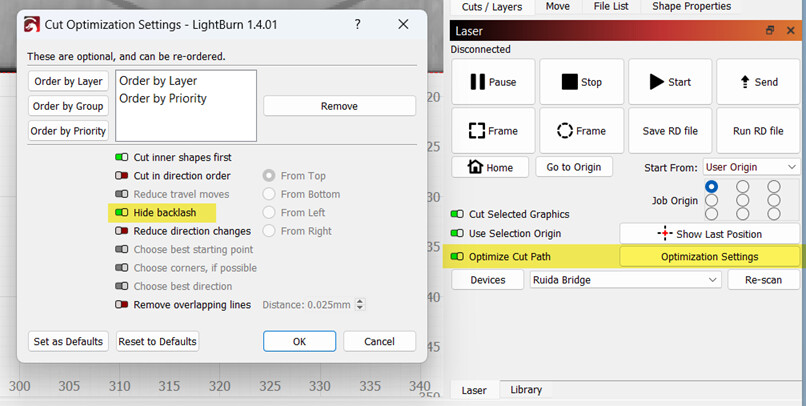
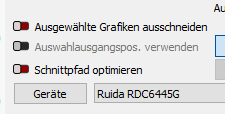
If hardware troubleshooting yields no improvement, LightBurn has software compensation for backlash which can be enabled with the ‘Optimise Cut Path’ setting ‘Hide Backlash’:
is there actually a tutorial with which you can optimally adjust lightburn to the laser start with nothing there are a lot of dependencies and sequences for such settings also for tests that you should do i think lightburn is a great program unfortunately it can also be very frustrating when it Wrong setting Even if some settings are already correct, I have not found anything that really covers all settings that the program enables to enable optimal work with the laser
It doesn’t matter whether you want to make something snow, engrave or rotary or …