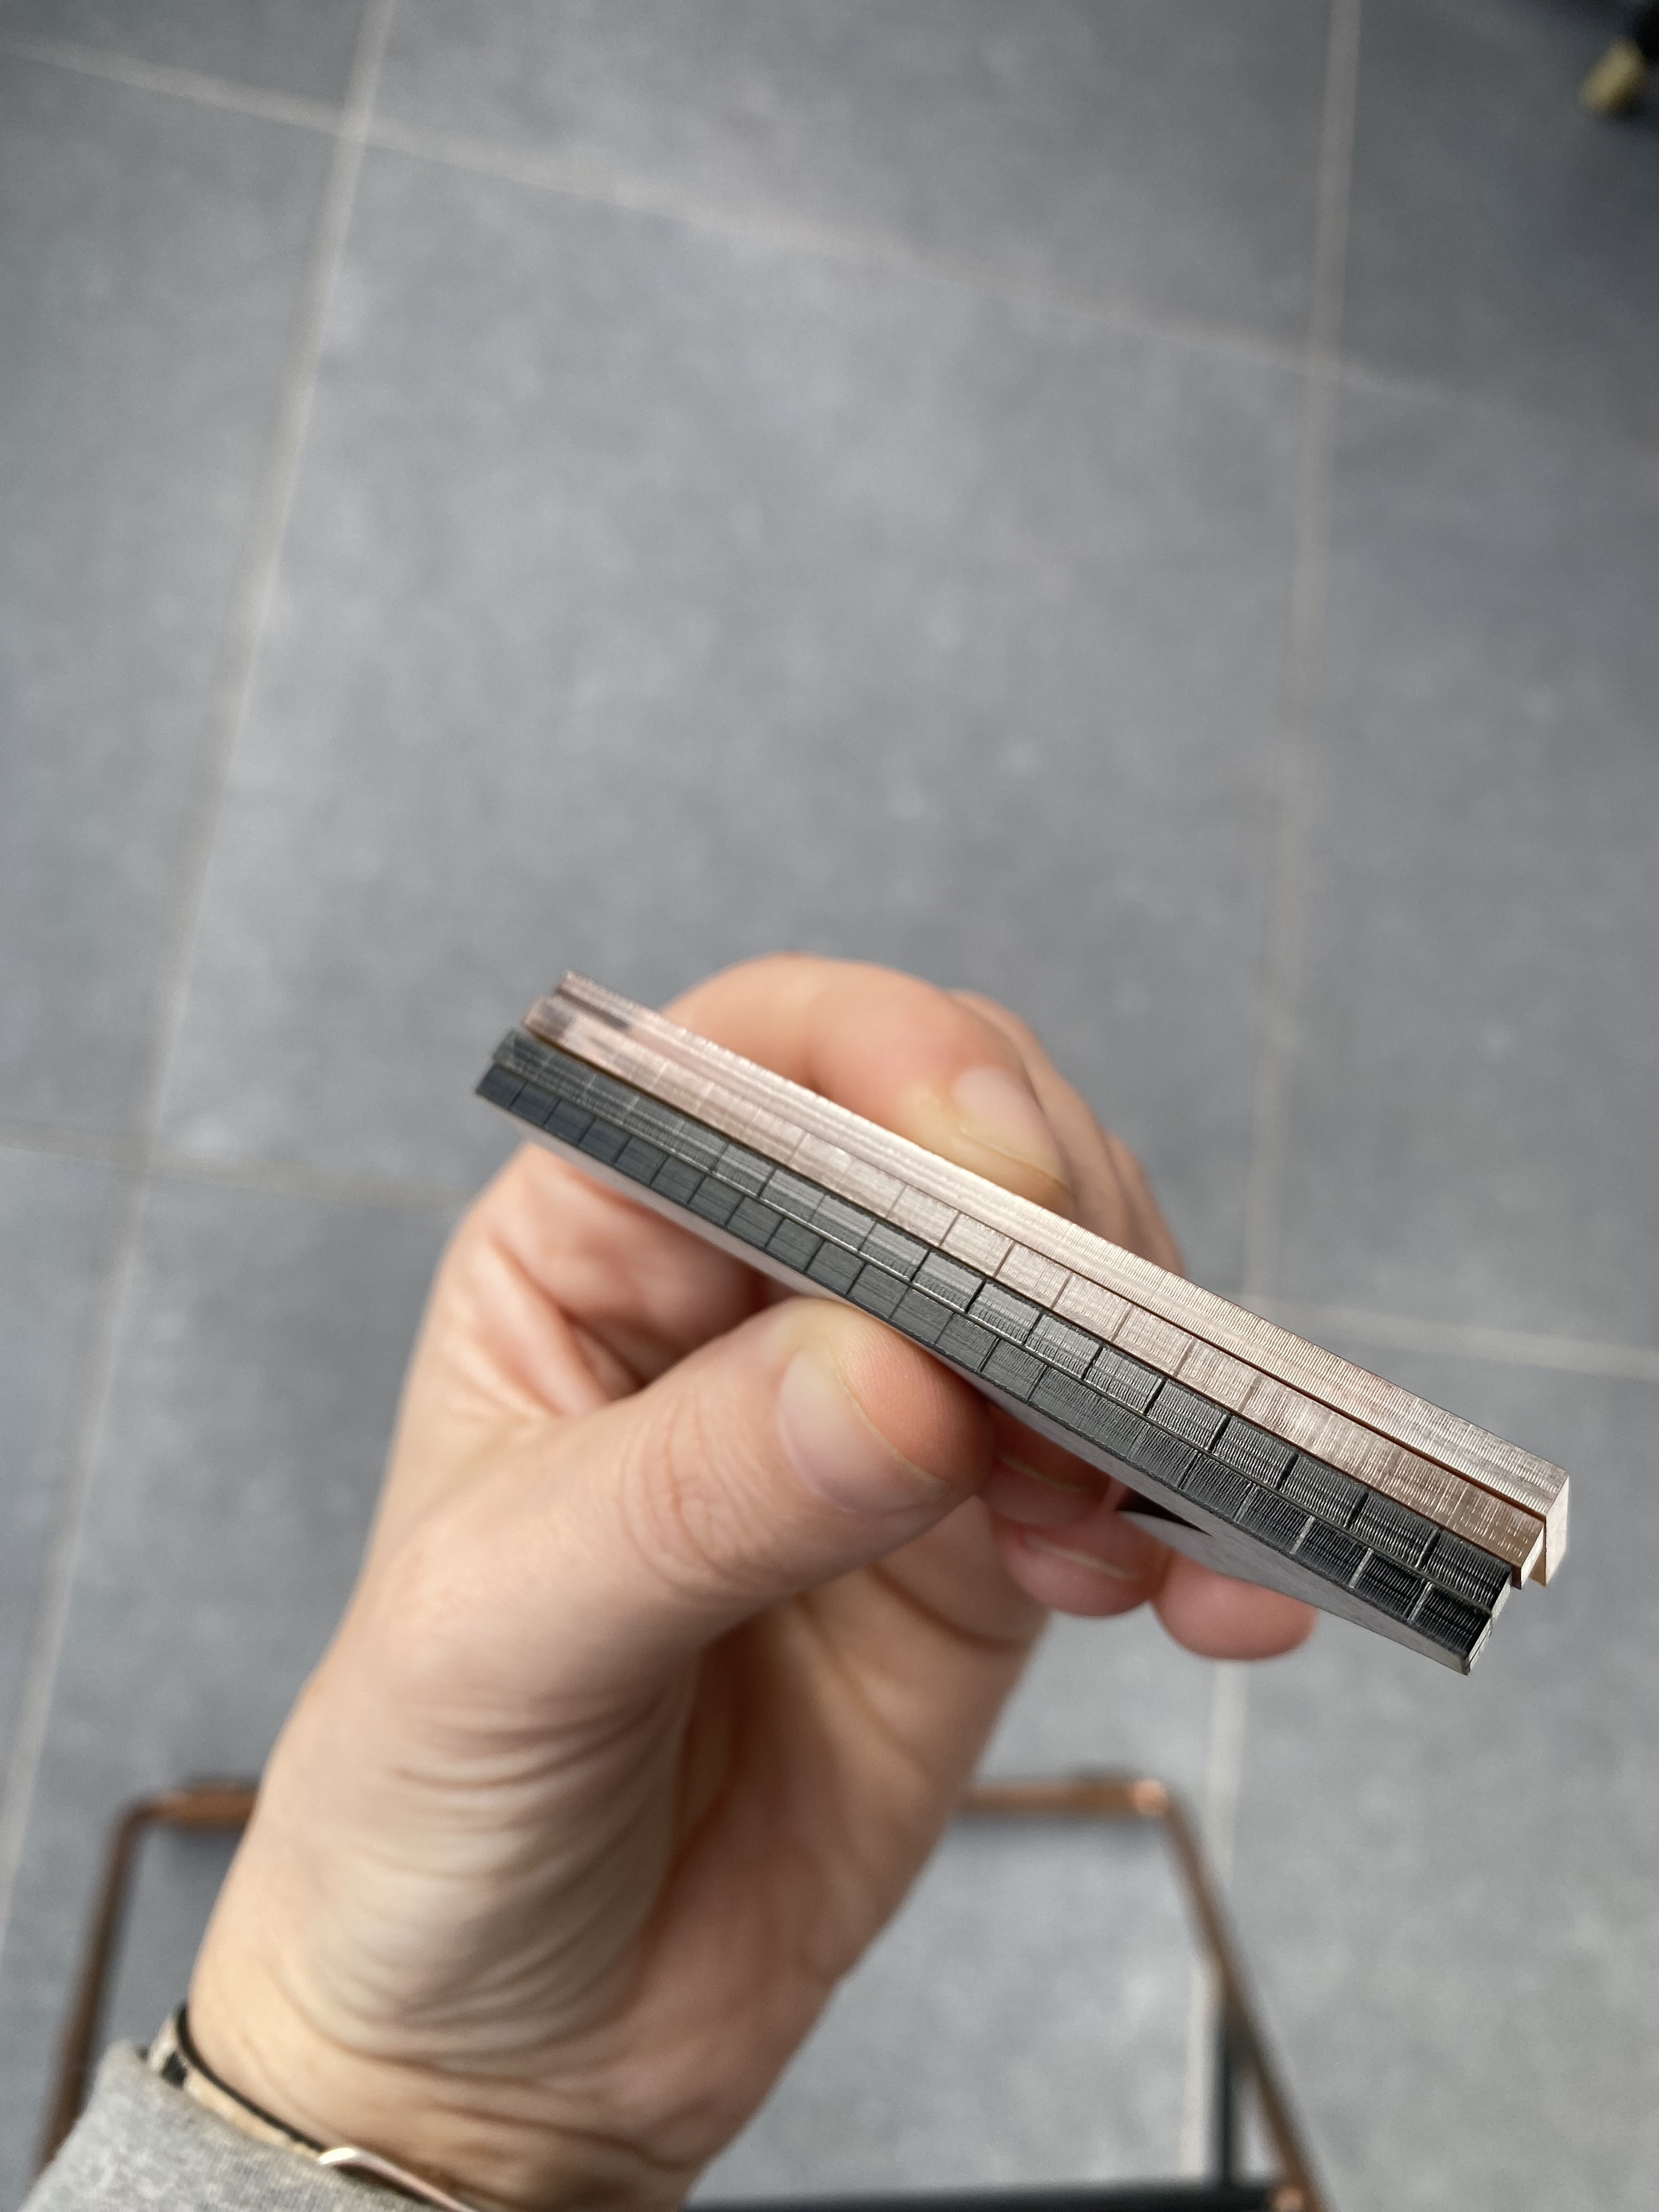
I’m having an issue cutting number digits in acrylic. By that I mean, opening the text option, and creating the digit ‘1’ in arial font. Other shapes created with lightburn seem fine but if I use the text option to create an 80mm number, then i get equally spaced stepped ridges around the outside. See the attached picture, showing the 80mm rectangle also created in lightburn at the top, without the ridges. All cut using exactly the same setting and conditions. I’ve tried raising off the bed and using a sacrificial piece of wood to see if that helps, but it doesn’t. Any ideas why numbers would be such an issue?
this is peculiar
Would you be so kind to share a LBRN created with the 1 or similar?
Also what version of LB you running? 1.5.06?
Thanks sorry should have asked before. also Save Gcode > upload, just to be sure we can see something hard coded
sorry right! ruida ![]()
It all looks perfect my end in terms of what outputs
so i am curious if is a speed resonance
have you tried changing speed/power variables and see if it replicates?
Yes, initially i cut a few squares whilst trying to establish the best settings for my acrylic. Once I had that, I ran the number 1 and got the ridges. After a couple of tries, i couldn’t work out why the square didnt have it, so I ran the rectangle at the same size (the top one in the original picture) and it didn’t happen.
I’ve also tried creating it in illustrator as an outline but got the same issue.
I’ve no idea what else to even try.
goes over my brain paygrade if i am honest. thats weird
@Rick @JohnJohn @jkwilborn
Maybe you guys have seen this before?
@Dakota, for clarification, share what you anticipated and how this should look when produces as you’d like. I am having difficulty understanding the desired result for what you show above. Share a picture, illustration, or drawing to help us “see” what you are after, and we can go for there. ![]()
Looking at your file, I see a shape in the form of the digit “1”, which is not currently a LightBurn “text” object / primitive with text attributes. Technically, this is a shape made of paths that form a recognizable shape, interpreted by our eye as a text number.
Update: I think I am getting my eye to see this. You are showing the edge of the cut, correct?
I am just looking to create numbers without the stepped ridges, the ideal visual being the top acrylic in my picture. I assumed that it would be as straightforward as clicking the text option in LB and typing in the number I wanted. As I mentioned, I have also tried creating this as an illustrator file and dxf file and importing it as a shape, but I still get the same stepped ridge result.
Thank you. I understand. Your expectation is very reasonable. I believe we are seeing a mechanical or machine/electronics issue and have reached out to additional resourced for confirmation and recommendation for corrective measures. I will provide updates as we investigate further. Thank you in advance for your patience.
Did you cut these with the material laying directly atop a honeycomb bed? If so, a quick suggestion would be raising the workpiece up off the honeycomb with a few washers to prevent the beam from reflecting off that honeycomb in what is known as ‘flash back’. Please update us with your results. ![]()
Apologies, I misread this, must need more coffee. ![]()
1 Like
If you move your laser head by hand do you feel any clicking or resistance? The periodic nature of the marks makes me wonder if there’s a bearing or belt pulley dying.
2 Likes
@Dakota I think the reason you are seeing the stepped ridges on your number 1, and not on your rectangle, is because your number 1 was rotated about 0.75° - it comes out to 0.74897724° if you do the math. That means that your laser is going to “stair-step” to recreate the “straight” lines.
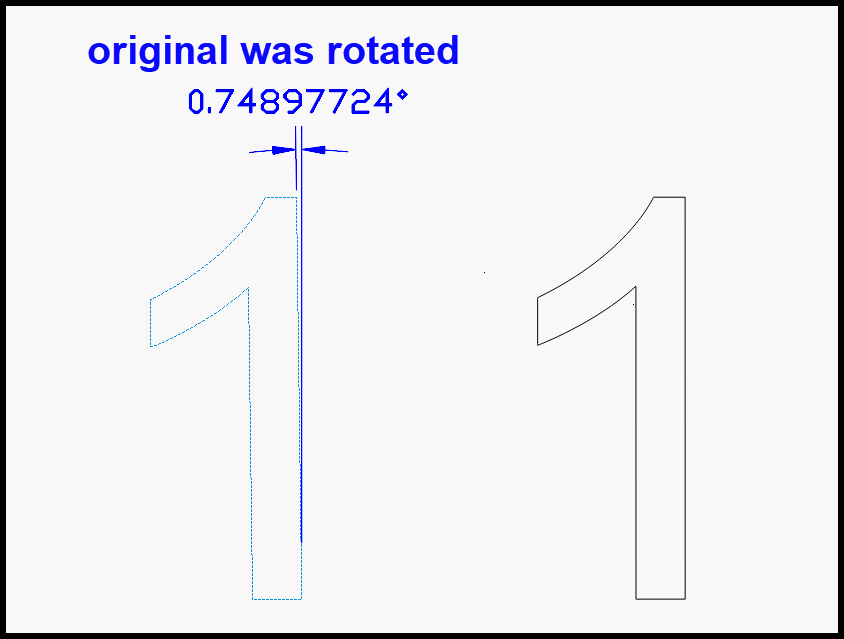
Here is your file back with the number 1 rotated back to being “square”. Not sure what setting you would need to adjust to get rid of the noticeable stepping.
Number 1 arial_RRU.lbrn2 (18.0 KB)
1 Like
Thank you so much, this was absolutely the answer. I was rotating the image by the corner anchor points to try and make the best use of the material I had. If I rotate the image an exact 90/180 degrees then there are no ridges and produce a perfect cut.
Might want to try a very slightly larger angle. This particular angle may have been just right to mesh poorly with your motor steps.
You can see this effect on screen in simple aliased renders when rotating straight lines near horizontal/perp. As you get further from polar, the distance from step to step decreases (tho step height remains the same…1 pixel). I would expect your stepper resolution to be high enough that it wouldn’t be visible IRL, but I don’t know anything about CO2 or Ruida.
Awesome catch still should it be so noticeable mechanically?
I would not have thought it normal to expect ridges that noticeable just because of the angle, I think it may be more related to speed since I can see that the spacing of the ridges is not consistent in your picture.
Please go to Edit > Machine Settings, what is the step length of your X axis?
While the Y axis was making the 80mm move at 10mm/s, the X axis only needed to move 1.04mm. At a very low rpm the stepper motor is likely to be naturally producing more vibration.
Try using the Move window to make a very slow measured move in the X axis of 5mm at 0.1mm/s does the axis move smoothly? - listen carefully, feel the movement and see if there is any sign of shuddering.
If you plan to use your machine primarily for low speed acrylic cutting you may be able to reduce this effect by tinkering with your stepper driver settings.
2 Likes
Was the speed and angle exactly the same for all three number 1’s in the picture?