The Baker project is a mix of an image and an object. I suggest you use TRACE on the image to get a consistent output.
There are hundreds of little trucks and tips to learn. Keep up the good work, you have gotten past the hardest part. You have movement and laser output. The rest is just small details.
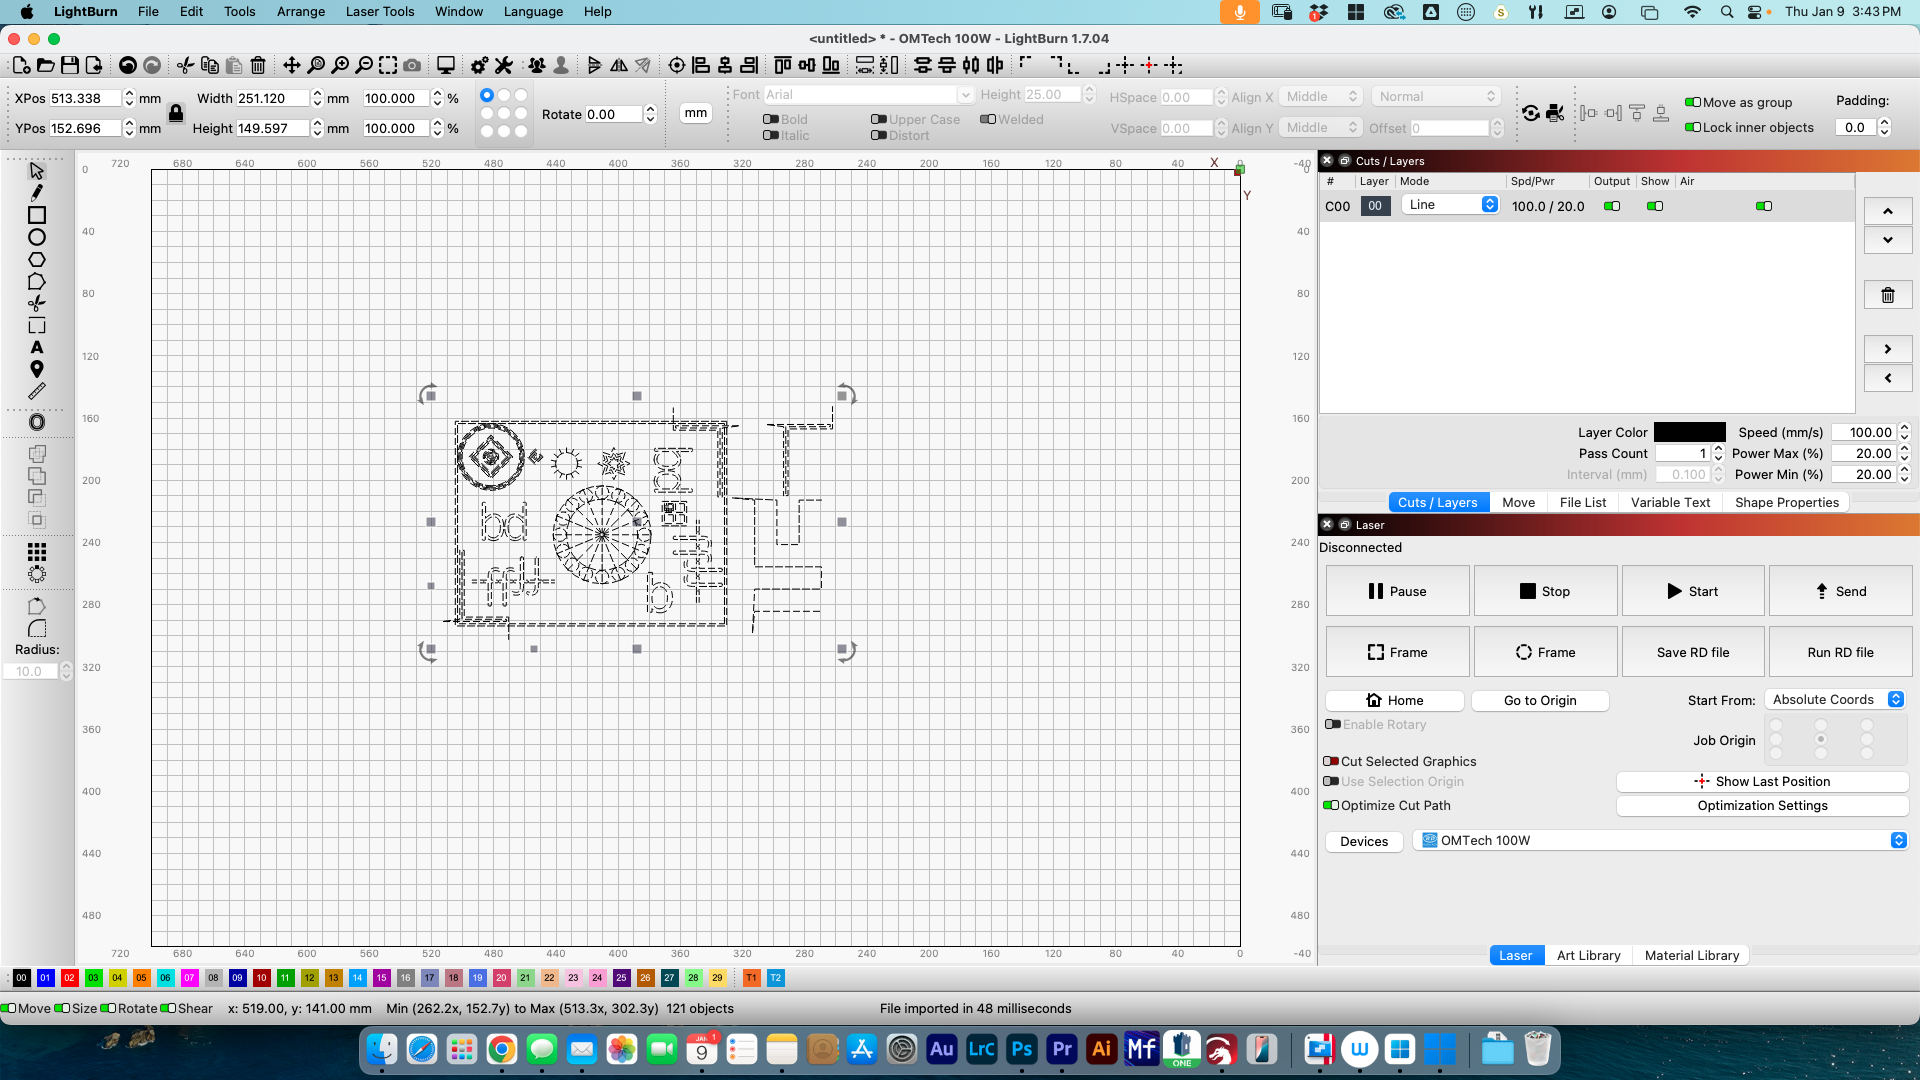
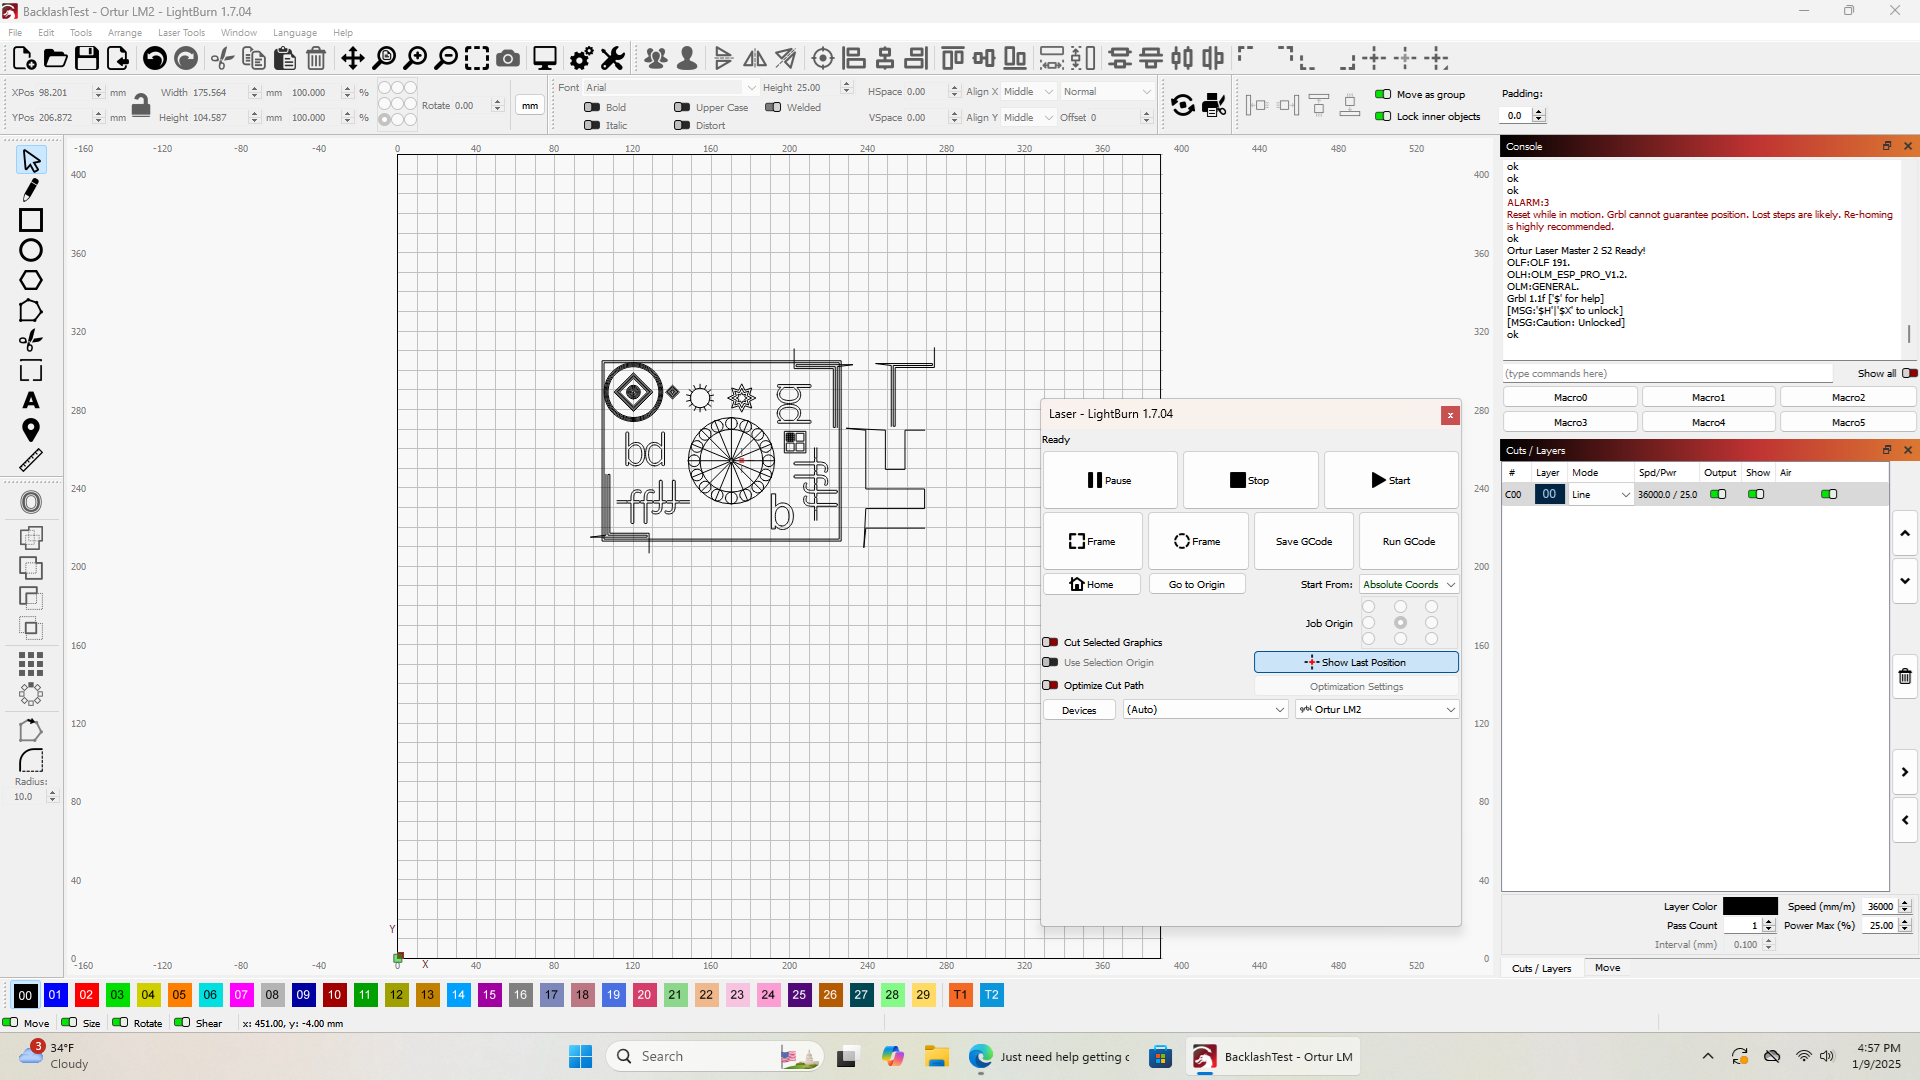
I’ve been away for a few days but I am back to trying to fine tune all of this. I have gone through the guide and made some adjustments and tightened some screws, etc. I downloaded the Backlash Test and I am trying to follow your directions to scale it to fit my work area but having some difficulty doing that. Also, I don’t have the Optimize Cut Path option on my laser tab, at least that I can see.
Turn off Beginner Mode, settings menu(Gears icon). That will open up more options for you.
To scale it, drag across the entire graphic, selecting everything then drag it larger using one of the corner handles that appear.
I ran the backlash test on the cardboard back of a notepad and it didn’t burn anything. It went through the motions but nothing showed up. I increased the power from 12.5 % to 25% and still nothing. So I switched to a practice piece of 1/16" plywood and ran it at the 25% setting and still nothing showed up. The laser is on so why isn’t it burning?
Excellent! Slow it down to 2500mm/m and see what happens. Do not know the output wattage of your laser, but you are getting in the ranges for a 10w laser.
Keep the speed up and increase the power. It’s the fast motion that will show the most problems. Try 50%, then go to 75%, then 100% if needed. Just need a nice legible marking.
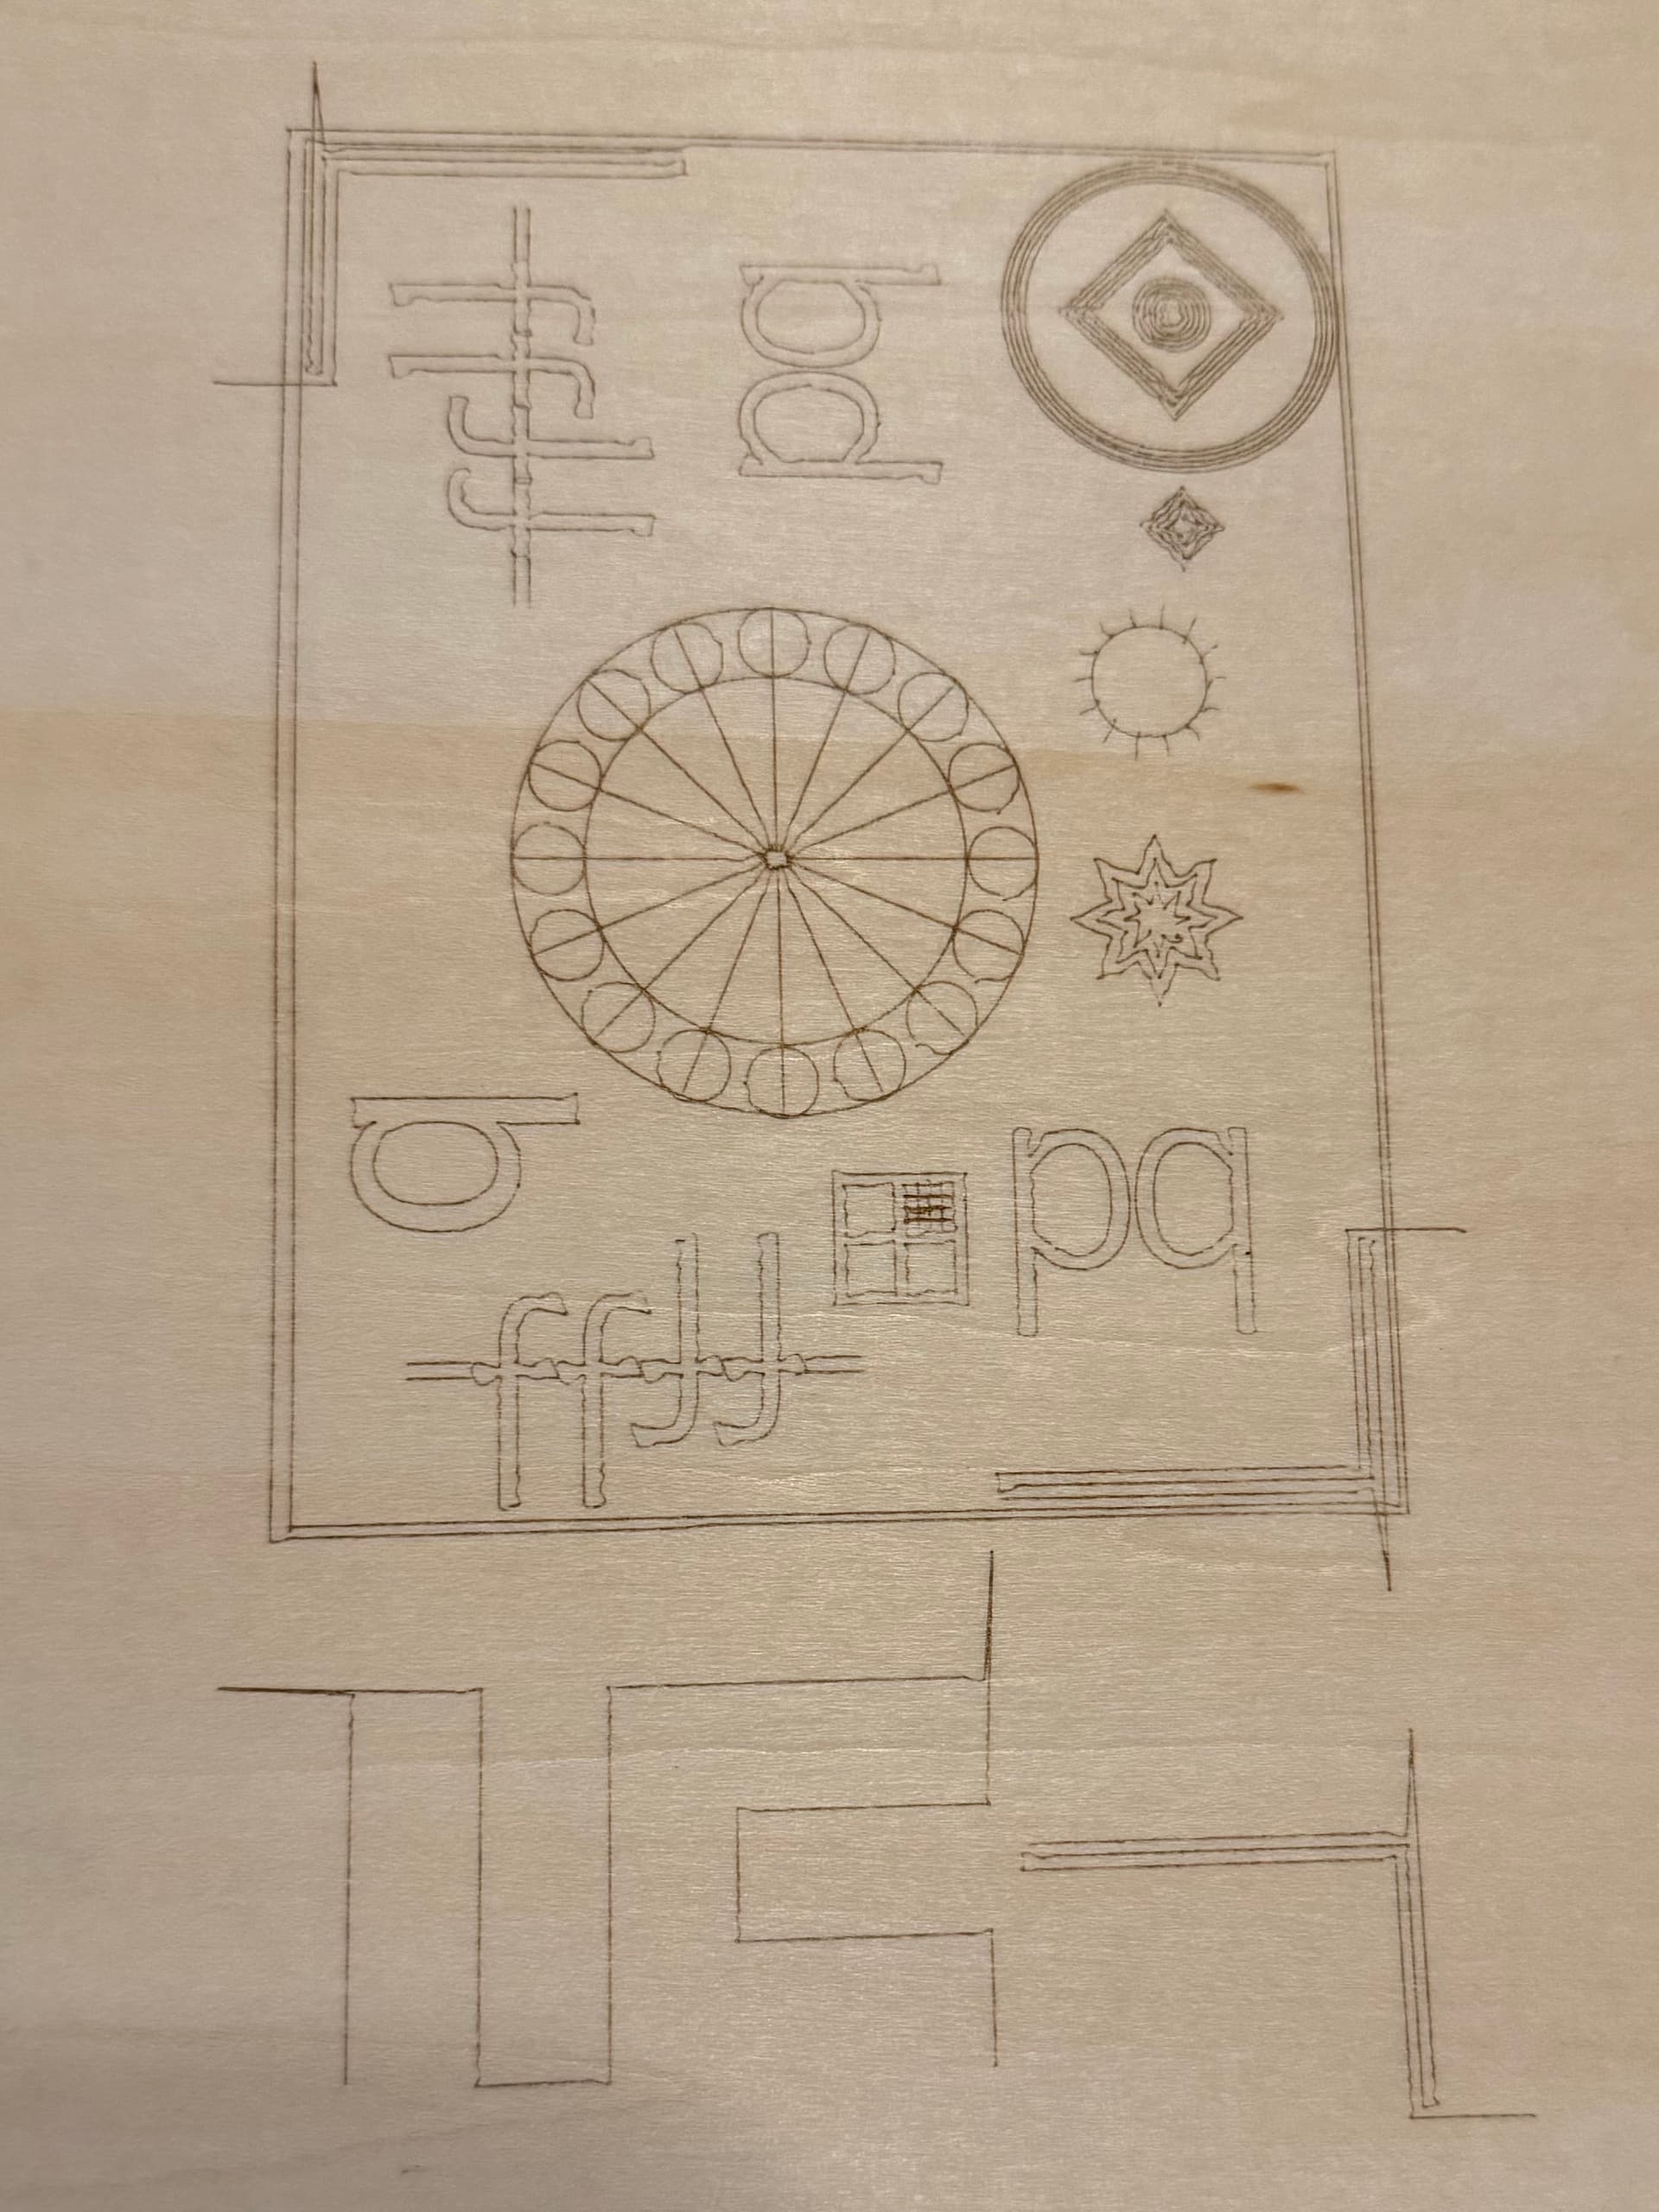
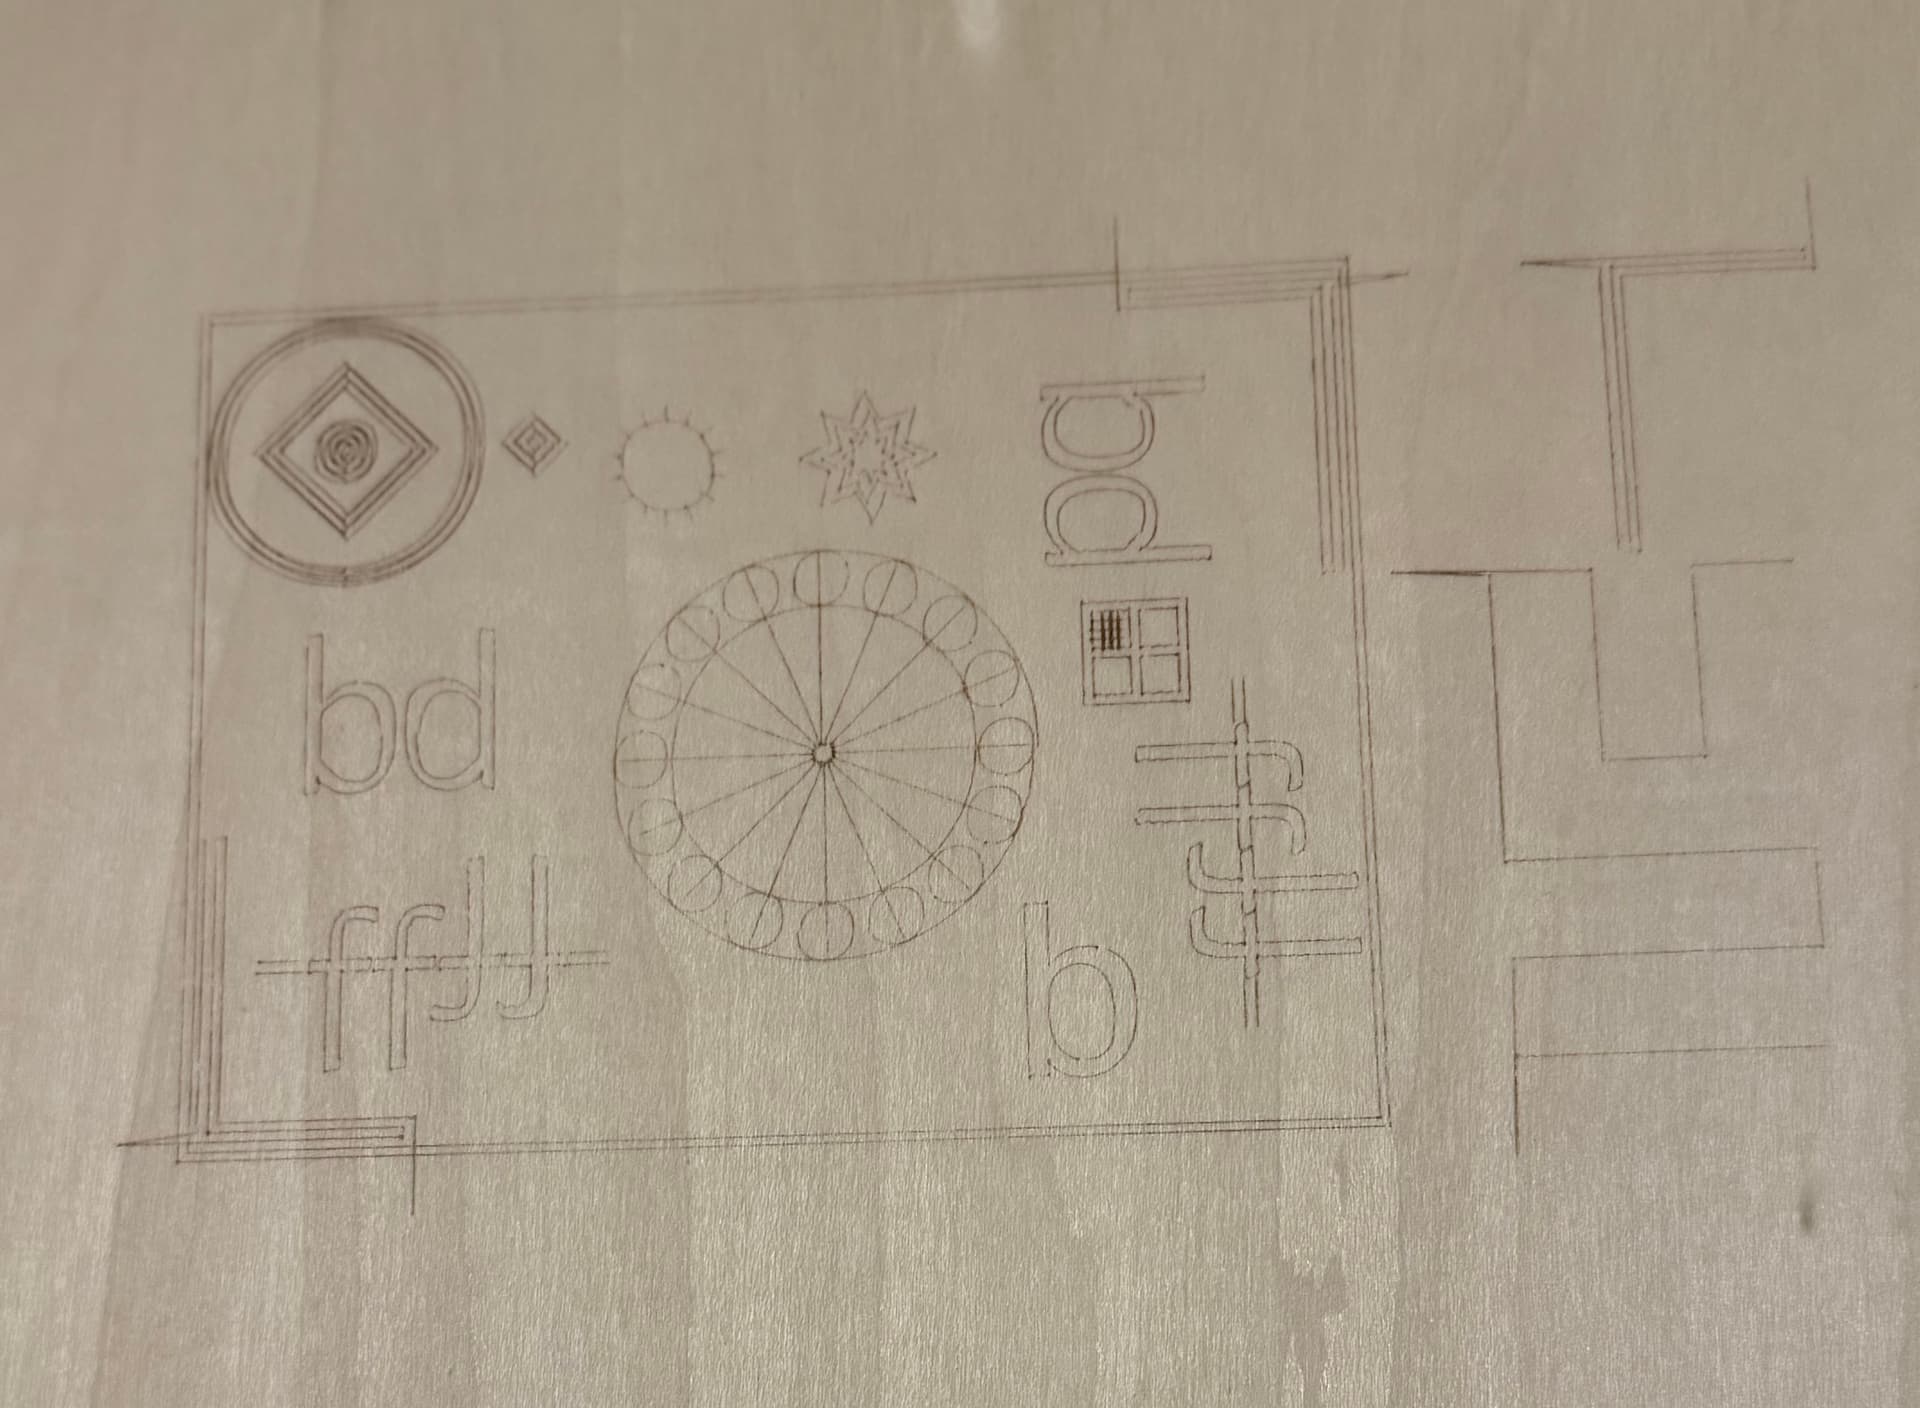
That’s enough for now. There are obvious problems with your machine. All the lines should be straight and there are wigglies. (Highly technical term)
Go through the checks again. Pay particular attention to the set screws on the motor shafts and any couplings that there may be. Until you can run the backlash file without wigglies you will not get good results.
Ok, I will do that tomorrow. Could part of it be table I have it sitting on? It is just a small table that does seem to jiggle as it is working. I will try to find something more solid and see if that makes a difference. I can’t imagine it wouldn’t help some.
It might be a small part of the problem. It’s more of an issue if the laser slips around on the table and your workpiece doesn’t. If everything shakes together it’s not so much of a problem.
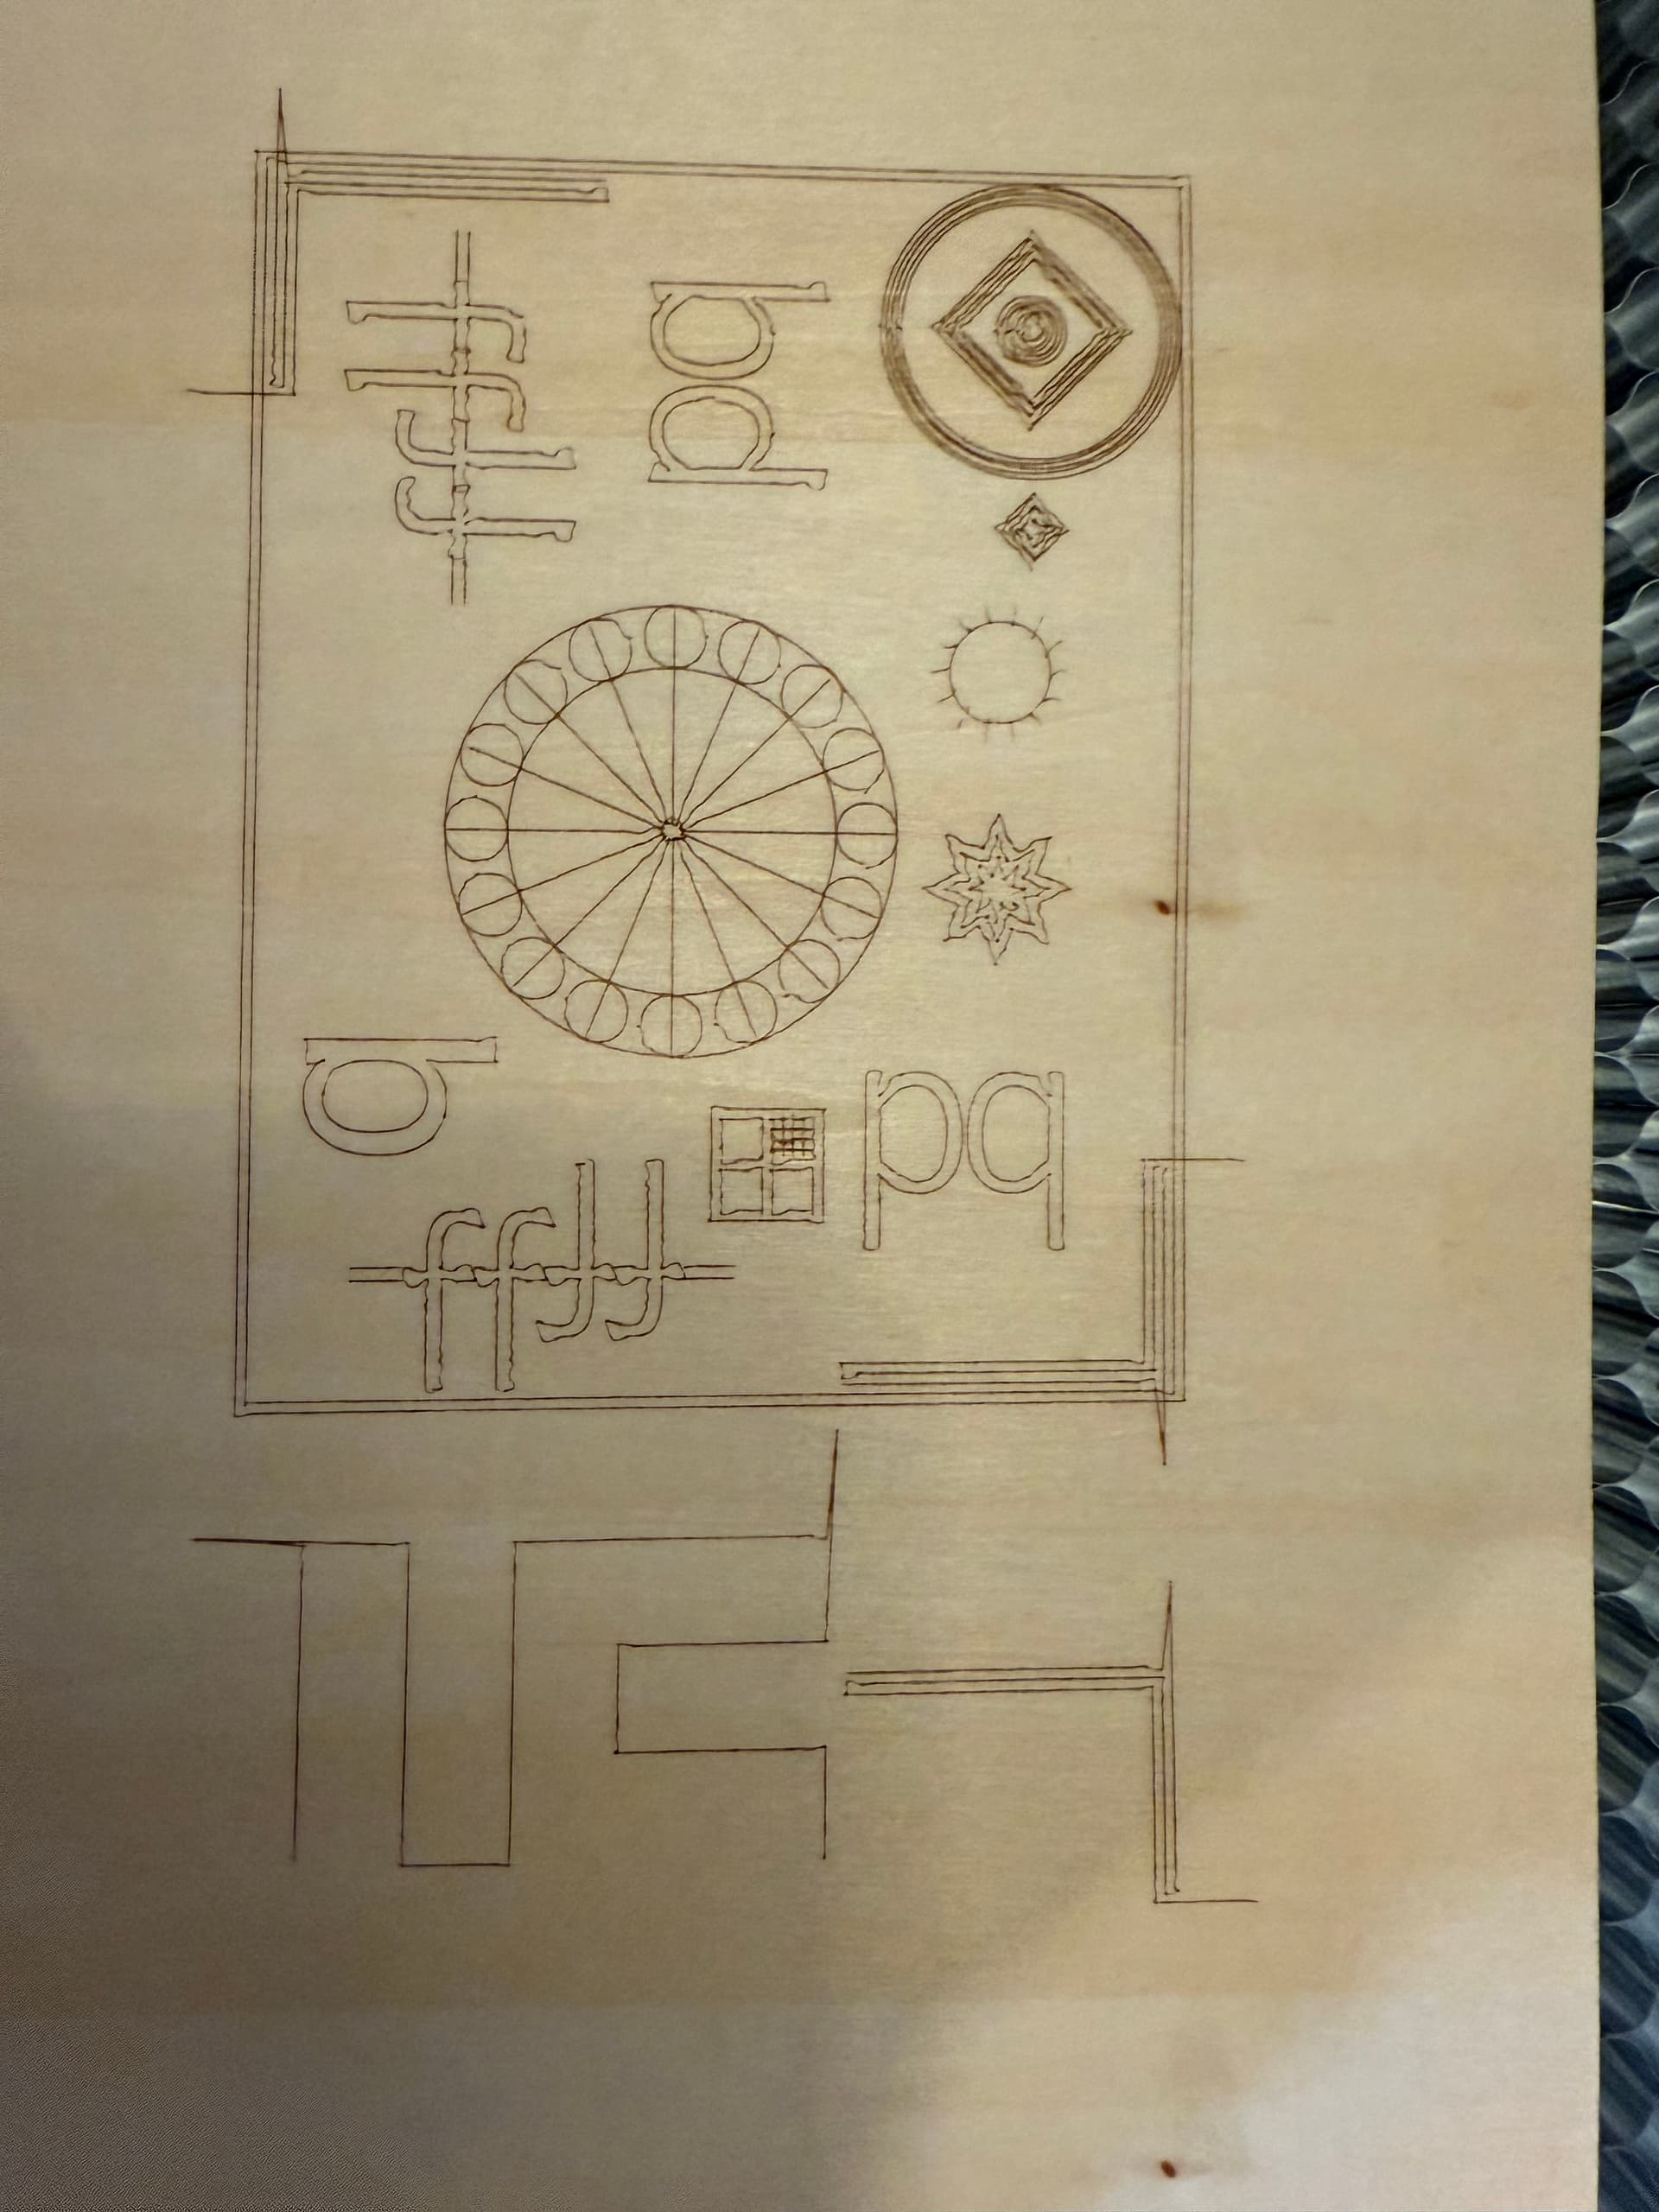
I tightened all the screws that were mentioned and secured the piece to the honeycomb this time. I also increased the power to 30%. Ran it again and it still looks jiggly.
It certainly does. Did you tighten the belts too? I seem to remember there was a point where you loosed them quite a bit, or maybe that was someone in another thread.