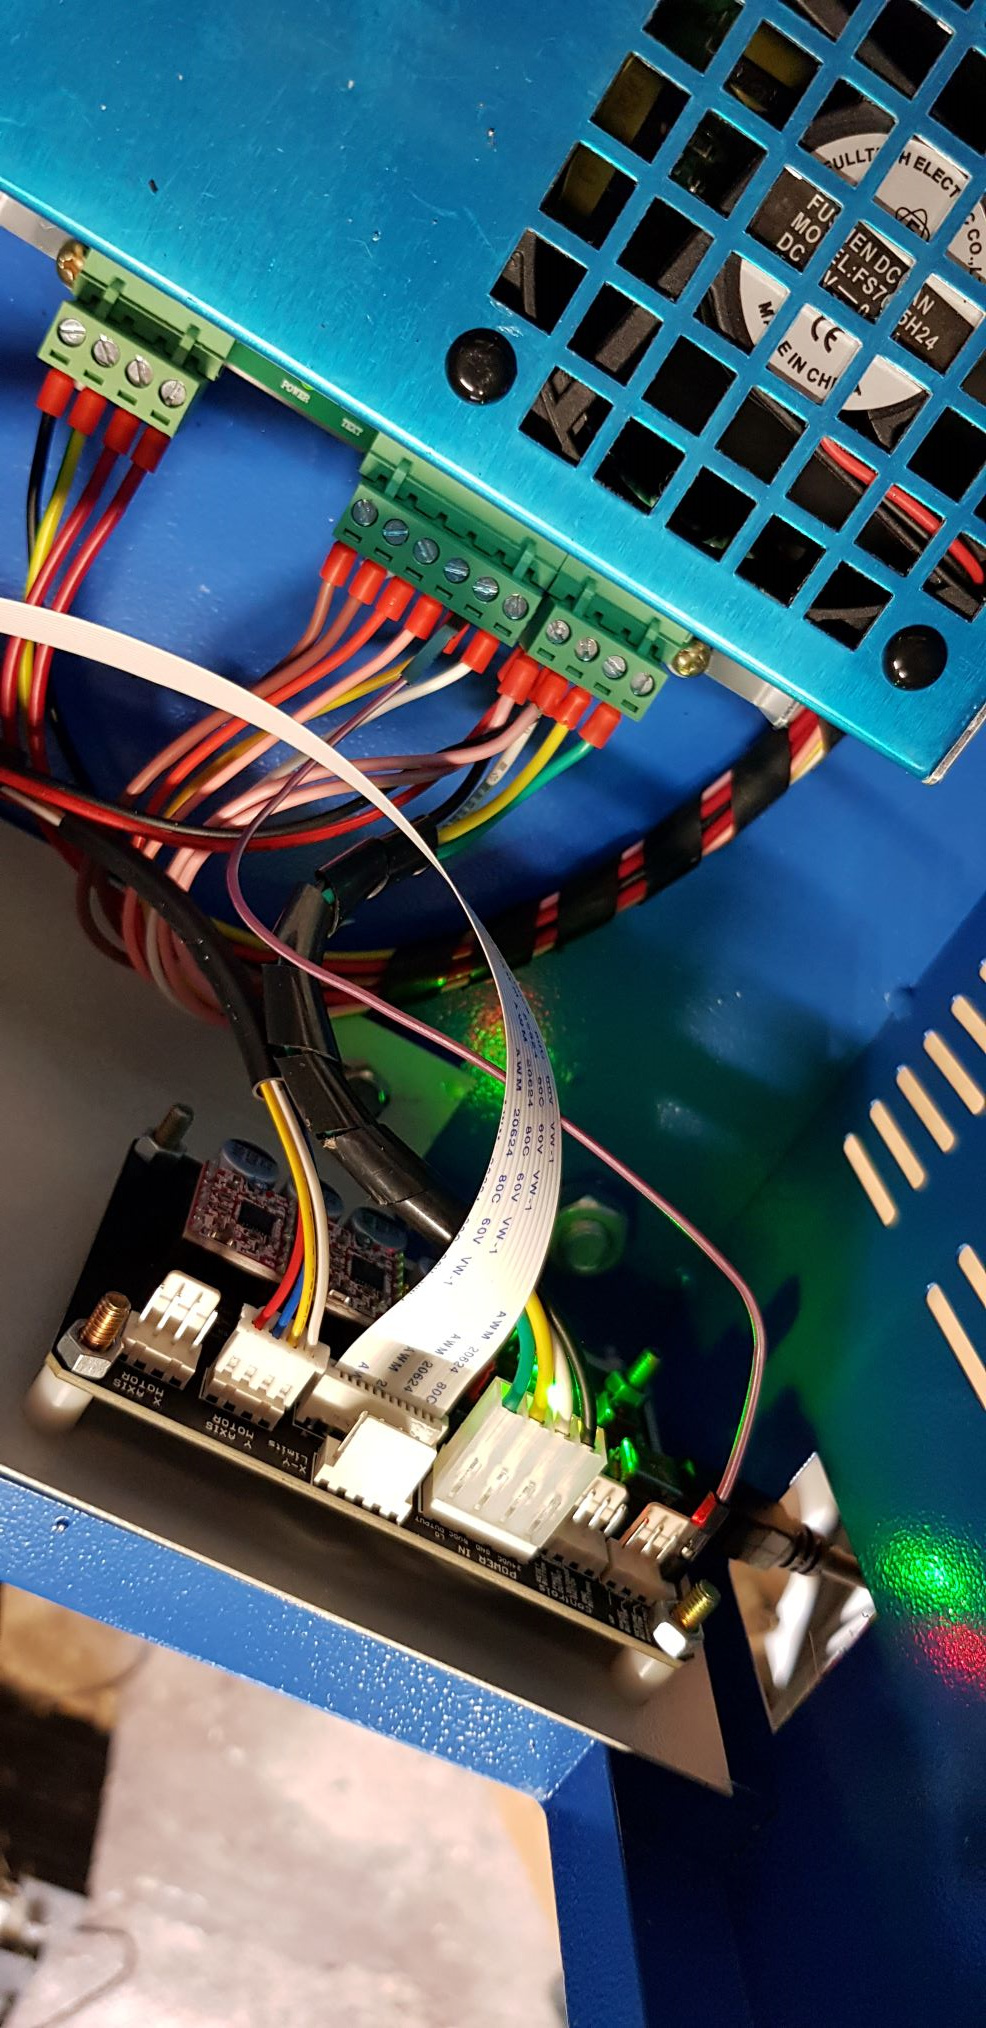
Just fitted a mini gerbil control board in my k40.
All the wires and plugs match the diagrams etc machine powers up and switches on but…
When I try to connect it to lightburn all I get is “waiting to connect” in the console tab. Whatever I try, different com ports etc it just does not want to connect.
On the laser tab it says ready and NOT disconnected but it won’t move, won’t fire won’t do anything really.
Any ideas why? Could it simply be a poor usb cable?
Also, will my laser add through the device search or do I have to add it manually? If manual, what device type should I select.
Hi Steve,
I have connected my K40 manually, (gerbil-STM)
You should also be aware that the usb cable is not too long and has a good quality. The normal usb cables are quite sensitive to electrical noise. The last thing I come to mind is that once you have the connection established, it is fine if you can connect other electricity consumers to another electrical circuit. My K40 can lose the connection during a job for a split second, when the compressor or extraction starts, it is very annoying. I will supply my large electricity consumers with extra starting capacitors during the winter.
Good luck with your K40
Thanks for your quick reply Bernd. I have a new usb cable coming today and will make sure I connect through gerbil stm.
Thanks again. I will update this post if I am successful.
The new USB cable solved most of the problem, lightburn now recognises my laser and moves but will not fire.
I have attached a photo of the wiring and also my grbl settings. Please let me know if you see anything wrong.
only difference to my settings is laser mode, it should be set to 1 (32-1)
I just want to go down to my workshop and see if there is a difference in cabling but I do not think so because the installation instructions are reasonably clear and easy.
I will report back …
the connectors look ok but I can also see that the cable colors have changed again in the K40, just as if they use what they have in stock …
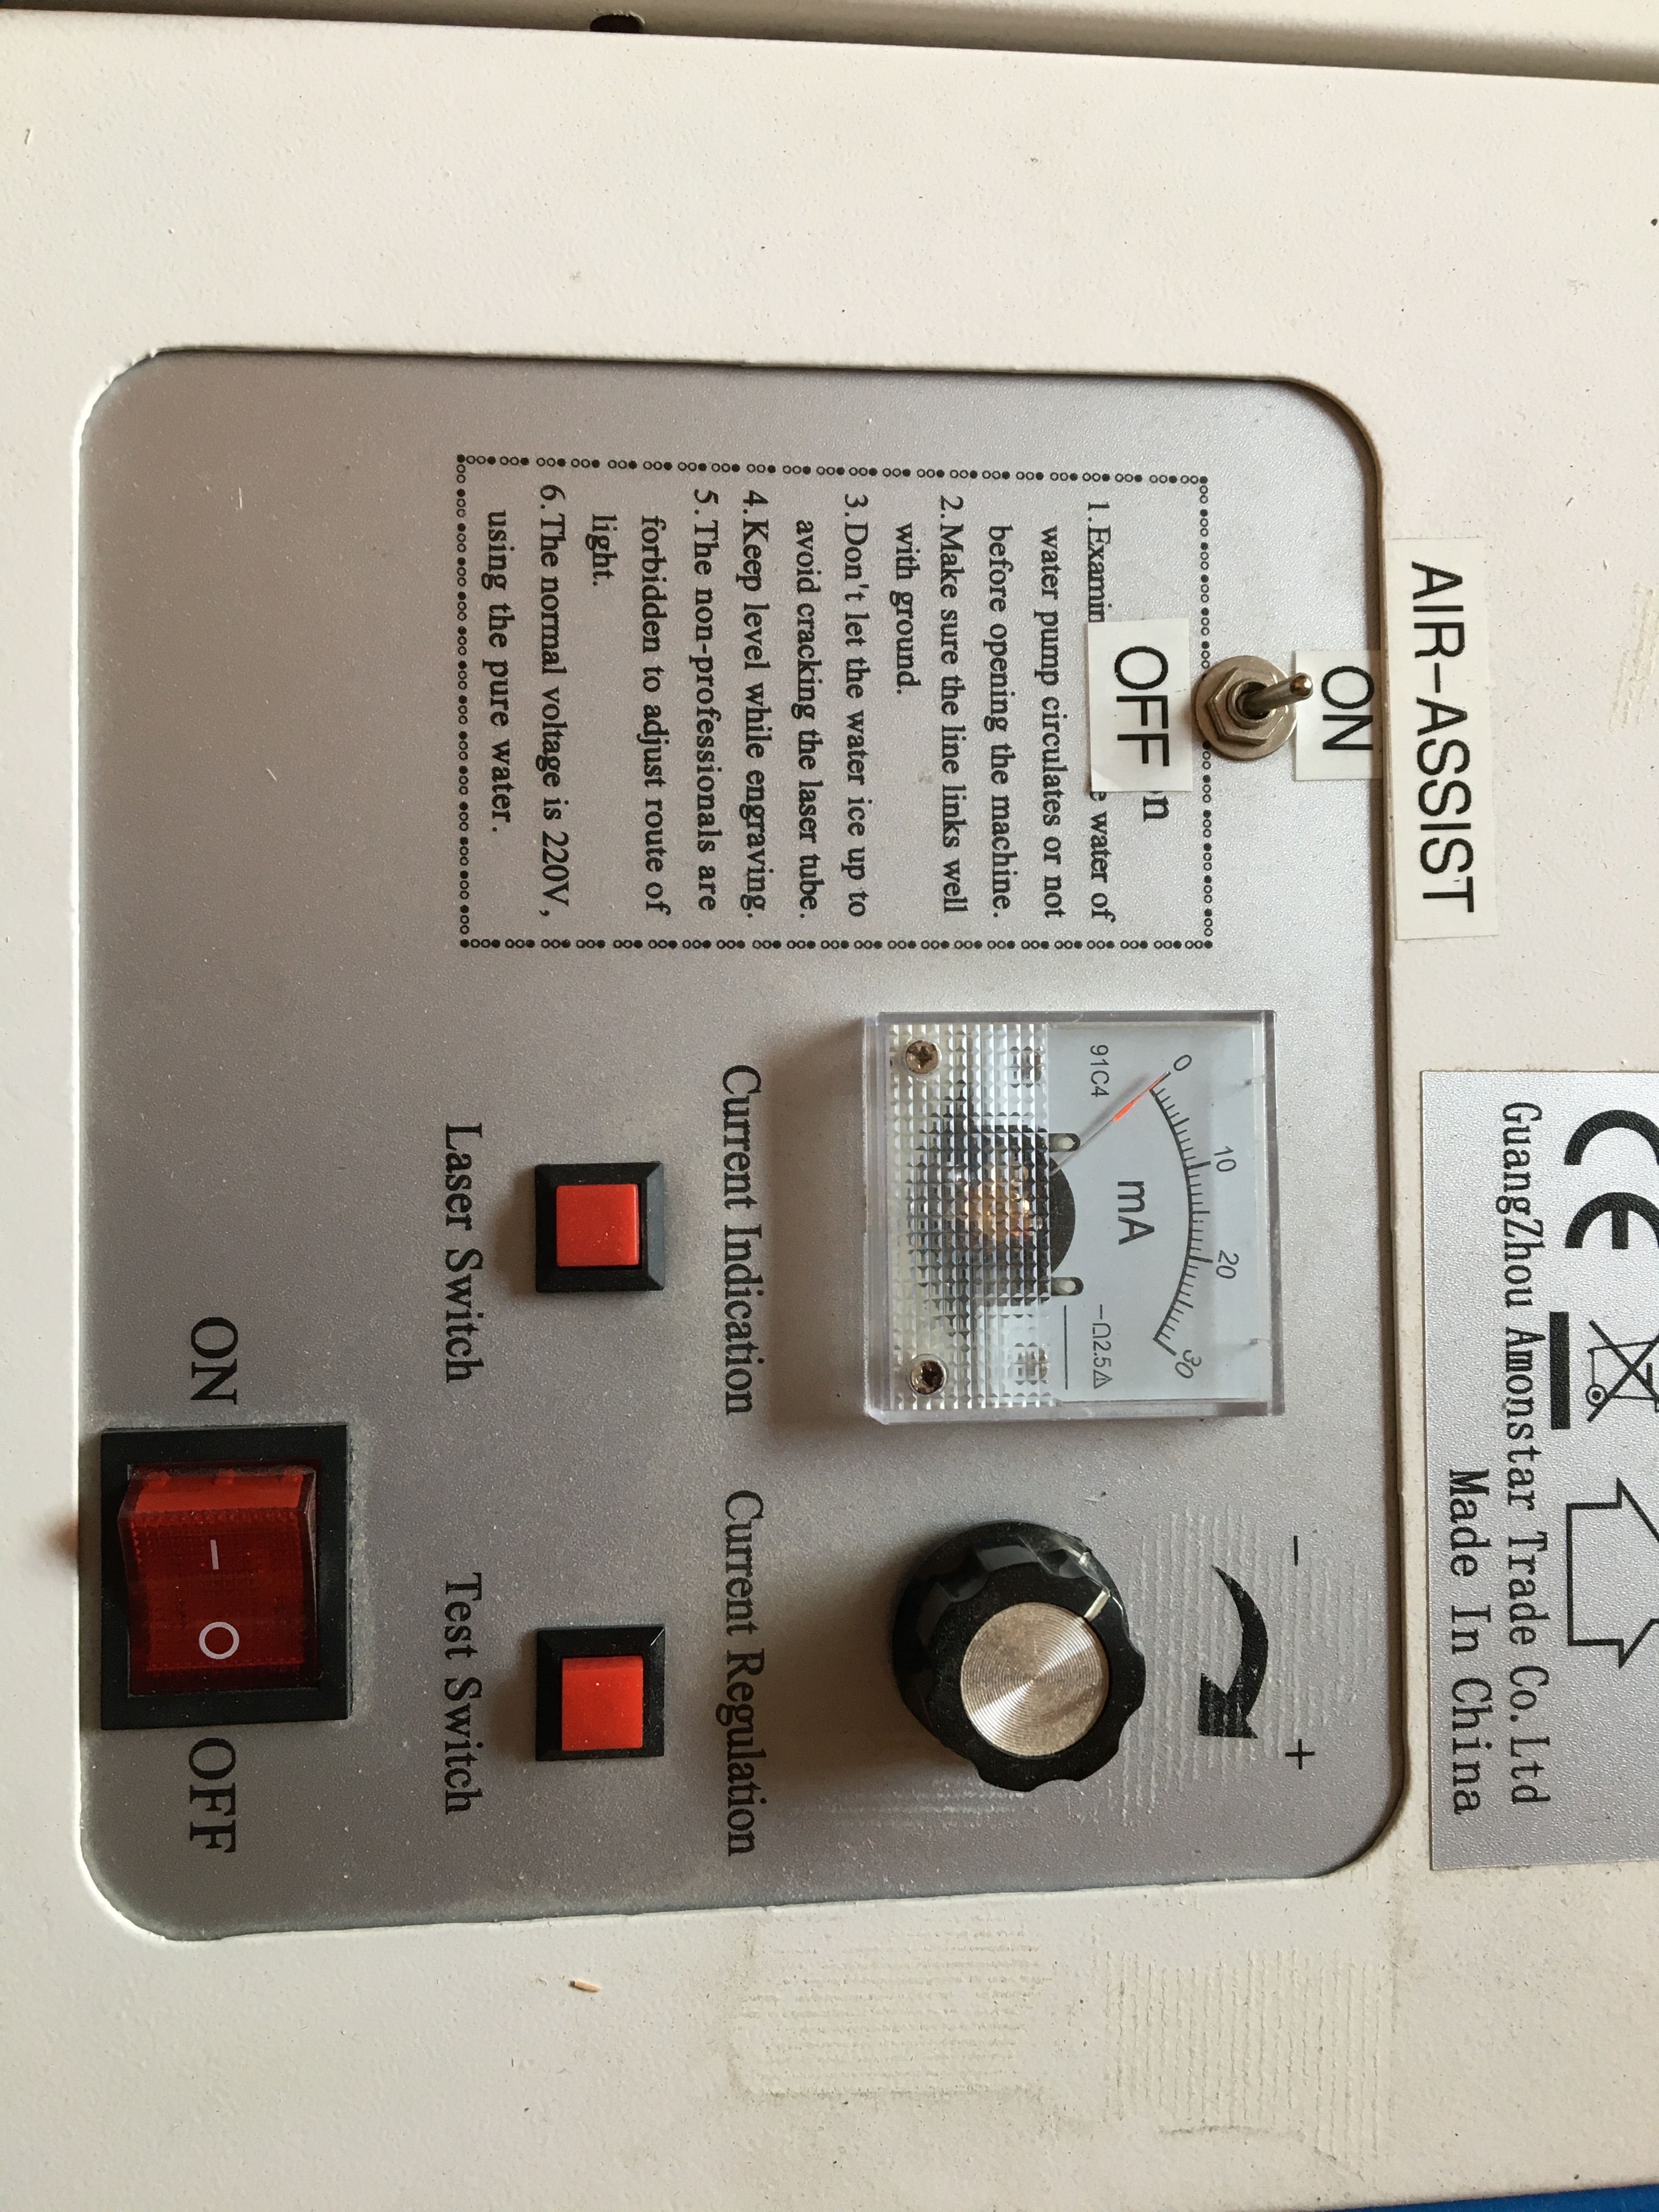
Can you still test shoot your laser with the original test button on the machine?
Real dummy question as well, What power setting do I need to have on the machine and does lightburn manage power to a max of what is set on the machine?
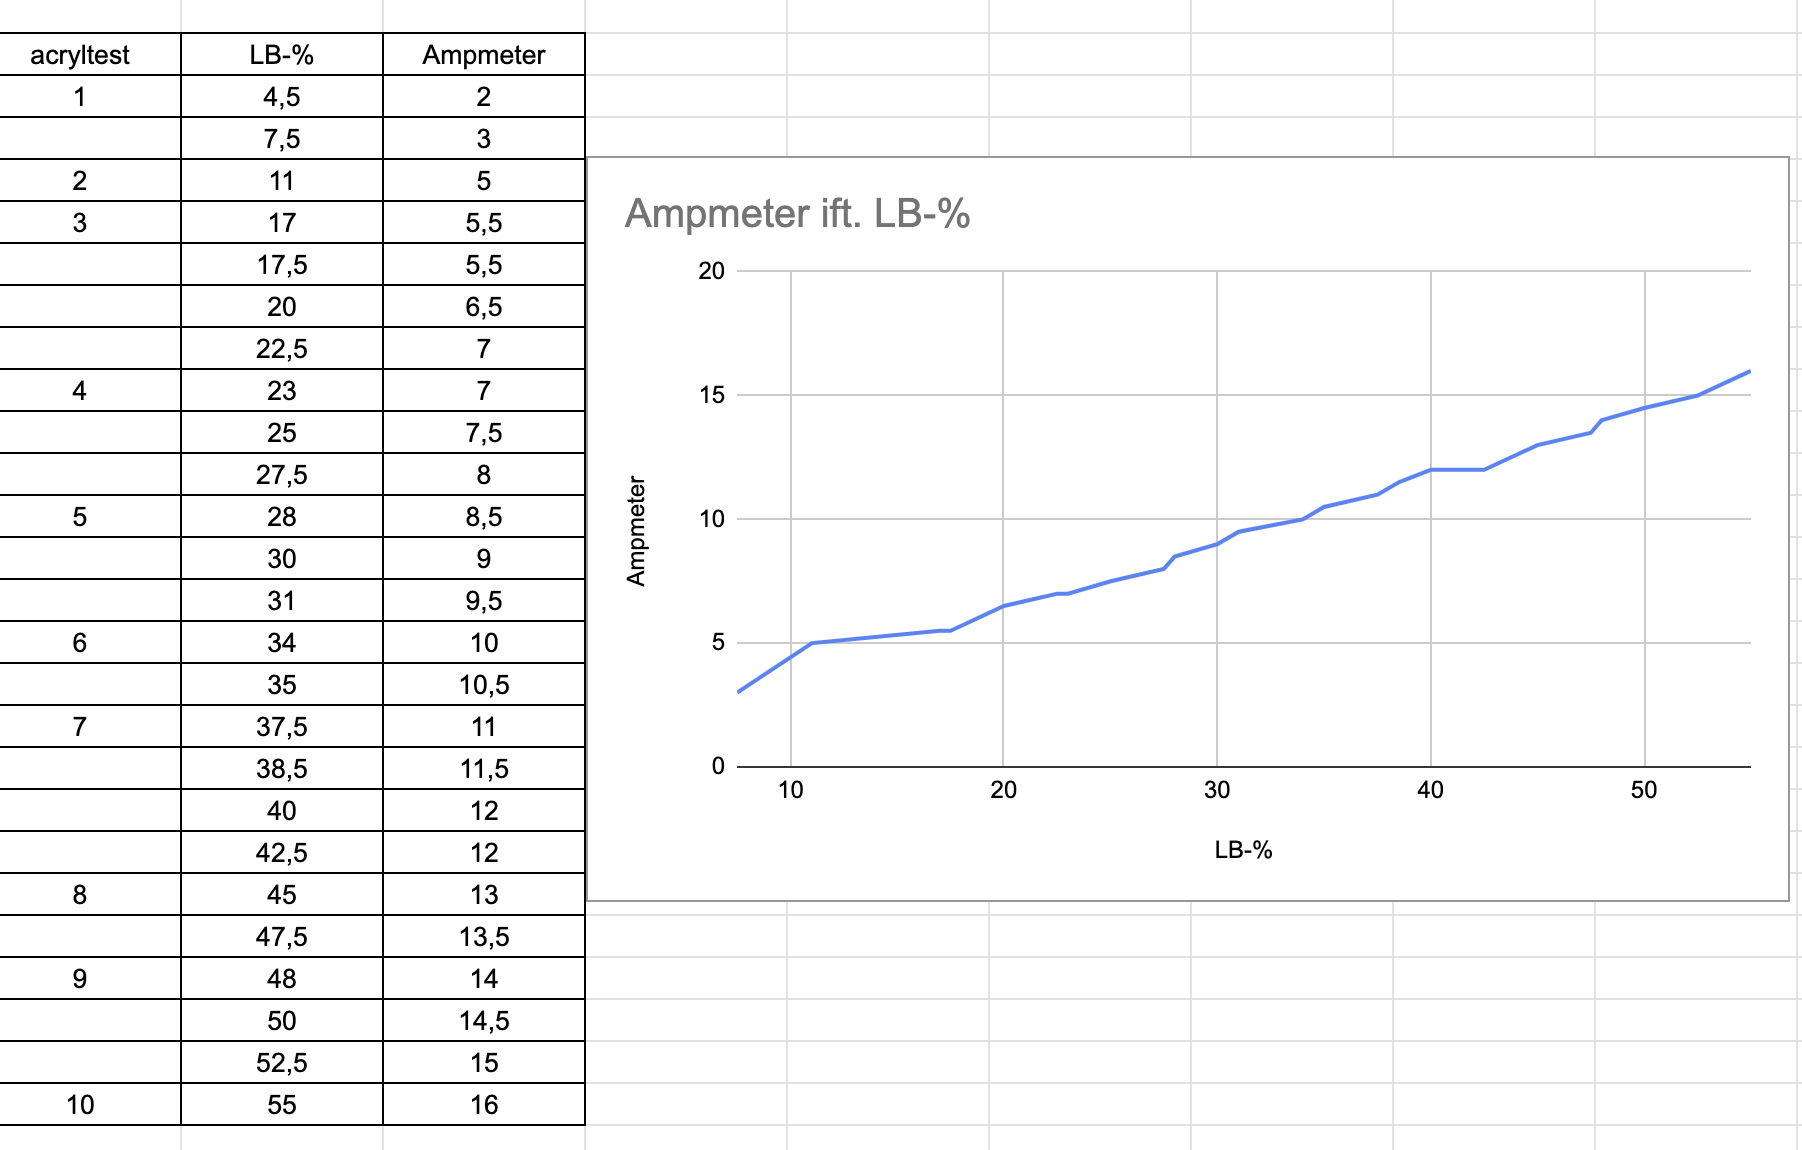
With my Mini-Gerbil controller, 60% in LightBurn is approx. 16mA for my K40 which is my max setting for the laser tube I have. Minimum% in LB to start the laser is approx. 5%, I mean.
There is also a laser test button in LightBurn, have you tried if it shoots? But beware !, it is either on or off and it is not a pulse contact.
Do you have an original Mini-Gerbil controller from AwesomeTech?
I also think it should be M3 …
I have just run an engrave at 30% and it seemed to work but I dont have an mA meter so don’t really know what this is drawing.
It was quite a light engrave though.
It must be a newer model that you have, mine looks a little different. Which cable was wrong?But it does not matter now that you have started. That is good news.
You should get an ammeter, this is important because energy output from K40 is not linear and difficult to adjust without a measuring instrument. To start, I would recommend not going over 50% energy output. I have made a small experiment with the settings that you may want to use in the beginning as a guide.
I use my K40 mostly to cut materials like plywood and acrylic and mdf, hdf and all sorts of other wood I can find. The machine is also quite suitable for engraving once you have found the right setting of energy and speed. But it is very important to have your optics focused and clean.
On mdf and Plywood I run approx. 1000 mm / min and between 5 and 8% power (LightBurn settings). I like to use diagonal scan in both directions (cross hatch). My line range is not less than 0.2 - our focus point has approx. this dimension.
Take the time it takes and experiment with your machine, it is interesting and you save a lot of material when you know your settings and parameters.
The PWM wire was connected incorrectly. It was an extra wire supplied with the board but the mistake I made was NOT disconnecting the original Pot wire.
Thank you ever so much for all the advice, I spent hours yesterday on this forum and others and your advice, particularly the graph you posted was the most useful.
I really appreciate your help.
I will have to get an mA meter. When I do, where do I connect it to? Do you have a simple wiring diagram, for this addition.
Thanks you so much for your help, I am not sure I would have got it going without you.
Hey Steve,
You’re welcome, I’m just trying to give back a little bit of what I’ve got from the other users and the team around Oz, here in the forum.
Good you found out with the potentiometer cable!
Installing an ammeter is really easy. You have changed the controller yourself, so of course you can also install an ammeter. It is also not that dangerous because it is on the “low voltage side” of your laser tube. Avoid tampering with the power supply or the red thicker cable from the laser, this is where many thousands of volts go through and there is a risk of electric shock. (Of course, the power supply must always be disconnected at the socket when we work with the machine …)
But, I think the actual physical assembly of the ammeter is almost the biggest job. If you choose to saw a hole in the control panel, you absolutely must avoid metal chips falling down to the power supply or the other electrical components, the rest is very easy
Here is a very nice description of the installation and there are also other good things on this page.:
Once again, I cannot thank you enough for the feedback and hints and advice you have provided.
Where do you suggest getting an ammeter from? I need to make sure I get the correct one.
I have one final issue now I have got the machine running.
When I start a job or sometimes in the middle of a job, my Y axis appears to jump.
I am thinking that the belts may be too loose as there is a lot of deflection in them with minimal force applied.
How do you tighten the Y axis belts specifically please. Photos or diagrams of the adjustment would also be beneficial.
Other than getting used to settings it all seems OK. The jumping just means I cannot compete a job at all as it jumps either at the start or in between cuts.