Hi guys
I’d like to know if it’s possible to have like 10 objects (individual shapes), that are combined in a group, and the change the overall size/scale, while retaining each shapes size and aspect ratio.
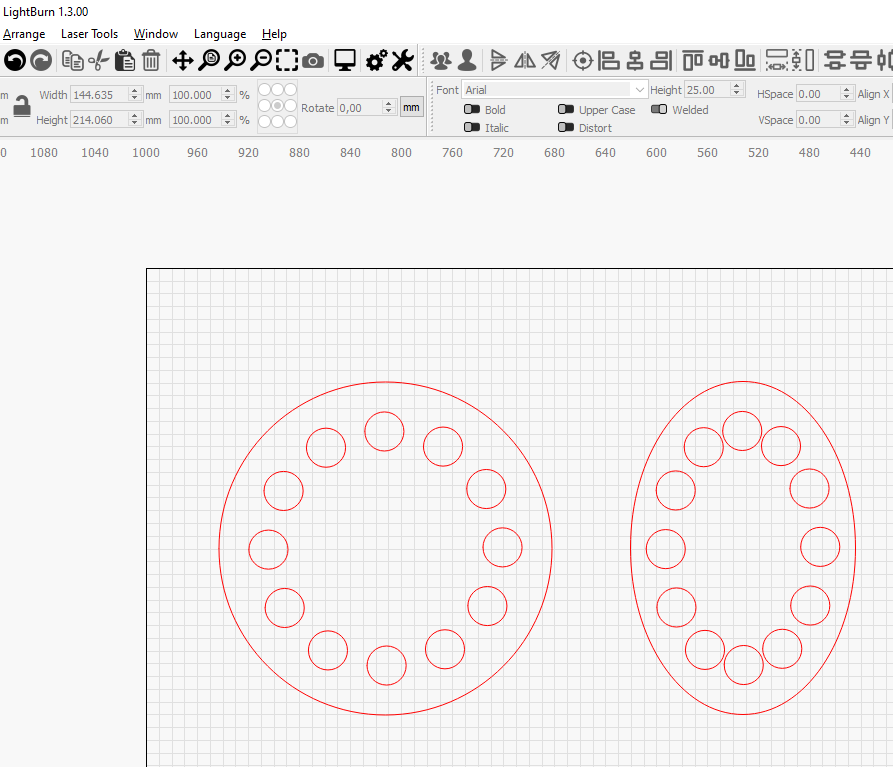
Like in this picture I need to have the circles overall dimensions changed, but I need each circle to still be a circle, and not an arc.
-Hope you get my point?
If changing size with the Numeric Edits Toolbar then make sure the padlock next to Width and Height is locked before changing one of the dimensions. When locked, LightBurn will preserve the aspect ratio for scaling.
If you use the corner sizing handles after selecting the group, the default is to scale proportionately. This can be overridden by holding shift key while dragging.
Thank you very much for the reply. I think you get me wrong though.
I do know all the normal features, keeping the aspect ratio when resizing etc.
What I need is to be able keep the specific dimensions of each item, while resizing it overall.
Please see the attached picture. I need each circle to keep its size and dimension, but I need to overall be able to scale the object.
In the picture I have manually added the round circles to the resized oval circles, but this is pretty time taking.
OK, that’s what I thought though.
I know there’s some ways to do it with simple shapes, but often I need to do more complex shapes containing multiple “dots” in 1 mm inside, and here it would be great if the overall shape could be resized and skewed while keeping the dots aspect still.
I want to make sure I understand. You want to resize a grouped object and have only certain shapes within the group become distorted while the others don’t, correct? That’s the general ask.
If you have a way of doing this for simple shapes I’d like to hear it. I’m not aware of anything like this.
There’s likely a way of doing what you’re wanting, but not in the way that you’re describing.
If you can describe what you’re after then perhaps someone can provide some insight into a different way of achieving what you want.
Maybe this image describes it better. For an example:
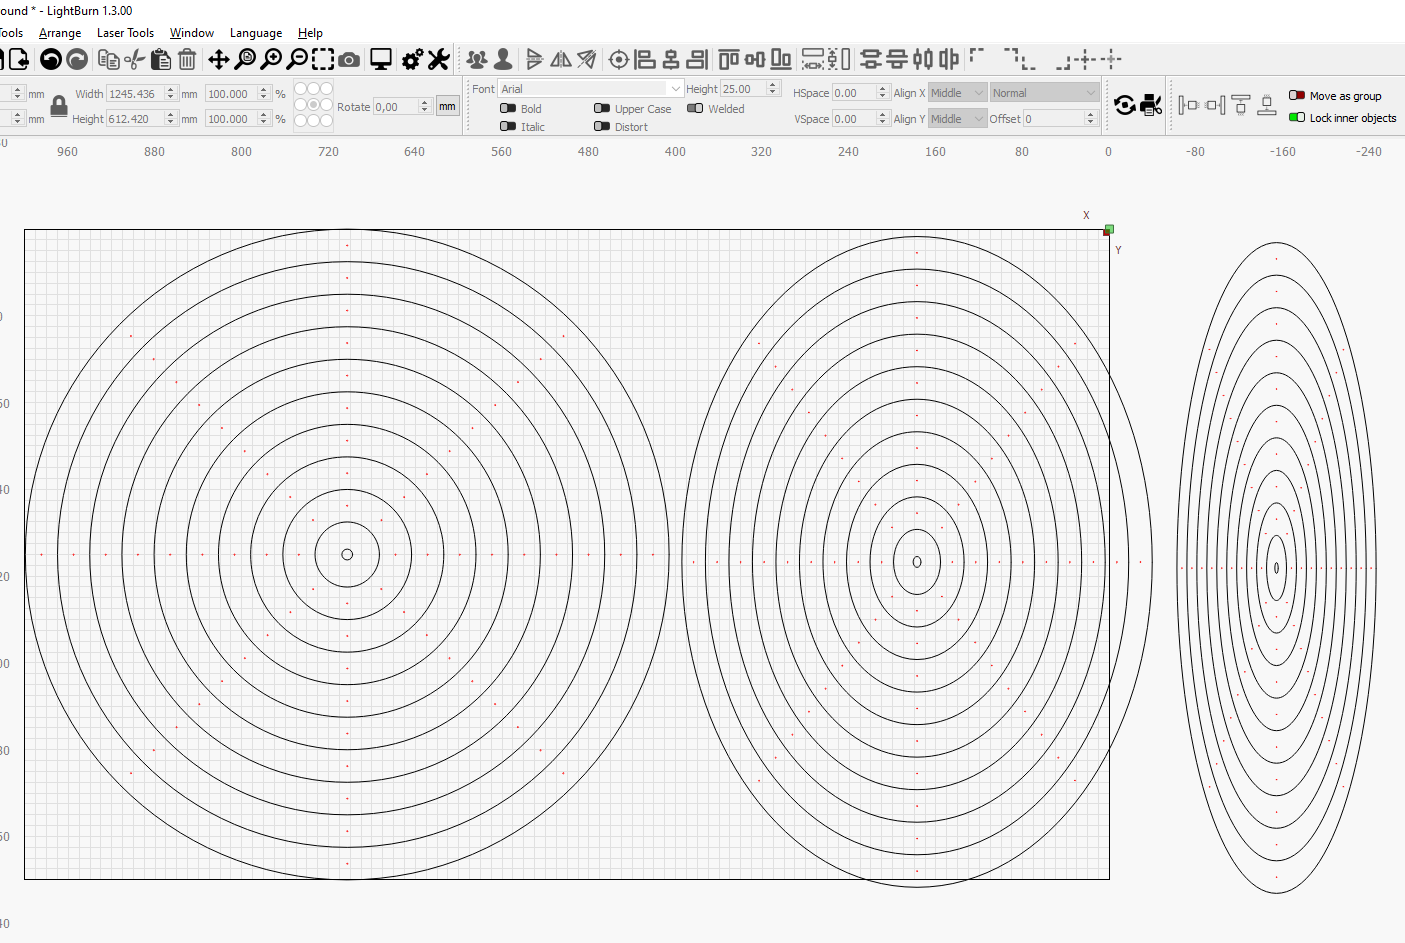
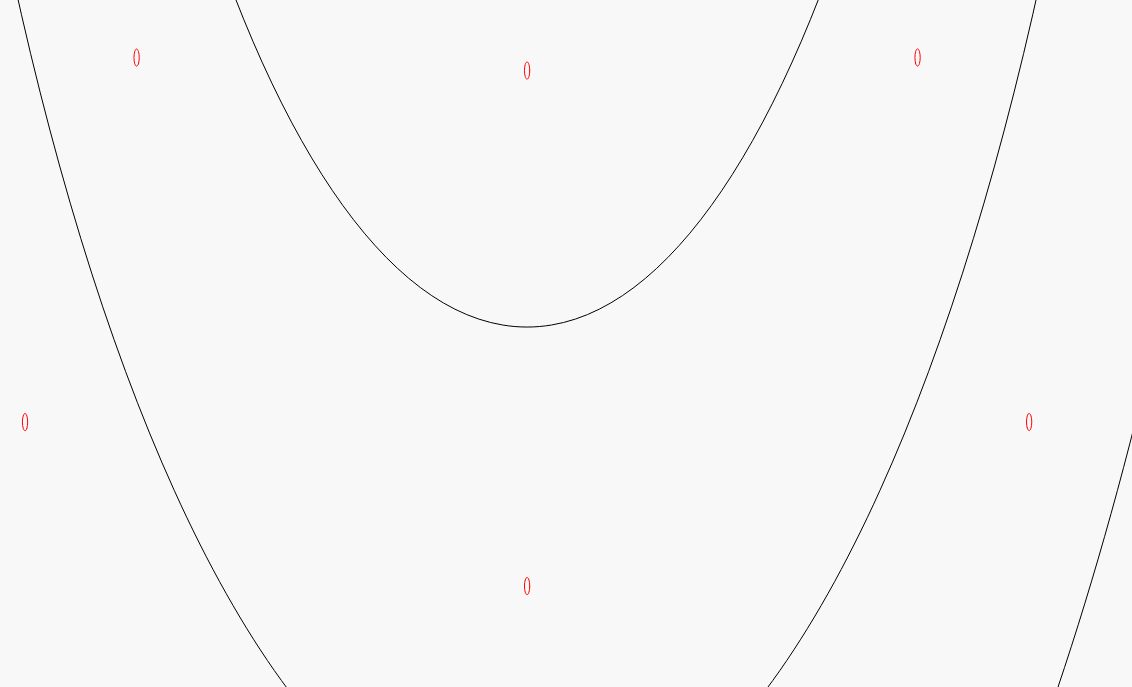
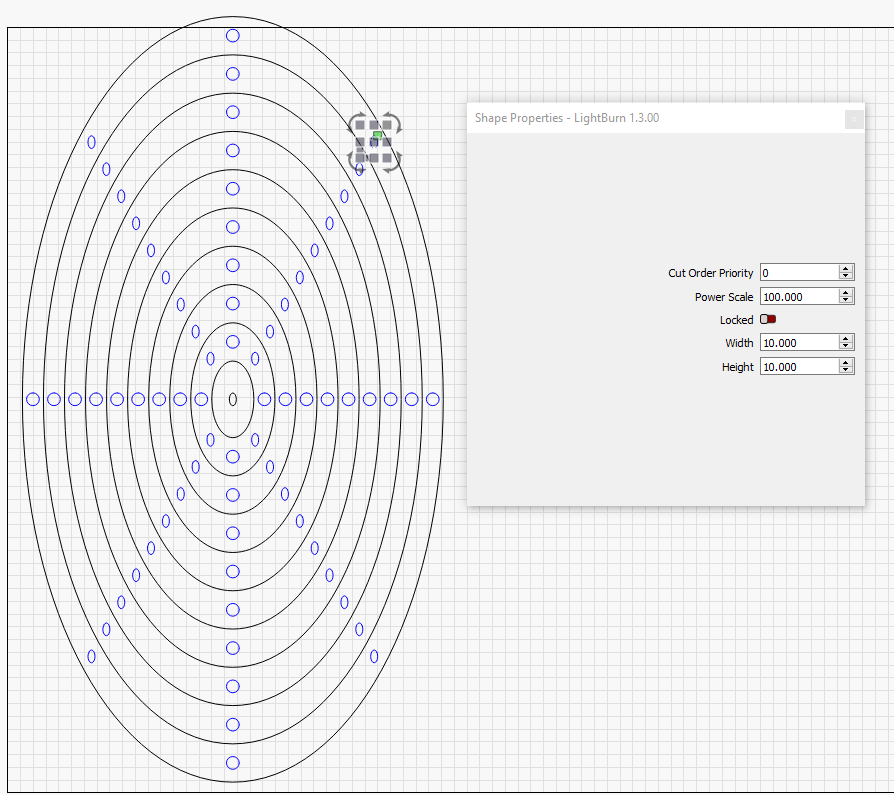
I’ve made these shapes that are basically some circles in different sizes. These are changed in aspect ratio, as seen in the picture. The red “dots” inside is for brad nails, so they should keep the size of 1 x 1 mm, even if the overall “circles” are changed in size and dimensions.
Do you get my point?
When changing the aspect ratio on the overall circles, the 1 x 1 mm circles are skewed as well, meaning I have to paste a new 1 x 1 mm circle onto each of the points, and this is quite time taking.
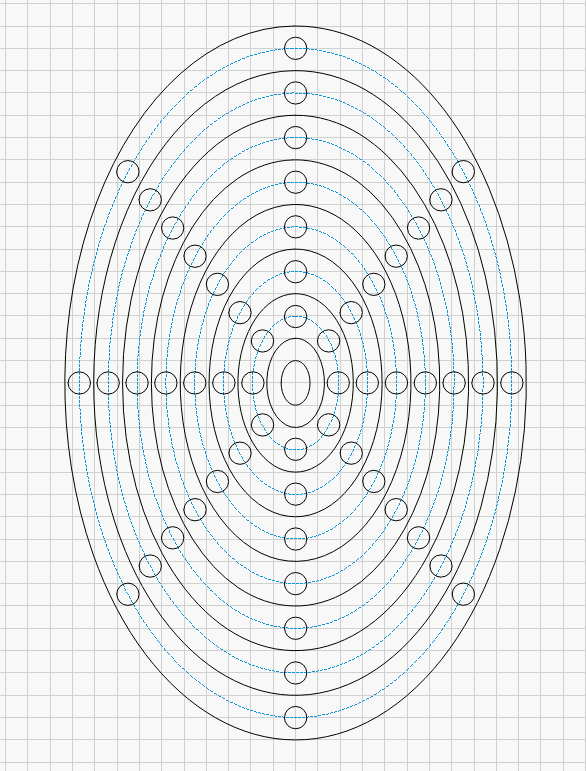
Create the concentric ellipses as desired. You will need to also create ellipses for the path that you want the peg holes to also follow. I’ve put that on a tool path in the screenshot.
Place a copy of the peg hole at the start of each circle
Select peg hole, then select path, then Arrange->Copy along path. Specify 8 copies.
Thank you SO muh for you effort helping me. It does work, but it is very time-consuming, as I will be doing a lot of different designs, each with the need of having the circular peg holes.
Really would like to find an easier solution, if it exists though:-
This type of problem is ideally suited for parametric CAD solutions. That way you could specify the relationship of the peg holes to other parts of the design. As you change the other parts of the design the parameters will dictate how dependent components, such as the peg holes, adjust to accommodate.
However, there’s a lot of overhead in such things. If you’re finding this solution time consuming the setup for a parametric solution might be higher than your tolerance level.
However, if you’re often doing a lot of mechanical designs it can pay off.
Also, I’ve thought of another approach that might work for a very narrow set of cases, including this one.
This requires that all the peg holes be actual LightBurn circle primitives.
Assuming that, start with the elliptical shape with the elliptical peg holes.
Select all the peg holes
Go to Shape Properties, then set width and height to match peg hole size expectation
Sorry for the delay in my reply. Just had some busy days.
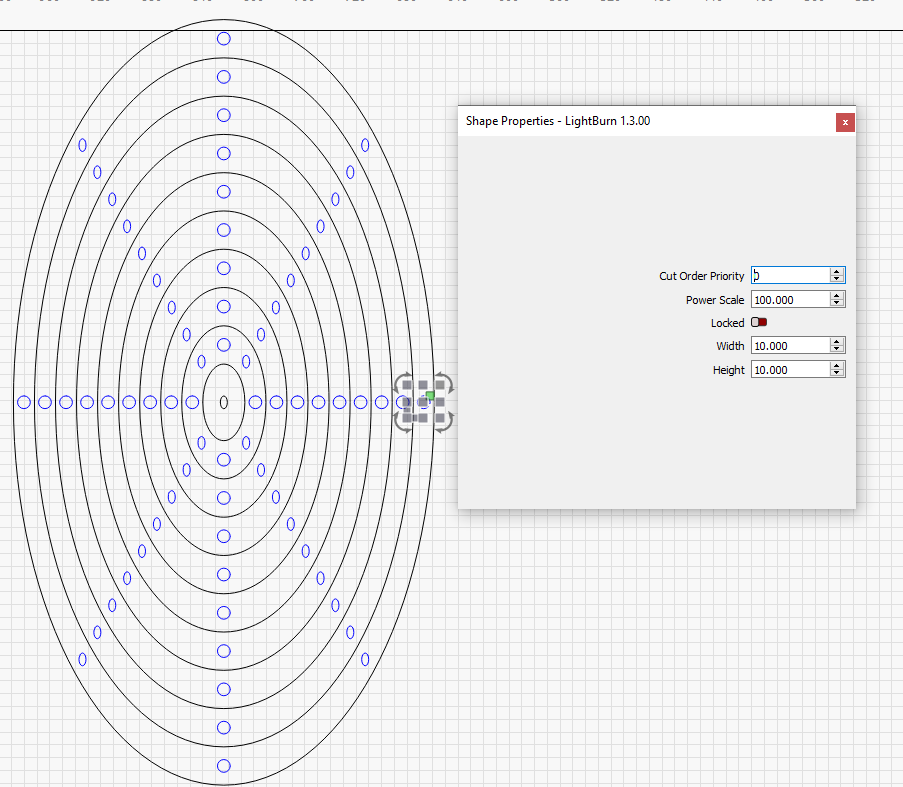
Actually your last suggestion almost did the trick… The peg holes that are placed perpendicular to the working working space/grid (90/180 degrees) can be resized perfectly.
The weird thing is that the peg holes that are placed 30/90/etc degrees are not resized at all, though when checking it does say that the size is equal to the others.
Any idea what can cause this, and maybe how to solve it?
If you make the circles without rotating them then this should work. If you rotate then this approach breaks down.
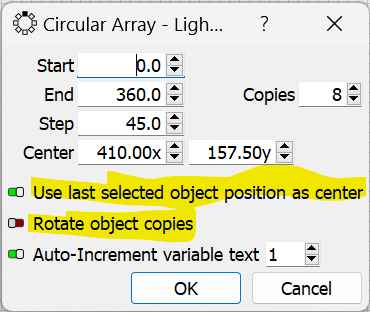
I suggest using the circular array tool to create the circles and disable the rotation option. You can do this easily if you create a column of circles at each ring diameter. Select one of the circles, add the center piece as a reference, then make sure you use “Use last selected object position as center” and disable “rotate object copies”. Repeat this for each ring of the circle.
I just did some different tests…
It seems that I can rotate the arrays in any degrees and still I can use the “shape properties” to change the size of the circles…But as soon as change the aspect ratio of it, ONLY the circles placed in the perpendicular directions can be resized using the shape properties.
But how do I make the circles without rotating them? Not quite sure I get the point?!
The circular array can be used it the object I’m working in is circular, but the problem is that some of the shapes I’m doing is triangels, rectangulars, etc. So I need to add the peg holes in another way than if it was a circle, yet I have to be able to keep their aspect ratio when changing it on the actually object.
This approach will only work if the shapes you’re using are LightBurn primitives. If you stick to LightBurn rectangles and polygons then this approach should work. Standard paths will not work.
I see…
I’ll try to figure out how to do it then.
It’s just weird that peg holes (circles) placed perpendicular can be resized perfectly, but not when in “non perpendicular” direction!
This is because height/width always works in the same orientation of the primitive shape.
This is the order of what’s happening:
You create circle
You rotate circle
You distort circle
You attempt to resize the width of the shape in Shape Properties.
However, because the circle has been rotated before distortion, you’re now stretching the circle based on the original orientation for width which further distorts the shape.