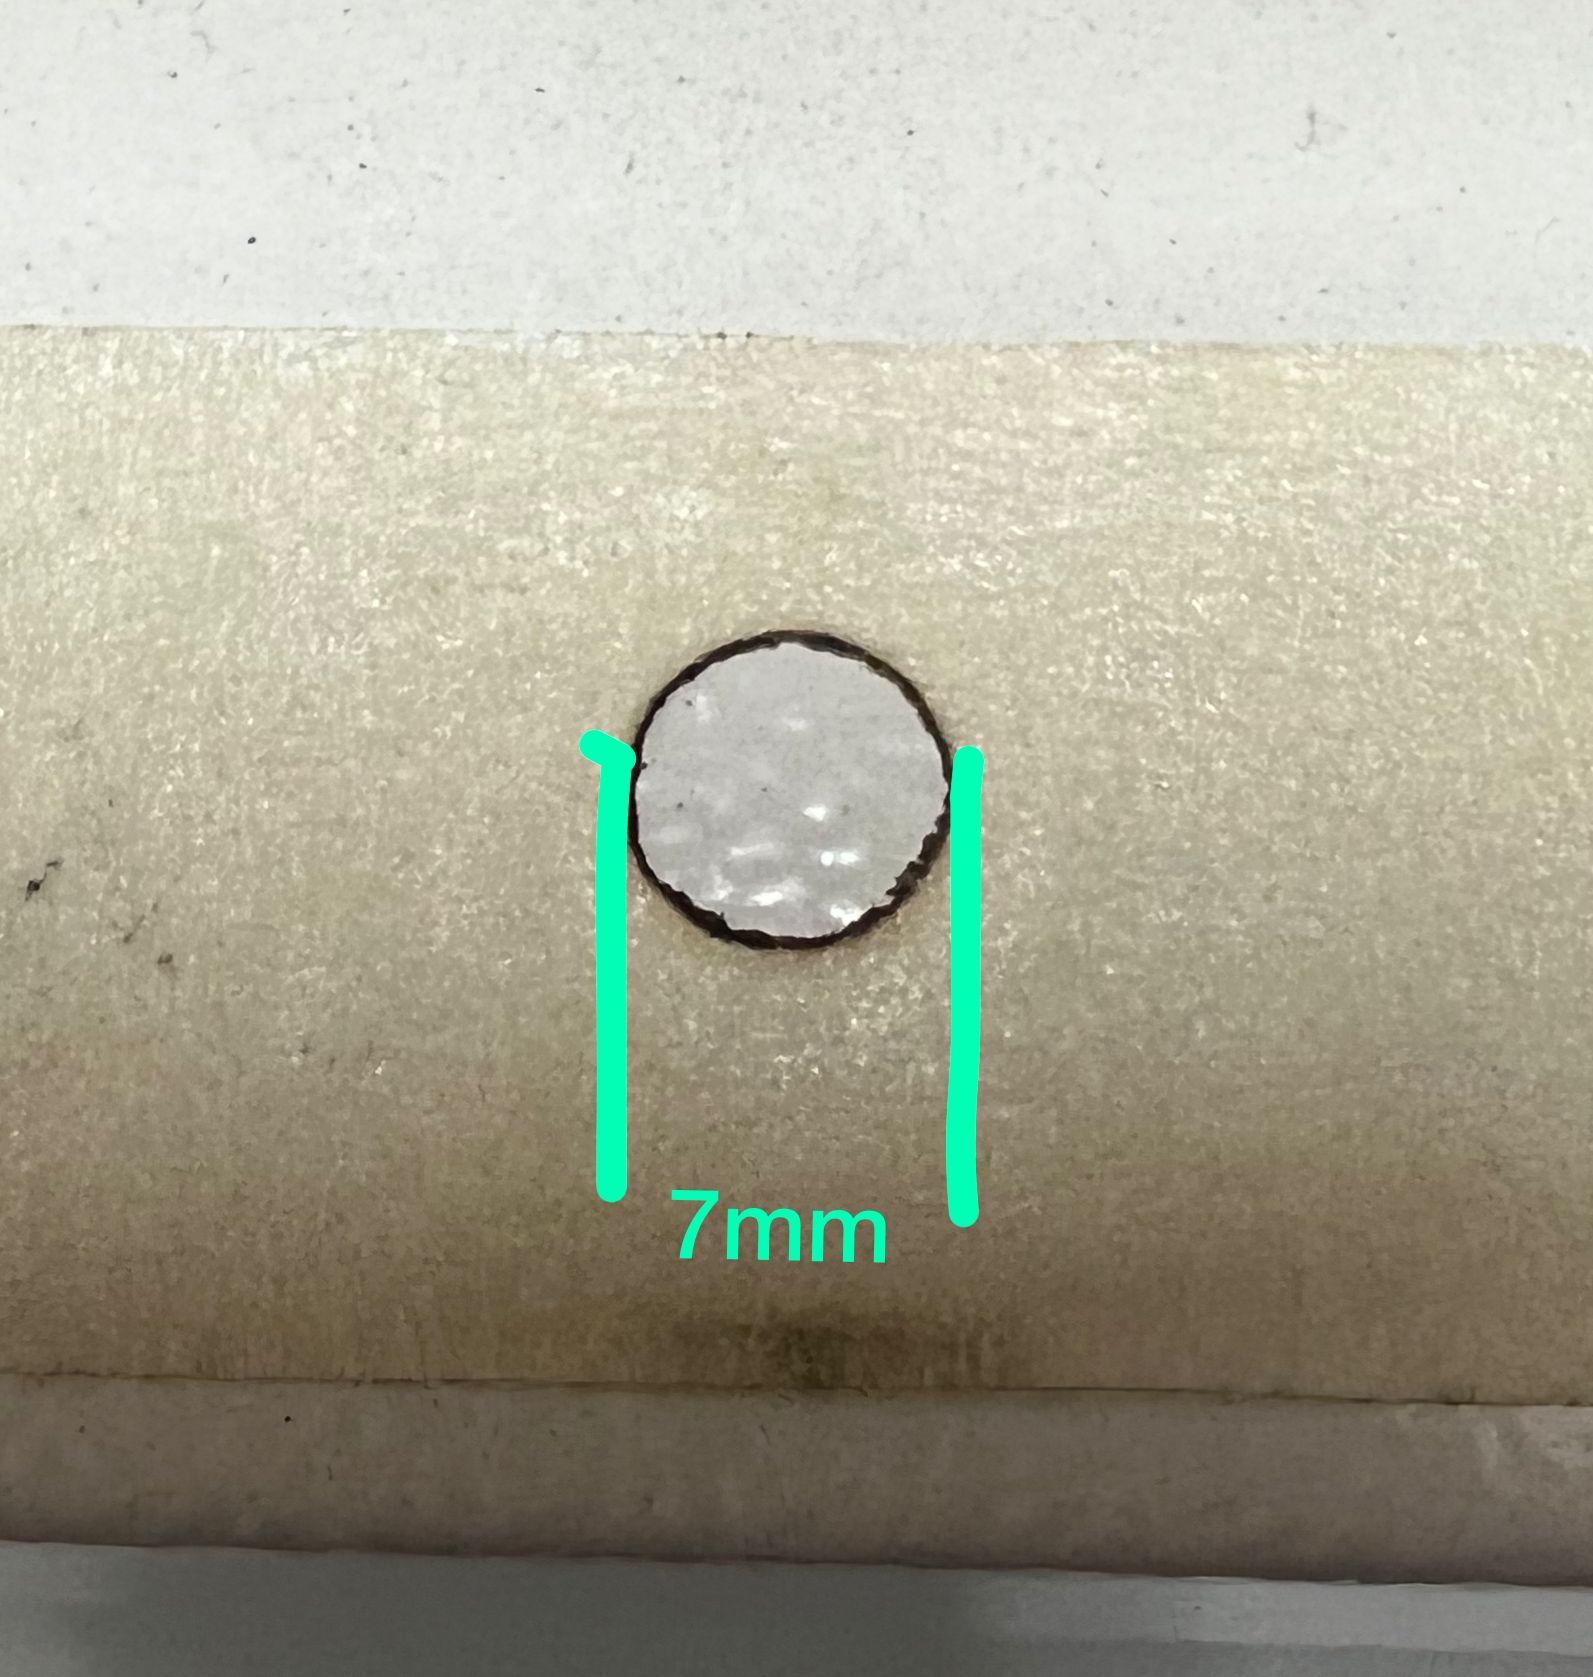
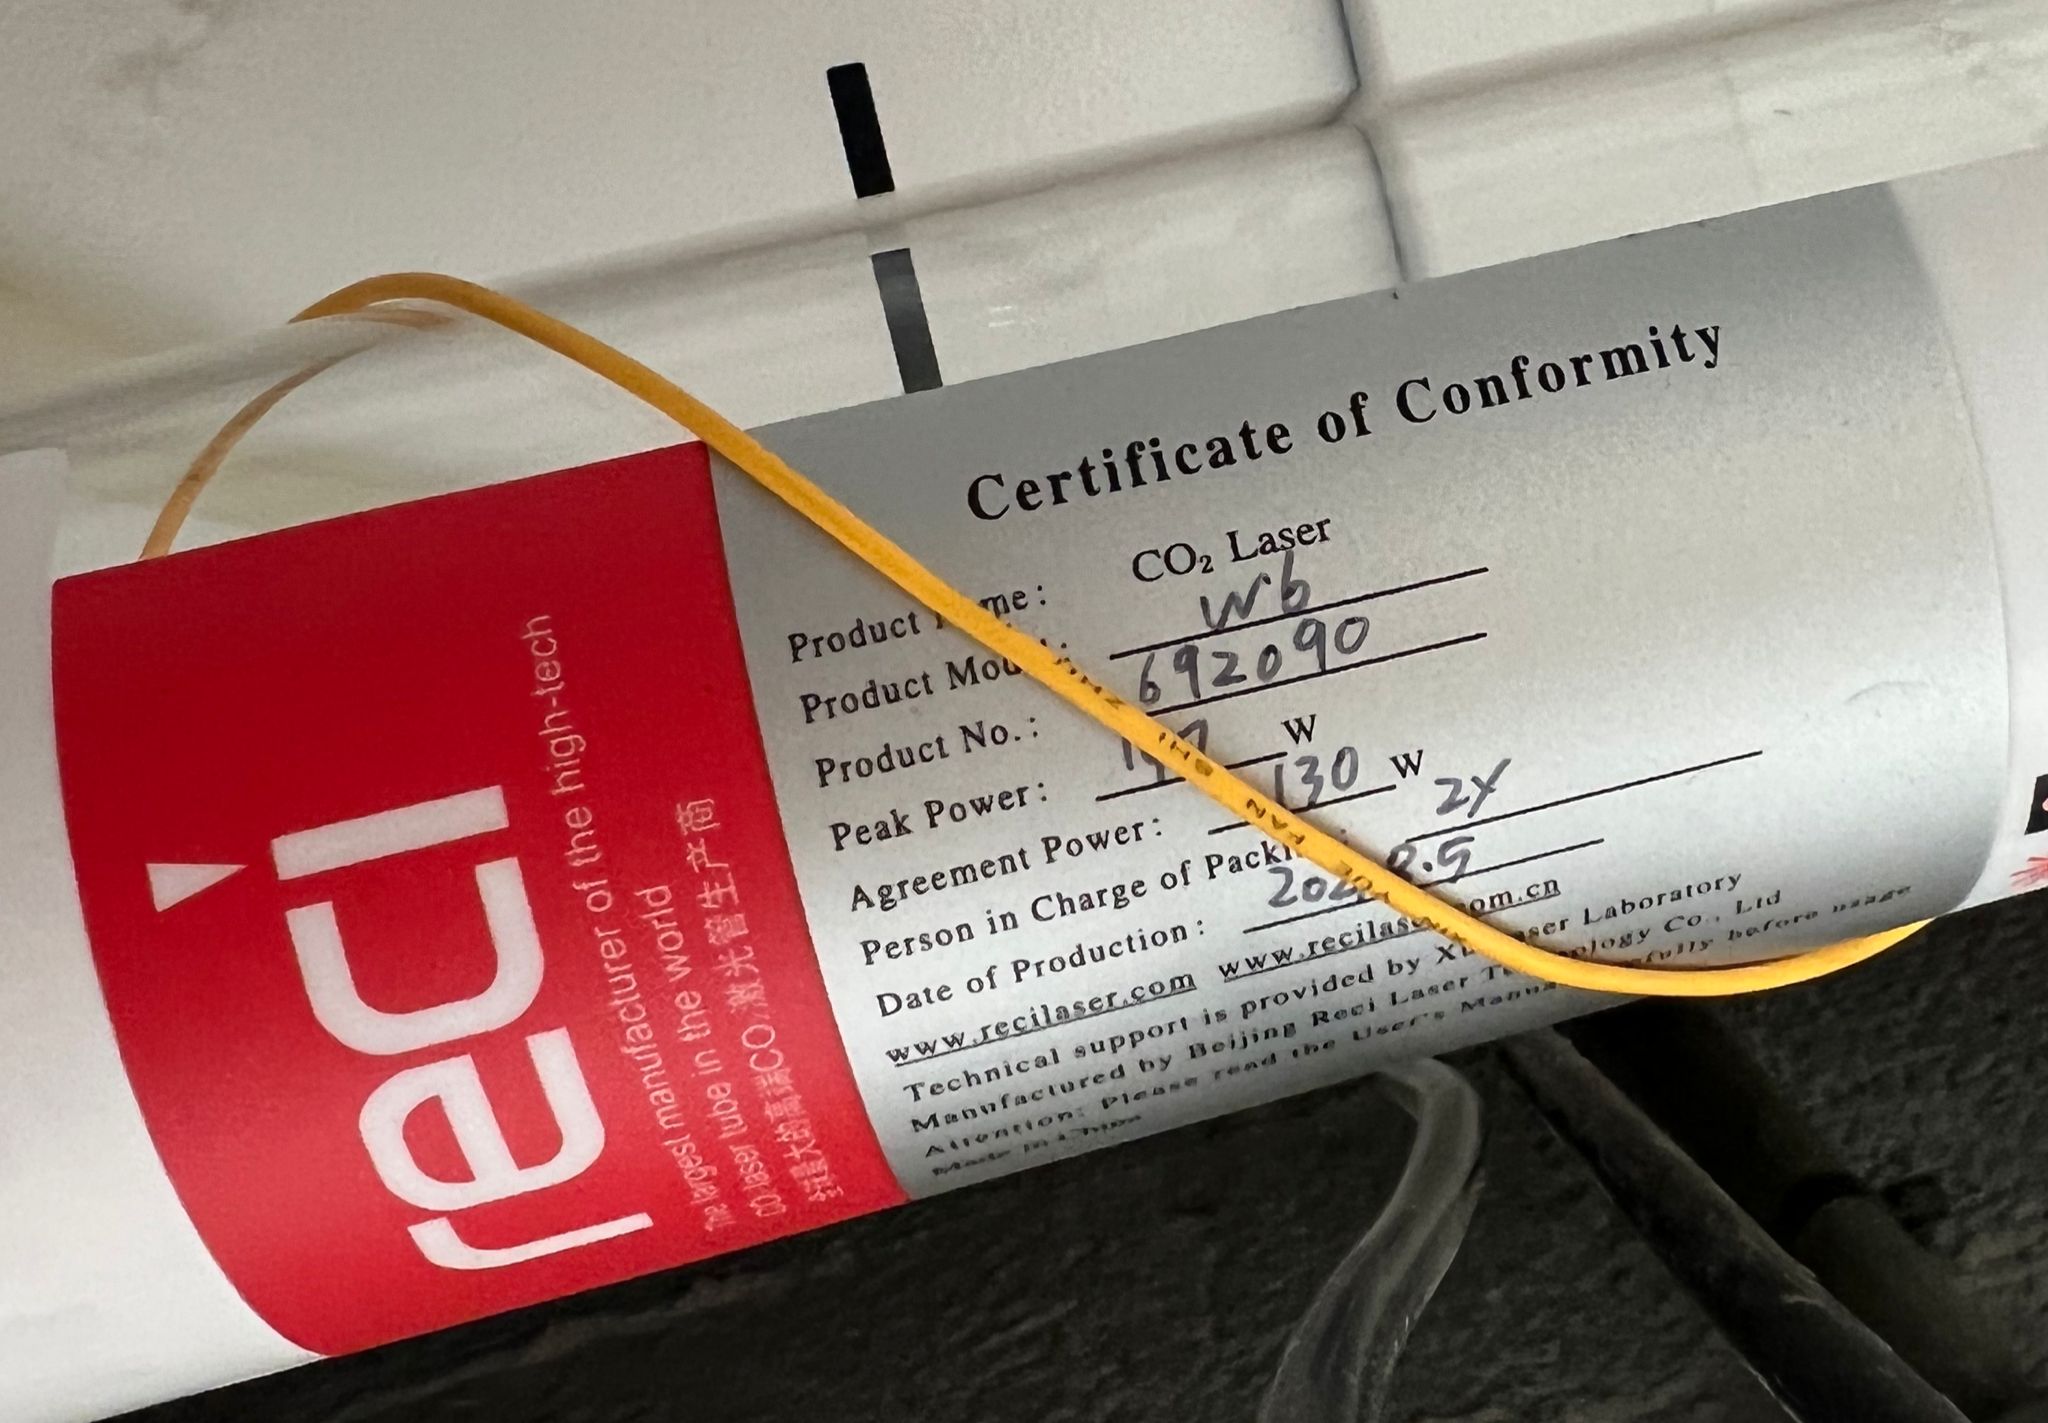
7mm does not sound unrealistic for a 130Watt tube, I mean on a 60Watt tube the diameter is 4-5 mm, before the lens. But it looks violent at your last mirror, just before the beam can not be there. How big are your mirrors?
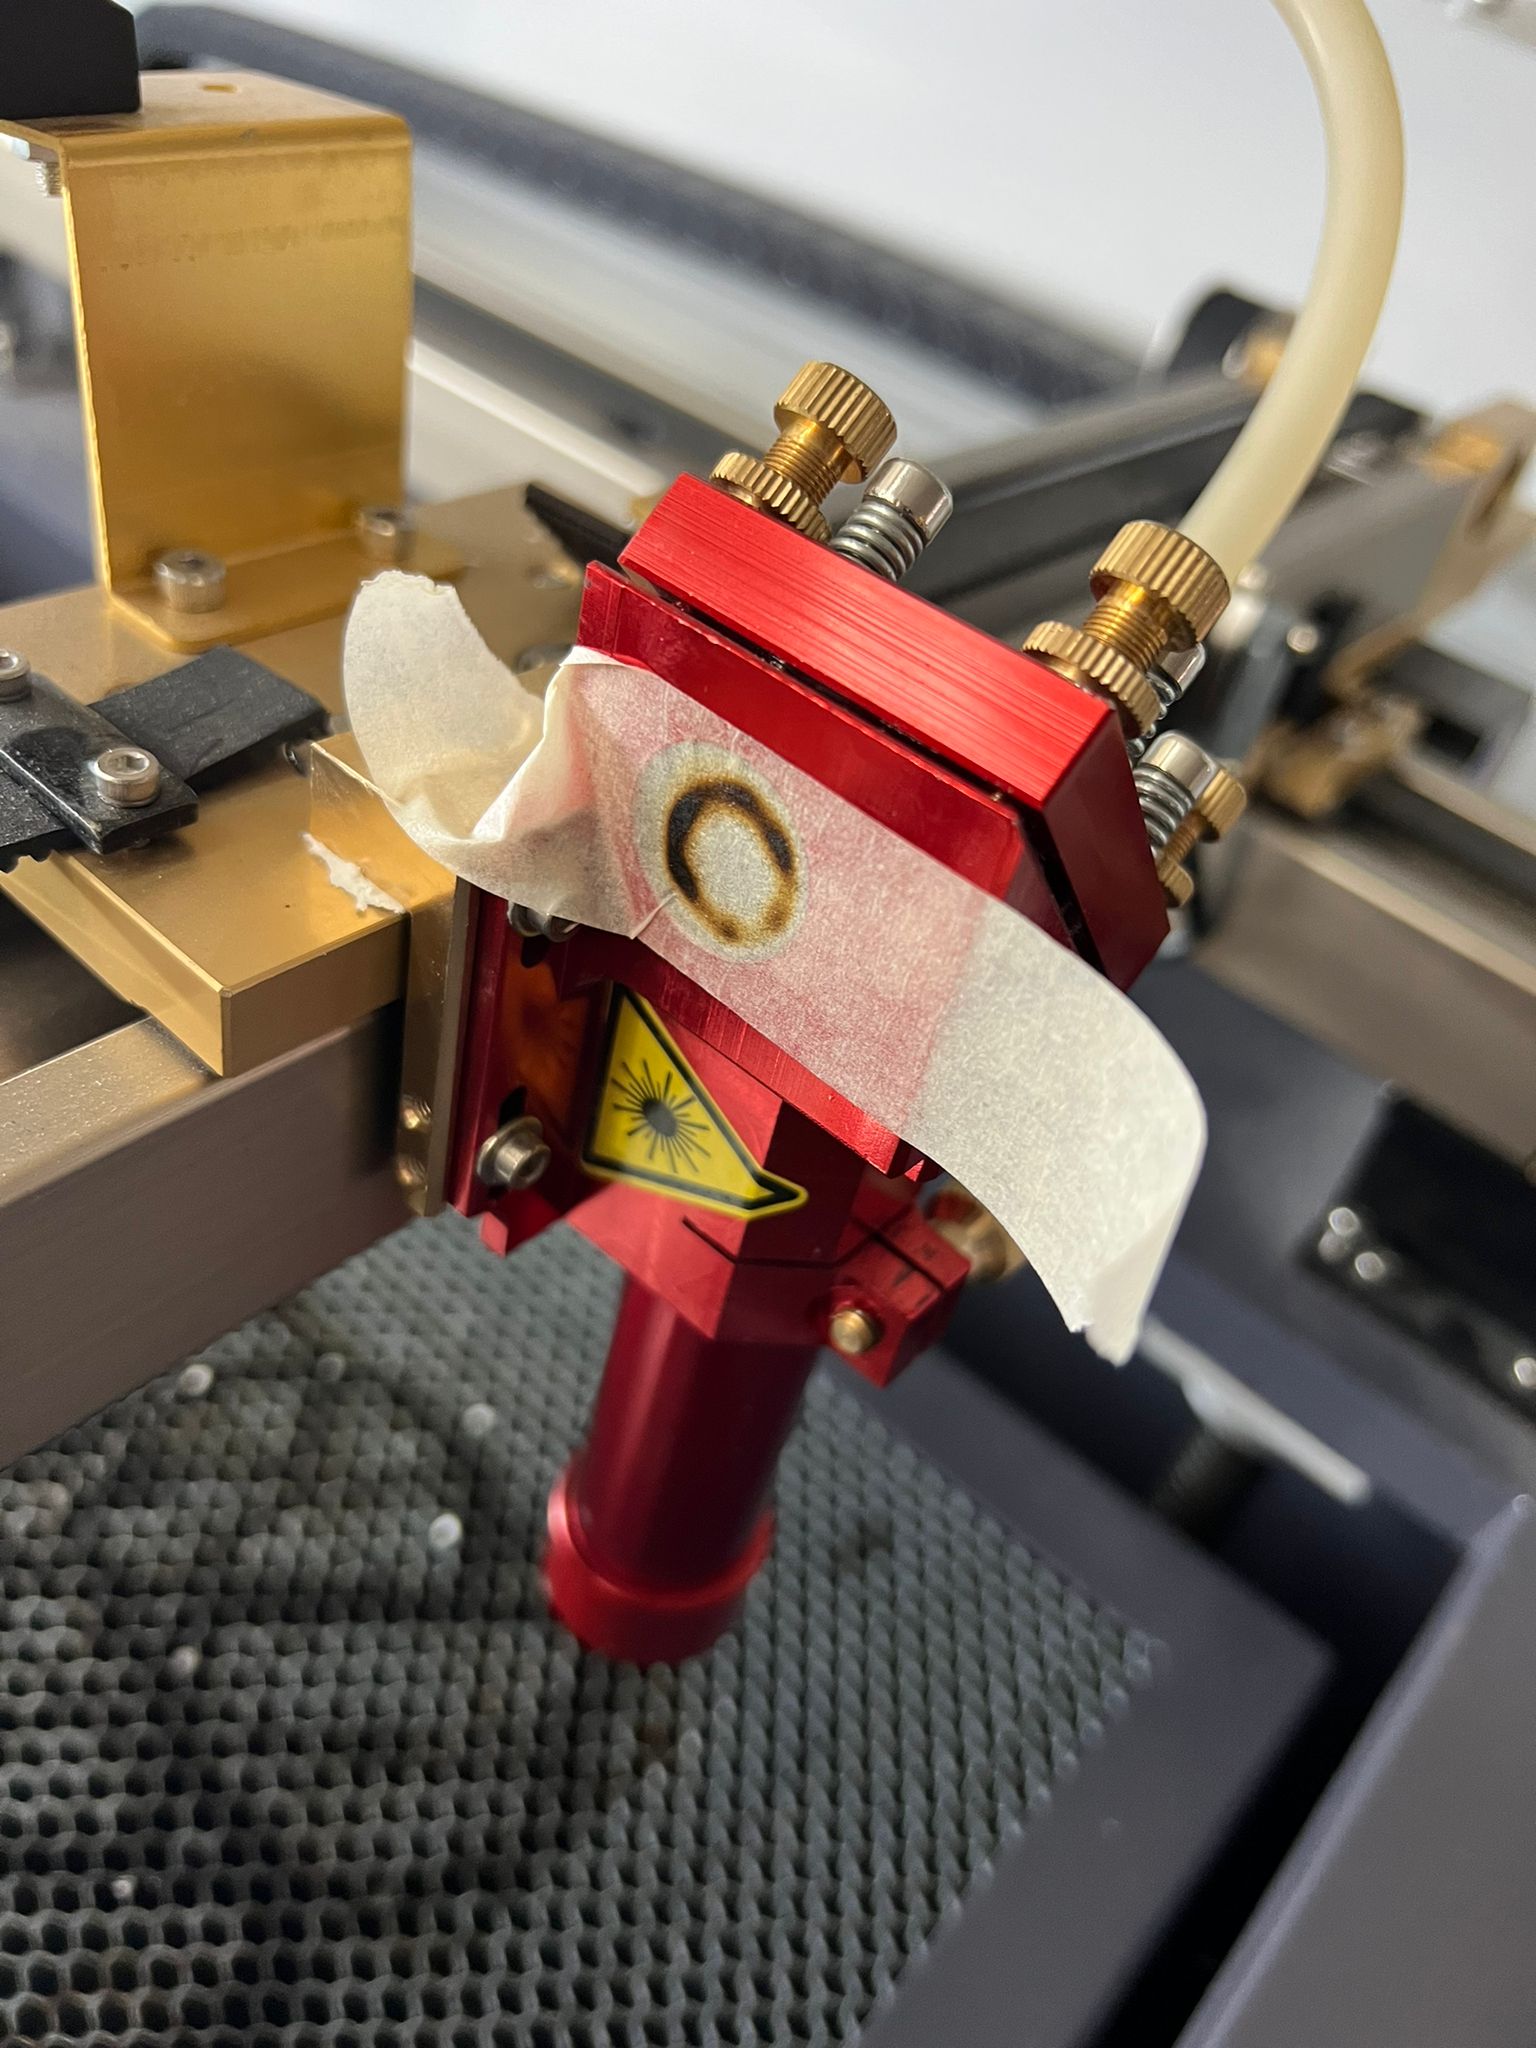
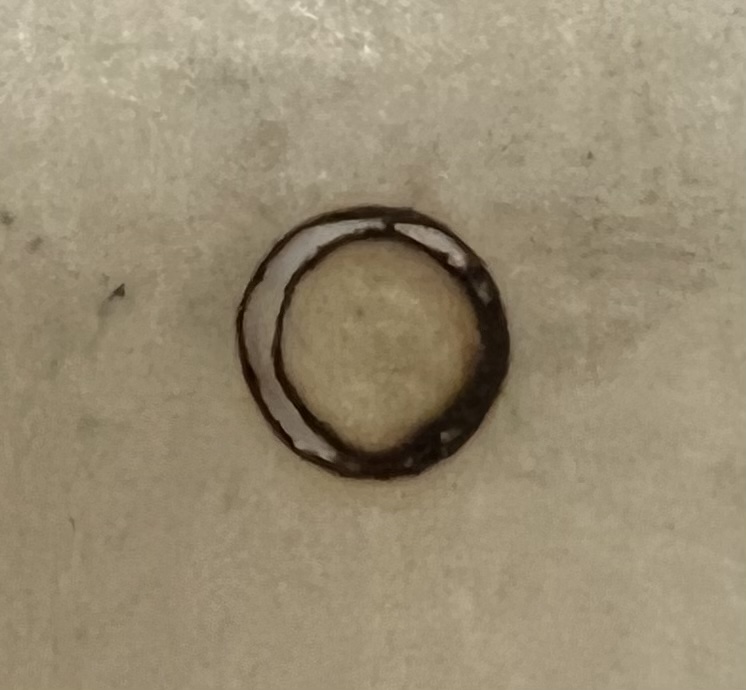
Hard to tell with the first image, but the ringed burn pattern on the third mirror is of concern. Reason being you can’t focus a ring into a point. Are all the mirrors in good shape? The technician didn’t say anything about that?
Not sure how low the energy was to not burn thru tape with a 130w tube. I would replace the third mirror with a wooden disk and test again. Generate a more normal power into the disk and assess the pattern.
10% should be ok but just to investigate further you could try again at higher powers. That pattern doesn’t look correct but bottom line if it cuts fine at normal power then I wouldn’t worry about it.
So you know more about my tube as I do, I cut 15mm acrylic with my laser, and have today run 6 hours of production in 3mm MDF with 15mm / s and 5mA. (nominal 60Watt tube).
As I have tried to explain, with too little starting voltage and or time, you can get a picture that is reminiscent of what you are describing.
I’m not saying it won’t cut. I’m saying this is TEM01- which may be happening under these extreme conditions only, such as “too little ignition voltage”. I don’t like to word it like that, because you’re not controlling voltage specifically, right? It’s too low of a power level in general and the mode is doing weird things.
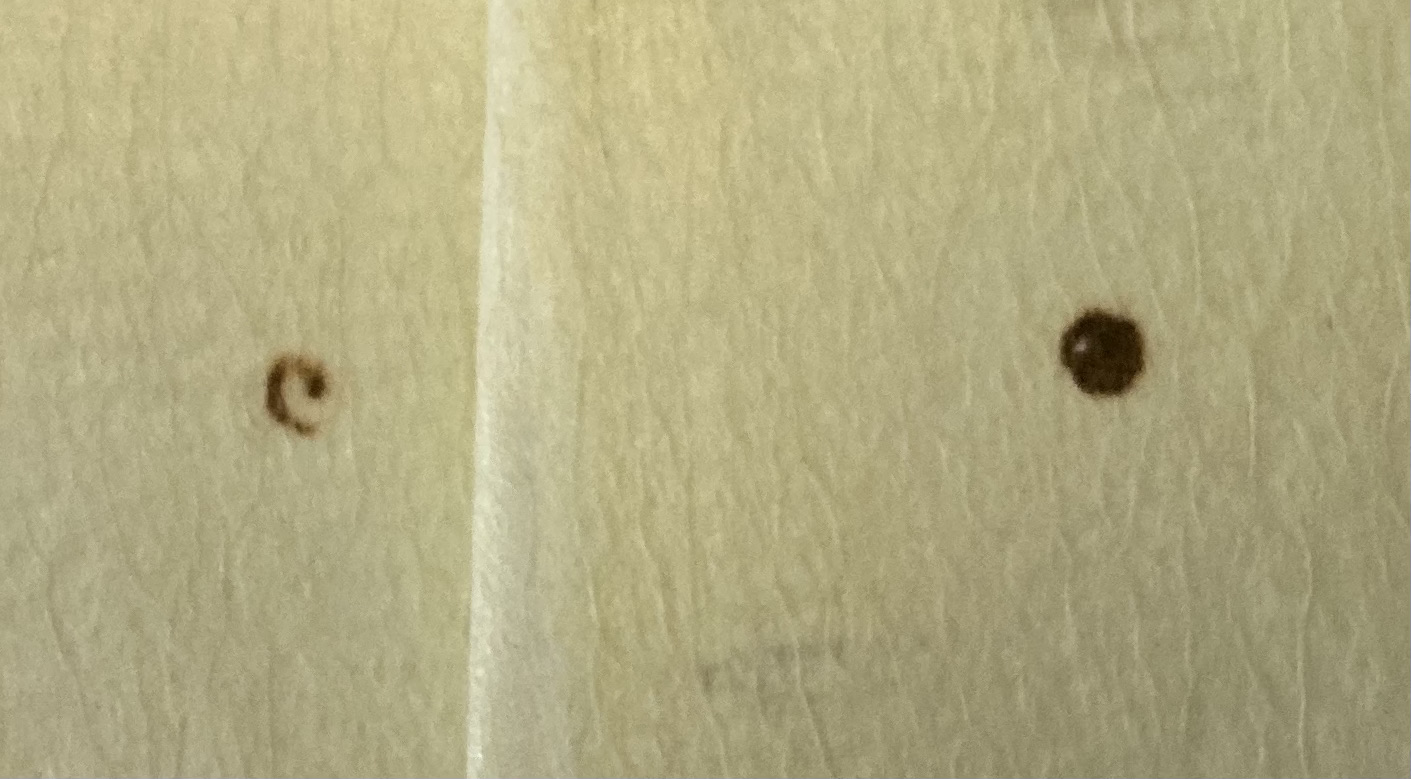
All CO2 lasers should be doing the gaussian TEM00 fundamental. It is most intense in the center and decreases with radius as per the gaussian bell curve. The beam intensity must be above a certain threshold to make a mark on the tape, that will always be the center of a TEM00 but will get smaller as the beam intensity drops because a smaller radius exceeds the threshold that marks the tape.
Getting this shape means the energy has redistributed itself in a way that doesn’t come from external optics. It’s the tube itself producing the wrong mode. If it’s happening at low power levels, well, glass tubes don’t operate consistently at low power. We know that.
If you’re firing at higher power and getting this, that’s the operating region you need to cut with, and I don’t know of any way to remedy it and get TEM00 again. As far as I know this is a physical defect in the tube and therefore just constitutes a defective tube.
No arguments from me that a misshaped burn pattern is a sign if a bad tube. What’s I don’t know is what power level was used to assess that shape. If you only see burn marks in a piece of tape it’s not a fair test. If I test on tape it instantly burns thru in a flash. That’s why I recommended doing the test on wood not tape. You can put tape on the wood for repeated tests. Also try different power levels.
I also agree that the normal pattern should look like when you were a kid and took a magnifying glass to a bug on a sunny day.
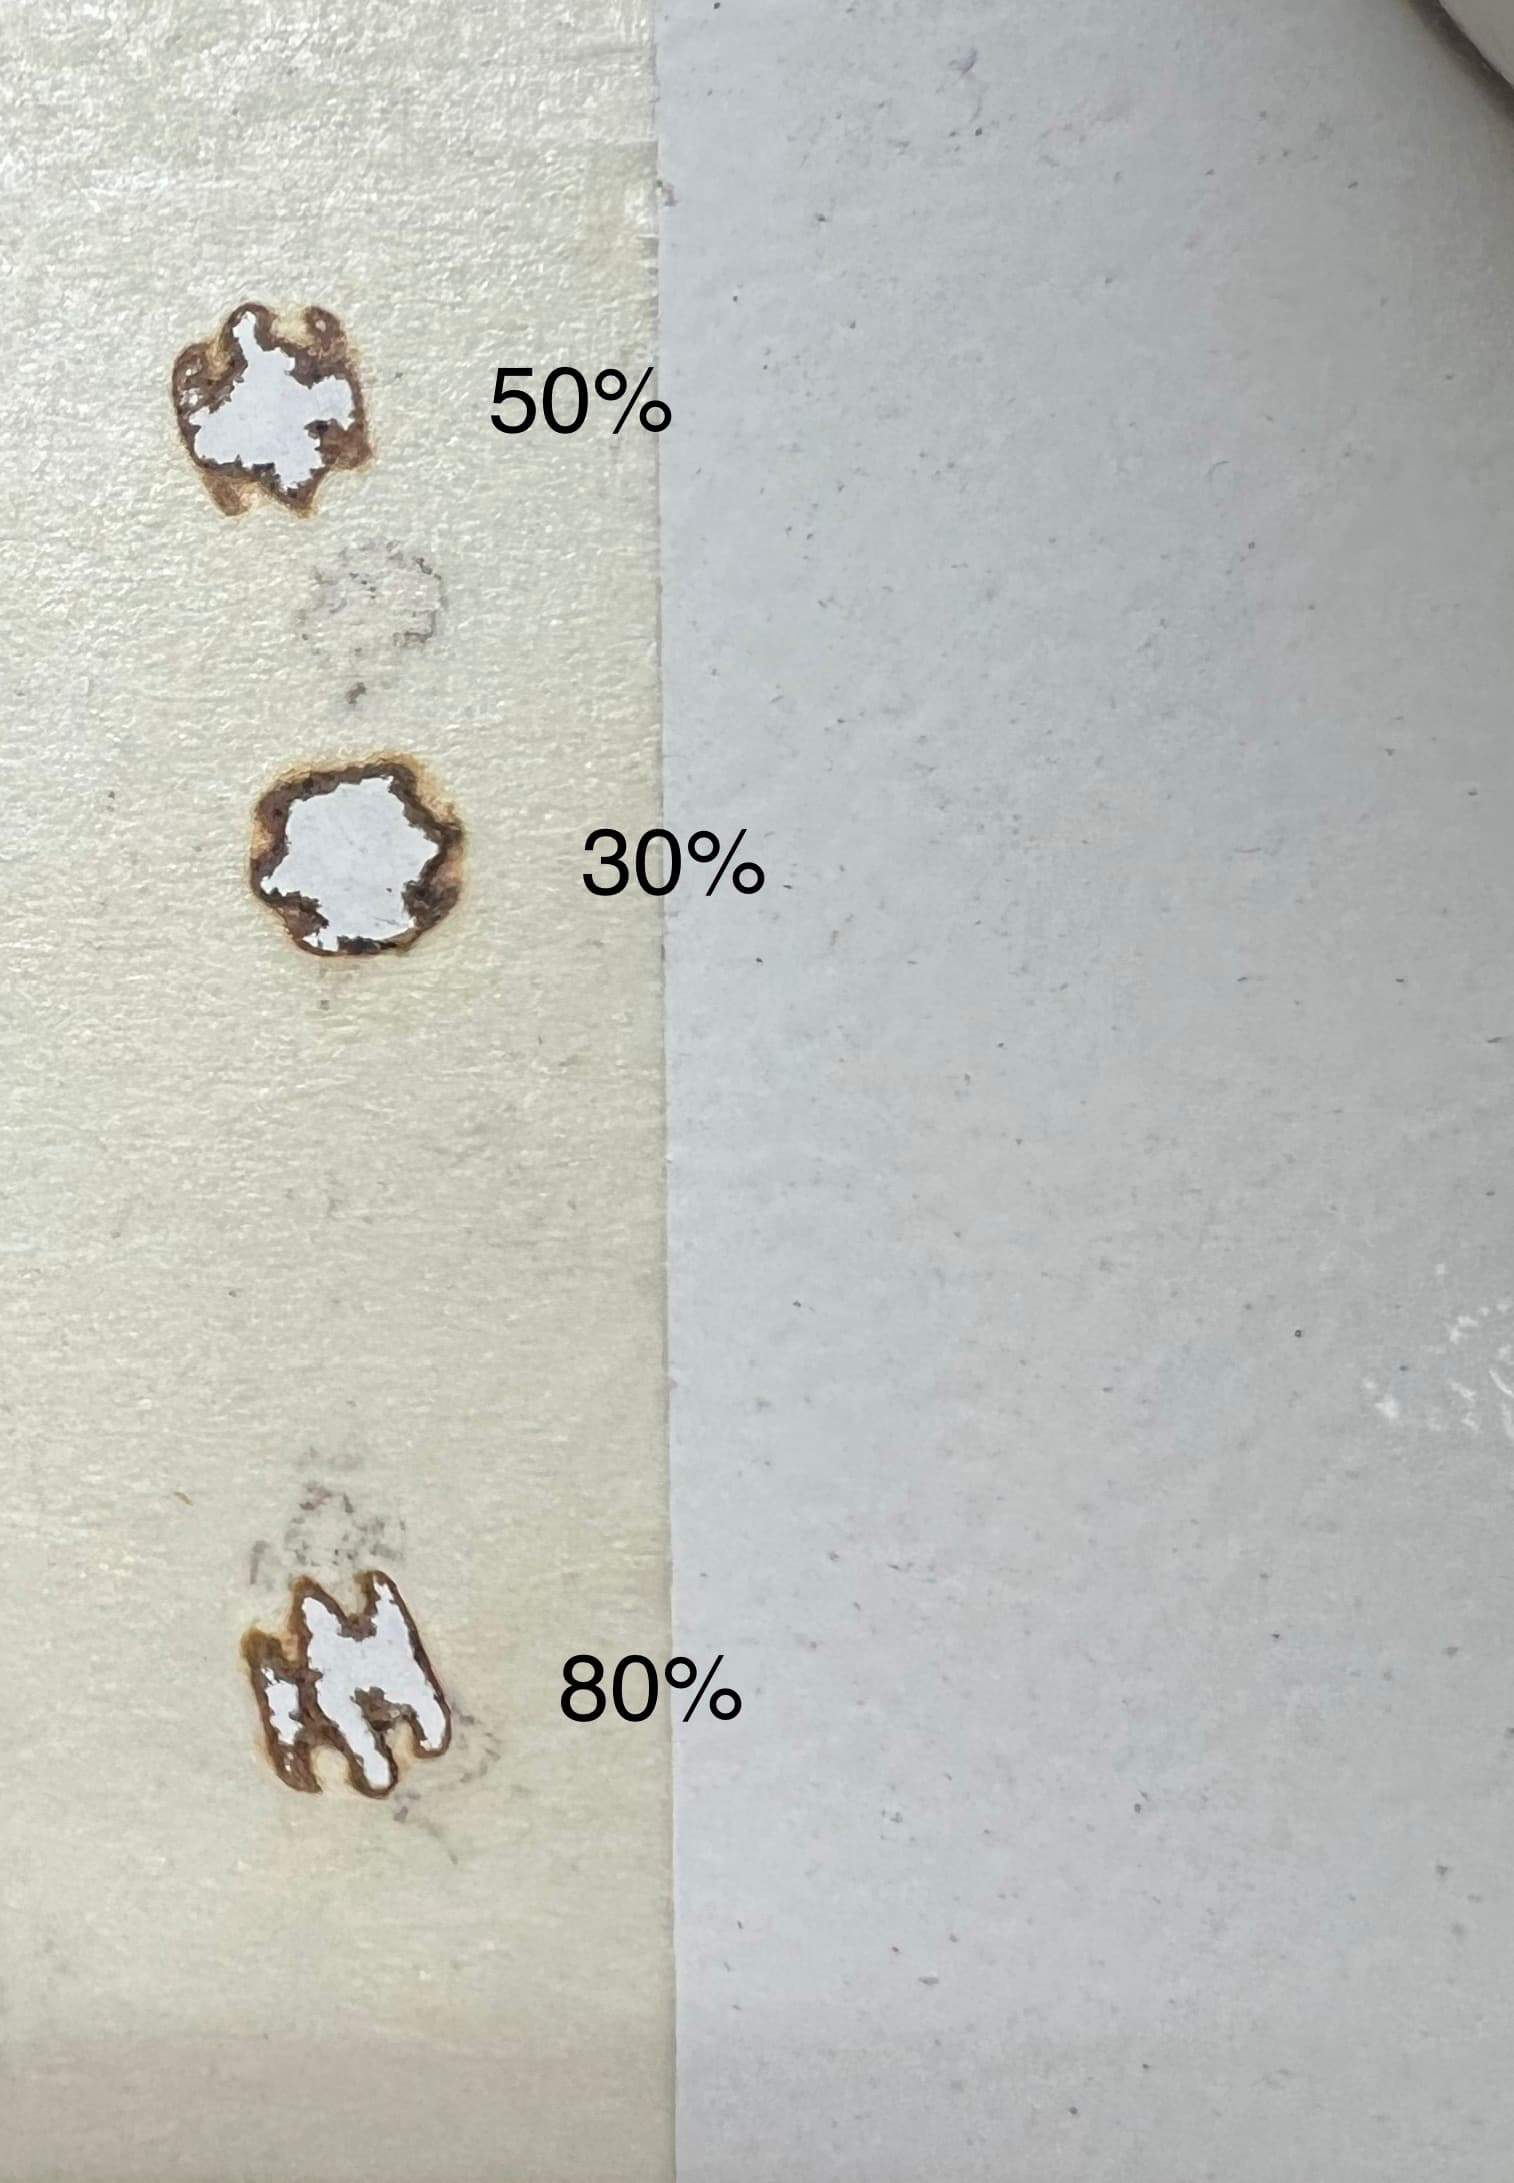
One aspect of this test and the pictured results is the missing duration. I’ve found that one can generate a huge hole in the tape if one holds the pulse button long enough.
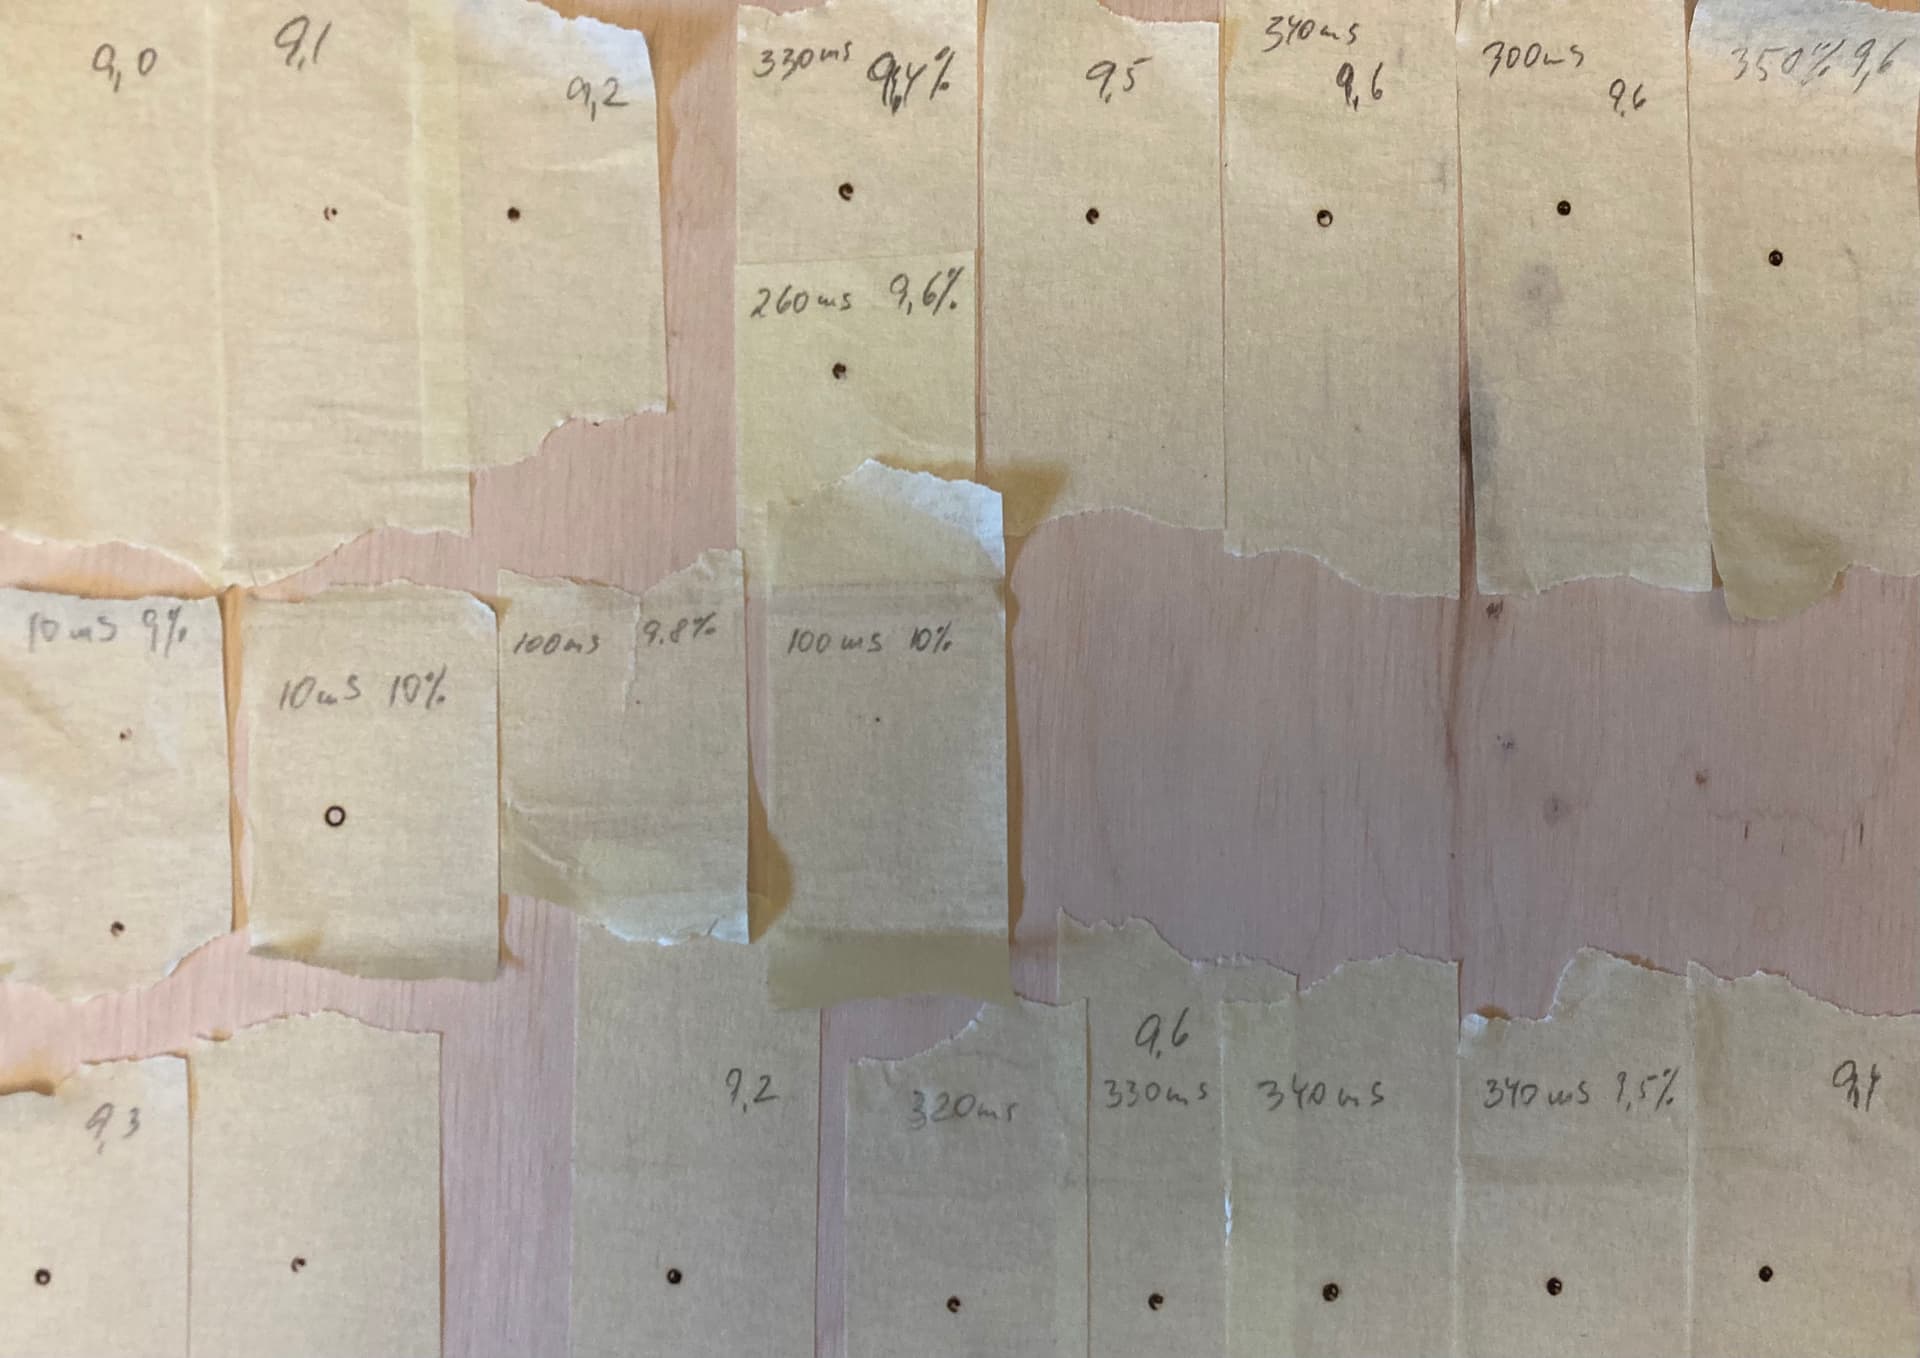
I do it a little differently. In the controller, under laser setting, I set the machine to pulse and determine the time, typically I use 250ms. Also in the controller I set power to 10%(2.5-3mA), It gives me a nice little point with Ø2 - 2.5mm
(my machine’s visible minimum power is at 9.8% and 100ms)
1sec and 50% power, sounds like a very high value to me.
Hi guys I’m new to this so not sure if I am hitting up the right section lol
But hope all is well.
Me on the other hand I’m having an absolute nightmare lol.
I set my ortur laser master 2 up and had a few aligning issues but now am fully in tune with that aspect.
My current issue is my first burns beam was obviously smaller than my current one as all my lines are coming out ridiculously thick. I have tried every speed adjustment fire is on 0.01% and I have also changed spindle settings to set default from controller.
There is nothing on YouTube or lightburn from Google about how to change beam size and I am really on the verge of giving up.
If somebody has any information please let me know
Kee x