Hello, I have an Atomstack X20 Pro and would like to cut out this drawing.
But although the preview looks perfect, the laser-cut product is a disaster. It looks like this:
What am I doing wrong?
Hello, I have an Atomstack X20 Pro and would like to cut out this drawing.
But although the preview looks perfect, the laser-cut product is a disaster. It looks like this:
What am I doing wrong?
Have you considered the possibility that your laser lenses and rails might need cleaning in the near future? It’s always a good idea to stay ahead of any potential issues. You might be surprised at how dirty they can get, even if you clean them regularly. Just something to keep in mind.
It looks like there are holes and such in the drawing…
Can you explain what you did or your workflow?
Can you post the .lbrn2 file for us to examine? You can drag and drop it on the editor reply window or use the upload icon ![]() in the tool bar.
in the tool bar.
I’m skeptical about the preview looking perfect …
![]()
It’s reversed left-to-right, which suggests the Device Origin is set incorrectly:
The janky results suggest the machine has serious backlash, which will require carefully examining all the mechanical bits from the motor shafts to the laser head to find all of the loose pieces that introduce slop into the motions.
Although this guide is written for Sculpfun machines, it will give you a good idea of what to look for:
And a recent troubleshooting session will suggest what’s required to go from “disaster” to “great”:
Good hunting!
3 posts were split to a new topic: ATOMSTACK X20 PRO - Axis calibration
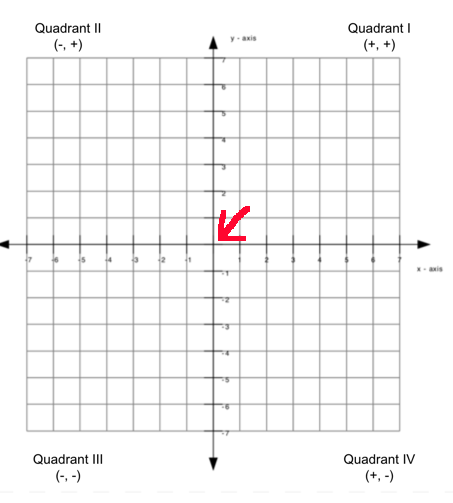
The coordinate system has 4 quadrants. The origin tells the machine which quadrant it is operating within. This is the home position for any machine…
However, if it homes in the back/left it’s using quadrant IV
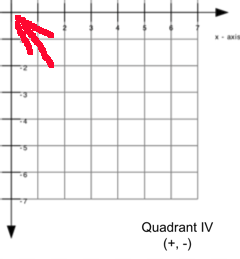
Front/left - quadrant I
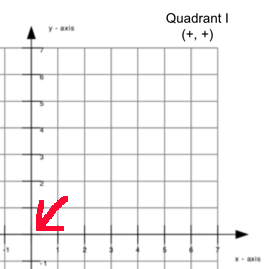
If this is incorrect in the software, the graphics or art is mirrored across the axes.
Make sense?
![]()
Is that where you have the origin set in the Device Settings?
![]()
Hi Jack. Here is the file
Vorlage Weihnachtskarte.lbrn2 (315,6 KB)
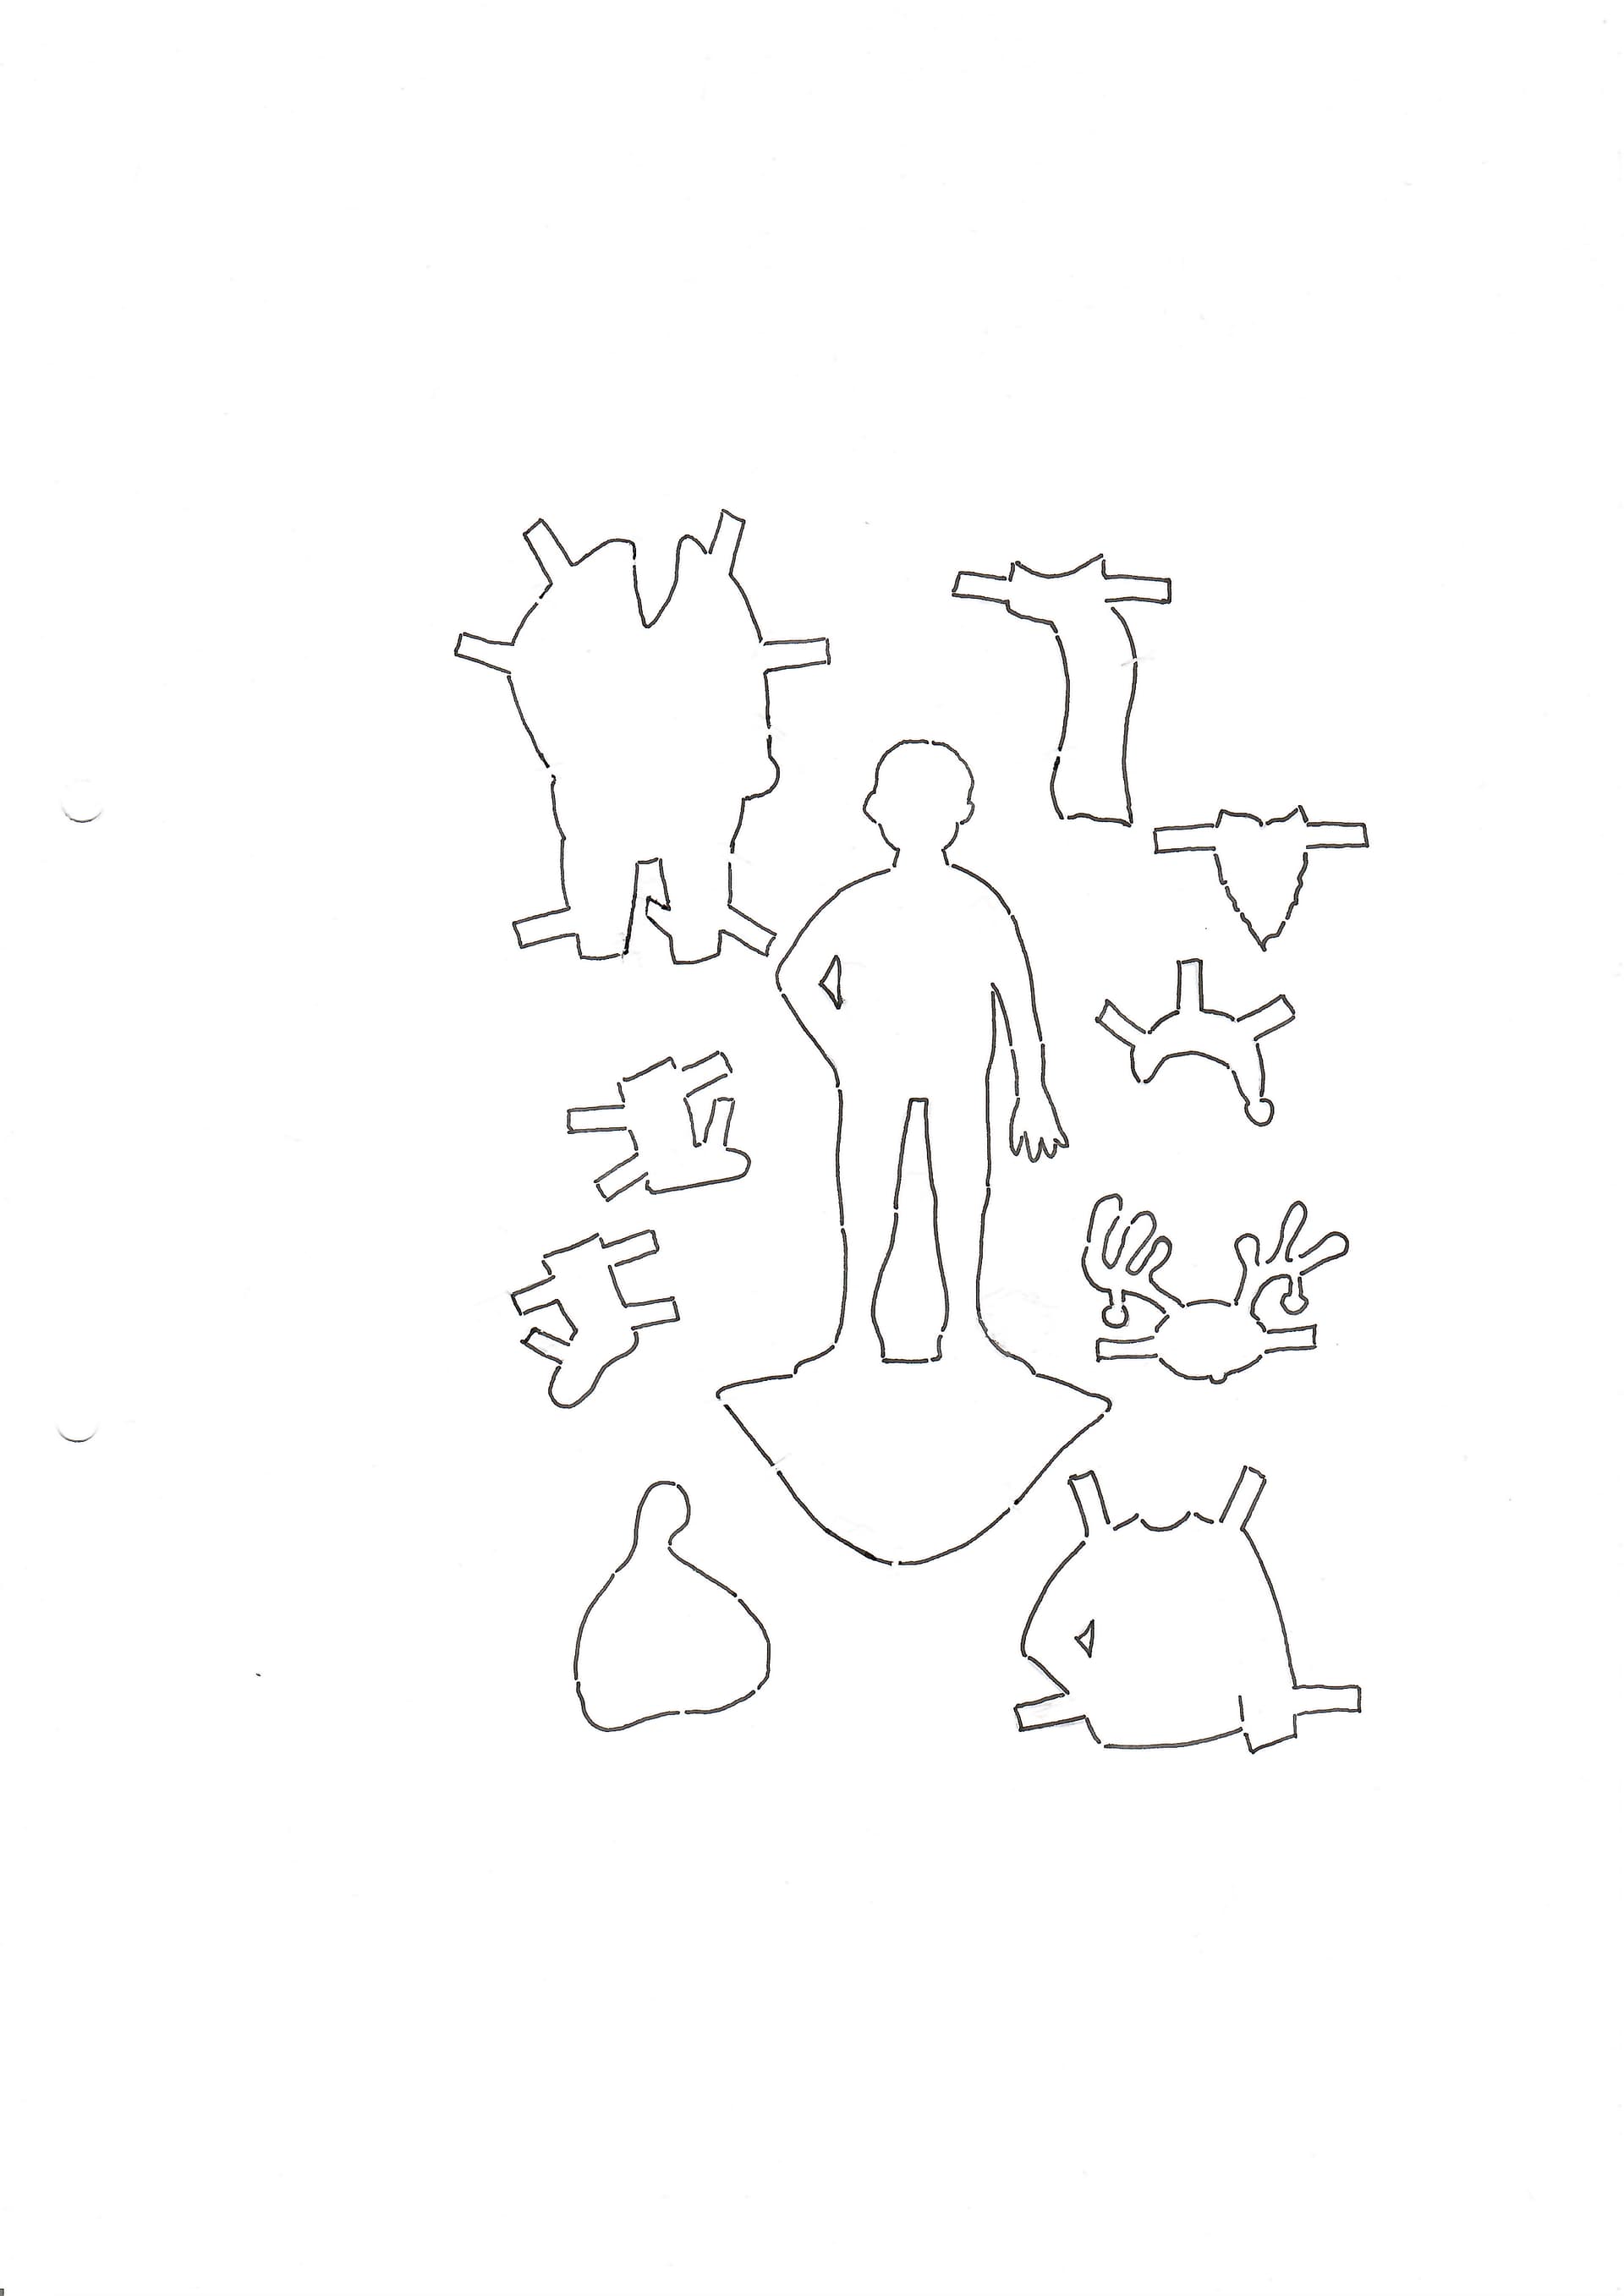
My workflow: I scanned a self-created drawing and then uploaded it to Lightburn. First I opened the template as a png format in Lightburn, traced the image and then lasered it. But the result was very unsatisfactory. Then I vectorized a line drawing (autotrace) using Inkscape and uploaded this file to Lightburn. But the result was the same. ![]()
Inkscape Path > Trace Bitmap using Centerline tracing (autotrace) results in the following for me:

“Centerline tracing” is the important part. It converts your drawing’s line into a single line that you can then edit in Lightburn. The resulting file will still need processing (delete some stray dots/short lines, close some shapes, as they are not closed in your original input image)
Do you have the original raw png file you can post or was I looking at it?
If you want to cut something out it has to have a continuous path for the laser (tool) to follow… This looks full of intentionally broken lines…
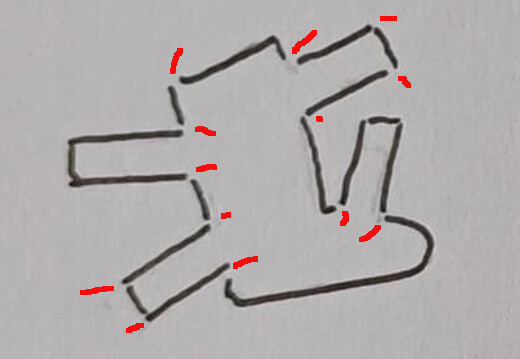
Anything like this will require you to manually fix or modify to make it possible to cut out. If you cut just the lines, it still wouldn’t fall out of the material. I’m not saying you can’t work with this, but it would be much more simple if whomever drew it actually connected the lines during it’s creation.
In the Feature Suggestions, we can vote to request Lightburn add a feature…
![]()
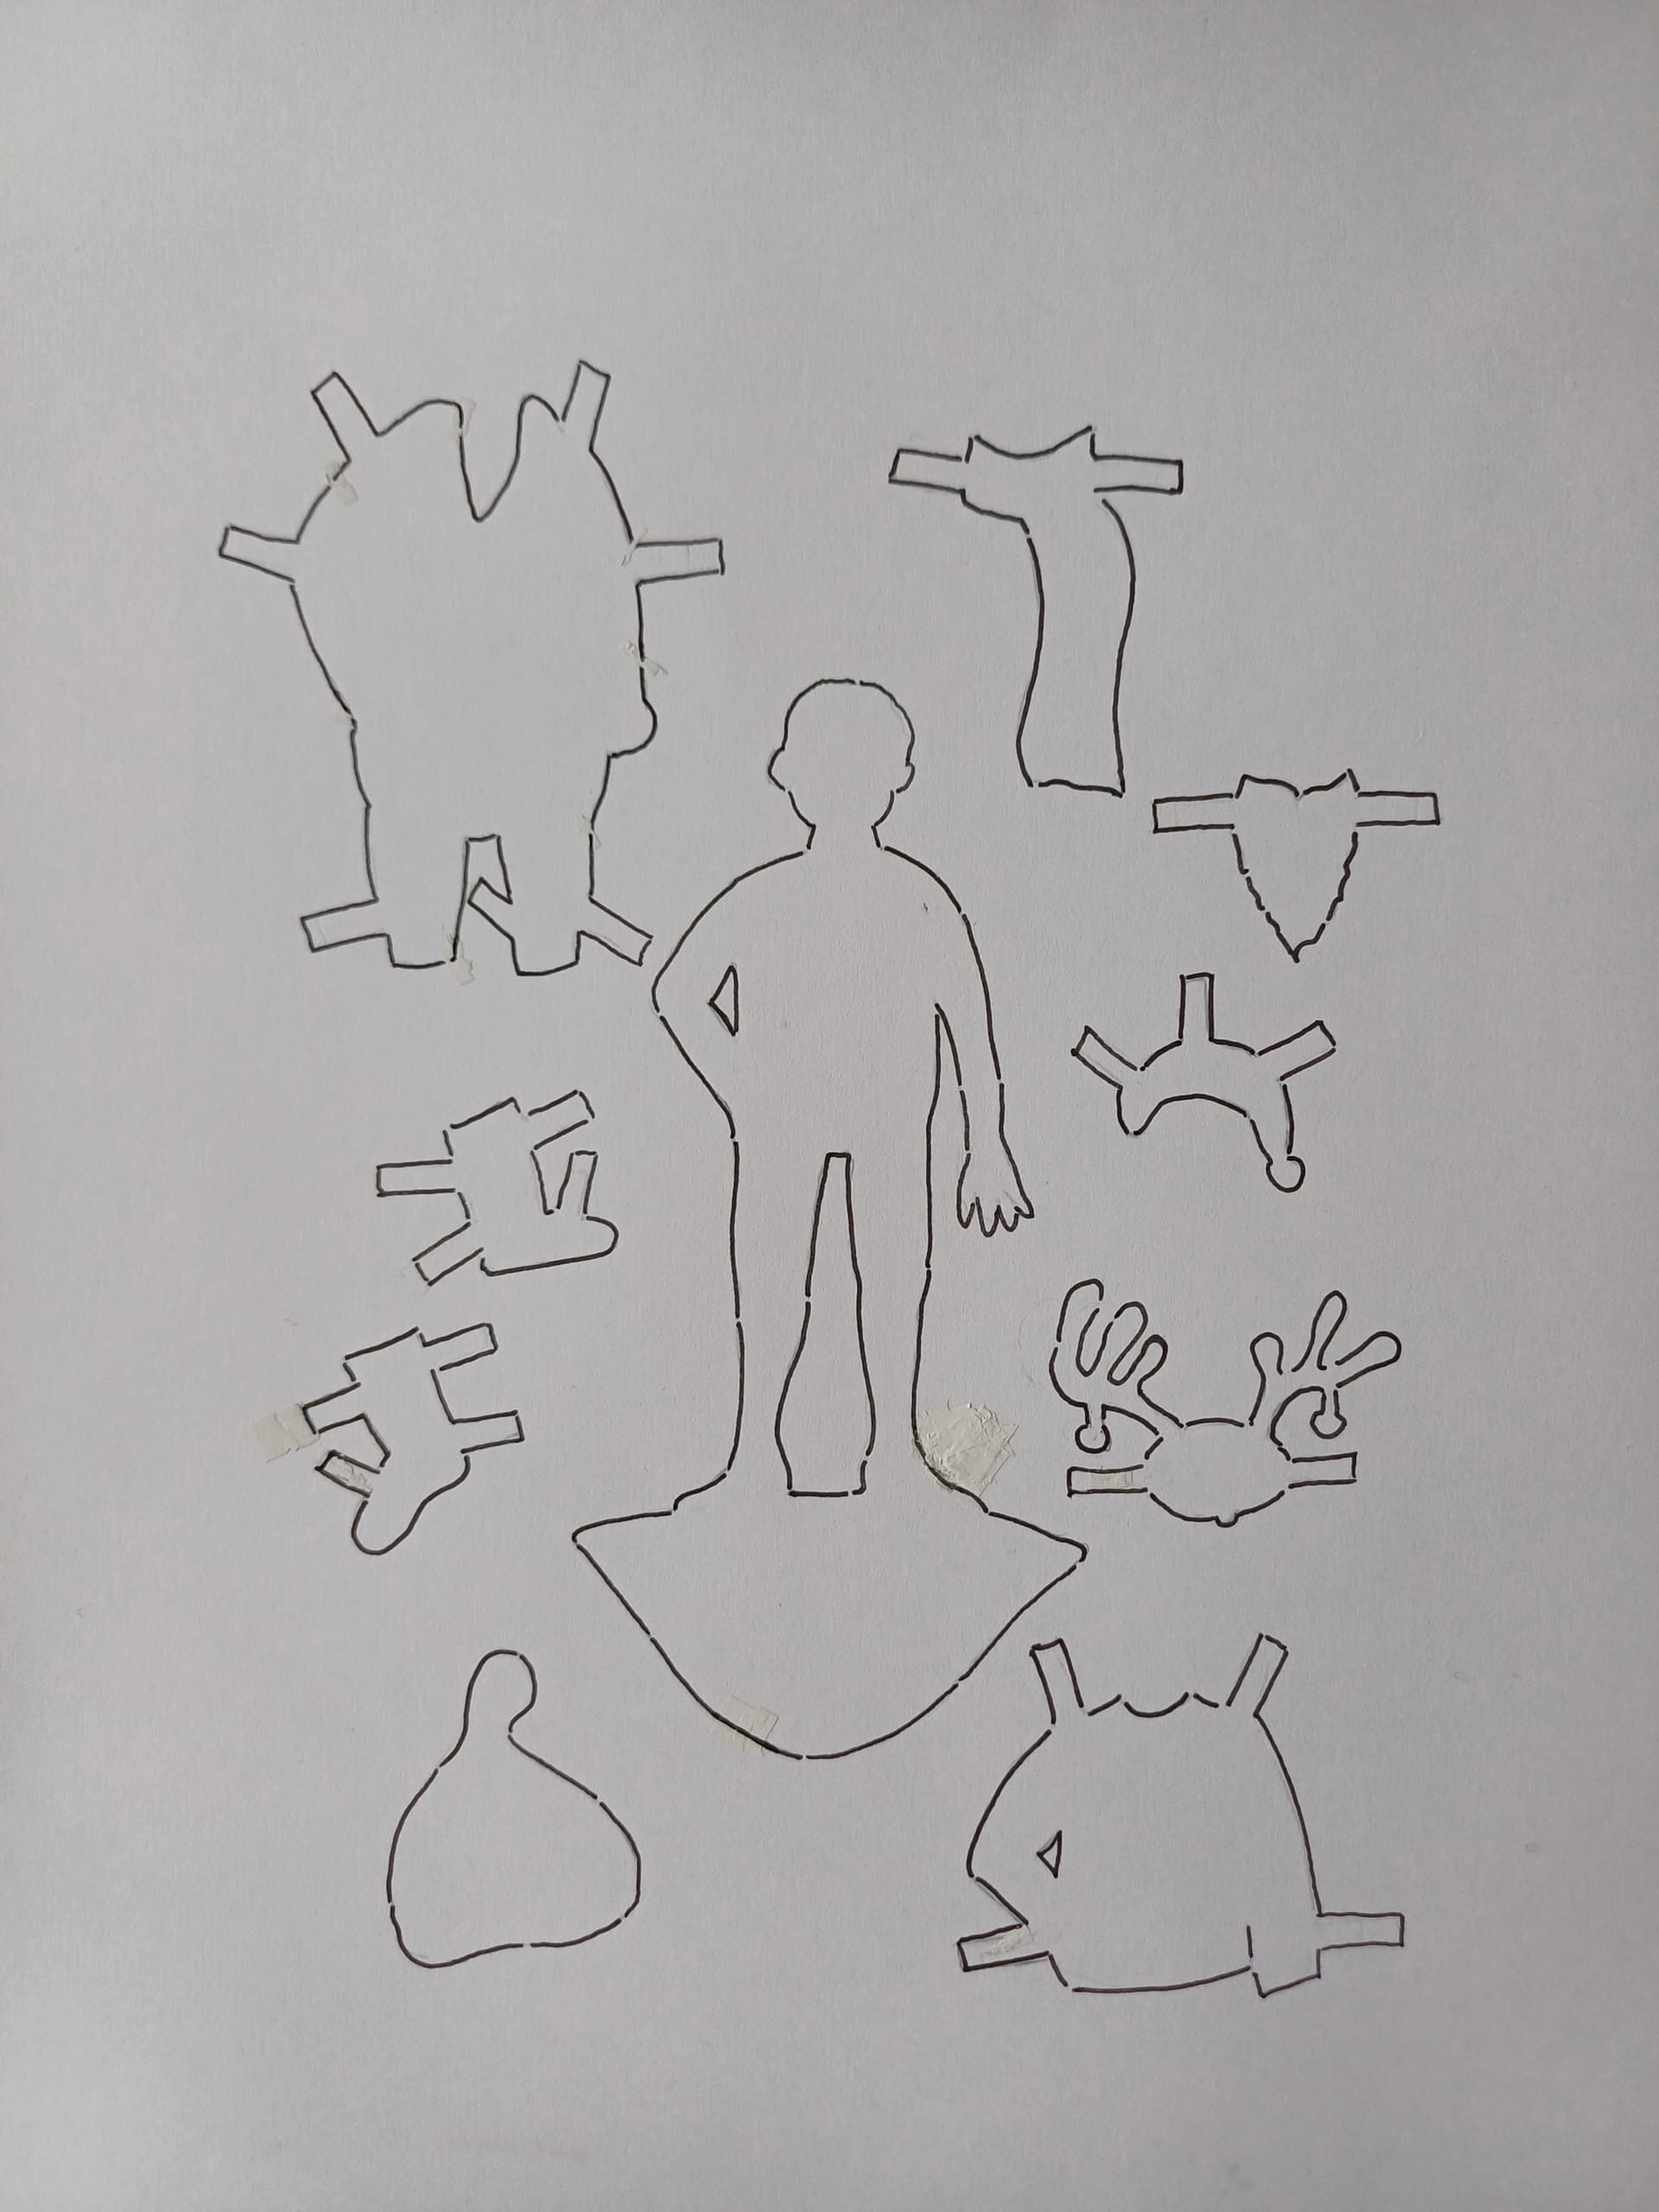
Hi Jack, the holes were indeed intentional so that the figure wouldn’t fall off the page. I’ve now closed them, but that hasn’t changed the result. But what is strange is that when I select the “line” mode to cut out the figure, the lines are completely shifted as shown in the photo. However, if I select the “fill” mode, the result is just fine. (Just not cut out).
I am sending you the original raw png file you asked for:
Warm regards Angela
Thank you very much, I will try it out.
There is a tabs option in Lightburn to stop the parts from falling out.
Do you have the non hole original you could post?
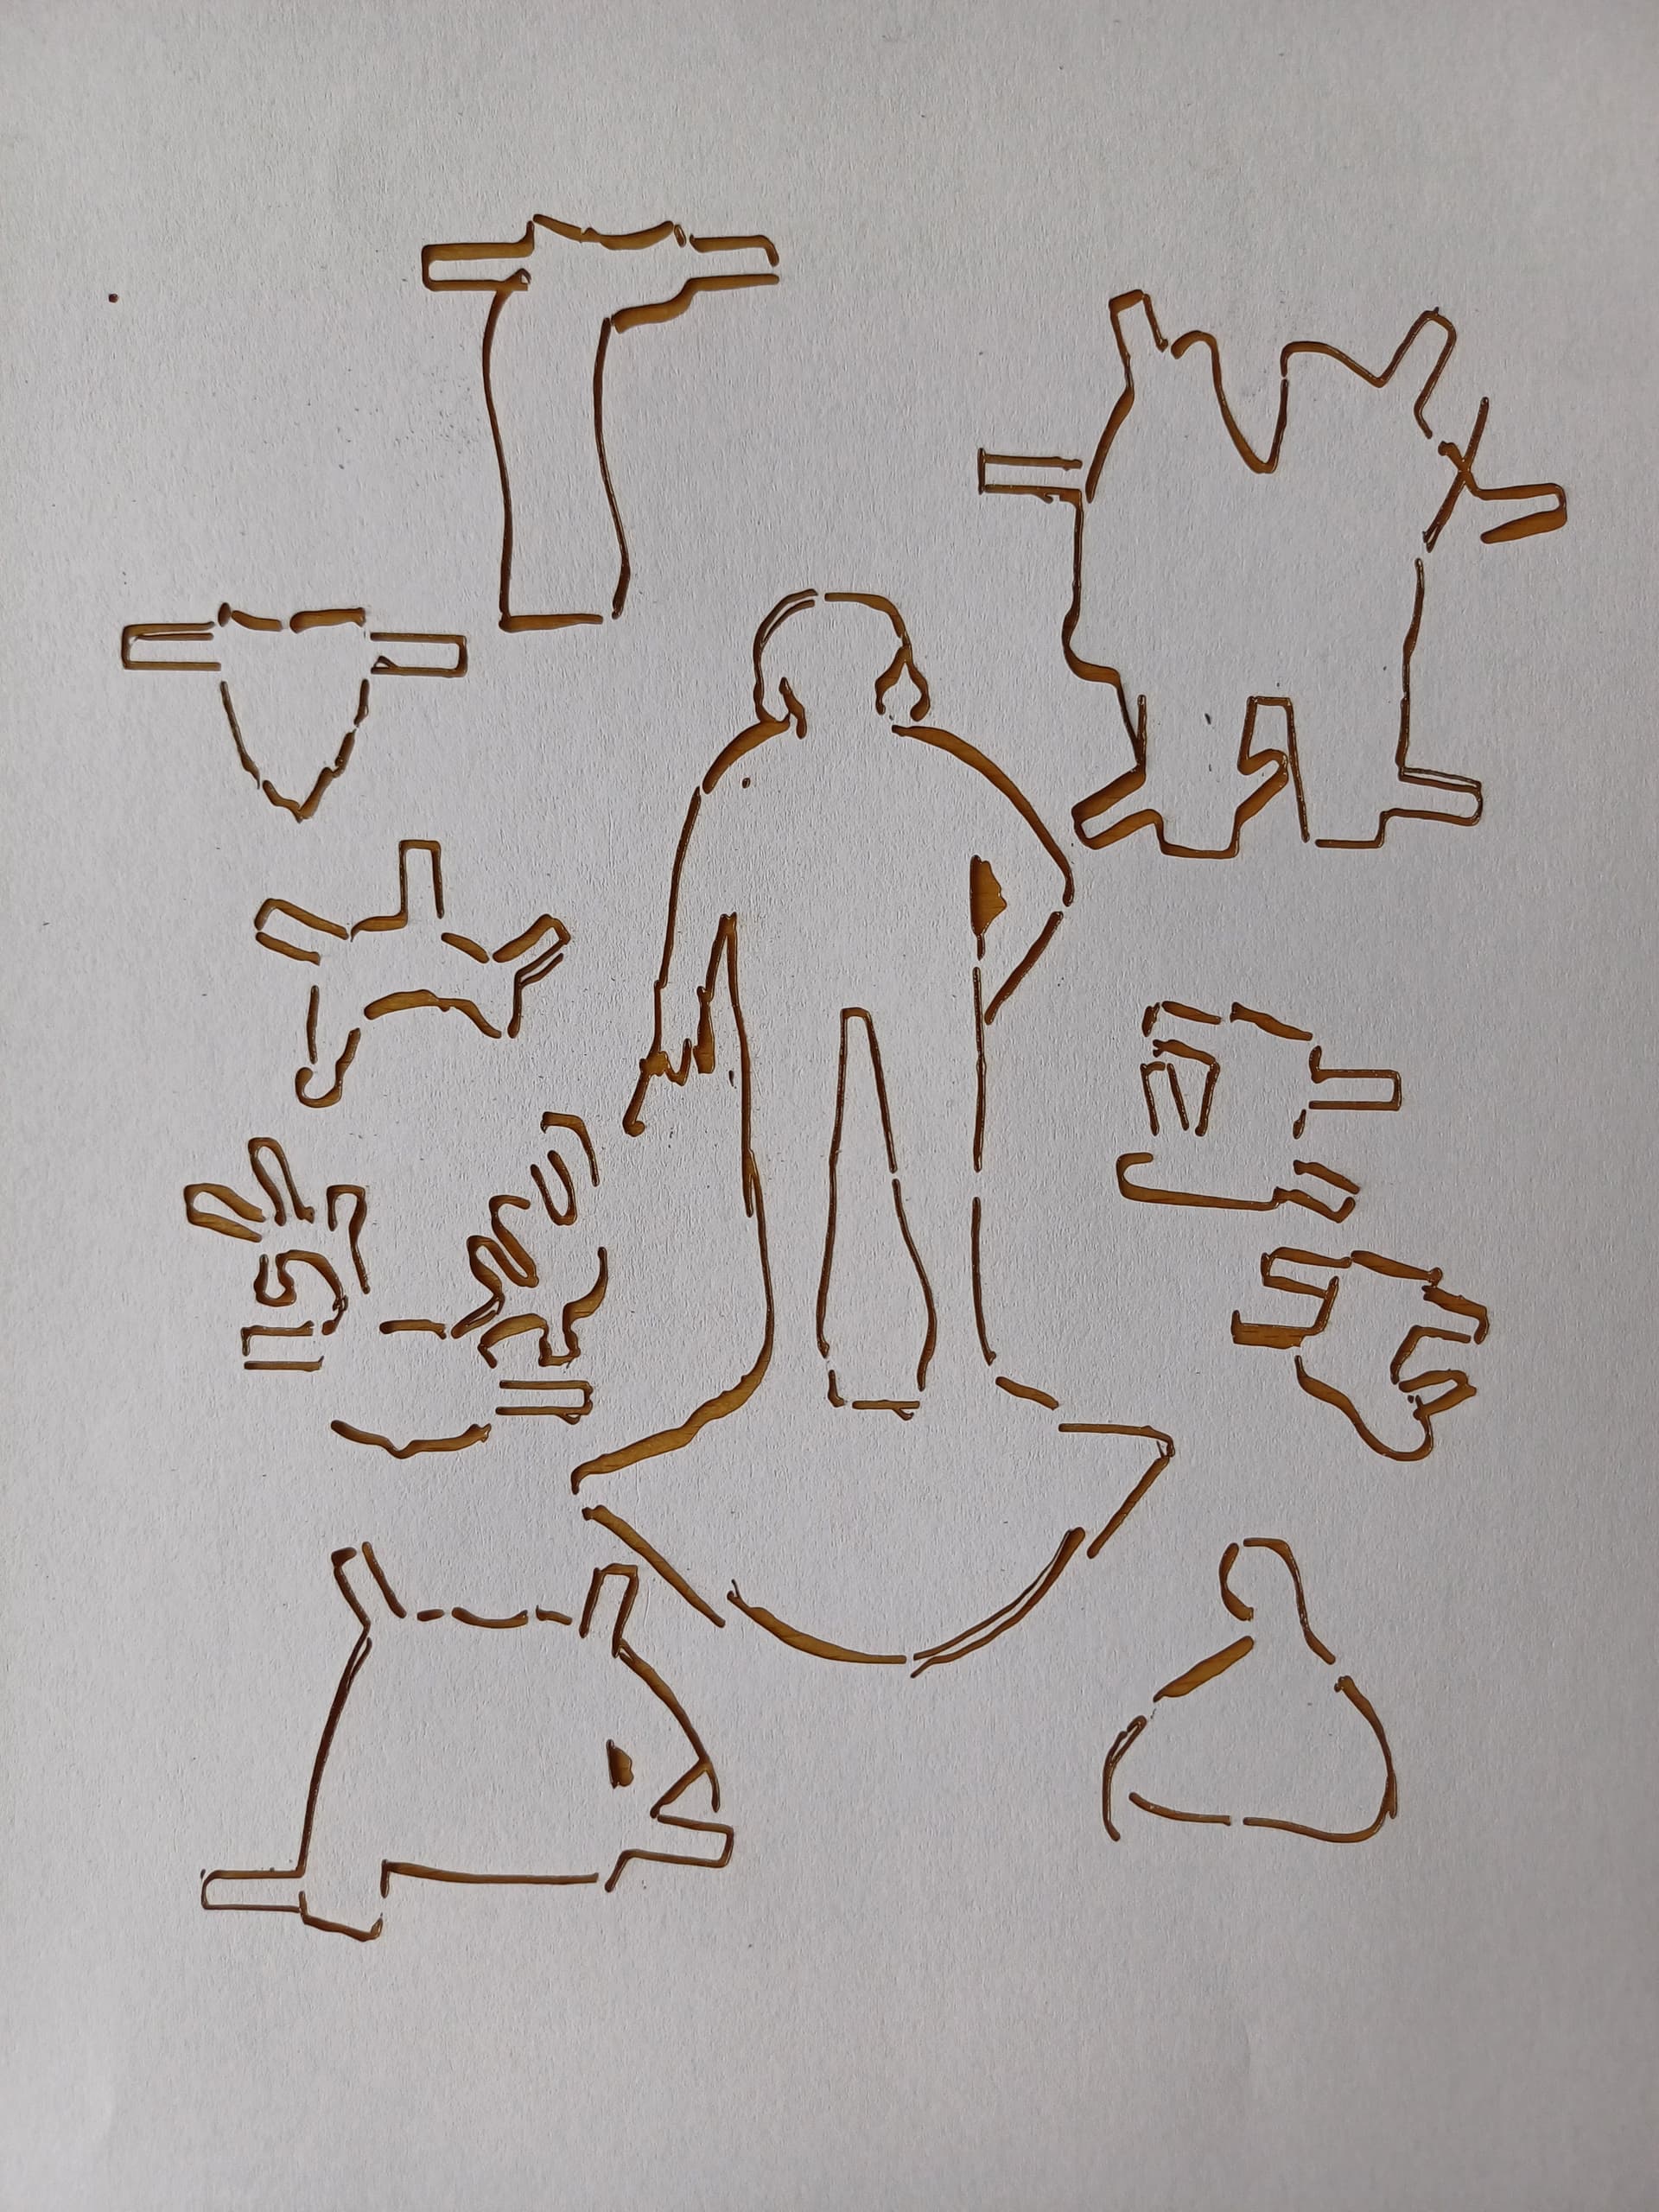
![]()
I didn’t know the option to stop the parts from failing out, that’s good to know. But do you think the holes are the problem?
Here is the non hole file:
Hi Angela,
use your new image (without the gaps) and follow what I have described here: Laser does not cut what it should - #10 by kschmit2
You will see that you still have to then manually clean up quite a few lines, as they are still not being interpreted as closed lines.
here’s a file with closed paths:
closed paths.lbrn2 (114,6 KB)
Fist step I used levels adjustments in Photoshop, then autotrace (centerline) as previously described, and ultimately manual fixes to the paths in Lightburn.
It would have been quicker to simply redraw your input file making sure it has no gaps and decent strokes that are not interpreted as gaps by the tracing function.
Thanks a lot. I will try it.
Where do I find the option to stop the parts from falling out?
It work’s ![]() Thanks a lot.
Thanks a lot.