Thanks, I will watch the video and see if I can learn something new.
1 Like
It was enlightening to me…
I started out like many, in the ‘old’ days, adjusting contrast in Photoshop, running unsharpmask a bit, going into Corel Photopaint and using Jervis or Streinberg dithers, and converting pictures to a bitmap, the lasering.
Yes, it works, but you needed to have a fair idea of processes, and outcomes, substrates and resolutions.
Nowdays there are so many options for photo cheating (auto-prepping), but for interest’s sake I ran a file yesterday, which was on satin silver Alumamark (which is a pain in itself to get right). It is a grave plaque for the wife of a friend.
I took the photo, and using Paint Shop Pro, and the 2 scripts from the Dude group, they looked good. I also used Photograv which I’ve been happy with in the past.
On screen, the wood script looked best. When I lasered all three, it was 2nd best, and the standard script was much better. Photograv was the worst.
It was interesting to see how the real finished image looked, compared with its screen rendition.
However i decided to try Lightburn, directly, and it was so much better than the others, the difference was amazing! In
each case, the pictures were at 224 ppi.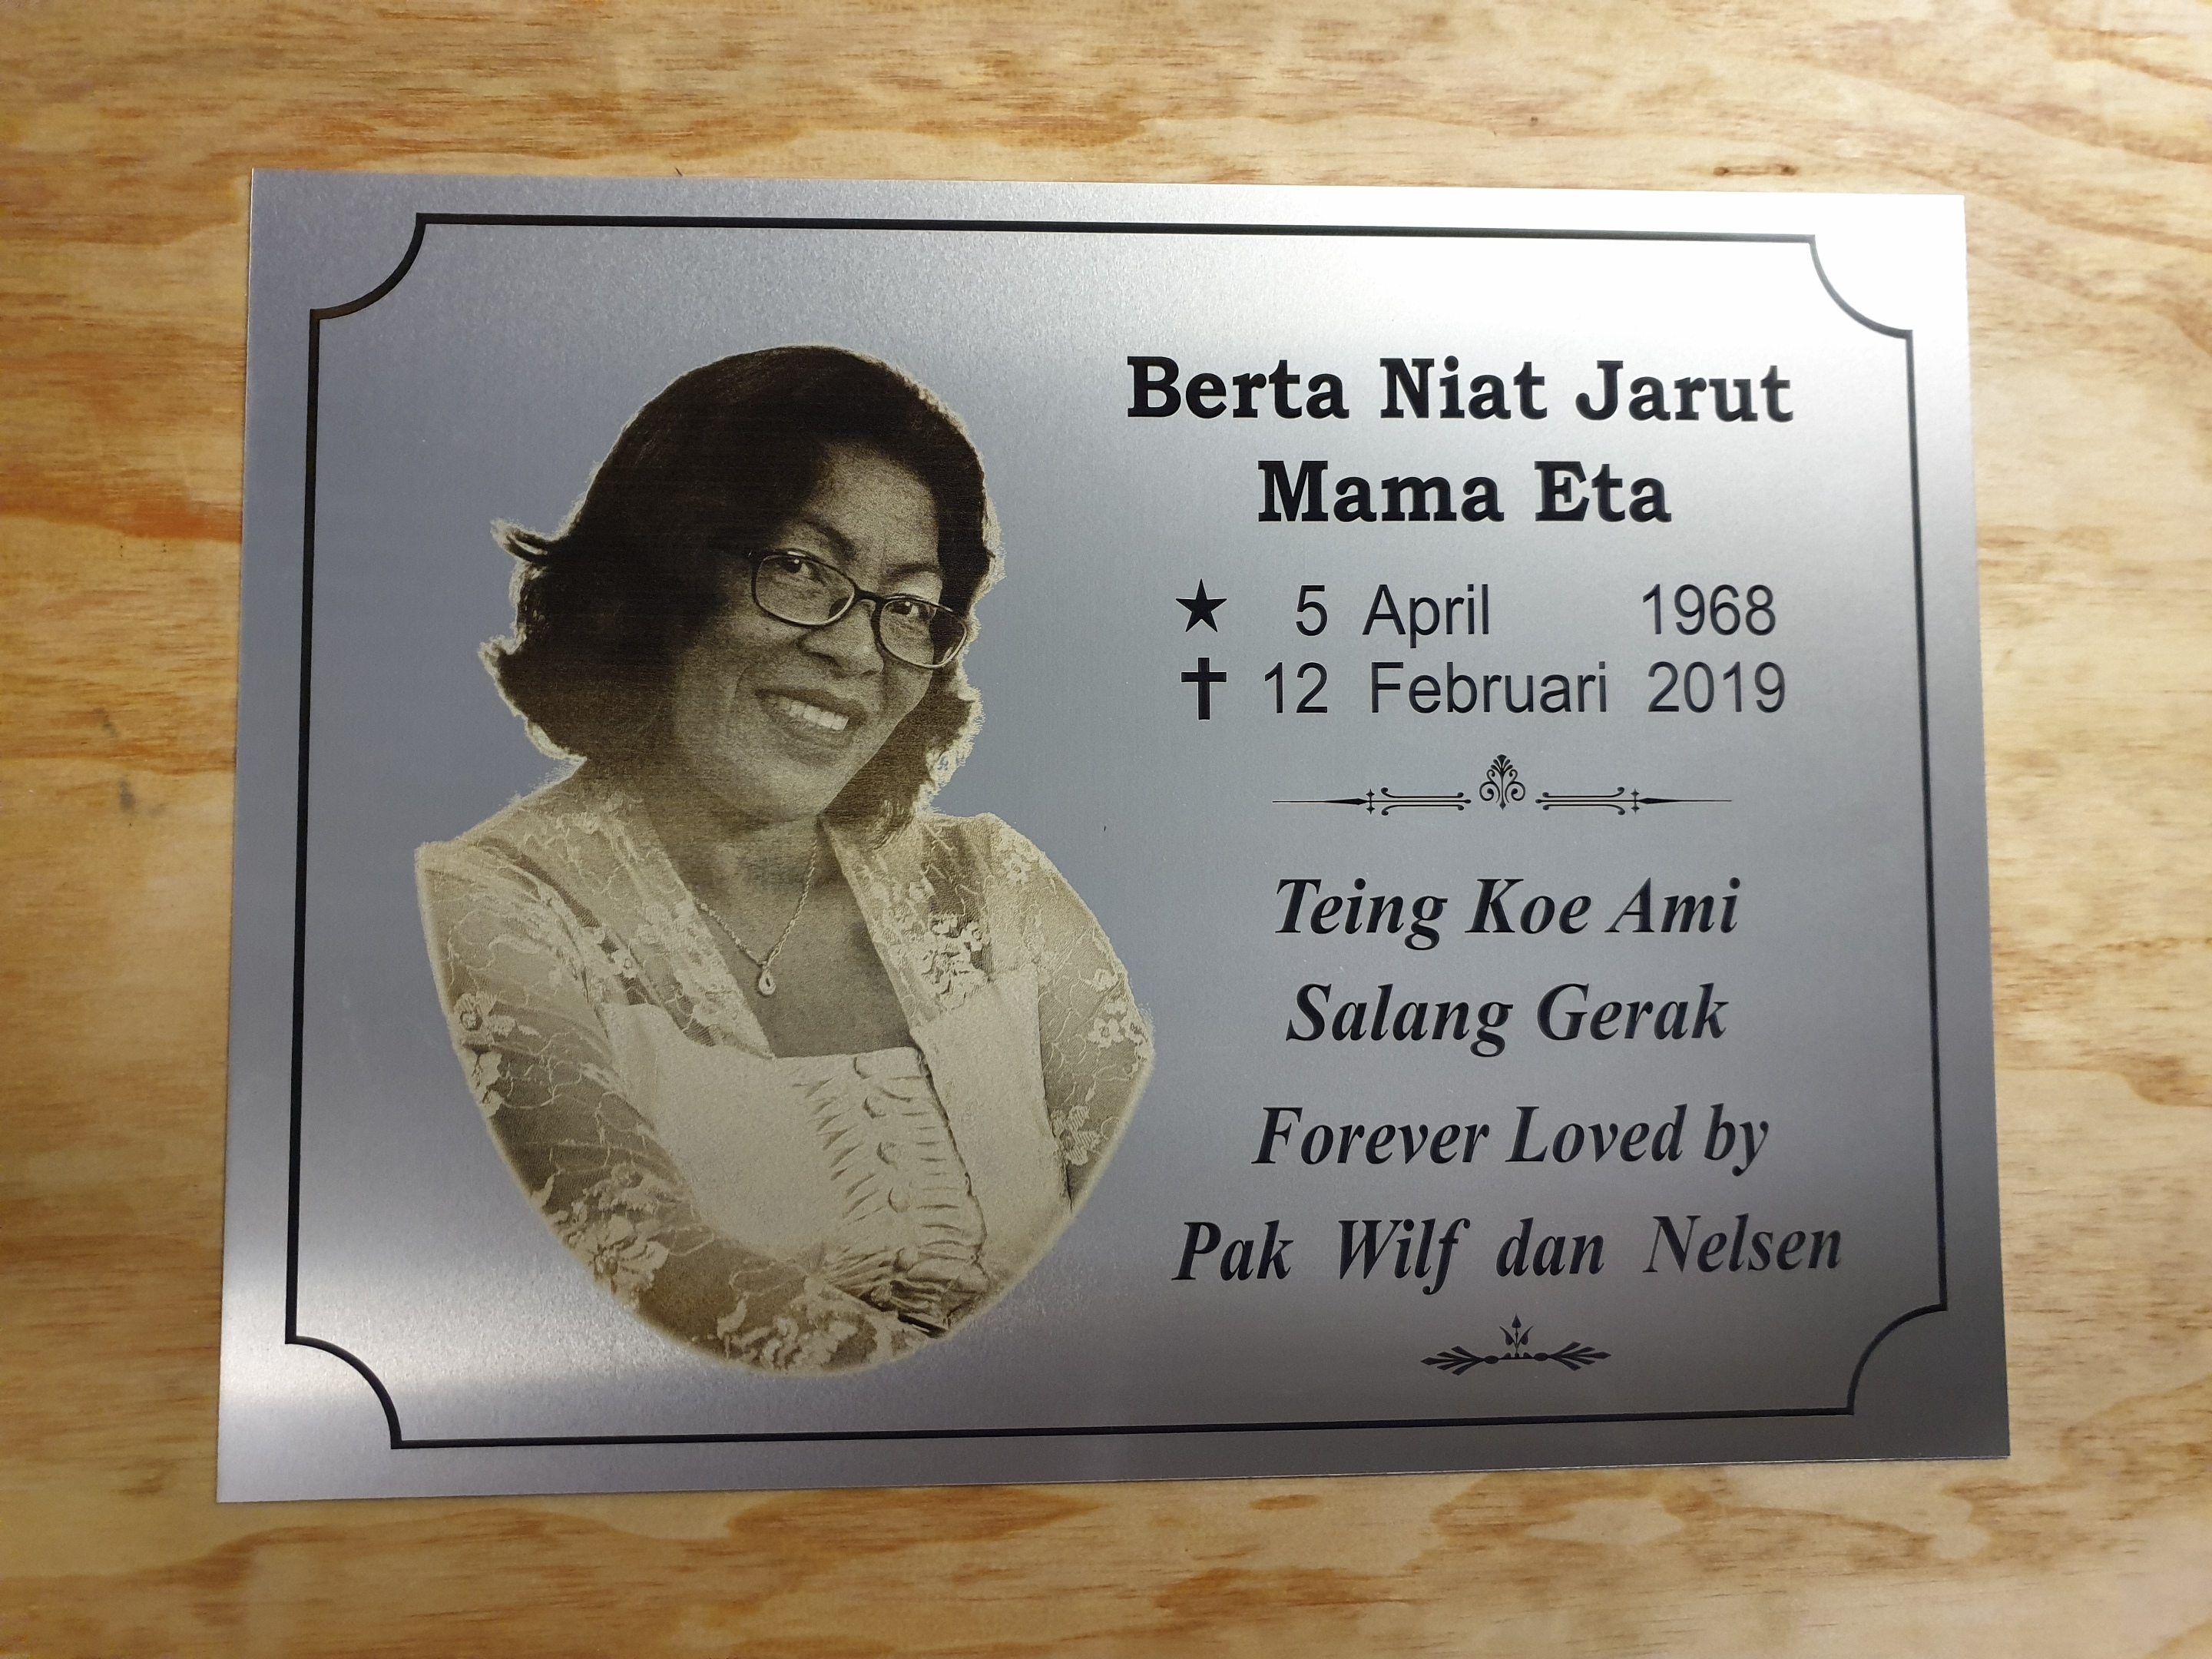
L’burn wins this hands-down!
P.S. I have Russ’ compound lens head, from Cloudray, but I diidn’t feel it was a great help, actually, for our machine.
5 Likes
That’s a great result, and a lovely memorial.
I knew this already, but when I say it no one believes me. ![]()
Kidding aside, make sure when using externally dithered files that you have ‘pass-through’ enabled, so LightBurn isn’t resampling or re-processing the dithered image, as that will cause artifacts. This is mentioned repeatedly in Sean’s group, so I’m assuming you have, but if I’m going to gloat I have to be sure I’ve earned it.
5 Likes
Hi Oz- thanks for the compliment. That plaque is 305 x 405mm
Yes, when I took the previously dithered BMPs, I lasered the test pieces through RDWorks.
Then I tested it in Lightburn, I imported the full colour unscripted jpg directly, and sending it via Jarvis dither from Lightburn at 224 ppi, which was the resolution of the original in each case.
The only thing I didnt try was Rodney Gould’s photoshop action on this job
I probably should for interest and comparison.
Getting the settings right for Alumamark satin silver, on a Chinese laser, is difficult and touchy.
I actually used our little ULS to do the writing and border, but it could not do the picture because of memory issues (insufficient RAM, 4 meg!) .
The 2 Chinese lasers could not achieve the blackness in the text that the M300 did. Thsts weird, but I have lasered about 24 sheets of it and I accept that. I’ve spent hours and hours trying to tune them on the CO2 machines, and got it to either too much power (light grey, unrecoverable text) or insufficient power (light brown), and barely 0.5% power difference between the two. Also minor water temperature changes of 1 degree Celsius, vary the result on that substrate.
It sounds a bit ridiculous, but it’s what I found!
P.S. thanks very much for the latest upgrade, and adding 2 tube control to it.
However, somehow in a previous upgrade, my comprehensive material and settings library vanished… weird. I thought I’d saved a backup elsewhere on the PC, but I must have been dreaming!
LightBurn does not overwrite the Library when upgrading. Maybe it is still on your PC, in a folder you were not expecting. Do a search for the library extension of of .CLB (If you have already done this I apologize)
1 Like
I’ll check again- I did do a search- but offhand thought the library was a .lib as it is in many other programs.
However, when I opened it up after the upgrade, it had only one item in it- a cardboard setting from 6 weeks ago. I’d not used it since then as I had work needing the 2nd tube, and at that stage L’b was a 1-tube program.
Somehow the library vanished between the previous 2 upgrades.
I did find a backup that included only that cardboard one- not the one with all the thicknesses of acrylic, to cut and to engrave, plus card, and timber, and alumamark.
Maybe it was still somehow my fault… but I’ll recheck.
(PS I cut card as letter-spacing templates for signage installation- that file was an 8x4 ft piece)
1 Like
LightBurn defaults to .CLB as the extension (cut library). It often defaults to “My Documents” so check there, and there was an issue early on where it ended up with no extension at all, so look in that folder for files without extensions.
1 Like
Thanks, Oz,
I found where it was in My Docs, but it was only the version with just one entry.
The comprehensive one has vanished- but I won’t hold you or Lightburn to blame!
I did run the Gold script in Photoshop, today, on the same file, then laser it, bypass mode, though Lightburn. The result was not bad- but not as good as the direct Photo>Lightburn Jervis dither>laser.
1 Like
Okay everybody, some stupendous photo engraves here. I’ve attempted to engrave only one image with poor results. I know it takes time and practice to find your best settings, but I see terms such as dither and Jarvis and I know nothing of these. So is there a tutoria videol about photo engraving somewhere? I’m slightly experienced with my Chinese 80W CO2 laser (Rudia controller), but don’t really know where to begin regarding photo engraving.
Thank you
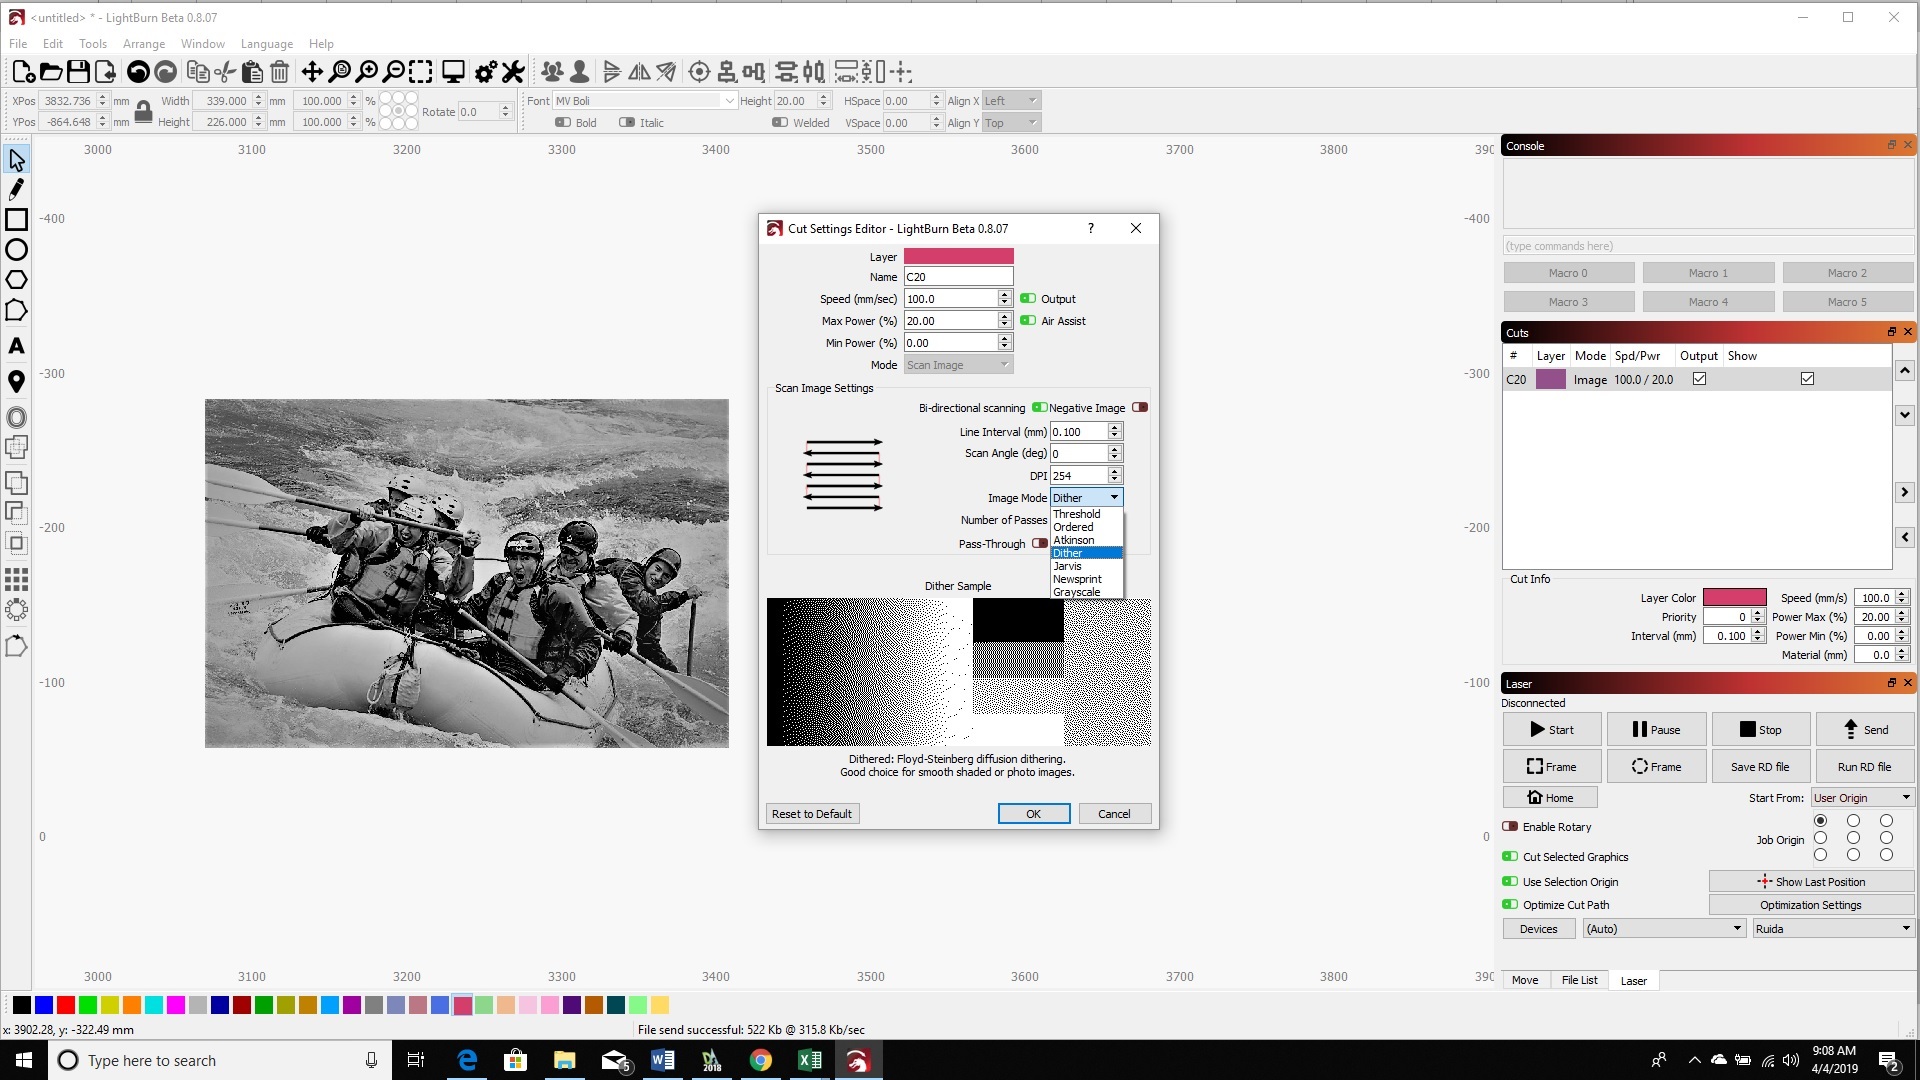
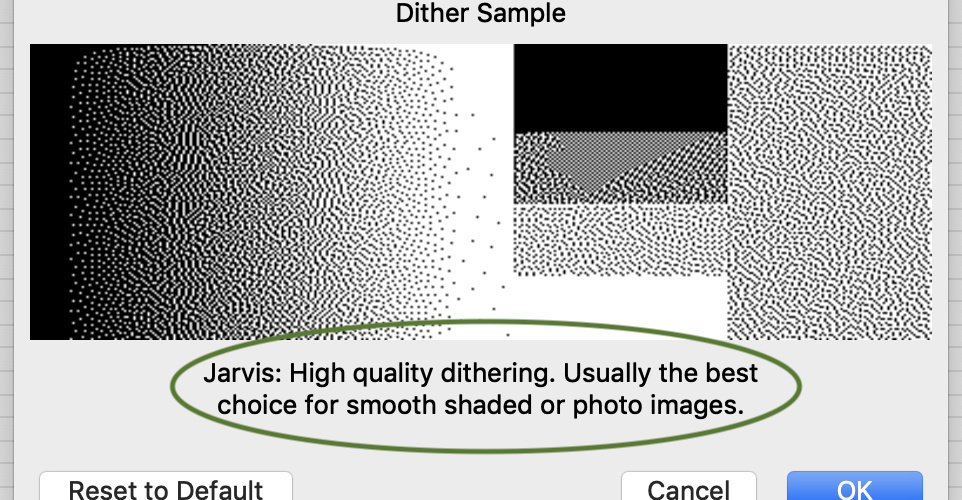
Jarvis and the others are just different methods for how the dots are distributed. As you choose different dither methods, you’ll see a brief description under the preview.
The important things are:
-
Dot size: With an 80w CO2, your smallest dot is going to be around 0.15mm or a little larger, though it depends on tube, mirror, and lens quality. Don’t try to engrave an image with an interval of 0.05mm because you’ll just bleed your dots together and lose the white areas between dots.
-
Material: different materials darken and vaporize differently. Wood has grain, and areas with dark grain tend to darken faster. Basswood and Alder tend to darken well, and have light grain. Birch is cheap, but doesn’t hold as much contrast. Pine is highly variable. Don’t use crap wood if you ultimately want to engrave on anodized aluminum, because the settings will be completely different.
-
Power: small differences in power can make a big difference in output, so run small test swatches to see what works.
-
Speed: PSU’s have a response time. If you go really fast, and make small dots, the PSU might not fire fast enough to actually fire the tube, so you’ll miss subtle shading. At high power/speed, material tends to vaporize before it darkens. Slow down, and use less power, to get better contrast. Defocusing a touch can help too.
3 Likes
Thank you so far. I’m sorry, but what preview are you talking about and what menu is it in? I’m embarrassed to ask because I am proficient in other areas of laser-cutting, but, I’m just lost here.
Thank you again.
Tim
Thank you Scott. I’m still not on the same page as you guys yet, but at least we’re getting somewhere.
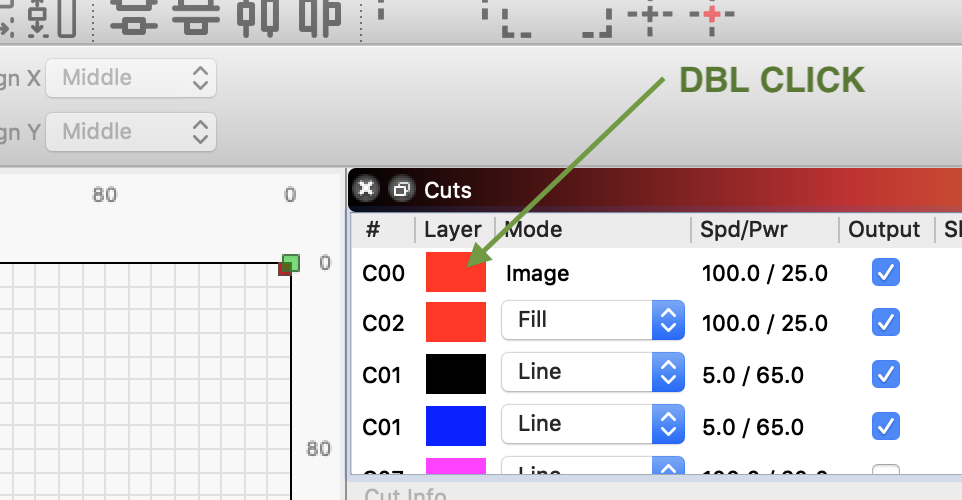
When I double-click on the layer in the Cuts list, the only type of cutting options in the Mode pulldown menu are Cut, Scan, and Scan+Cut. I’m familiar with this menu, but I don’t see where to get Dither Sample.
Sorry again.
Thank you.
Tim
You will find that on the layer that is created when you import an image… Cut and scan are for vector layers…
Ahhhhhhhhhhh. NOW I’m getting somewhere - thank you!
I had imported an image into a file I already had open. But when I clicked on one of the color layers to open up the menu, only Cut, Scan and Scan+Cut came up.
So after your previous response, I started a new file and imported only the image. Now when I open the Cut menu for the layer the images was imported in, yaaaay, I get the other menu setting with the Scan Image options.
Well, now at least I can begin learning some settings for scanning images.
Thanks!!!
Tim
1 Like