I’m using a Monport GA 100W MOPA Fiber Laser, and after some calibration I’ve run into an issue I can’t seem to fix.
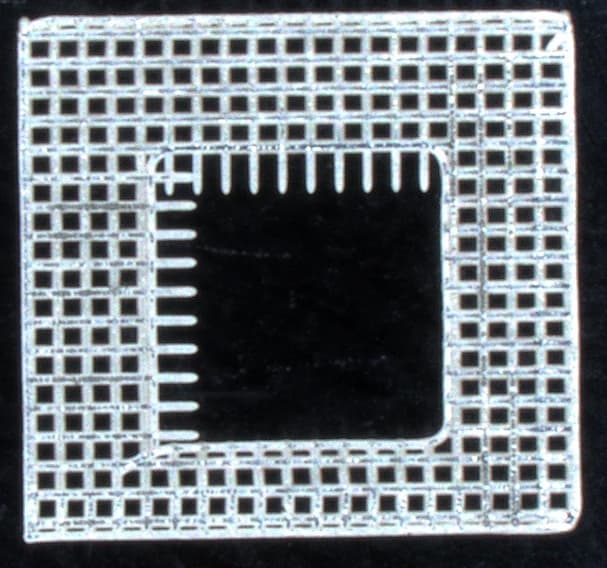
If the laser should turn off and on during a single movement, the laser does not turn off when it should, and it results in fill lines not ending when it should. I’ve attached an image for clarity.
As you can see when the laser does the fill operation from left to right and up to down, it doesn’t stop at the edge of the inner square. (My polygon TC also seems to be too low, but that’s not related.)
I’ve tried to mess around with laser delays, and jump delays, but nothing seems to influence this.
The test in the picture was engraved with 1000 mm/s speed on anodized aluminium.
My first thought was to change the Laser Off TC to a negative value, but that is not possible in Lightburn.
Hi,
Thanks for the reply!
No the manufacturer didn’t include a COR file, so I have to figure out the delays, since the default ones they use in the user manual are not optimal.
The engraver has a nameplate with the galvo and red dot calibration values (scale, offset, skew, bulge, trapezoid), and I’ve configured those already.
Also I followed the video, however he uses another software (not Lightburn) and he can set a negative value for Laser Off TC, which is not possible in Lightburn, so I’m kinda stuck on how I should proceed.
Sorry a screenshot of what exactly?
And no, there is no markcfg7 file, I even talked to the manufacturer, and they said they use a BSL motherboard, and I should just copy what’s on the nameplate and user manual, the latter containing the delays and timings. But those are general values, not finetuned.
If they don’t supply something like EZCad2 markcfg file, you’ll have to manually do it. That’s sad they don’t even give you a printout of the values. Wonder how they know it even works correctly?
Can you give us a screenshot of where you can not enter a negative value?
Laser Off TC cannot be a negative value. According to the EZCad manual, laser off TC does not allow negative values, so neither did @LightBurn when he wrote the code.
In the video, Alex is using EZCAD3 and I don’t know why EzCad3 offers negative values there. In this EZCAD3 manual, Laser Off TC also doesn’t support negative values. Someone asked in the comments how he is doing that and Alex hasn’t responded.
The Laser Off TC is the delay time of turning off the laser after a marking is finished. Think of this as the time it takes for the Galvos to reach the end of the line. This value can’t go negative because it would mean, the laser turns off before the galvos reached the end of the line. - Too high of a delay here appears as a burning mark at the end of a line.
Yes, I understand what it controls, but it seemed like the only logical solution to me based on what I experienced.
In the image I posted in my original post, the laser should turn off when it reaches the edge of the inner square, however it turns off later than it should, creating the overly long fill lines.
I still haven’t found a setting that could help with this issue, so any recommendations are welcome.