Few meet this requirement. I have the same desire, and now have 3 Sculpfun machines, s30 Pro, SF-A9, and iCube Pro Max, in that order. A plus is Melvin Isken’s ( @misken ) superb website dedicated to Sculpfun machines (https://diode-laser-wiki.com/).
It is better to build your own enclosure setup than use one ready-to-go. Most have no fan, or a lame one at best (greenhouse duct fans work great). You do not need to build a box using overkill like I did. PVC pipe and canvas sides would work too.
I recommend a 10w machine as the minimum. You say 3mm now, but…
The “cube” machines are difficult, but most rotaries use the same stepper motors as the axis drives. The only issue might be getting a working hookup cable.
Depends. My metal marking is done by using Cermark Ultra spray. Very expensive, but it works like a charm. You can also buy an optional IR module ($$$) that will mark metals directly.
Suggestion: Don’t take my word for it. Search the forum for the various machines and read about the reported issues before you spend the money.
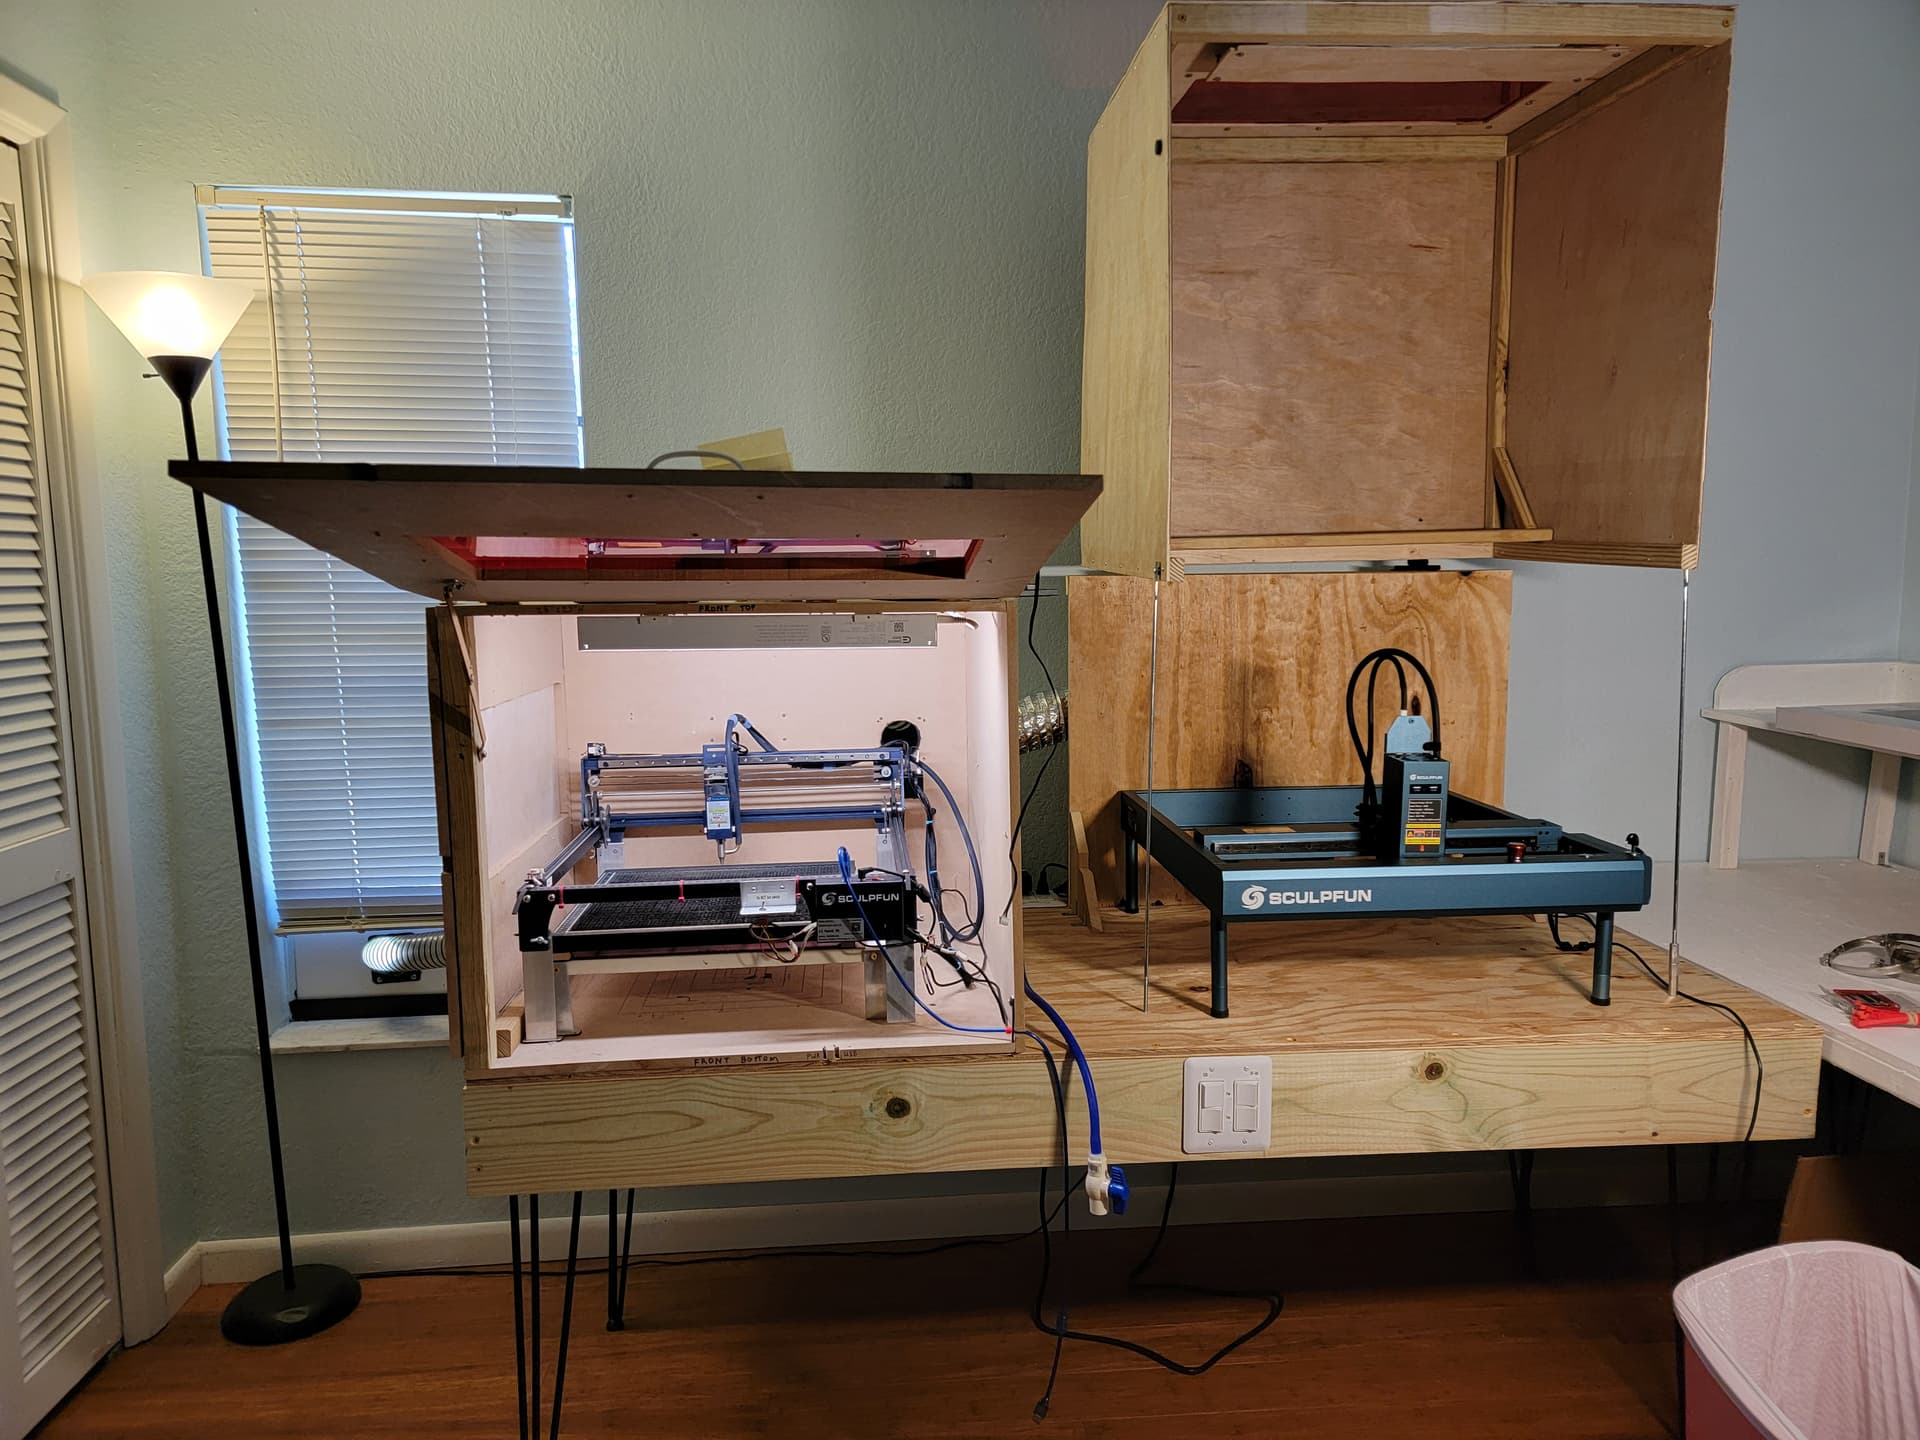
In the image, left is the S30 and right is the SF-A9 set up for longer-than workspace use (the S30 sits on a riser).
Your wish is the same as the rest of us… However none of those options presently exist.
Once setup, they are relatively simple to keep operational.
If you can see through it, a visible light laser won’t mark it directly or cut it. Your best bet is a co2 and the most dependable and least maintenance would likely be an RF excited co2.
You can mark glass, coated mugs, wood, but not metals without some type of coating that bonds to the metal.
You didn’t mention how deep your pockets are…
Anything mechanical will wear and need maintenance. The optical path of most tube co2 is usually via three mirrors, so those need to be clean and aligned. Optical alignment is relatively easy once you do it a few hundred times, so you’ll get used to it.
I have upgraded my machine with a lot of goodies created by Russ Sadler… If I knew then what I know now I would have purchased the Russ Spec machine by Cloudray. It has all his standard upgrades and then some.
Unless you’re up to doing maintenance on these yourself, buy an expensive one that service comes as part of the deal and to your door… It’s next to impossible to find a laser tech if you don’t want to pay the big bucks.
There are also UV which I have no experience with and they claim the work on everything…
Got a wecreat 40w with the IR head a few months ago and seriously regretting it.
Thought about going co2, but still kind of like diode and being able to change the heads out so I don’t have to have multiple machines.
Think if I could find a solid diode with an easy to change IR head for when I want to do metal I’d be happy. Just tired of the jankiness of the wecreat and not having 100% Lightburn compatibility. Yesterday I sent my 8th equipment replacement request with their support since September because the dang thing is so cheaply made.
Imagine once the warranty expires I won’t have it around much longer and just trying to think of a future replacement and what kind of cash I’m going to need to drop.
I just included a link to the Thunder bolt webpage. The thumbnail that’s posted was pulled in automatically by the forum here. They obviously have something incorrect in their Meta Data or something that pulled the thumbnail. But, you are correct, the Thunder Bolt machines are co2 lasers.
Their 30w/10w MK2 XW with the IR head seems perfect for me.
Their machines and support are spoken of very highly. Actually 100% Lightburn compatibility. Fixed bed so 0,0 is always in the exact same space. Rotary attachment with fixed positioning that appears to be right under the camera for the best accuracy. Can’t really ask for anything else.
As soon as I can recoup the money I wasted on the Wecreat I’m going to place an order.
I have been impressed with my ThunderLaser Nova 24 (approaching 1 year). It has worked well for cutting and engraving. The enclosure and included exhaust fan work as one would expect. Technical support is top notched here in the USA.
100% Lightburn compatible…
Cheers!
If/when I get to the point I’m ready to get a CO2 that’s the company I would go with. I’ve heard a lot of good things about them. I’m just not there yet. Diode still does everything I want and they’re in my price range. Lol
I have a MK2 Roly LaserMatic (30W) and it is a very good machine. Things I have had to change:
I replaced the supplied exhaust fan with a higher volume one (180CFM).
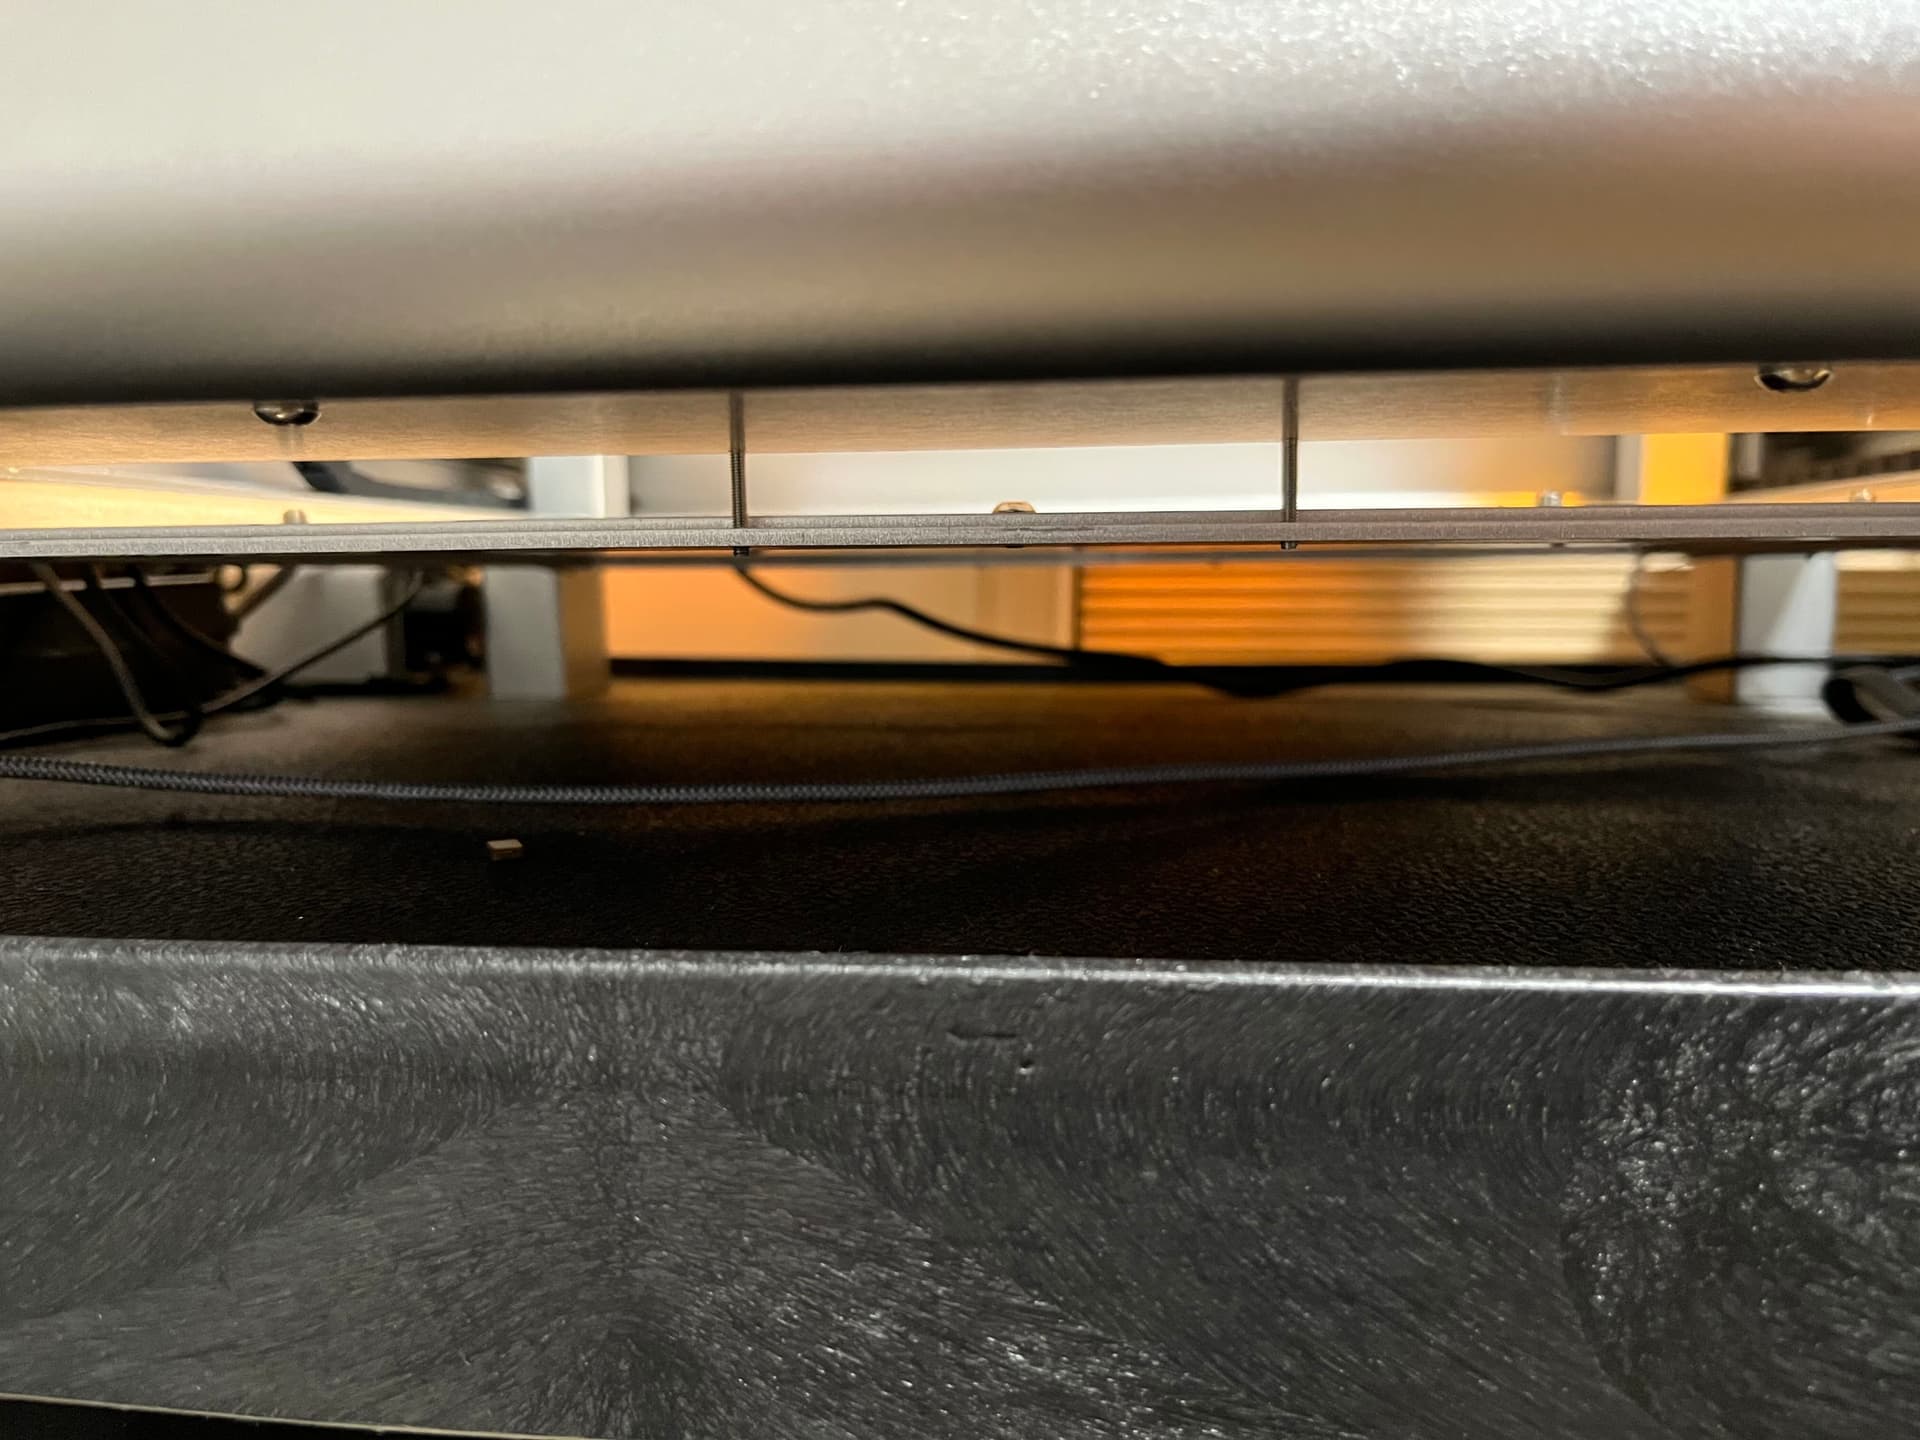
I put a spacer around three sides of the drop-down table at the bottom and sealed up the vent at the handle.
These two minor modifications dramatically improve the flow of the smoke produced in cutting so it doesn’t roll upwards (and this into the laser head’s fan). I also added a Z-shaped piece of aluminum to block any light from being able to be seen in front of the opening at the front of the drop-down table. Now, I don’t see any smoke in the upper half of the machine.
Even without the modifications, I am really impressed with this laser and the support is absolutely fantastic. I’ve had discussions with the team about my modifications and I think they are going to incorporate some of my ideas in the next model.
I’ve got an external exhaust on my current laser. I’ve only got about 12” of gap to get to the window I vent out of, so going to try the factory one first and if it’s not enough, pull the factory out and hookup the external.
Would you mind posting pictures of the spacers you used in case I need to do something similar? Without seeing one in person I can’t really picture what you mean.
I’ll see about getting some pictures this weekend.
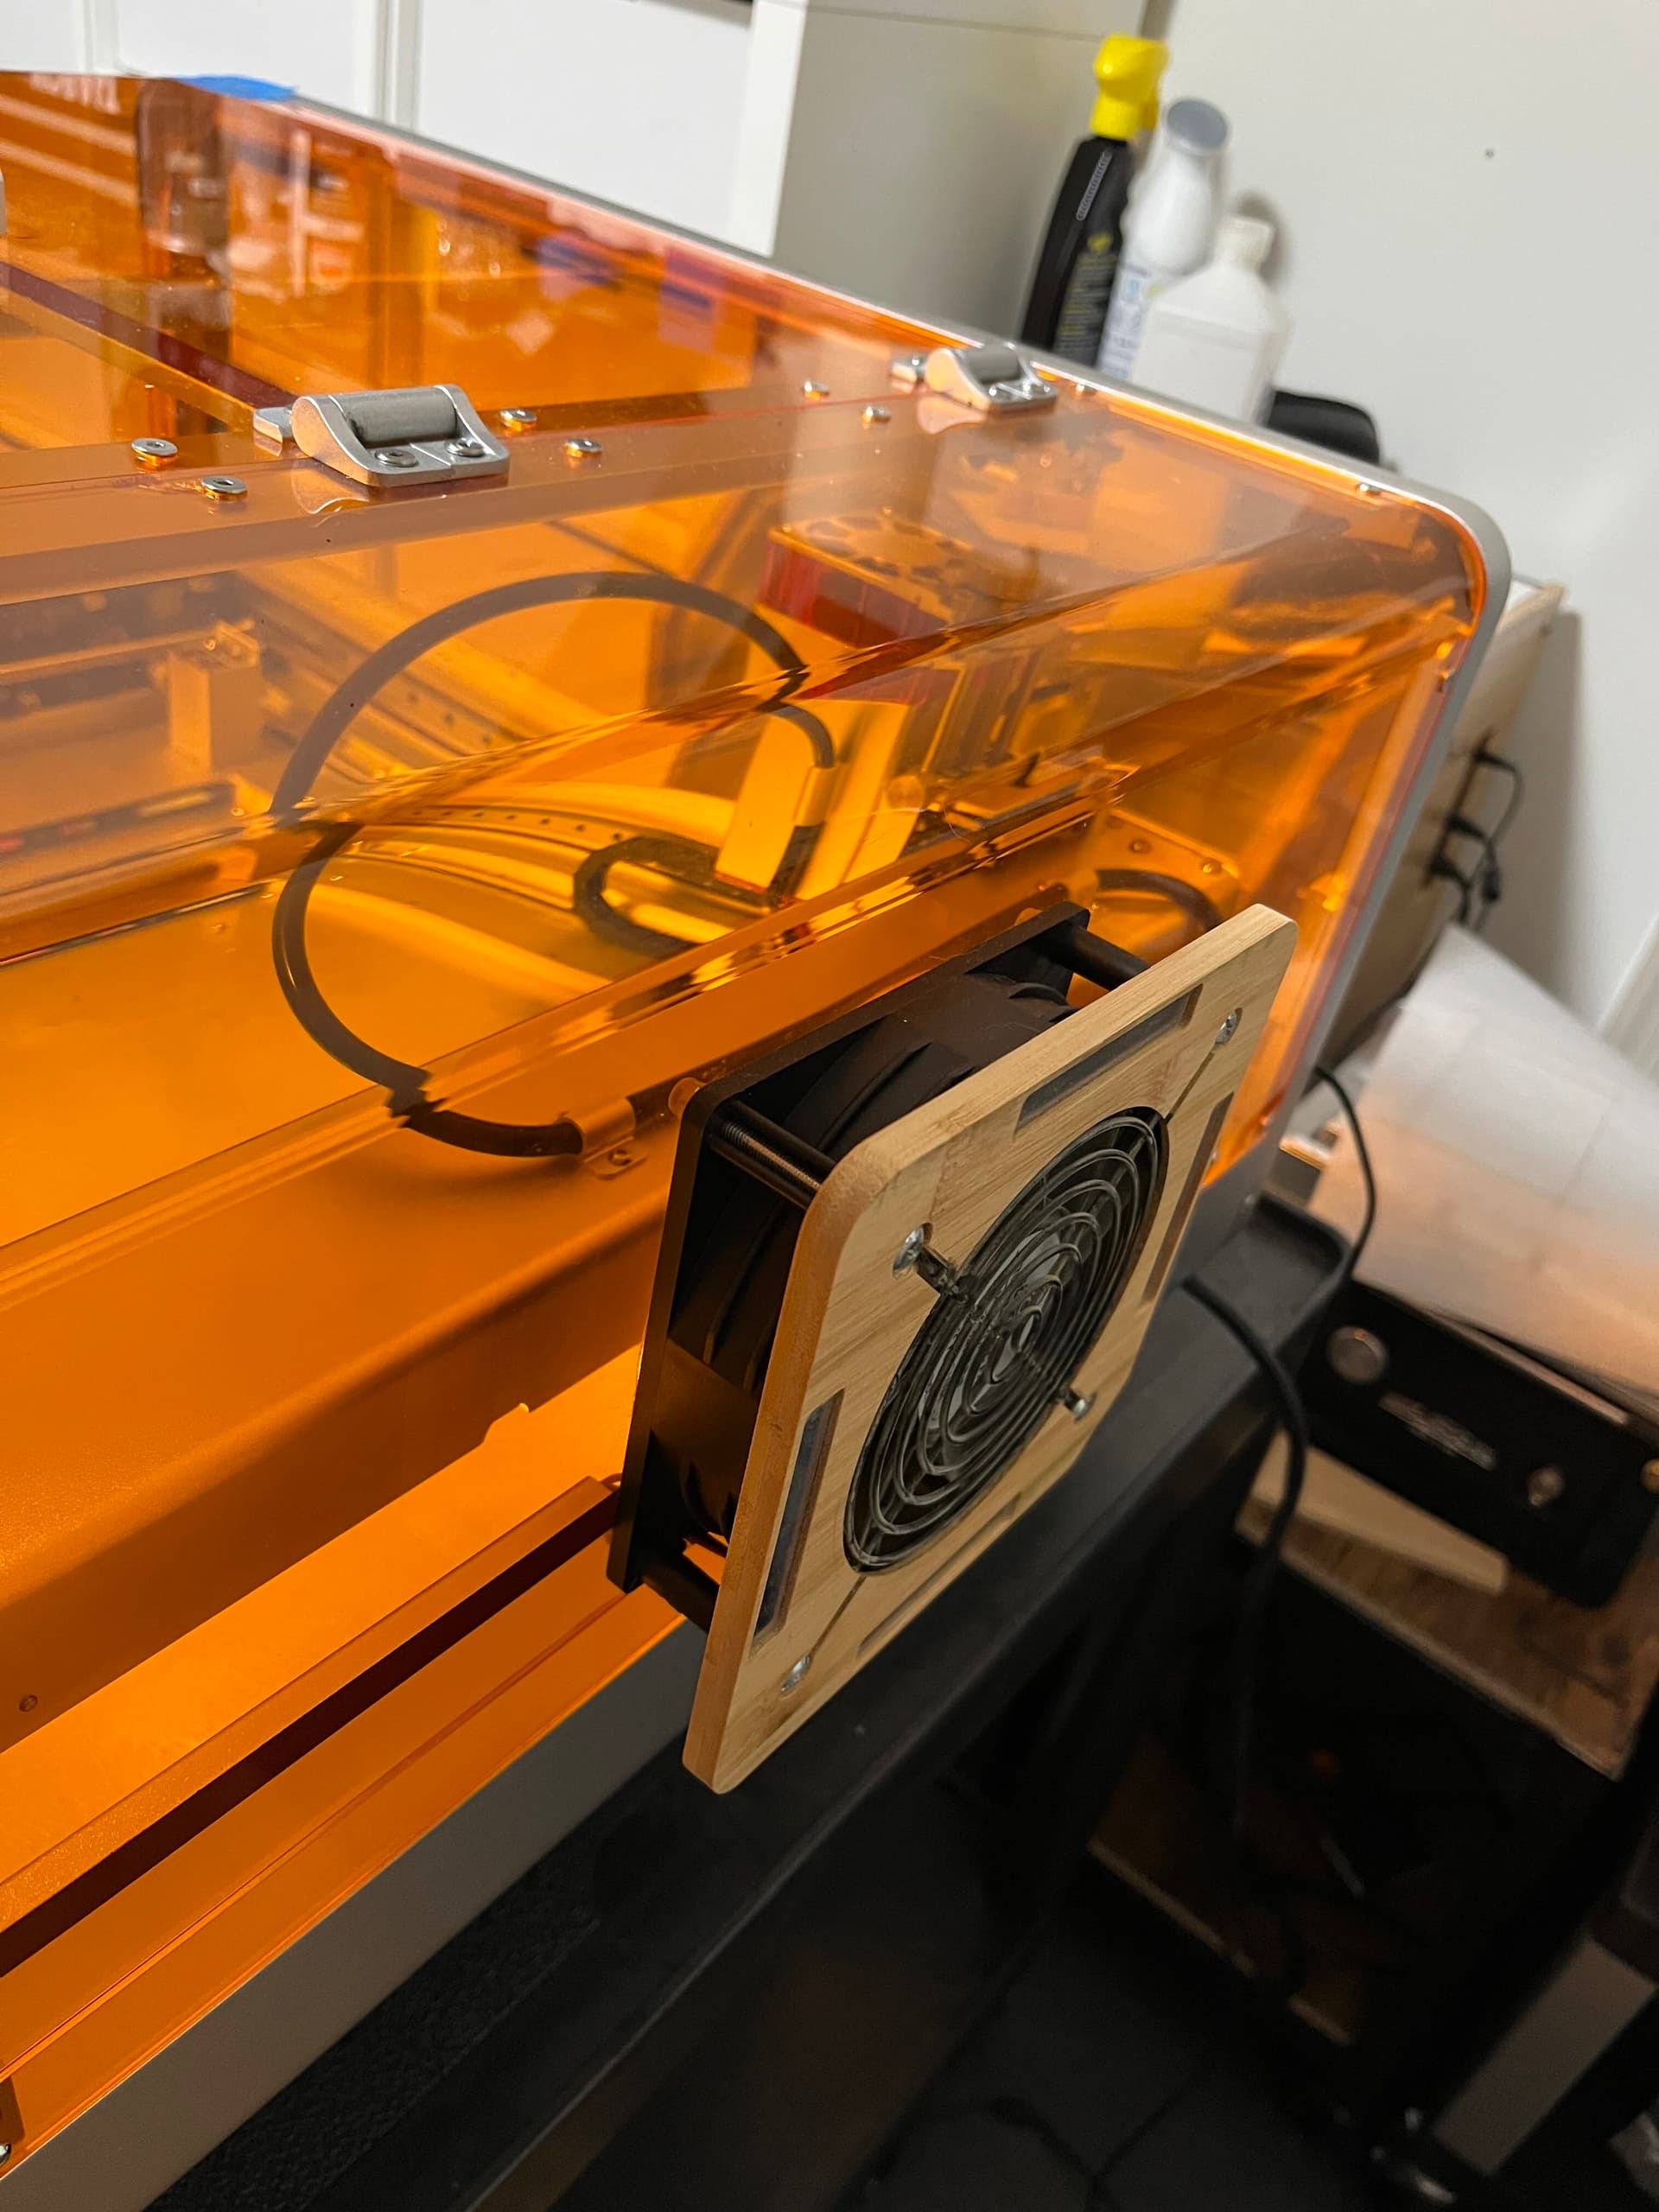
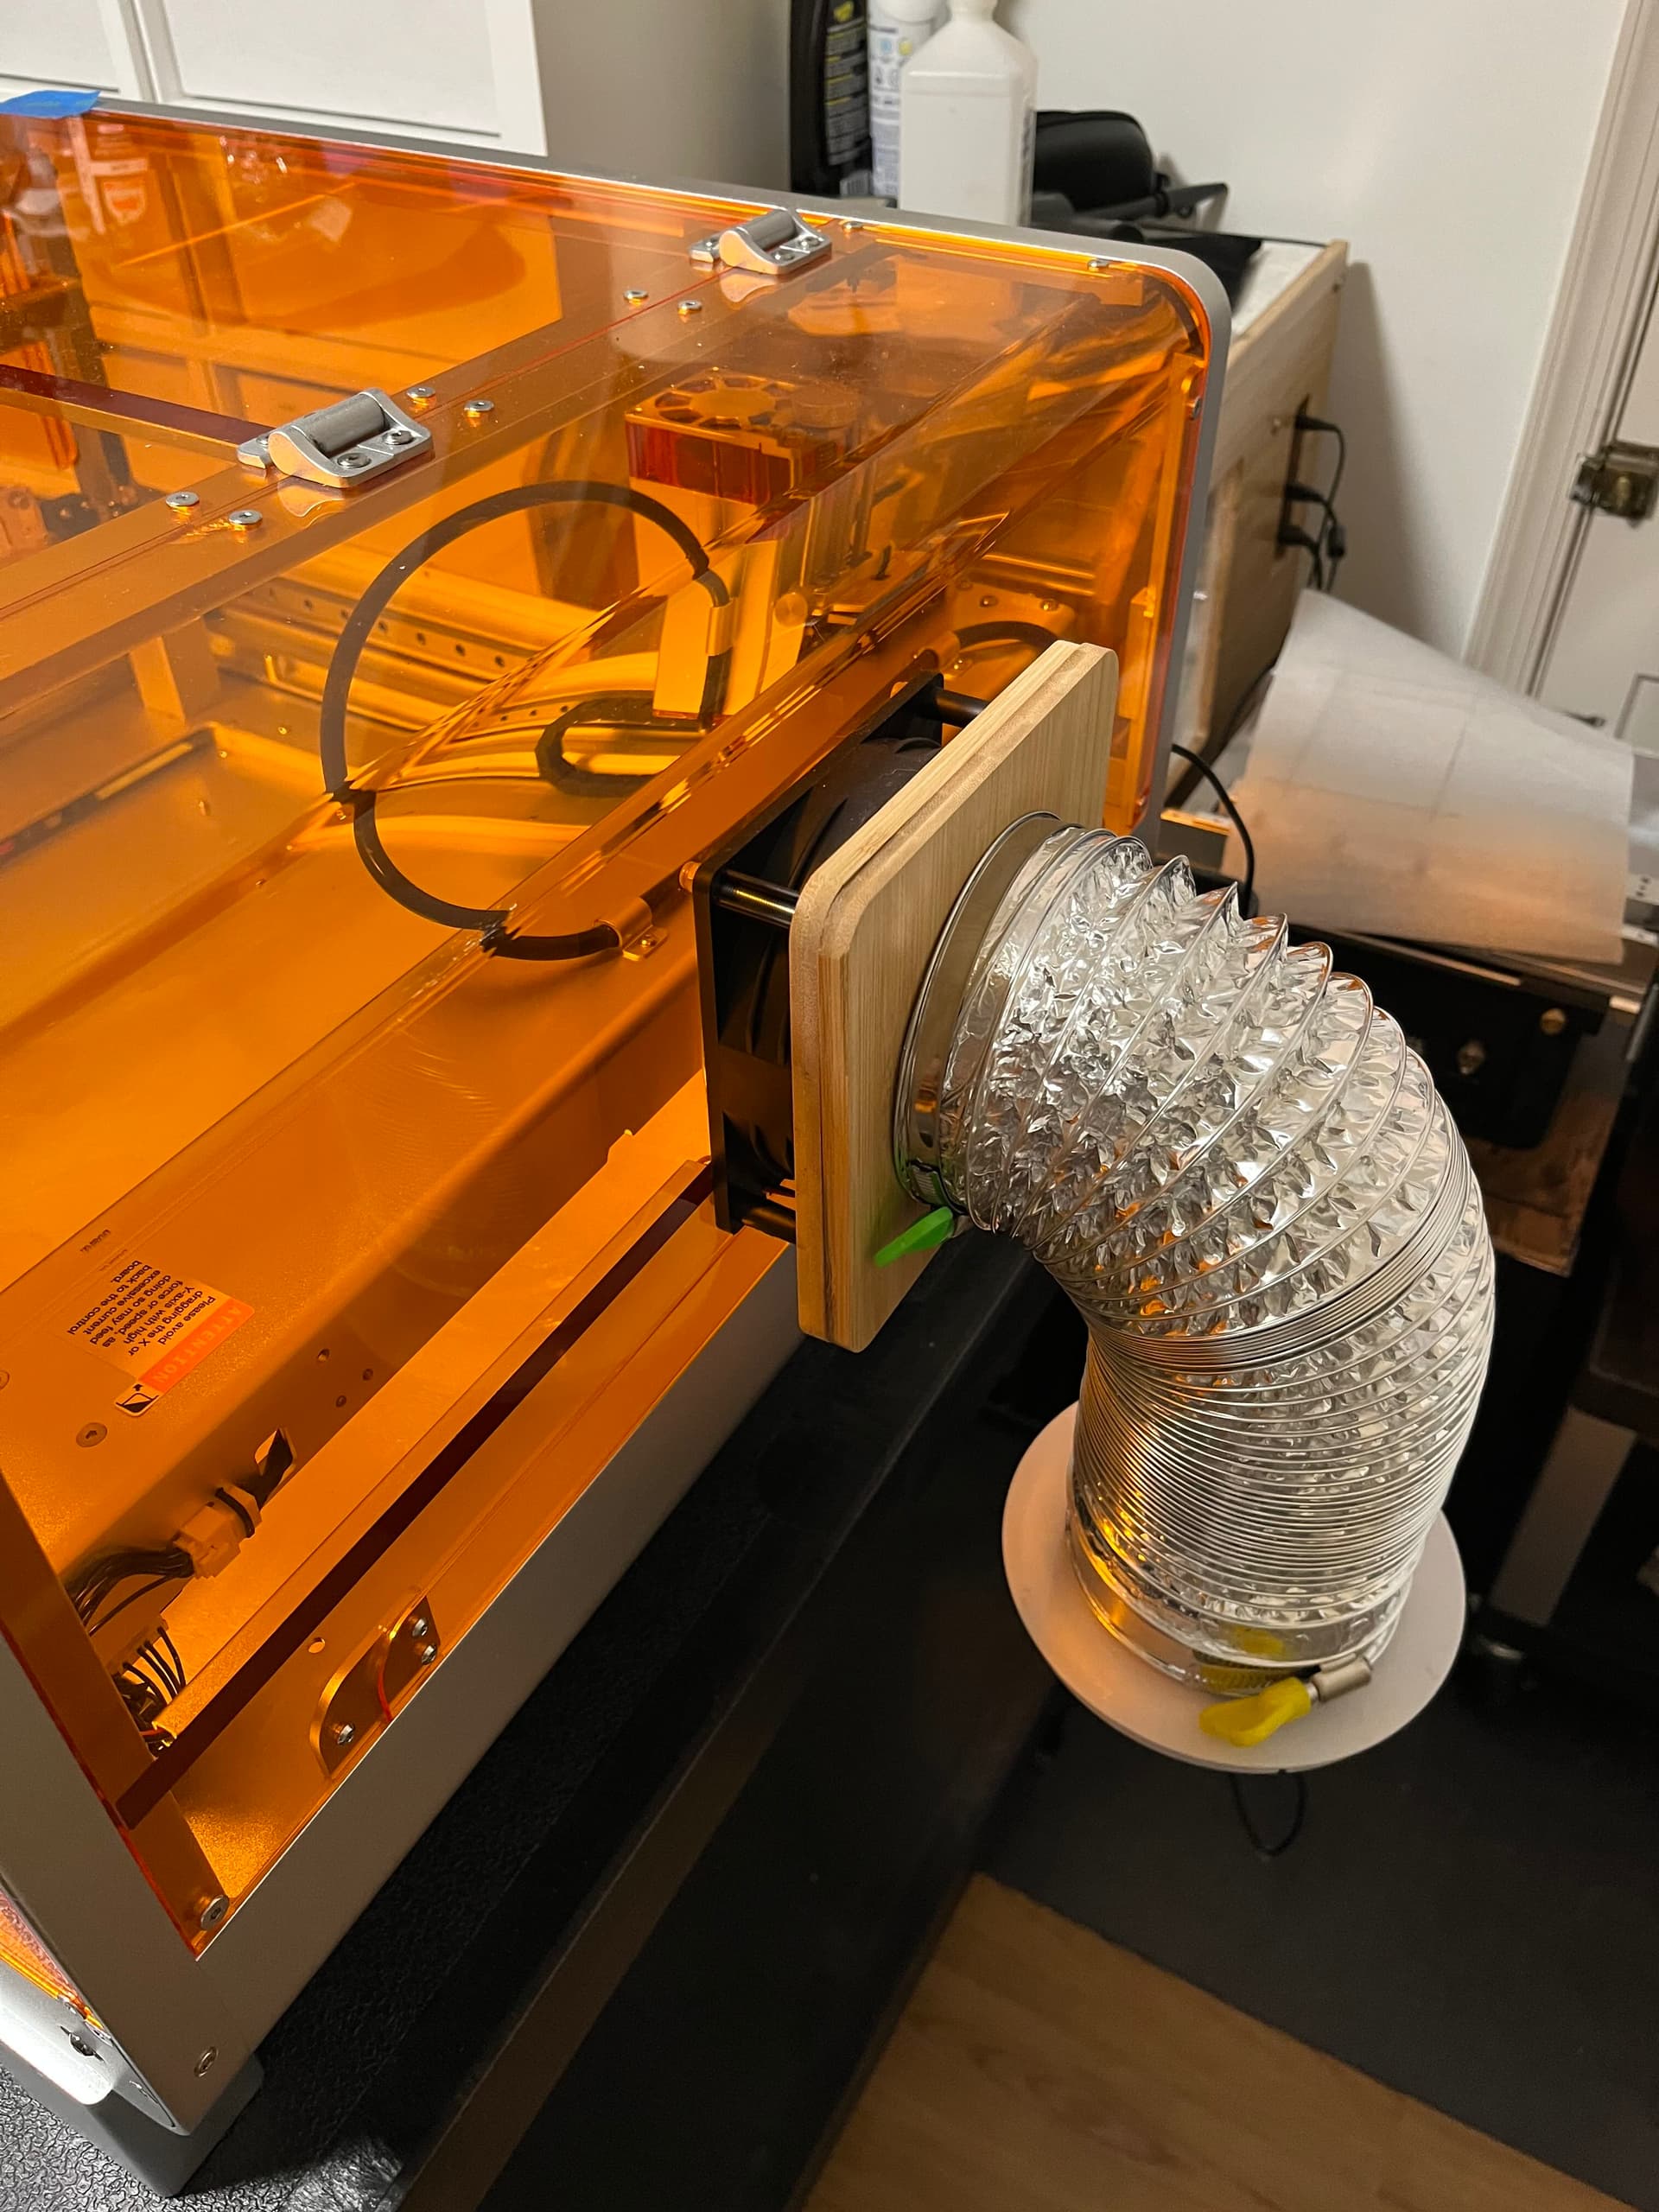
For the fan, it’s thicker than the stock fan, so won’t mount inside, so I mounted it on the outside with a custom adapter that allows me to connect and disconnect quickly (magnets). I also have a very limited amount of space (my entire office is 81 sq. ft. with a significant portion taken up by IKEA KALLAX cube storage units). In that office, I have the laser, a small CNC machine (Carbide3D Nomad 3), a 3D printer, and a model machines table saw (12" x 12"), all on rollable carts so I can pull out what I need at the moment.
The spacers were nothing more than 12mm thick pieces of wood (I used the model machines table saw to rip and trim them to size that have holes drilled for the mouting screws. I had to order som M3x20mm screws to they would reach the drop down table. The three pieces of wood block air on the sides and back so all the air comes in from the front at the bottom of the laser enclosure. I used blue painters tape to hold the spacers in place while mouting them and it remains in place.
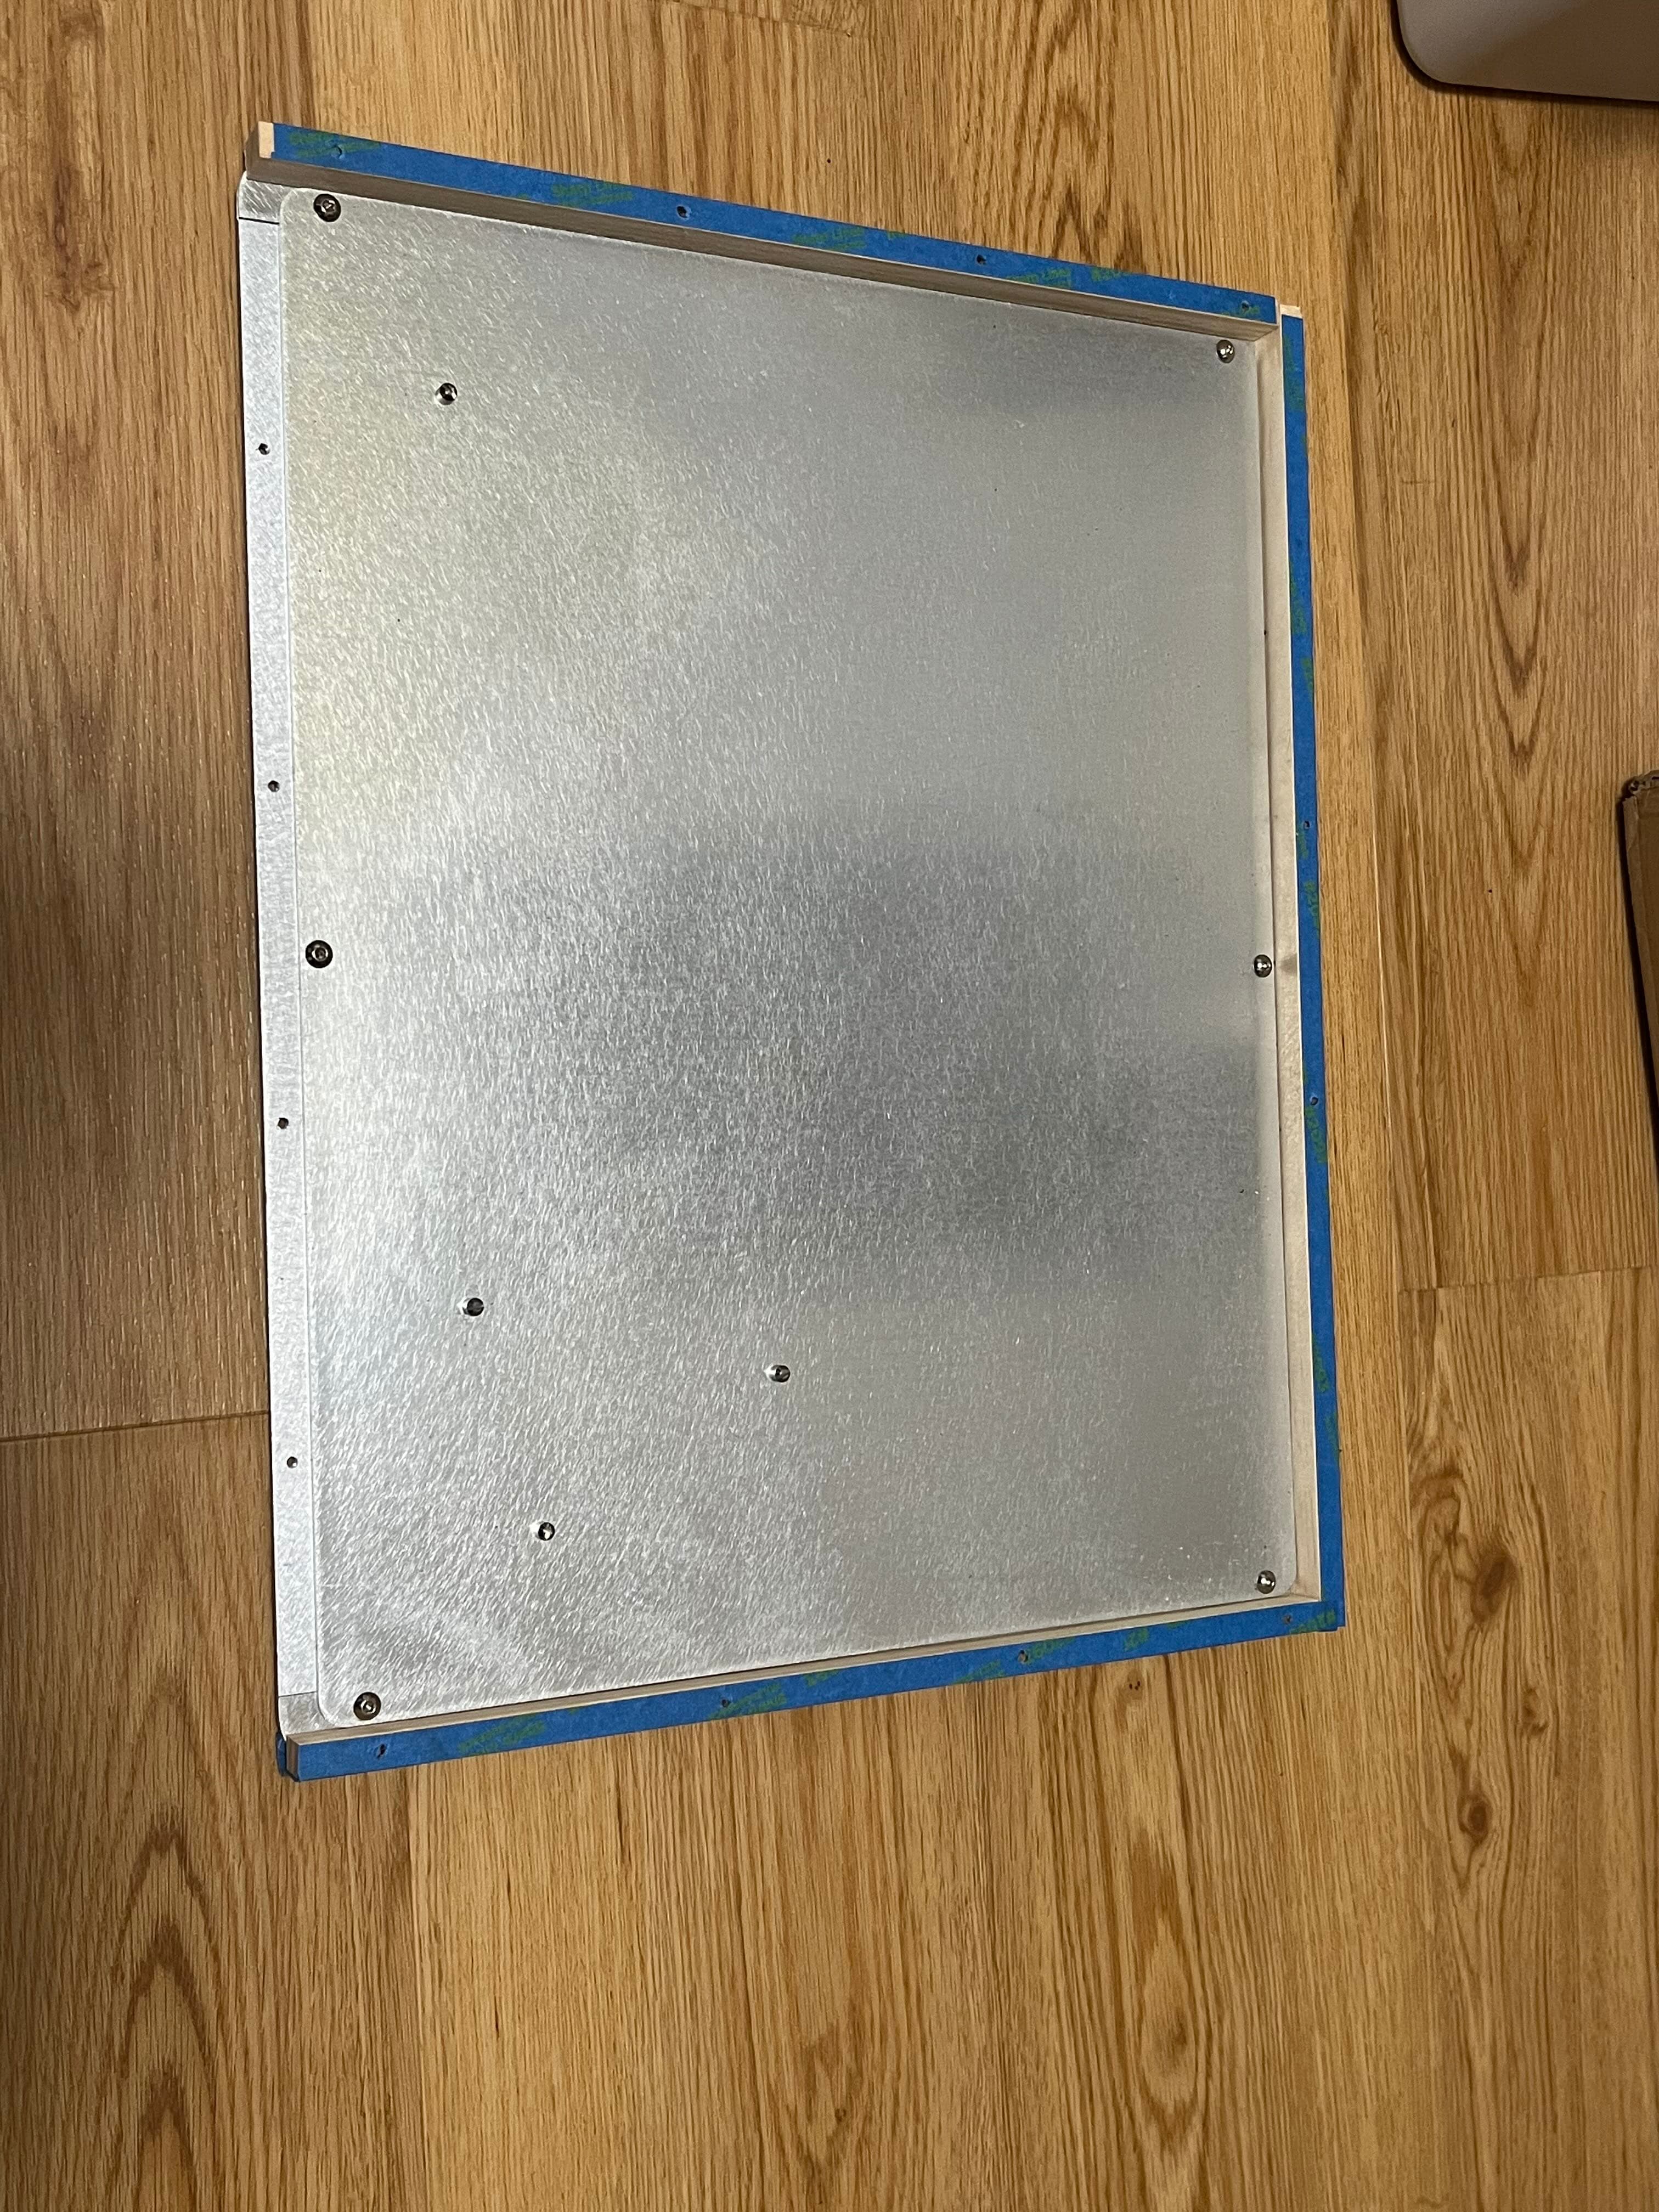
A bottom view of the machine showing the modified plate attached and a 3/4" aluminum angle mounted in front to prevent anyone from being exposed to the laser beam.
The back of the machine with the larger (thicker) fan attached to the back and the mouting plate for the exhaust hose. The four sliver bars on each side are rare-earth magnets inset by about 1mm to prevent the opposite plate from slapping into them and breaking them. They are plenty strong enough that space doesn’t matter.
The hose adapter attached (it has 4 rare-earth magnets as well, aslo inset by 1mm). The white plastic end, when in use, is attached to a window adapter to vent outside.
How’s the factory fan do with keeping the smoke smell down?
I kept my Wecreat 240CFM inline just in case. Have like 12” to vent out the window, so I’m guessing factory or inline will be enough to keep the house from smelling.
Thanks for the pics! Love the magnetic connections! Working smarter not harder. Lol
The stock fan is rated at just under 100CFM, while the replacement I have is just under 200CFM. The reason I switched was because there was still a strong smoke smell with the stock fan when using the laser. The new fan cuts that down significantly but, because it is 39mm deep instead of the 25mm deep of the stock fan, it interferes with the gantry in its most extreme Y movement, so I switched to mounting it outside.
I, too, only have about 12" for the duct hose.
Also, don’t forget the air you exhaust has to come from somewhere. My house is old (built in 1931) so has some air infiltration that makes up for the almost 200CFM I exhaust. I even have to put some towels in the partially open window to prevent it from drawing the air from outside back in along with the smoke just ejected. That, too, dramatically reduced the smoke smell.
Something I forgot to mention is that I modified the front handle to sit flush to the front of the machine. Without the modifications I made, the air is drawn in from that, which forces the air upwards, creating a flow that keeps much of the smoke near the top of the machine. This means the fan that cools the laser draws that air through the cooling fins inside the laser head as well as needing to clean the inside of the acrylic more often as the smoke makes contact and sticks. I don’t have to clean any where near as often now.
My house was built in 1911. lol even after replacing the windows, we still have drafts.
I ended up building a vent board out of an old sheet of plywood with a hole for the hose to poke out of. Weather stripping around the edges. Can put that in place and close the window to keep the air from being sucked in as much as possible.
Hopefully my 240 cfm will be enough to keep it to a minimum. I’ve seen folks on Facebook say they’re using 400-600 cfm fans and there’s not smell at all.
Do you have any engravings you can share from the 10w step down on the 30w?
I keep flip flopping between getting the 20w and the 30w. Like 90% of what I do is engraving and like the details. When I do cut, it’s usually 3mm or less. I’ve cutting thicker with my 40w, but it was more out of laziness of not wanting to go get my hole saw or skill saw out to chop off some wood. lol
Was thinking about getting the 20w because I’ve heard it’s kind of the sweet spot for being able to engrave at high speed for most things, then down step to 10w when you want really fine details. Just curious how the 30w does on both settings.
I’ve searched google and YouTube and can find cutting comparisons all day, but would really like to see side by side comparisons of the 20/10 and 30/10.