As they mention in their instruction: “The LP’s power setting in the App/software is 1%-100%, which equals Power:130-255 in LightBurn.”
LightBurn only doesn’t allow to set a min S-value. Only then I would be able to compensate for the weird burn at the edges.
I use mm/min as it is “common” for diode lasers. But I do prefer mm/s.
The LP4 was advertised be able to achieve 2000mm/s engraving speed and 16000mm/s preview speed.
Currently in Design Space you are limited to 24000mm/min (400mm/s) engraving/cutting speed, but preview speed is extremely fast as you can see here:
(filmed at 480fps, square was 140x100mm, only available in Design Space, I did a rough calculation: I counted 18 frames for it to travel the circumference of 480mm. So 18/480fps=0,0375 sec, 1/0,0375*480=12800mm/s preview speed, so I assume it is indeed 16000mm/s preview speed.)
But with human eye it is flickering solid.

LightBurn can achieve 50000mm/min (833mm/s) but for both preview and engraving/cutting speed as stated in their Parameter Equivalence Chart
They have all platforms covered, but the best maintained is first Android and second Windows.
Yes, that is what I first found out in the Facebook-group.
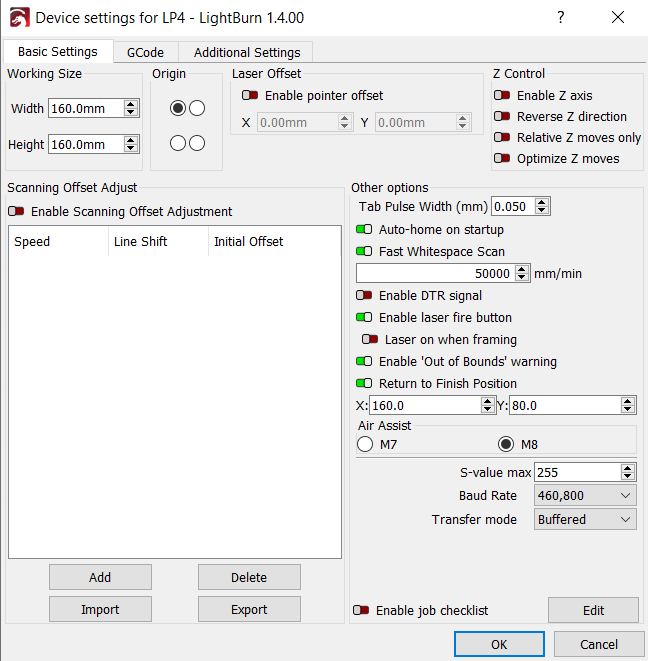
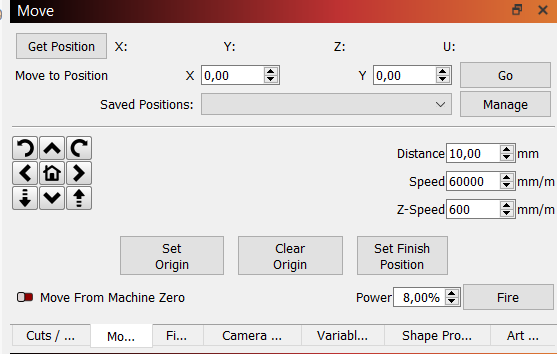
You can also use the “Enable laser fire button” in the settings. Then you can open the move-tab and be able to turn on the laser at a certain %. I use 8% for mine.
Keep in mind to first use the 450nm macro to enable the blue laser as you won’t be able to see the IR laser but would still turn on.
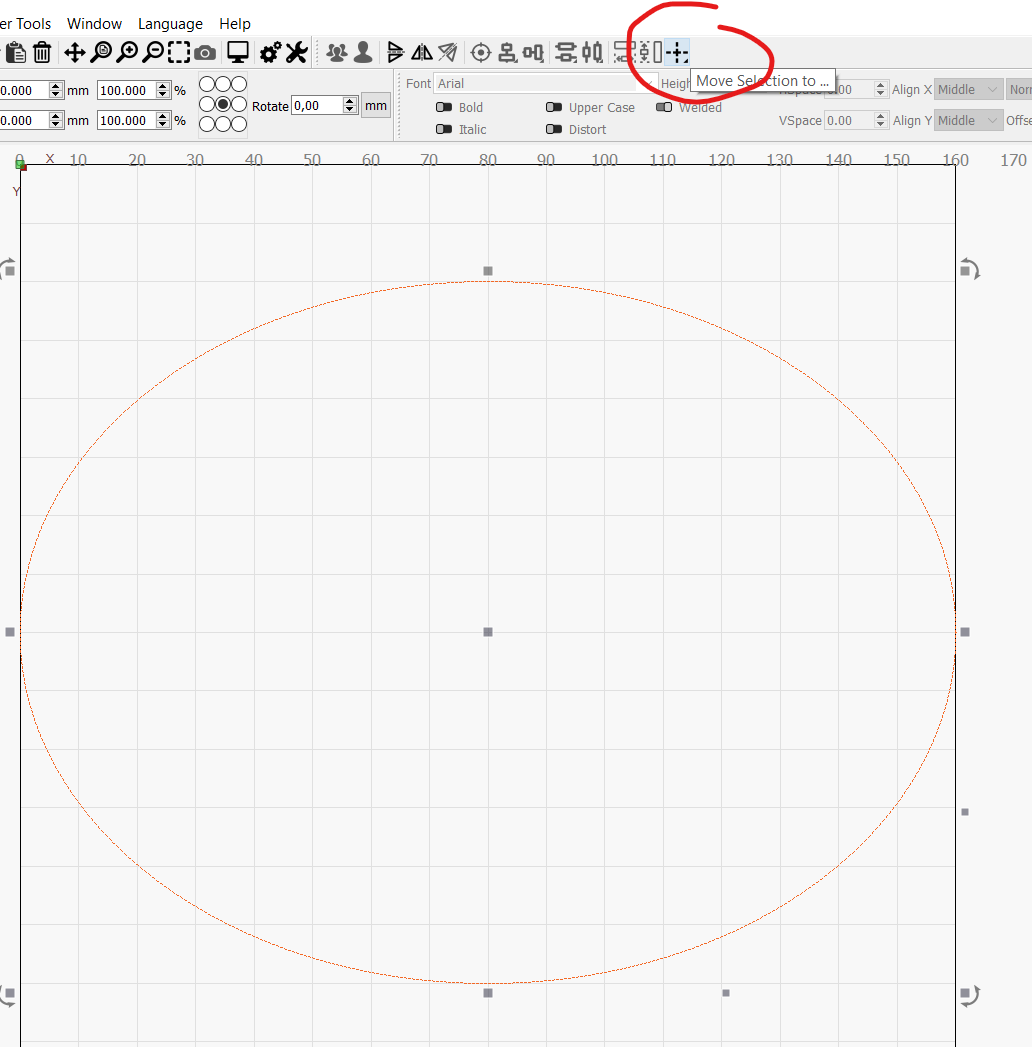
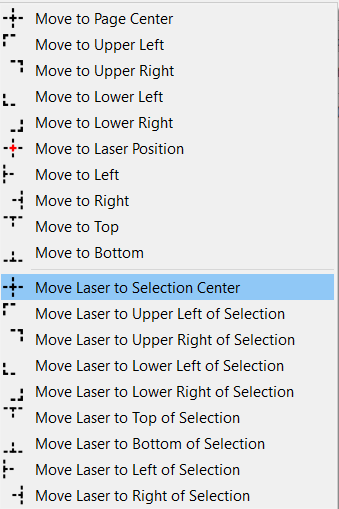
You then can click on the highlighted button and select 'Move Laser to Selection Center. This way you can see the blue laser in the center of your selected object. This gives a way to position your object. (This is not for finding the right height with the two red dots, these can’t be turned on from within LightBurn yet. I will assume they will add another macro for this.