I ran the lens calibration, which took a while because of lighting issues. Finally got it and tried running the camera alignment. Burned the image successfully and it was seen by the camera. I zoomed in, double clicked the number one target and the box said to click on number two. When I double clicked it, it put the red crosshair on the number two target but never goes on to numbers three or four. Restarted Lightburn several times with the same results. Running on Windows 10 with ELP-USB8MP02G-L180 camera.
What happens instead?
It just stays asking for number two.
That’s odd. Can you take a screenshot of what you’re seeing?
1 Like

No Targets selected

Target 1 selected
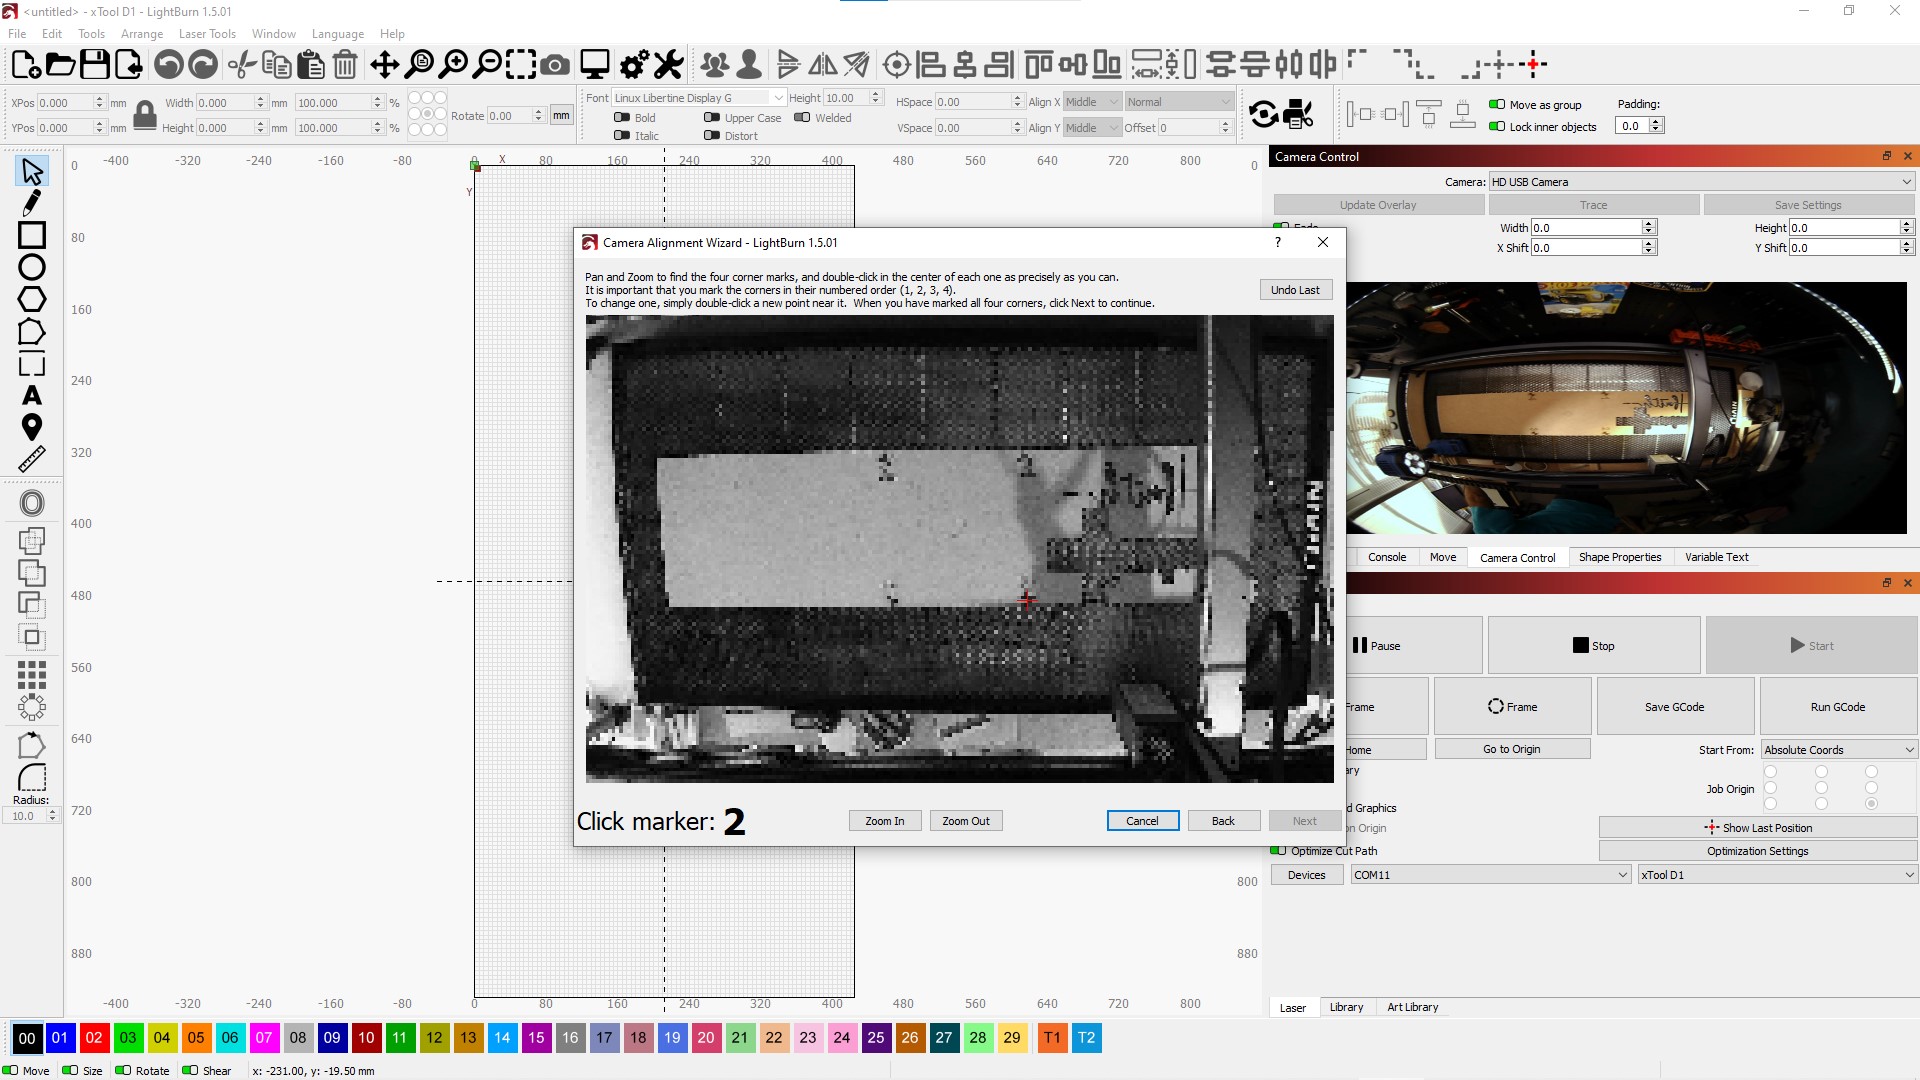
Target 2 Selected

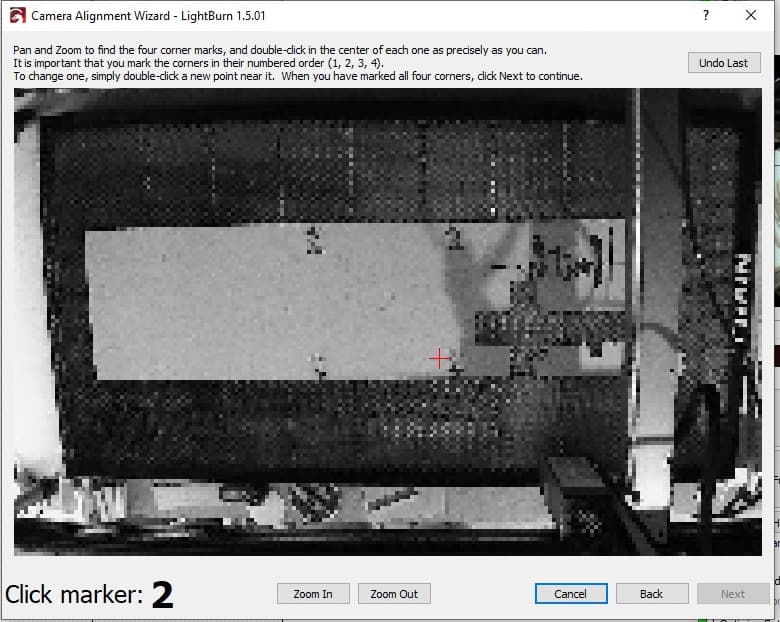
Target 2 selected off target to show that nothing changes.


That’s odd indeed. I have not seen this before.
If you continue to double click 2 or 3 more times elsewhere on the screen, does anything change?
Asking @JohnJohn if he’s seen anything like this before.
No. It keeps saying “Click marker: 2” It will put the crosshair wherever I double click, but it will still keep asking for marker 2. When I double click the new location, the prior crosshair moves to the new location, but never accepts the point so it never moves on to asking for the third point. At no time are there more than two crosshairs. One at point one and one where I double click for point two…
At the recommendation of someone I trust I updated from Lightburn 1.5.02 to 1.5.03 beta, since 1.5.02 had known camera issues. The only difference that I am seeing is that now when I select point 2, the crosshair on point 1 disappears. It still won’t allow me to select points 3 and 4, but forgets point 1. Hopefully Lightburn will fix this before I have to decide to return the camera. It’s obvious that the camera is working, but too expensive to buy and not be able to use. I’ve only got 20 days (approximately) left before my return window closes.
I sent a help request directly to Lightburn and hope to hear back from them.
I’d actually suggest trying to downgrade to 1.4.05. 1.5 was quite a large shift. If you’re able to get it calibrated you should be able to upgrade back to 1.5.03 and still retain calibration.
Thank You. I will try that and see how it goes.
Rolled back to to 1.4.05 and am still getting the same results. I’ve been using Lightburn and my laser without the camera thus far, so maybe I’ll just have to stick with using it without the camera. The camera works with other programs, just not with Lightburn. Other people are using the same camera, so I’m at a loss. I’ll wait until I get a response from Lightburn, but I’m not very hopeful at this point.
Before giving up I’d suggest taking a looking at Edit->Settings->Camera Control System.
If set to Custom, try Default. If Default, try Custom. Then retry calibration.
My Camera Control System was set at custom. Setting it to default allowed me to see the camera view, but when I clicked on capture, I got a black capture instead of the image (Lightburn 1.4.05).
With Lightburn 1.5.02 and 1.5.03 using default Camera Control System settings I got no preview and capture was just a black field. Setting it back to custom allowed the capture correctly, but would still not let me select more than the one point.


This is quite the stubborn issue. I assume support will connect with you shortly.
Let’s add @JohnJohn here for visibility.
I’ve had 3 successful camera calibrations back to back with different hardware. The first superstitious thing that I’m doing differently is that I’m doing the calibrations under daylight. I have a feeling that some of the variability in captures is caused by LED / Fluorescent Flicker. This isn’t proven. It’s a hunch at best. A Quartz Halogen work light or a tungsten filament bulb won’t have the flicker that is undetectable by eye.
I’m looking at the camera captures and they look very pixelated. I’m inclined to ask what might be down-regulating the image.
If you have an air compressor running, an exhaust fan running, or an electric motor running nearby - temporarily stop it to reduce the possibility of noise on the USB line. I’m not saying this is a definite cause - but it could be a partial contributor to what appears to be down regulated camera captures.
Early Windows 10 computers and Later Windows 7 computers used a blue socket ‘key’ inside the USB socket on the computer to indicate that the higher speed USB 2 protocol was available. If you have the option to plug the camera into a USB port with a blue plastic insert in it, please connect the camera there. The better USB port could be on the back of the computer.
If you are using a Wireless USB Keyboard or wireless USB mouse, it may be wise to temporarily remove them from the USB sockets (if possible). Maximizing what the Camera can communicate, and minimizing what might be impacting camera communication is key for this step.
- How long is your USB cable?
- Does it have ferrite beads at each end?
- Is it Shielded?
- Is it remotely possible that it was changed out for another cable?
I’d just like to lock this part down as a first step. Let me know if this approach helps, or if you’re still stuck between Target 1 & 2 on Camera Alignment.
The reason I think it’s so tiled is because the laser bed is 2ft wide and 4ft long and I had to get a camera that is 180° to get the whole thing. I may try seeing if I can move the camera any closer and still fit the entire laser bed in the image. I am using DC powered lights so I shouldn’t have any flicker issues. I have no wireless devices in the room and the USB port has the blue insert. Lens calibration took a while to get because of light issues. Had to keep playing with different lights to get a good lens calibration. The USB cable I have is shielded but doesn’t have the ferrite noise filters. I haven’t given up yet, but I’m getting close. No response from Lightburn support other than the automated confirmation.
Tried moving the camera closer, but it would need to be way closer. Can’t put it where it would need to go. Couldn’t test it. Then I connected my Mobius Mini camera (from my days flying drones) and had to make a jig and move that one way up. With the Mobius I got the lens calibrated successfully and aligned (almost) the camera. Calibration and alignment said it was successful. Tried using it and only the very center of the laser bed was visible on the screen. A 4" round circle had to be moved to the center of the laser bed, to be seen and it measured about 10". Confirmed it when I created a circle the size of the the circle on the camera and tried to frame it. Camera alignment was a definite fail, even though it said it passed. I can see most of the laser bed in the camera control window. I can see maybe 10-15% when I put it on the work area. Very disappointed and very frustrated. Still no response from Lightburn.
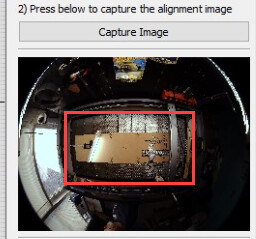
@JohnJohn discussed this with us today, it seems to be related to the lack of resolution shown in the image that you are getting, likely compounded by the nature of the 180deg lens as it looks to me that the working area crop could be also cropping away over 70% of your resolution:
With the low pixel resolution, target 2 will not be registering because it will not be far away enough (in pixels) from target 1. You can test this yourself by gradually clicking further away until the second target is registered.
If you were to put LightBurn into debug mode (Help>Enable Debug Log), and then go into the camera window and change to ‘None’, then back to your camera again, close LightBurn and open the ‘LightBurnLog.txt’ file in your documents folder, you should see evidence of LightBurn communicating with the camera, enumerating available formats, and selecting one. If you attach that file here it might help explain the resolution you are getting, and there may be a way to improve that.
But basically, if the resolution cannot be improved, and/or you cannot move your camera a lot closer (like half the distance), you will likely need a different camera.
1 Like