So - Attached my laser today, and it came with the lightburn camera installed. The camera is detected by the computer - in fact I used my globalmeet meeting room to show the camera working in google chrome.
But in lightburn, selecting the camera lens calibration tool, then select lightburn camera, the NEXT button is never available and no preview shows. Help?
Also - does Lightburn have a crop tool? to crop a photograph, for example? Or do I need extra software for that?
What operating system do you use? If it’s Windows 10, they’ve recently rolled out new permissions for cameras and microphones and screwed up a lot of things.
For the crop question, LightBurn does not currently have an image cropping tool. It’s something we’ll likely do after the pending release, hopefully for the next one.
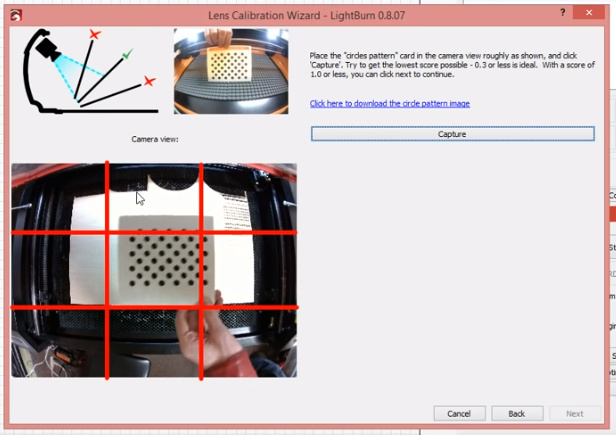
Ok. Installed those drivers and now LB is seeing the camera. It’s a lightburn camera installed by the ‘factory’ - engravingmachinesplus / Aeon laser who we bought the unit from. They say it’s a standard lens. I go to lens calibration and I get this:
I had to stack boxes to get my card about 18" above the bed. Oz said it doesn’t matter. Trick is you want that pattern to fill what would be the middle square of a tic tac toe board in the image.
Travis is correct, and this is called out specifically in the walkthrough video for calibrating the camera.
If you haven’t seen it, it’s here:
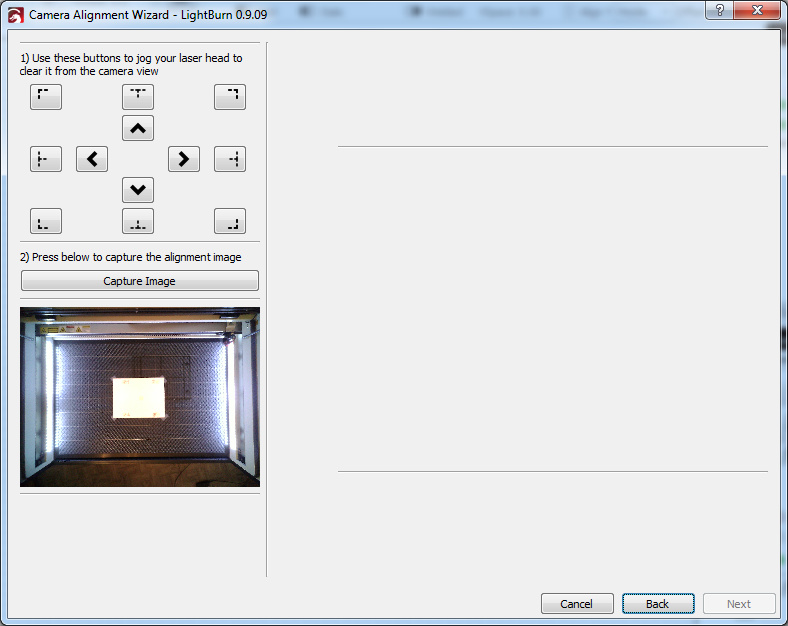
The camera doesn’t even have to be mounted in the machine to calibrate the lens - it’s strictly a visual thing, to determine the amount of lens distortion and curvature, and doesn’t involve the laser at all. The next step (camera alignment) is where the laser comes in.
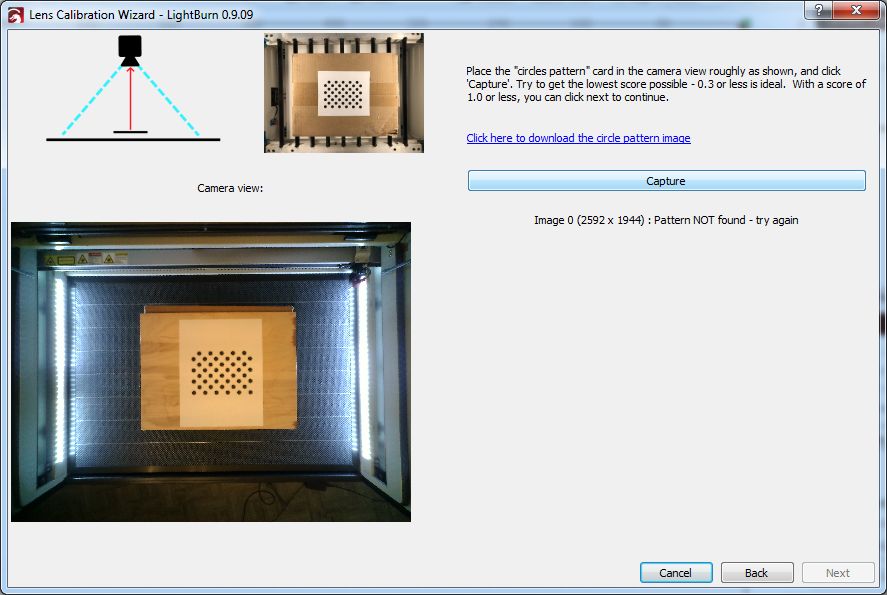
You should cover the honeycomb bed of the laser with a bedsheet, cardboard, paper, etc, though - the pattern looks like circles to the software and confuses it.
Thanks - Did the white paper thing - got scores below 3 (below two in most places) but now I’m onto the last step…
My camera is so high / so far away from the bed
It won’t let me click the center of the circles when i zoom in (they are pixelated/blurry, but i can see what I think is the spot. Yes, I did watch the video - I guess I missed the part about the bed confusing the software. Maybe you should make the dots a specific pattern?
Shoot me if you will, but glowforge (yeah I said the word) scores about a hunderd specific pattern items on a piece of material that’s bed sized and uses that to do it’s calibration. it’s pretty accurate now too.
Anyway - transitioning because we need more capacity / speed if we want to ramp up our little hobby into a real business…
Thanks for all the answers and help - I just need to get past this last step…
They are - they’re a series of 5 + 6 circles, in offset rows, repeated 4 times. Finding that pattern means identifying circles in the original image using a blob & edge classifier, then correlating those circles with neighbors within a distance threshold, allowing for possibly extreme distortions in both lens curvature and perspective, as well as lighting variations, until enough information is present to infer the pattern. If you have concrete ideas or links to papers for how to improve this I’m all ears.
Yes, single click is used to click-drag the image around when you’re zoomed in (which you can do with the mouse wheel, and that helps a lot). The pattern you show here is quite small - you’ll get better accuracy if you increase the scale that you run the alignment job on. I usually use a cardboard packing box cut to size, or a piece of scrap wood - the bigger you can go the better.
This confused me slightly too until I watched one of the tutorial videos. When Oz says “increase the scale” he’s literally talking about the text entry box labeled “scale” on the burn settings right before you burn the pattern. Keep increasing that number then frame it to see the bounds of the pattern it’s going to cut. I kept increasing mine until running the frame moved the laser just almost to the top and bottom of the bed bounds.
Just based on what I see in the image you posted I’d start with 200 as the scale and probably you’ll have to go up some from there.
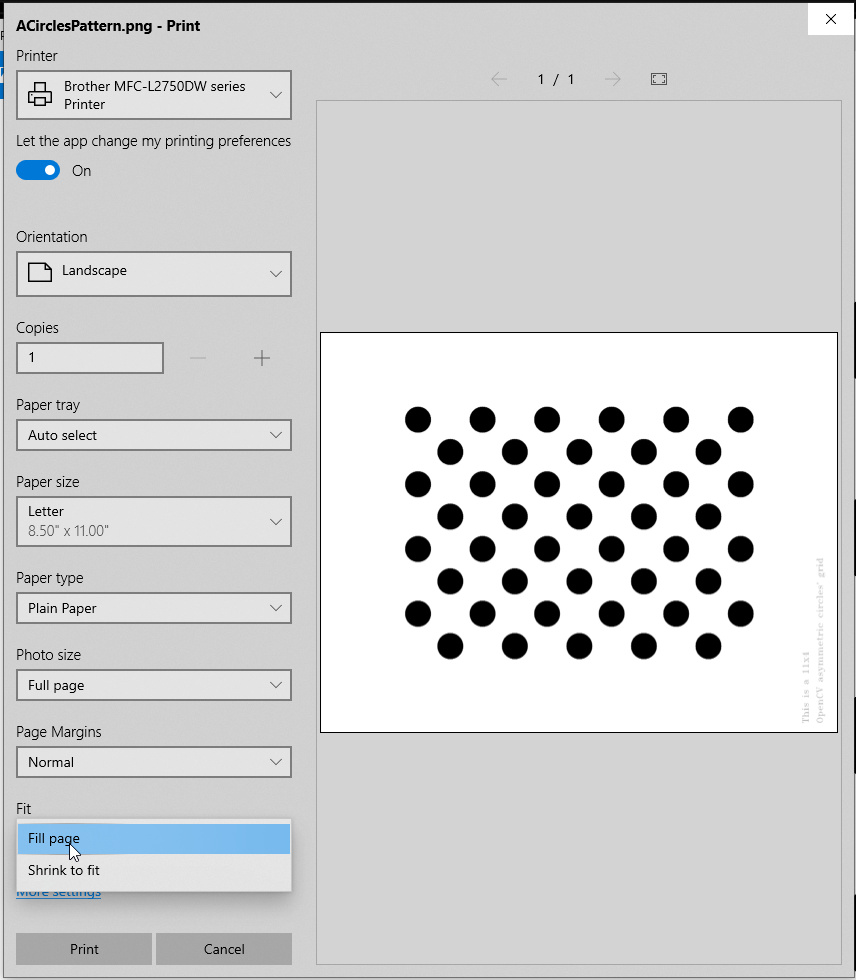
Yes, and that prints a full size page like it has been. My memory may be slipping but I thought I saw references to it being 4" x 6" pattern, not 8.5" x 11".
It seems other examples, including yours shows the smaller 4x6 size also.
I blanked a little there - I thought ‘shrink to fit’ meant print normal size. It’s supposed to be about 1/2 an 8 x 11 page, but it really doesn’t matter as long as the size within the view of the camera roughly matches the sample pics. You’re shooting for it taking up 1/3 the view horizontally and vertically.

 outside the laser