I am running the newest version of lightburn on grbl 1f I believe on my cnc controller.
I am trying to do a material test and it refuses to fill all shapes at once.
Under the optimization setting, in the laser window, I’ve insured “ order by group” is not listed but “ order by layer” is listed. I’ve even tried not listing anything.
I’ve made sure my $30 was the same as the s-value and I’ve insured my speed was in the horizontal column.
The only thing I haven’t done is to make sure all the squares are on the same layer but I would think that should be automatic considering it is a material test that is generated and I don’t see a way to make that all in the same layer. If it isn’t, it should be as it is auto generated.
The last time I had a laser with a different version of lightburn it didn’t do this.
I am slowly discovering that there is no way to fill all at once in an auto-generated material test and I have no idea why that isn’t fixed.
Whenever a laser hangs out in any given area for to long the burn will spread or burn efficiently.
What that means is if your burning a square at X speed and you like that speed and power and chose to use that speed and power on a bigger project with more space for the laser head to truly get to that speed you will get completely different results.
It might not even burn because now your laser has time to get to that speed.
Maybe I’m wrong, dunno, but it looks like lightburn is treating each individual square as a seperate level and so it is forced to burn each individual square which in turn gives false results because the laser head does not even have time to get to that speed.
Si if anybody has suggestions on how to get the material test to fill all at once I would be glad to hear it. Until then I guess I have to make my own which makes the time and effort of creating a materials test for programmers of lightburn wasted.
Burning each individual square does not reflect in actual burning projects simply because of the time factor. It probably won’t even burn. I know because it happened to me.
Material test is a starting point. If you want to test LARGE squares, build your own test or test settings one by one.
Do a little of your own work and you will be rewarded with the knowledge that will add to your abilities so you can skip that step on future projects. Yes, the learning curve is rather steep - but you can do it!
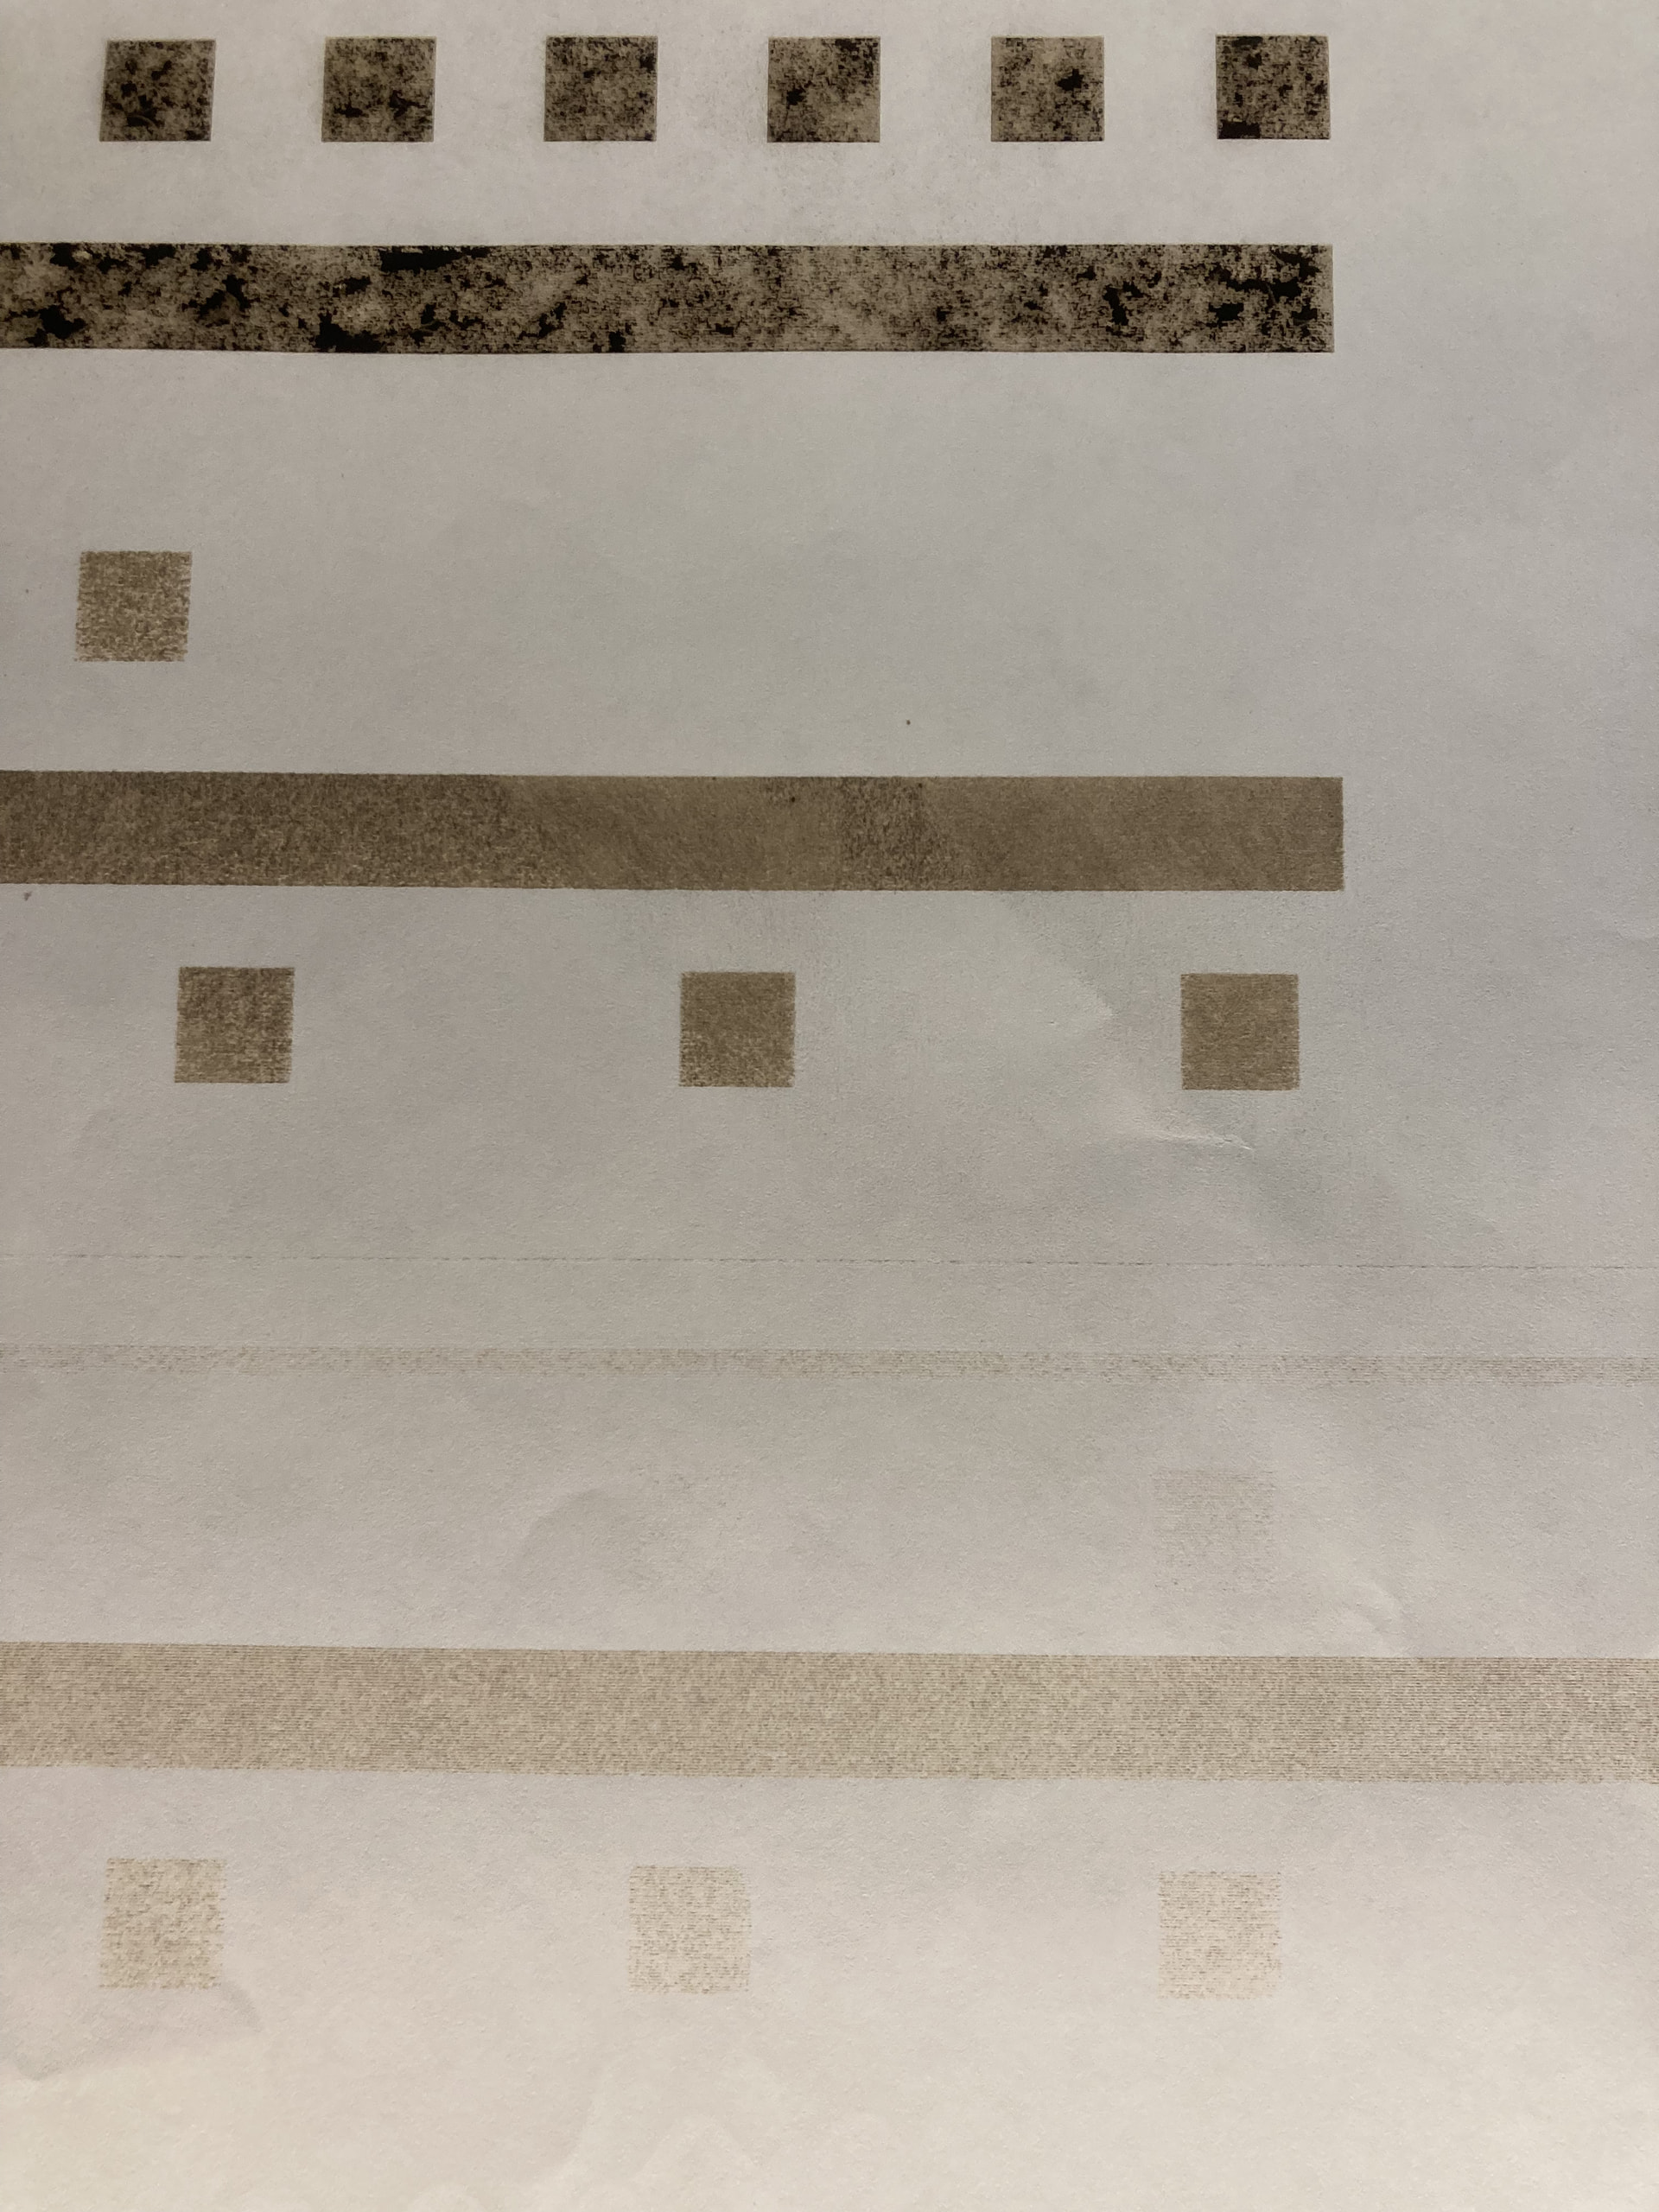
If you pay attention to my test, here there is only a minimal difference in the engraving effect between 10X10 mm and the long beam of 200mm. Acceleration and deceleration apparently do not have a big effect anyway - on my machine. All tests are of course done with the same speed/power.
Another variable in this test is the speed of your specific machine. In this test with 10x10mm squares, 175mm/s is the fastest, all values above that are eaten by overscanning (on my machine). For the 10x10 square my machine uses 12 seconds if the speed setting is optimally set to 175 mm/s.
If you do not have such a clumsy machine as I have you will get faster results. But of course there shouldn’t be much difference in the result, no matter whether what you want to engrave is 10mm or 200mm.
True and false. The results are accurate for the area scanned, but the laser may or may not be reaching the programmed speed. You cannot blame physics on Lightburn. If you are going to work a large area, make a(some) large square(s) with the Material Test. That will give you a result more comparable to your intended project.
Lightburn can only give a Best Guess based on the parameters of your machine. However, there is nothing that can tell Lightburn how your machine is going to actually respond with those parameters. Every machine is different, even the same model off of the same production line. @bernd.dk added the perfect qualifier to his statement, “do not have a big effect anyway - on my machine” (emphasis mine).
Yes, it is AGGRAVATING that what you see is not what you get. With experience as @JimNM says, you will be able to guesstimate fairly close the settings for a given material. A different material needs different experience. One thing is for sure, this is not a boring hobby.
Large squares have nothing to do with it. Maybe you didn’t get the picture I was drawing? Let me draw it out for you.
As a result of the lightburn programmers refusing to treat each row as a group each square is on its own layer which forces light burn to burn each square individually (which also makes the three radio buttons that are shown useless. That was a waste of time to put them there because they don’t work during a material test) which in turn does NOT allow the laser head to get to full speed.
Since the laser head doesn’t get to full speed you are not getting an accurate representation of that speed.
So knowing that, why not fix it or why even have a material test in the first place because we have to make our own because of that.
Btw. This is also for someone at lightburn to read.
Why can’t the entire row be filled like the radio buttons say they will.
Btw, yes I already created my own just because of that.
My point of view is not only from a customers point of view but also from a programmers point of view.
Yes, I can work around it from a customers point of view.
But from a programmers point of view it was a waste of time to put three radio buttons there that don’t even work
And it’s a waste of time to assign each square to a different layer which forces lightburn to treat each square individually.
Why not give customers the choice? Why not allow “fill all” to work?
Why even put it there if it doesn’t work. They are costing customer frustration and time trying to get the dummy switches to work.
The answer is in the question. You cannot have one shape with one set of variables and another shape with different variables on the same layer. Layers take precedent over Groups
Layer = same variables for all objects on that layer. There are multiple suggestions on how to enjoy your ice cream - the rest is up to you.
I forgot,
What I can blame on lightburn are the dummy switches they put there that don’t work.
What I can blame on lightburn is the time it took me to figure out they didn’t work.
Additionally, I see no reason why they should not allow to fill all squares at the same at the proper speed so it really does not matter what your using it is possible your not gaining proper speed in that little bitty square.
I do not know about the MAC world, but in the Windows world, if a selection is greyed out, it means it is not available with the particular display options. For example, the Boolean Tool will be greyed out, but still listed in the menu of choices, if you select only one, or three, vectors. The rule is only 2 at a time.
If it’s that important to you and you think it’s the right way to do it, you can get “fill all shapes at once” for any group of shapes - as long as they are on the same layer. To do a power test, you should then use the “Power Scale” function.
Do a simple test and see if it gives you what you want to achieve, and especially if it gives you a representative result for a power test.
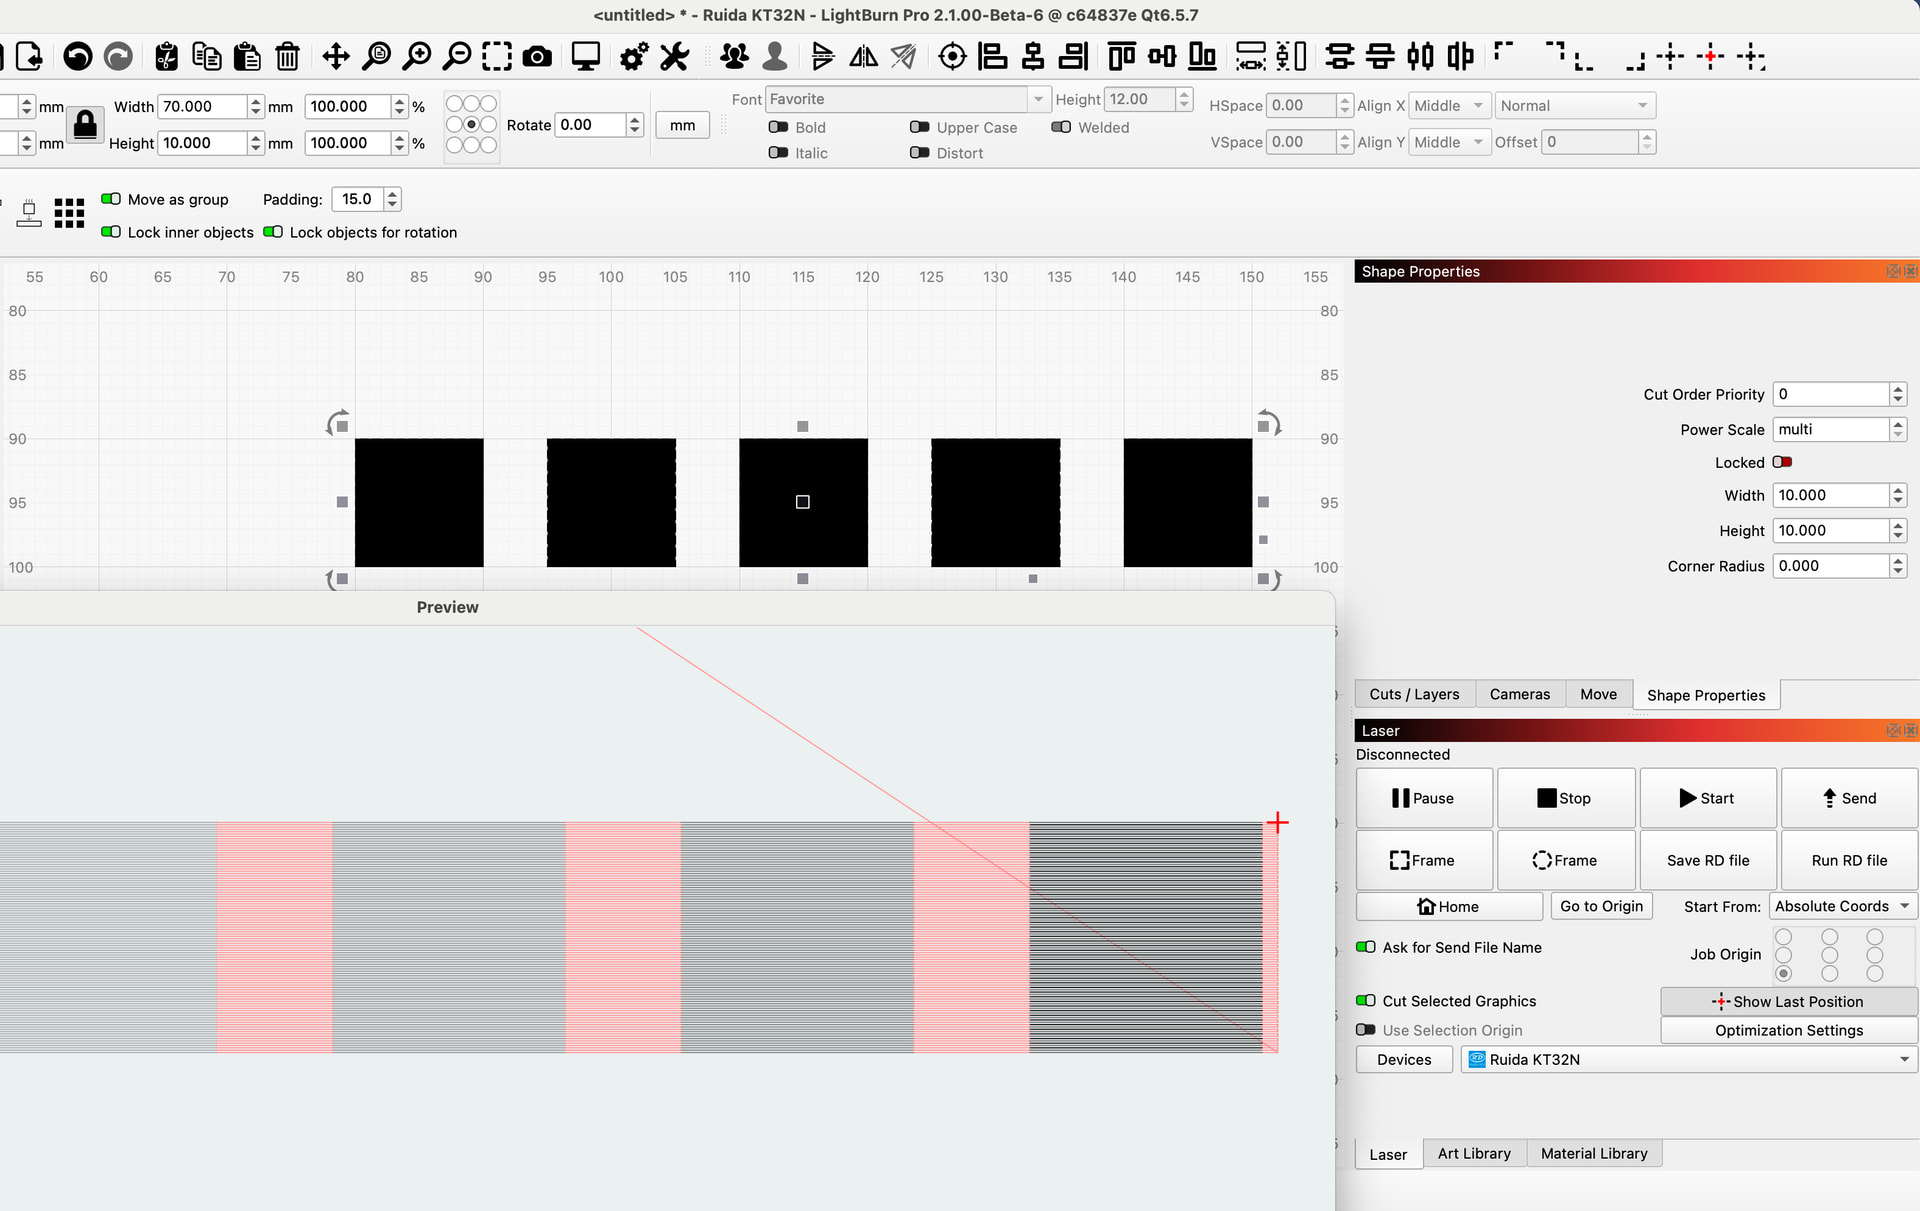
None of those work during a material test. I can select any of them, even fill all at once, and each the result is the same. It just fills each square individually during the preview.
Try it and screen shot it in slow mo filling all squares at once and post it here for me please.
When I am talking about dummy switches I am referring to switches that are there and are not grayed out.
As in the radio buttons for the material test. None of them work.
Especially fill all at once. Try it using the preview. Result will be the same each and every time. It only fills one square at a time.
I speculate the programmers put each square on its own level which forces light burn to burn each square individually which in turn makes the time and effort to put those radio buttons there, and the coding behind it, useless. Additionally, it costs customers time trying to get them to work when they really don’t.
Those are dummy switches. Switches for dumb people.
By the way, I already did have to make my own.
So why even make lightburn have a material test if the radio buttons do not work like they should? The customers then have to turn around and make their own.
I feel they are doing something wrong when they implement an array for the buttons, like fill all at once, not to work.
That wasn’t a question. That was a statement. I already knew why and what was happening.
I am saying all this because there are ways around that and when I do that I already know how lightburn can get around that to make it easier for customers.
I don’t have much time as I have to find some wood but immediately, right off the bat, is to not go straight from the material test dialogue box to burning but to get the diologue box to print that ARRAY to the work area. With each row having its own layer.
At that point the customer can do the same as if he made his own.
There are other ways to. I haven’t even gotten started.
It’s been a while but I still remember my programming and how to get around things.
Y’all are just treating what to do with the material test wrong. The end result is you have radio buttons that don’t even work as proof of what I say. Thank you for replying by the way.
It’s okay that you see things differently than others, but closing a thread with the tag “Solution” is not okay.
The purpose of this “tag” is so that others with the same or similar questions get faster answers. In your case, they get nothing.
If you are so convinced that LightBurn’s material test is useless and other functions also do not work as they should, write directly to support@lightburnsoftware.com and explain exactly what you mean/want.
I think the @LB people have mostly gone on Christmas vacation, or they will have dropped in here and come up with a qualified clarification.
Lightburn has another really cool feature! It’s called the preview button. Push that and then push play on the window that pops up and you will see exactly what the program is going to send to the laser.