If your limit sw is wired to the BJJCZ board I dont think it would home, but it could shut it down at one of the IO ports (I think). I’ll look through the literature see how that works.
If it really is a home in ezcad, that would be awesome and I bet the team would like to know about that
I suppose it moves until the limit switch is triggered and changes the value on the I/O port — at that point, it immediately stops.
But in Rotary Mode 100 cm is 100 cm it exactly how it should be with same parameters with no gaps or any other troubles. Here, we stopped only by max length parameter of working area (total steps + roller diameter).
Trouble only appears to be in Repeat marking.
Looks like its apply some sort of rotational trajectory/working area bend recalculation, but its turned off… and even more we use linear mode, dont know what cause trouble in here…
I will rec video of test above a bit later (share with you on monday).
Also, sad news for us, according to docs of ISO we cant use repeat marking for our purpose as it intended to mark EACH 100 cm length mark as " Xm " (1m/2m/3m and so on…) So sadly, but repeat marking by 1 cm is not suitable
Looks like need to wait for disabling limitations of parameters…
That is the odd part.
What value are you using for splits?
If you used 10mm splits with rotary setting, does it still come out exact?
What acceleration value did you use in your latest testing?
That would require a second pass. I used to do it that way to add the numbering and the longer tails 10mm graduations after running the 1mm grads, before I figured out the easy way. When I first started testing the X-Y table I would actually run 1mm repeat marking and then go back and run 10mm repeat marking to check repeatability. I don’t have a video up of it currently but didn’t have any issues.
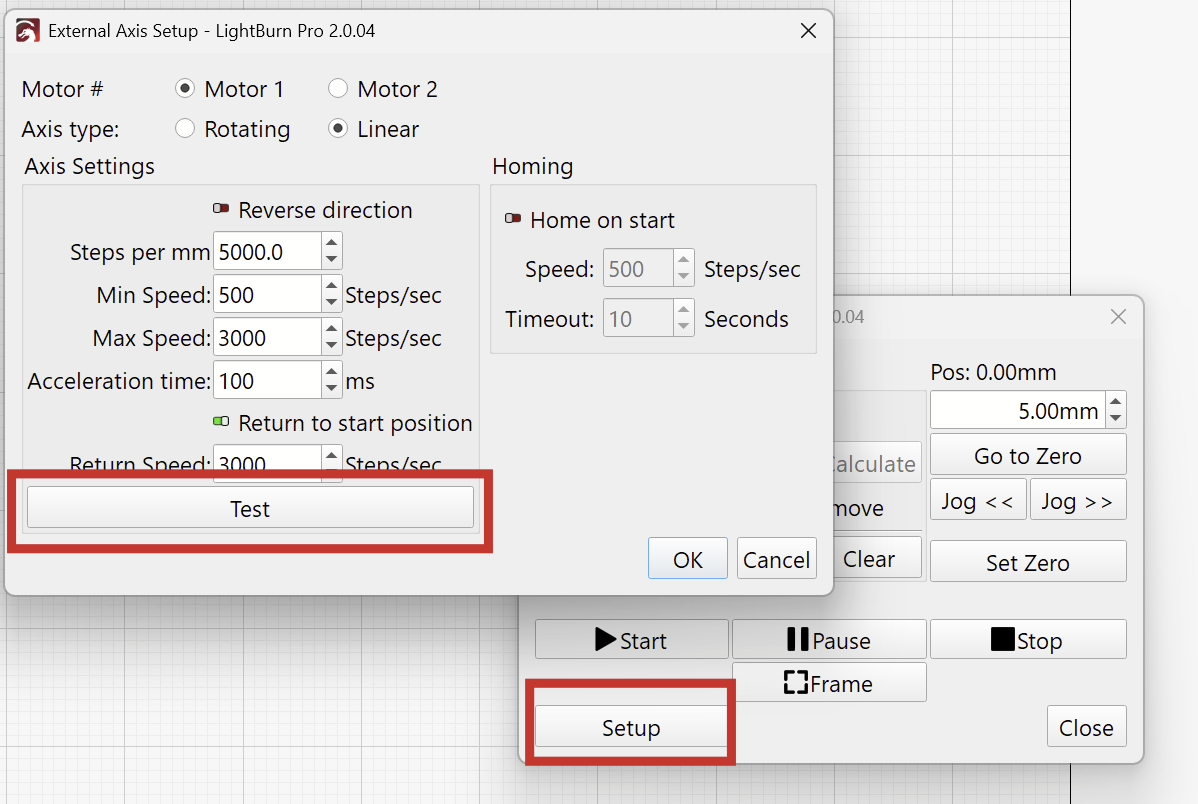
Your methodology looks sound. I would still slow down the 8000 down to maybe 3000. Never mind, I see you used the old image but updated values in your post.
That would require a second pass. I used to do it that way to add the numbering and the longer tails 10mm graduations after running the 1mm grads, before I figured out the easy way. When I first started testing the X-Y table I would actually run 1mm repeat marking and then go back and run 10mm repeat marking to check repeatability. I don’t have a video up of it currently but didn’t have any issues.
But how would I skip the 100 cm mark?
It will mark 99, 100, 101, and so on… I can’t just skip 100 cm. To do that, I’d have to mark up to 99 cm, stop, skip one step, then continue from 101 cm. Only after that could I go back and repeat the meter marks.
So instead of a single operation, it would take 10 operations for 4.5m ruler:
mark all 0–99 cm positions (5 operations),
skip every 1-meter mark (4 operations),
continue again with 0–99 for the next meter,
and once the last meter is done, finally add the 1-meter marks (1 operation)
So the whole point of automation is completely lost in this case…
Your methodology looks sound. I would still slow down the 8000 down to maybe 3000. Never mind, I see you used the old image but updated values in your post.
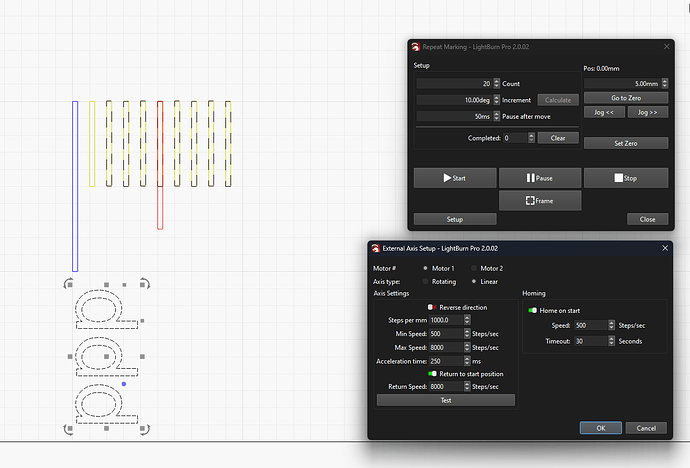
Yes, the initial settings were as shown in the image (all matching the EZCAD configuration). Later, following your and Aaron’s advice, I reduced the speeds and increased the pauses — but it still didn’t help.
Can you measure the movement when you use the Test button in Repeat Marking ? It should be exactly 50mm. I claim, it will be more in your case.
Sure, i will be near laser on monday and will rec video of test for you.
The gap after each “repeat” indicates that 1000 steps per mm is too high. try a lower value here.
But why in rotary mode with length of “1_000_000 steps per rotation” its marks 100 cm exactly as 100 cm with no errors… There are another “inner” meachincs in this mode?
No, I switch back and fourth between linear and rotary both work as expected. For your projects sounds like rotary is the better of the 2. Im going to put in a feature request about 2 or more layers of dynamic text.
There is another dynamic option where a csv file is used so it advances to the next value in the column or table, I haven’t messed with it much but it should work for your 1-99, 1 m, 1-99, 2 m, etc. But if linear doesn’t work well It won’t help. Hopefully after next update the 500mm limit on rotary is removed.
I can’t currently wrap my head around explaining this.
It’s possible that when you are using Rotary Mode, your 1M steps per rotation experience a rounding difference depending on your Split size.
But yes: 1 Million steps should move your table 1000 times further than 1000 steps would!
So my bet, instead is that you still have this difference, it’s just harder to spot.
→ Try the Test button in the Rotary Setup with the 1M steps per rotation. It’ll take a while to travel all the way, but measure the distance it moved. (If my understanding is correct: It’ll be more than a meter)
Simple workaround: Instead of marking with Lightburn’s number format, mark with its CSV one, using a file with “1” on the first line, “2” on the second, “3” on the third…“99” on the 99th, “1m” on the 100th, “101” on the 101th, and so on. Shouldn’t take more than a couple minutes to set up, but it can’t handle more complex changes.
Something I would be curious about, if you set your repeat marking graphic to a 20mm scale or a 30mm scale, if it still errored the same amount. Still trying to get my head around on what is causing your error.
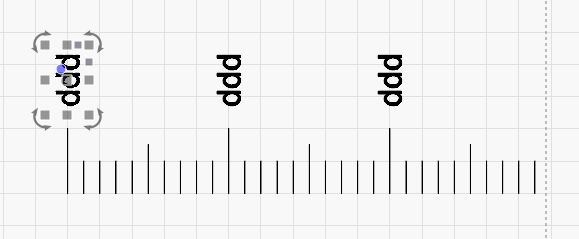
Each part is 5 cm long (numbered for convenience).
As you can see, the start of the next part is exactly where it should be (on the cm mark), while the marks in the previous part are partially shifted.
Video 2 (3 cm sections):
Same issue… all lines except the first one are partially shifted, while the first line of the next part is exactly where it should be.
100% correct. It moves the right amount, but it is squeezing the gradient lines. Make sure of focus and re-calibrate. Then remember to raise the head to re-focus on the ruler.