I need some help guys. I hope its ok to ask this here. 80w omtech blue and grey laser.
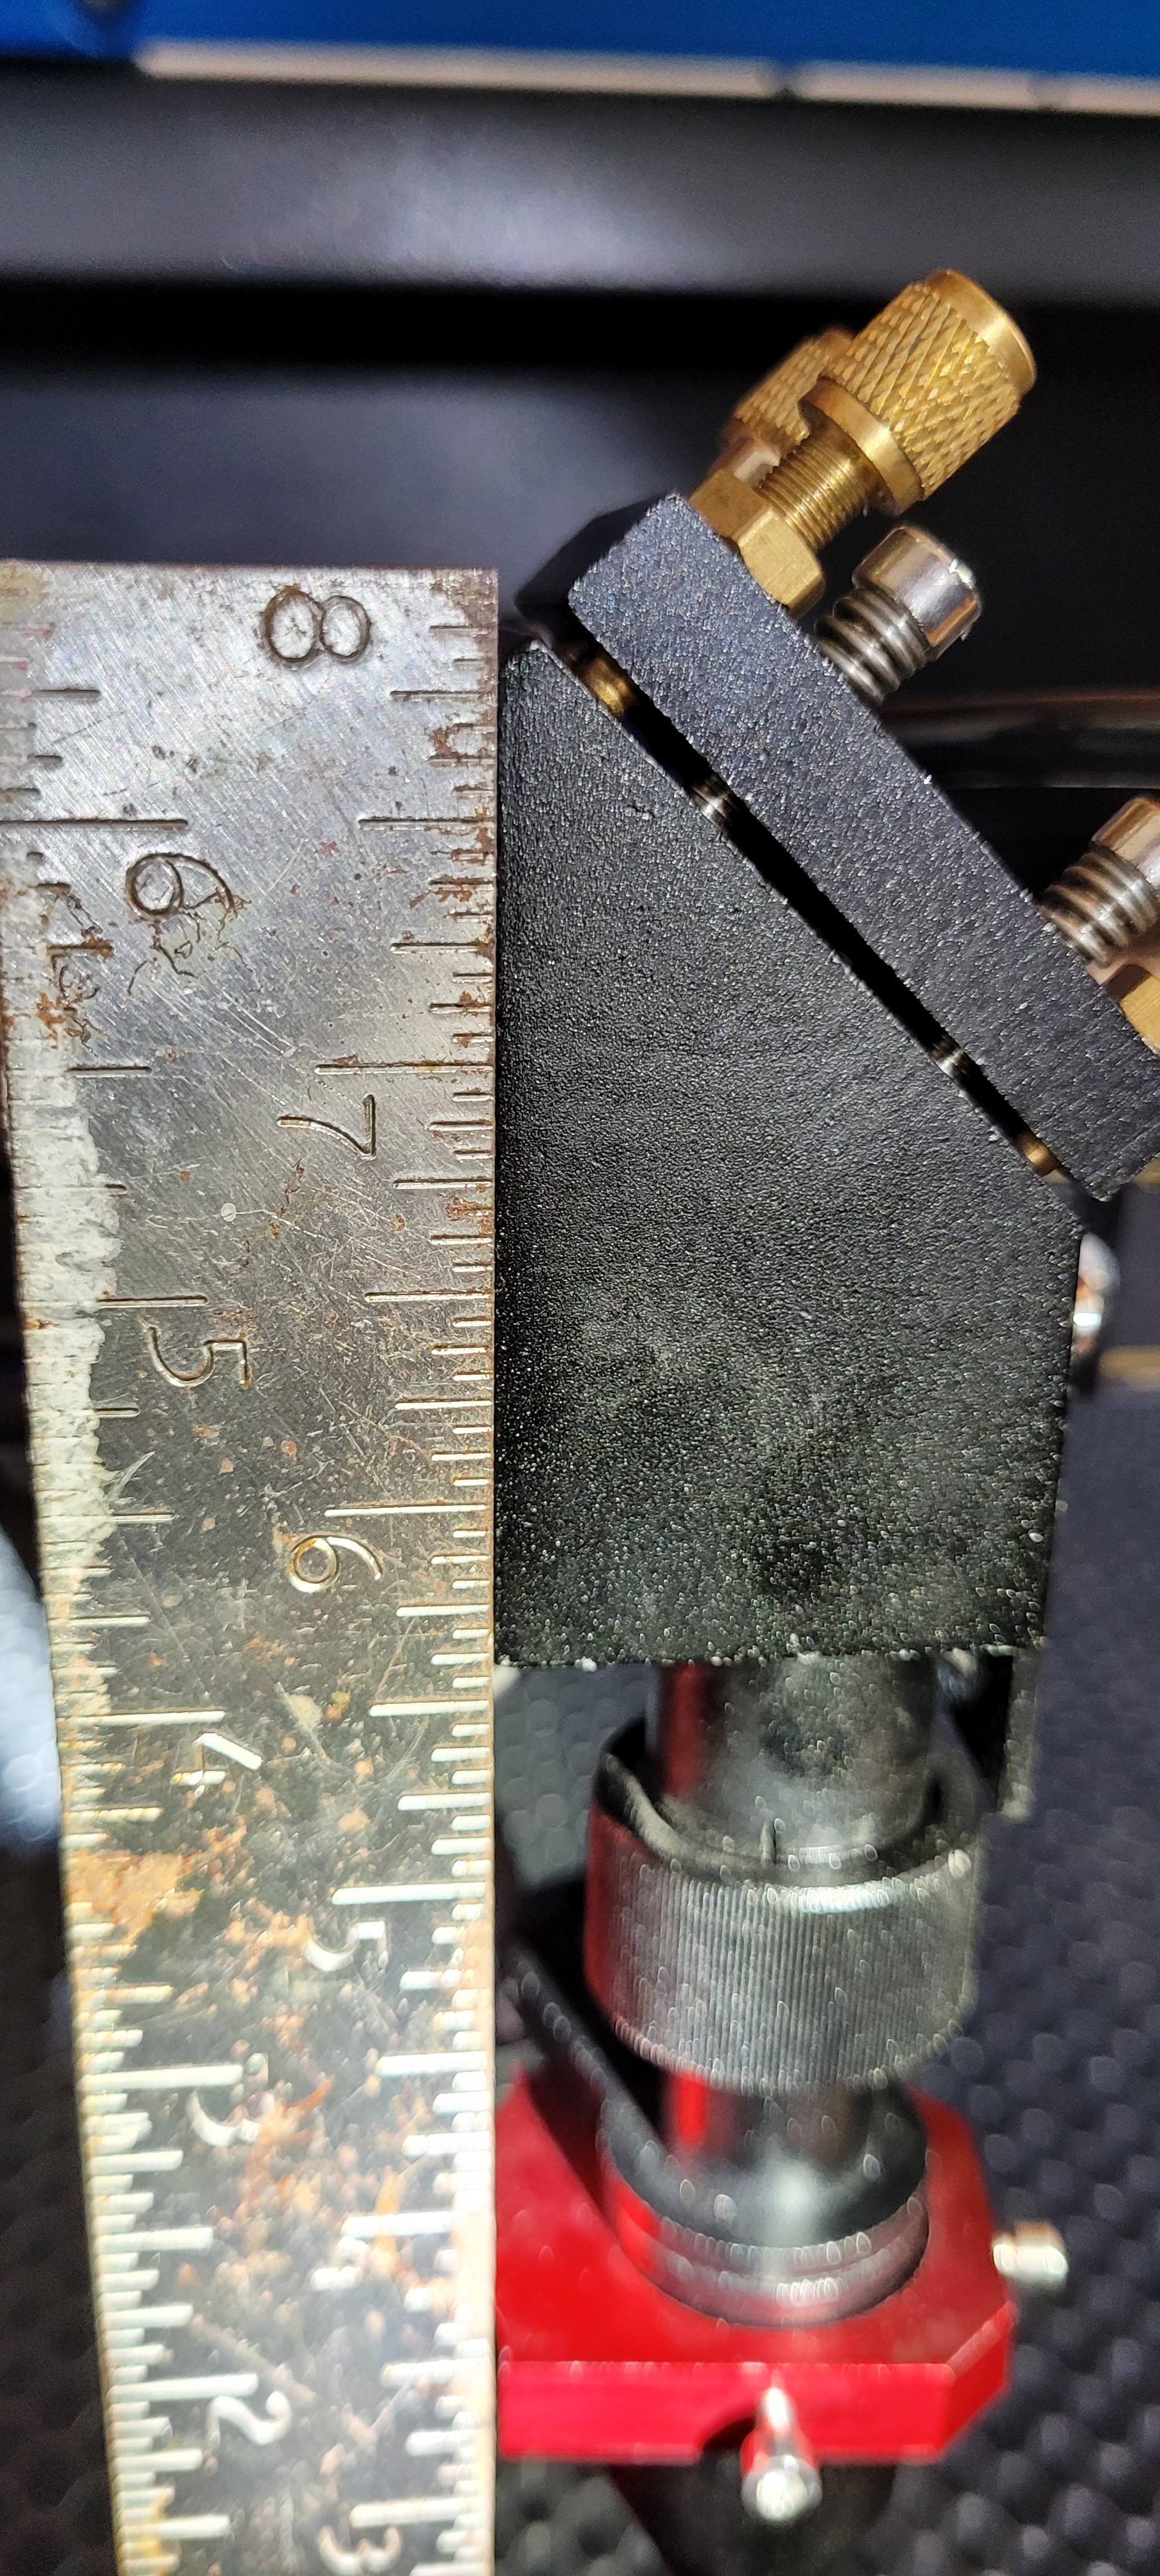
I’m trying to align mirror 3…like in this video:https://youtu.be/G-HhArItCqQ
I have the front right dead center…when I move mirror 3 to the far left and do a pulse…its off. Which adjustments do I use to get the 4 corners to align on the same dot/pulse? Mirror 2 screws…or the ones on mirror 3. This has been extremely frustrating and I can’t tell you how many HOURS of videos I’ve watched…even before purchasing the laser!
Cam’s aligned right up on the 4 corners…mine is not. I still have a long way to go…but I’m trying to get the machine set up so I can go thru the lightburn tutorials.
Any help GREATLY appreciated. Thanks
M1 MOUNT should be adjusted so that the burn dot is in the centre with the mirror set roughly 45 deg to the face of the laser tube. That’s a good start for the following. The alignment on mirror 2 is done by adjusting mirror 1 screws. Do not try and get the dot in the middle of mirror 2 until you can move the Y axis (I assume) from very close to mirror 1 to as far away as possible. When the dot lands at the same point at both ends of the axis then mirror 1 is done. If the dot isn’t in the centre of mirror 2 then move the whole mirror mount L or R and Up and down. Try and not change the mirror angle. When it’s in the centre go back and start the process again. Start close to M1, then move away. If it tracks the dot then you are done. If not re adjust M1 and then if required move M2 MOUNT as before. Check that the burn dot is still in the centre of M!. If not adjust and start again. If you have plenty of adjustment on the M2 MOUNT for the next stage then it isn’t too critical to get the spot dead centre of M1. When M2 is done, do exactly the same with M3. Move it very close (150mm) to M2 and make a burn. Move M3 as far away as possible and make a dot. Again don’t worry about it being in the centre at this stage. When the dot stays aligned over the full distance then move the M3 MOUNT to centre it then repeat. In most cases the M3 is machines at a perfect 45 deg to the lens tube so I have found that to touch that is asking for trouble. I just leave it flat against the machined face of the lens tube mount. If you suspect that the lens tube is not vertical, then check this first with a square off the table in both axis.
Well I do it different. I do use the alignment tool sold by OMTech and made by American Photonics. This video is done by them and this dude is spot on. Some key points. Back all the adjustment screws out all the way before you start. Make sure the laser head is level to the bed and the vertical. Once mirror 3 is adjusted you don’t touch it again, move other stuff to align to center. Same with mirror 2 once it is adjusted. Also, you can move the whole mirror assy to get a basic center to start with full alignment. Again, working backwards.
One of this guys points is to align to the AXIS and that made all the difference in my system adjusting properly. Once the first two mirrors are aligned put tape over the output end of the tube and move mirror 1 to as close to center as possible and finally if it is off at the laser head now, as in not centered in the output hole, you adjust the TUBE to get centered.
Works for me. The tool is excellent and is very bright. I tried to make my own but it was not good enough (bright).
Remove the part that holds the lens and measure diameter. What is really nice is you can see how much you are adjusting, cut the distance in half and you are very close.
As I see the problem with this method of working backwards toward the tube is if for example the head was set too low at the start and you come to set the tube to mirror one and it needs to go down. If you have generic tube clamps that come with these machines there is no down adjustment.
My next tube purchase will be a SPT TR series with the built in Red Dot pointer to do exactly the same job as in the video but in the beam direction of travel.
I pretty much have my mirrors aligned. I even aligned the laser to somewhat the center of the cone.
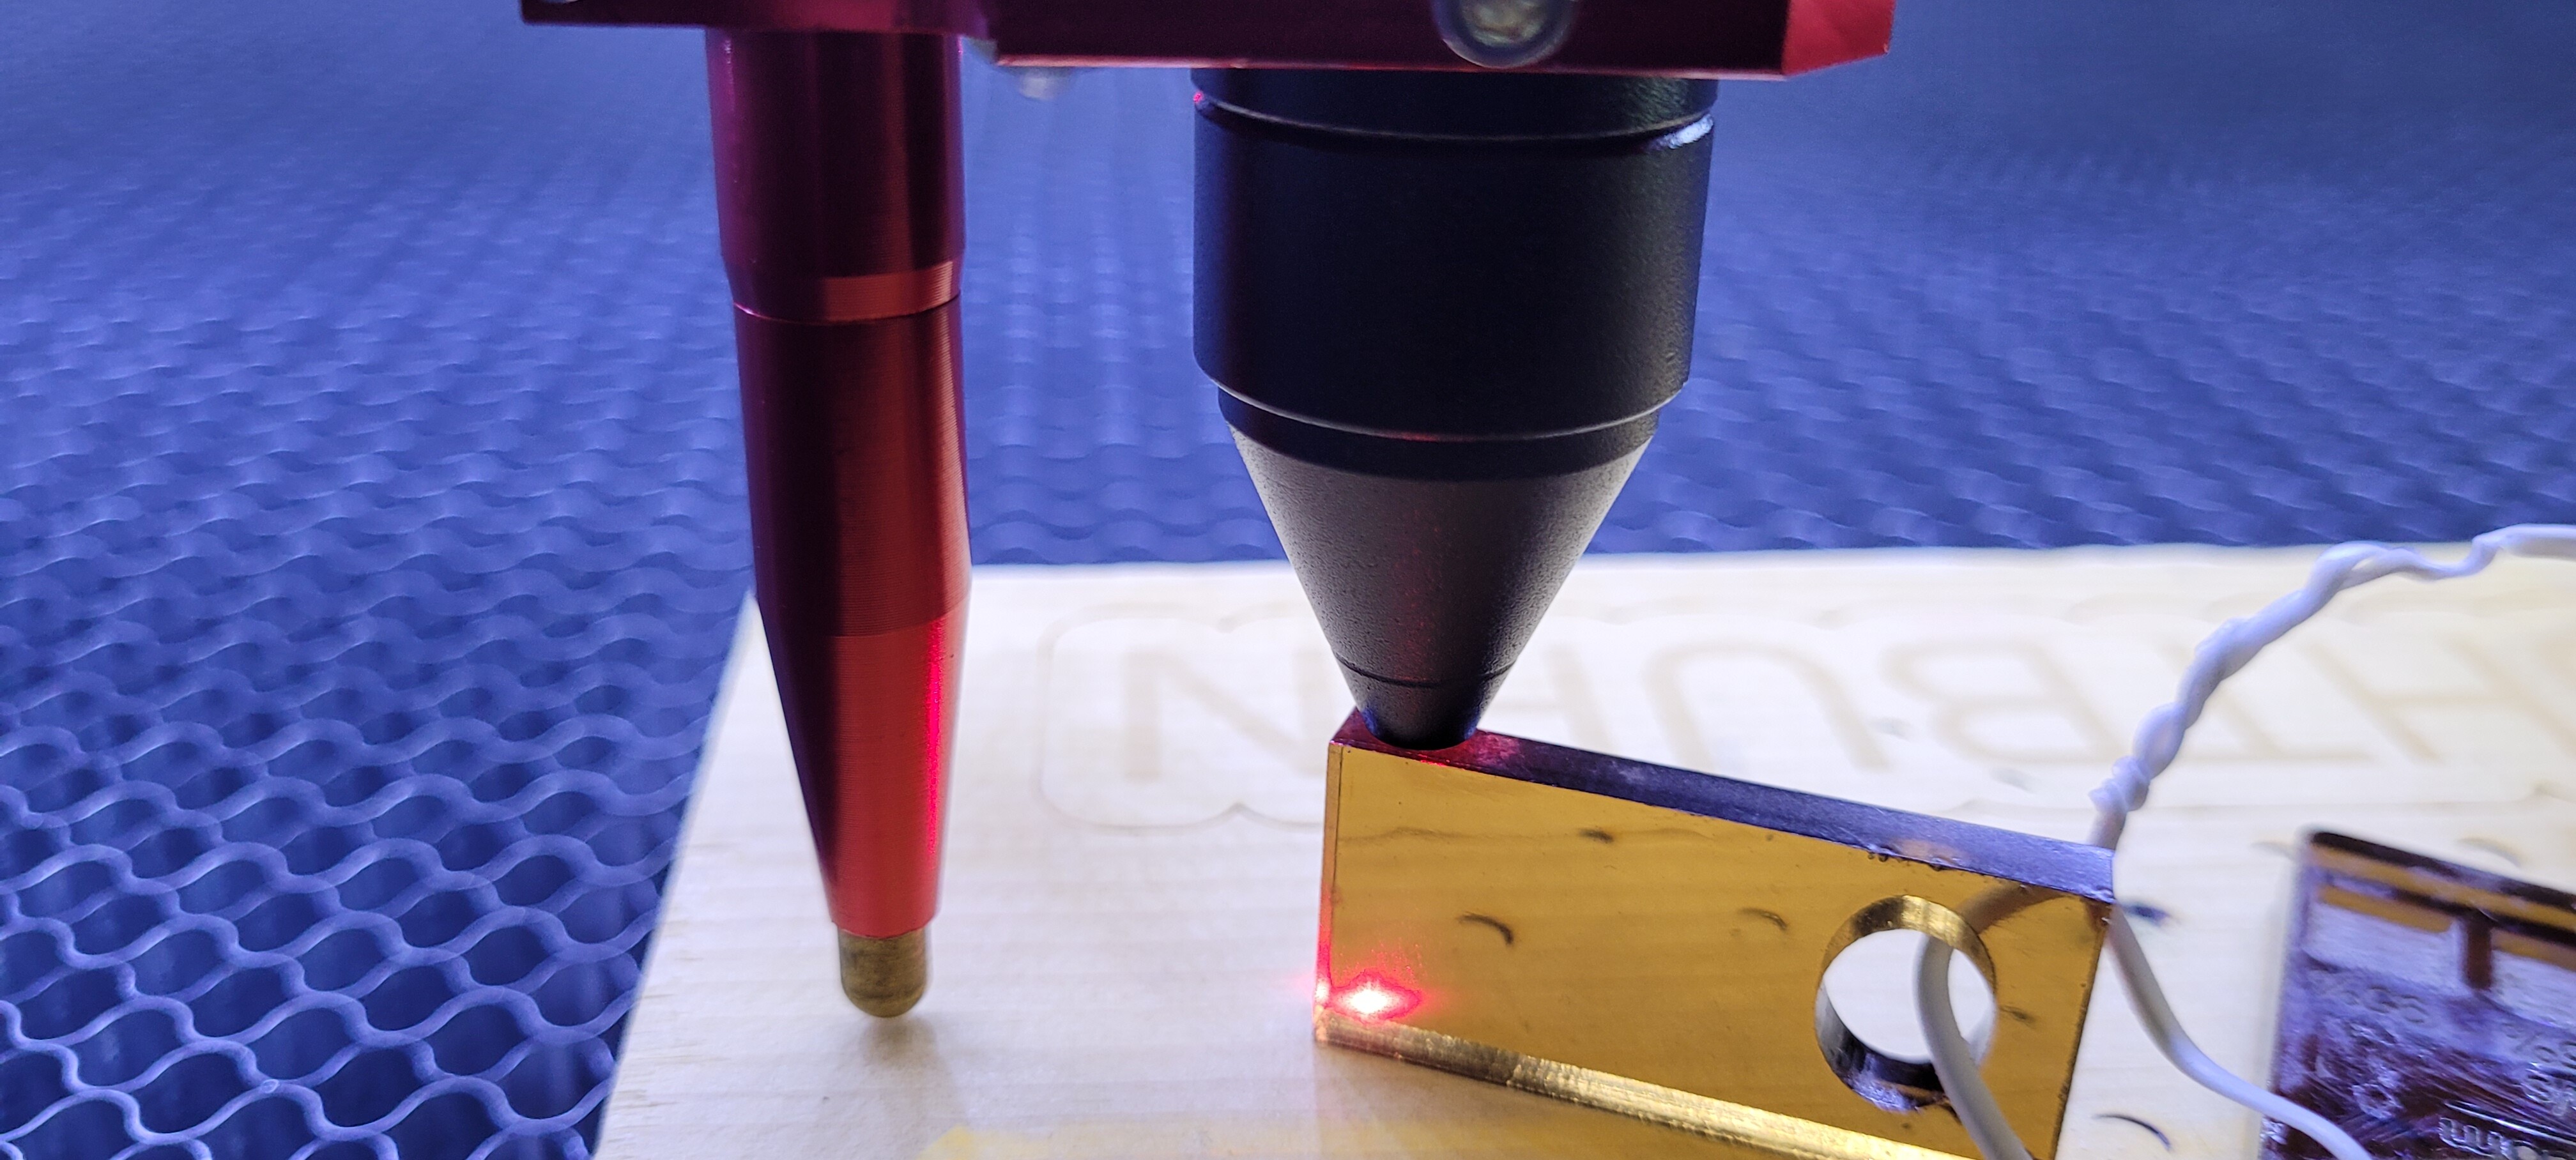
I tool the tube apart and cleaned the lens…put everything back…made sure lens was in correct orientation…saw my reflection…and now the pulse is a half moon.
@DrAsus I’m guessing the beam is clipping your nozzle. Do yourself a favor and see if you can cut a nozzle checker. I got this file from the net (thanks to the person making it available, can’t remember who).
You’ve see the videos of people sticking tape over the nozzle to check if the beam is passing centrally. Well stick the tape to this checker, hold it over the nozzle and pulse at low power. You can fine tune this way.
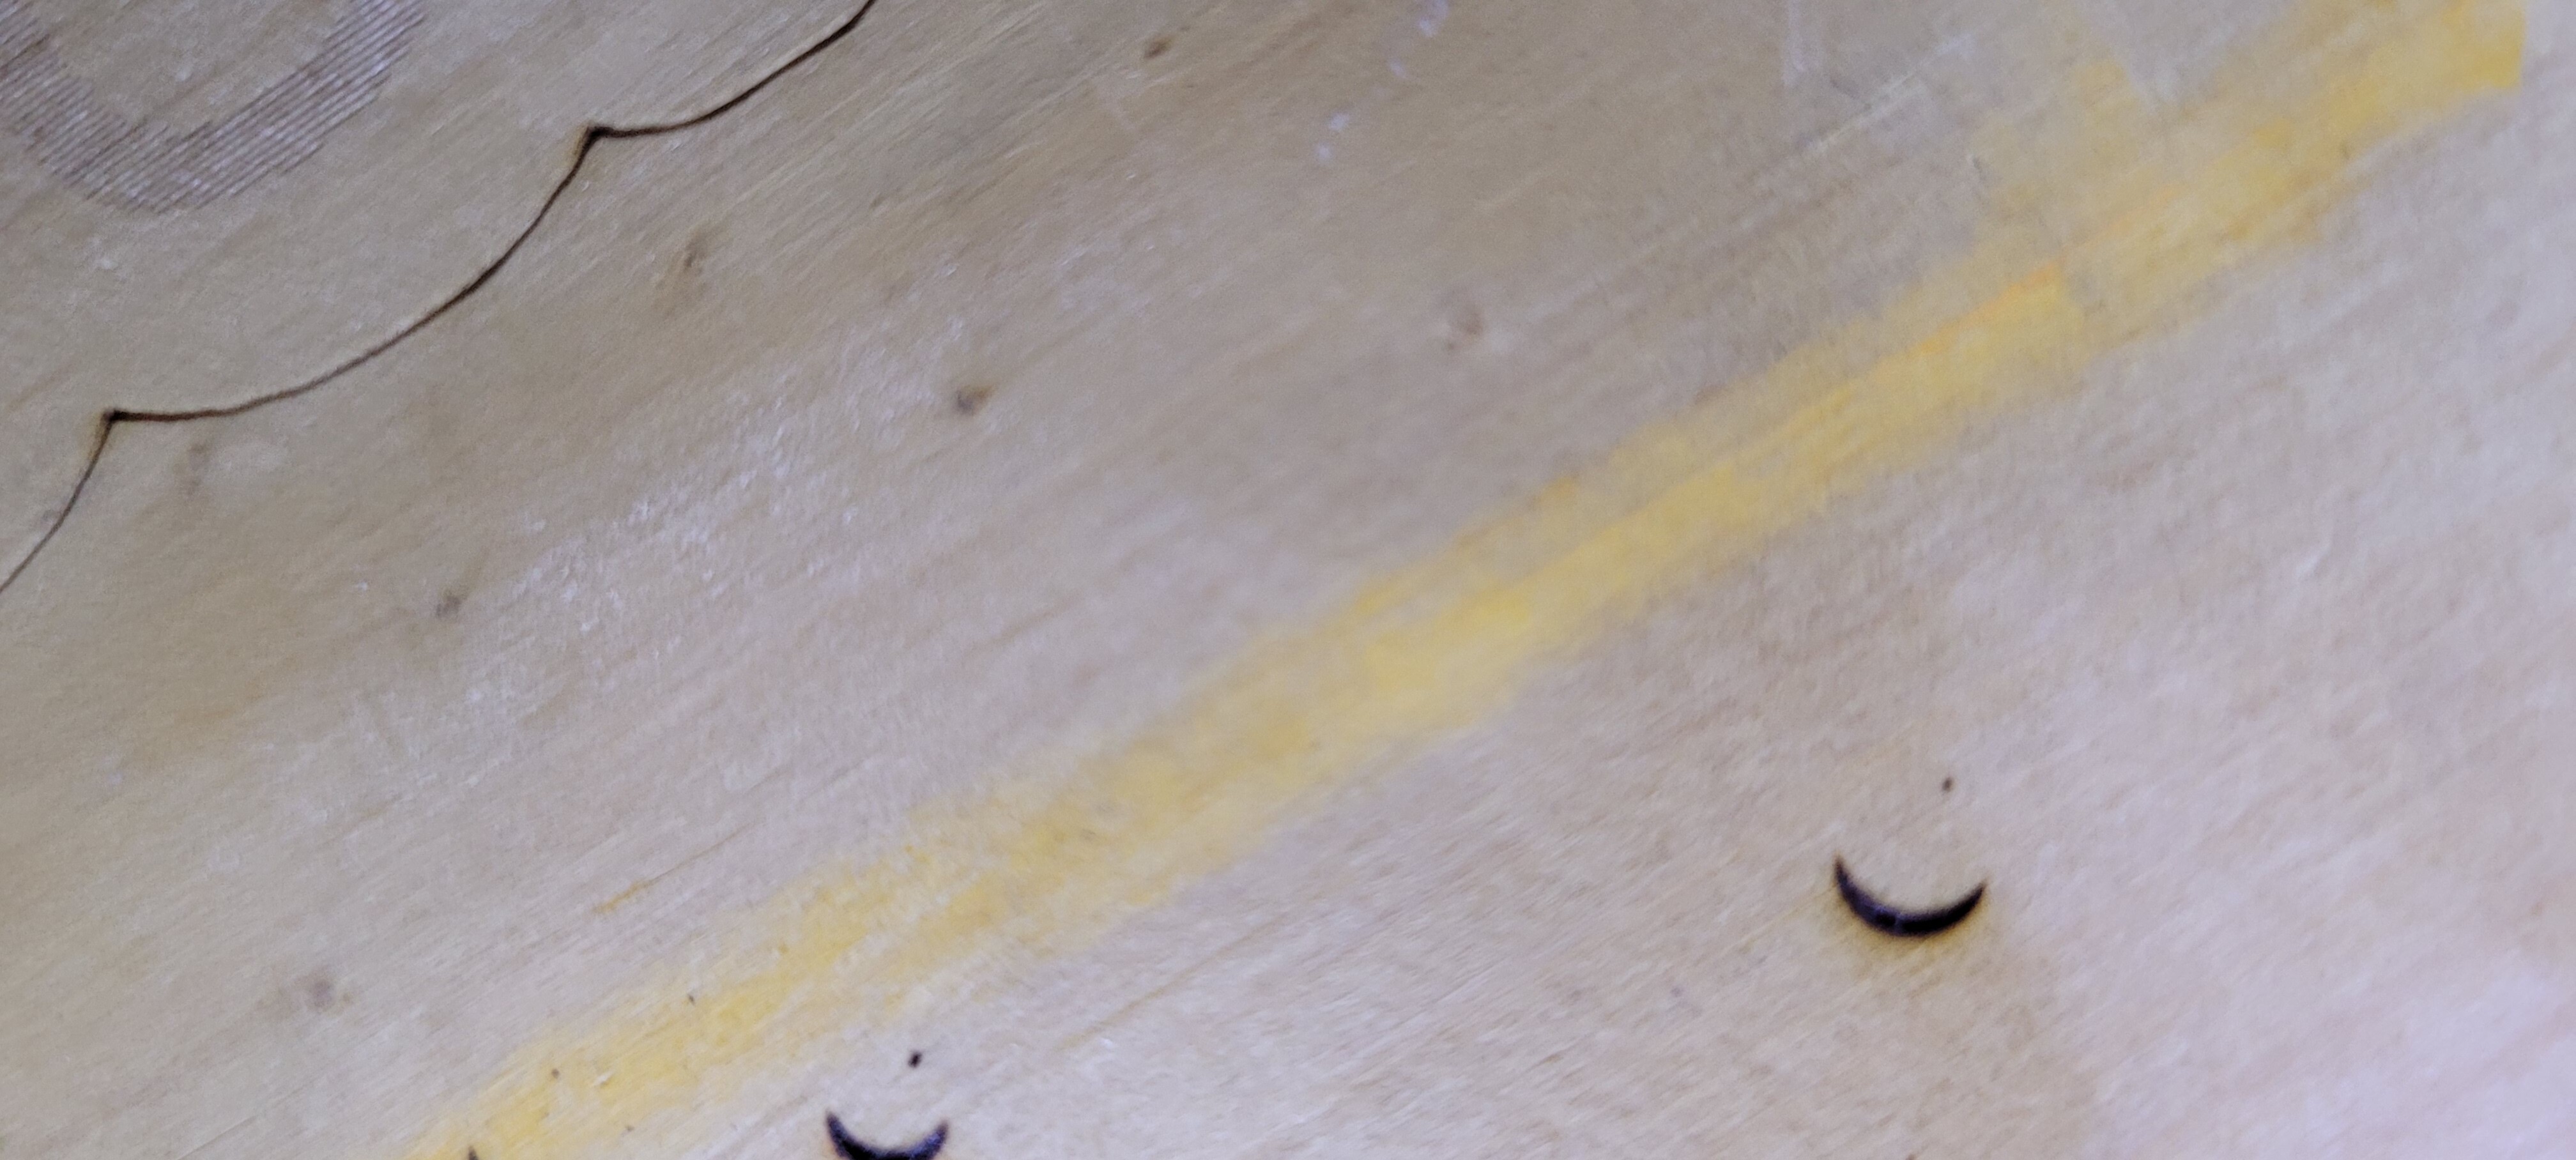
I’ve adjusted and adjusted Mirror 3…and finally have a small dot in the tape that was placed over the nozzle. I used the gage that came with the machine for focus…but it still is doing a moon shape on the scrap wood when I fire a pulse…instead of a dot like before.
This is the way i’ve done it with great success. No special aligning tools needed, just some tape. Hope it helps, it helped me a while back, I found that he gives very thorough instructions and details.
If you do start again Adam, I would really recommend setting M3 flat onto the machined surface first, It’s good reference. When I was running round in circles setting my alignment I found that putting M3 back to the machined face settled everything down. Check the lens assy is square to the table in both axis before you begin. And if you can, check that the M3 mount front face is perpendicular to the X rail.
I’m back from vacation and hope to tackle this this week!
I’ve got to figure out why it’s making a perfect center circle on the nozzle tape…but the half moon on a piece of wood that is height adjusted with the acrylic gage that came with the machine.
I think I’m going to disassemble the nozzle again…clean the lens…again…and reassemble…again…see if that does anything.
Hopefully I will be able to upload these photos.
I did square the nozzle to the bed…it was a tad out…but that didn’t help…still half moon on scrap piece of wood that is focused with oem acrylic gage.