I don’t understand.
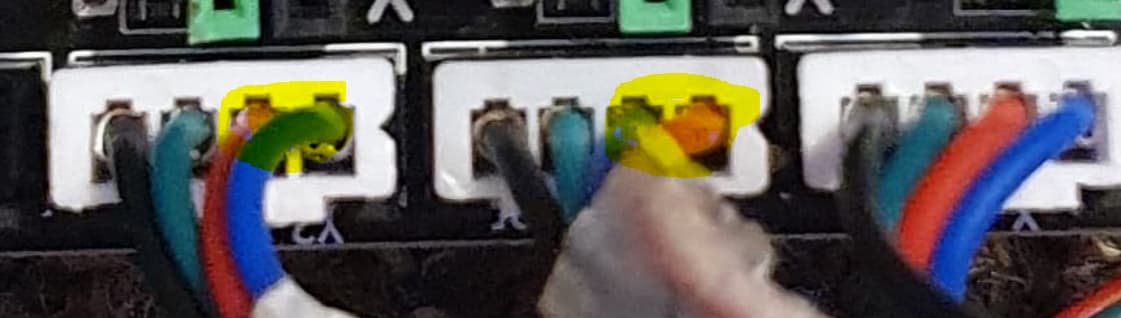
The Y motor on the right side works synchronized with the Y motor on the left side but in reverse, so the move of the gantry is in the same direction.
.
One Y coil pair reversed.
1 Like
to leave as it is?.. ![]()
You have 2 working drivers. Put the one with 0V out of the board.
As a start adjust both VRef to 1.10V. Maybe Y needs a bit more but start with thaht values.
i bought another 3 driver from amazon
Your machine does not have a Z motor, but you can adjust the working ones and start lasering.
Adjust the drivers with the the X Y motors connectors unplugged.
And don’t forget to align the left belt.
can you help me, please, how to set the DIP switches for the tmc 2208 and drv 8825 drivers… I can’t find anything to help me on the internet
Thanks
For the TMC2208, it’s right there in the table.
High, High, 3rd Switch doesn’t matter.
For the DRV8825
Low, Low, High
Source:
low means off and high means on?
I do not really understand
which of the switch 1,2,3 must need up or down…down to 1,2,3 …up to ON DP
Correct! “ON DP” means High.
The Switch positions depend on the stepper driver, you are using. You can find it all in the table of the screenshot I posted.
Since the initial positions were set for 1/16 steps, I assume it is the correct microstepping. It all depends on the firmware. But 1/16 is common.
Did you try it with the two working stepper drivers?
of the 2 stepper drivers that worked, the one that indicated 1.76v …i turned the potentiometer to the left or right, no changed anny values.
I changed the slot and it had the same problem .
I changed all 3 stepper drivers…the new stepper drivers is TMC2208. I adjusted Vref as you said.
I found Vref calculator online. I adjusted Vref to 0.64V…DIP switches = high-high. Centered and stretched belts…I did tests and everything was perfect…Everything is solved. Thank you to an to Parsec for all. if it is necessary to post pictures or something, I will gladly to do…
2 Likes
- .First check if limit switches are working and not triggered.
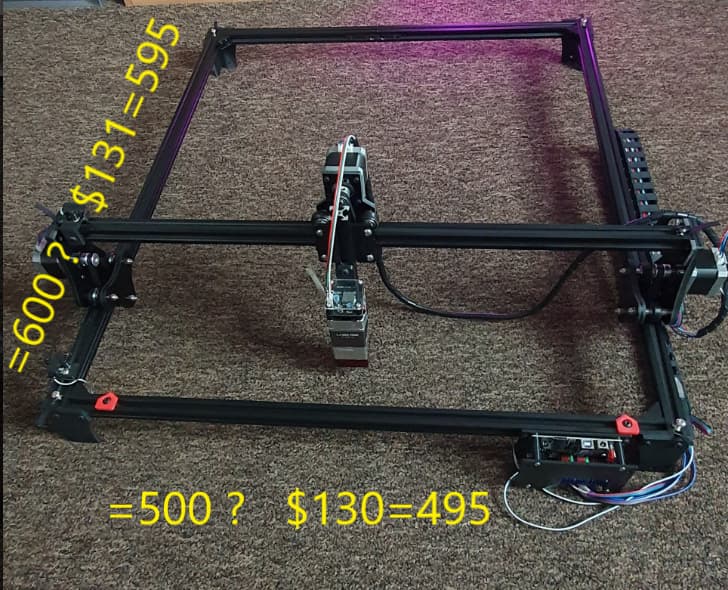
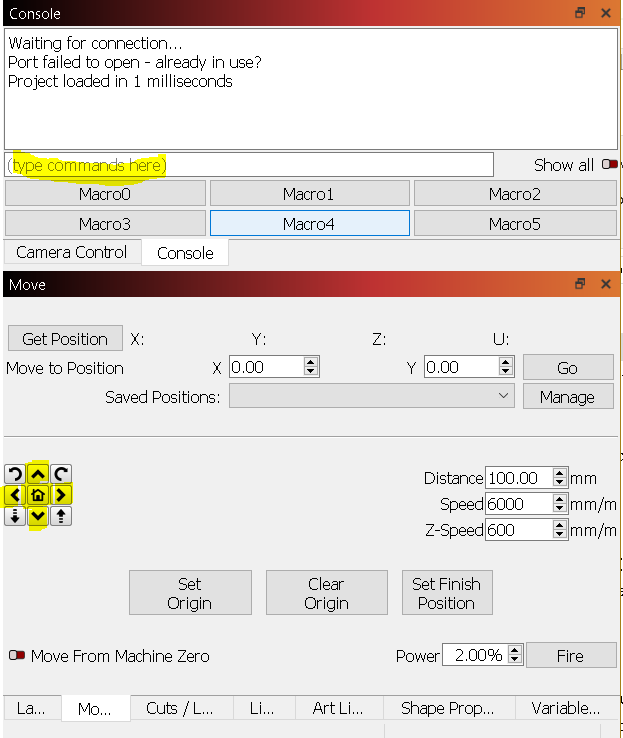
- .Check the measures and with laser connected to PC type the corresponding values in Lightburn Console (eg. $131=595) and press enter.
- .Jog laser head by hand to the middle of working area.
- .Type $22=1 and press enter.
- .Run a Home cycle (click home in the Move window).
,Then in Lightburn Move window slow jog the laser head to upper right corner - .In the Move window check X Y coordinates, when X=495 Y=595 check left distance in the upper right corner.
- .If there’s any distance left and you want to, you can add the amounts to $130 and $131.
Limit switches work
Y-650
X-550
$130=545
$131=645
I tested…now all it’s work perfect
Thank you
2 Likes