My Acmer P2 using Lighburn is not making a second pass on the same line as the first and the the cuts are all wonky. I’ve tried reinstalling both the driver for the machine and the Lightburn software , I’ve also made sure the LB setting is mm/min and nothing helps. Any thoughts on what setting i screwed up to make this get all weird?
If the machine does not follow the same path when given the same commands, the problem is almost always a loose screw / belt / fitting somewhere between a motor and the laser head.
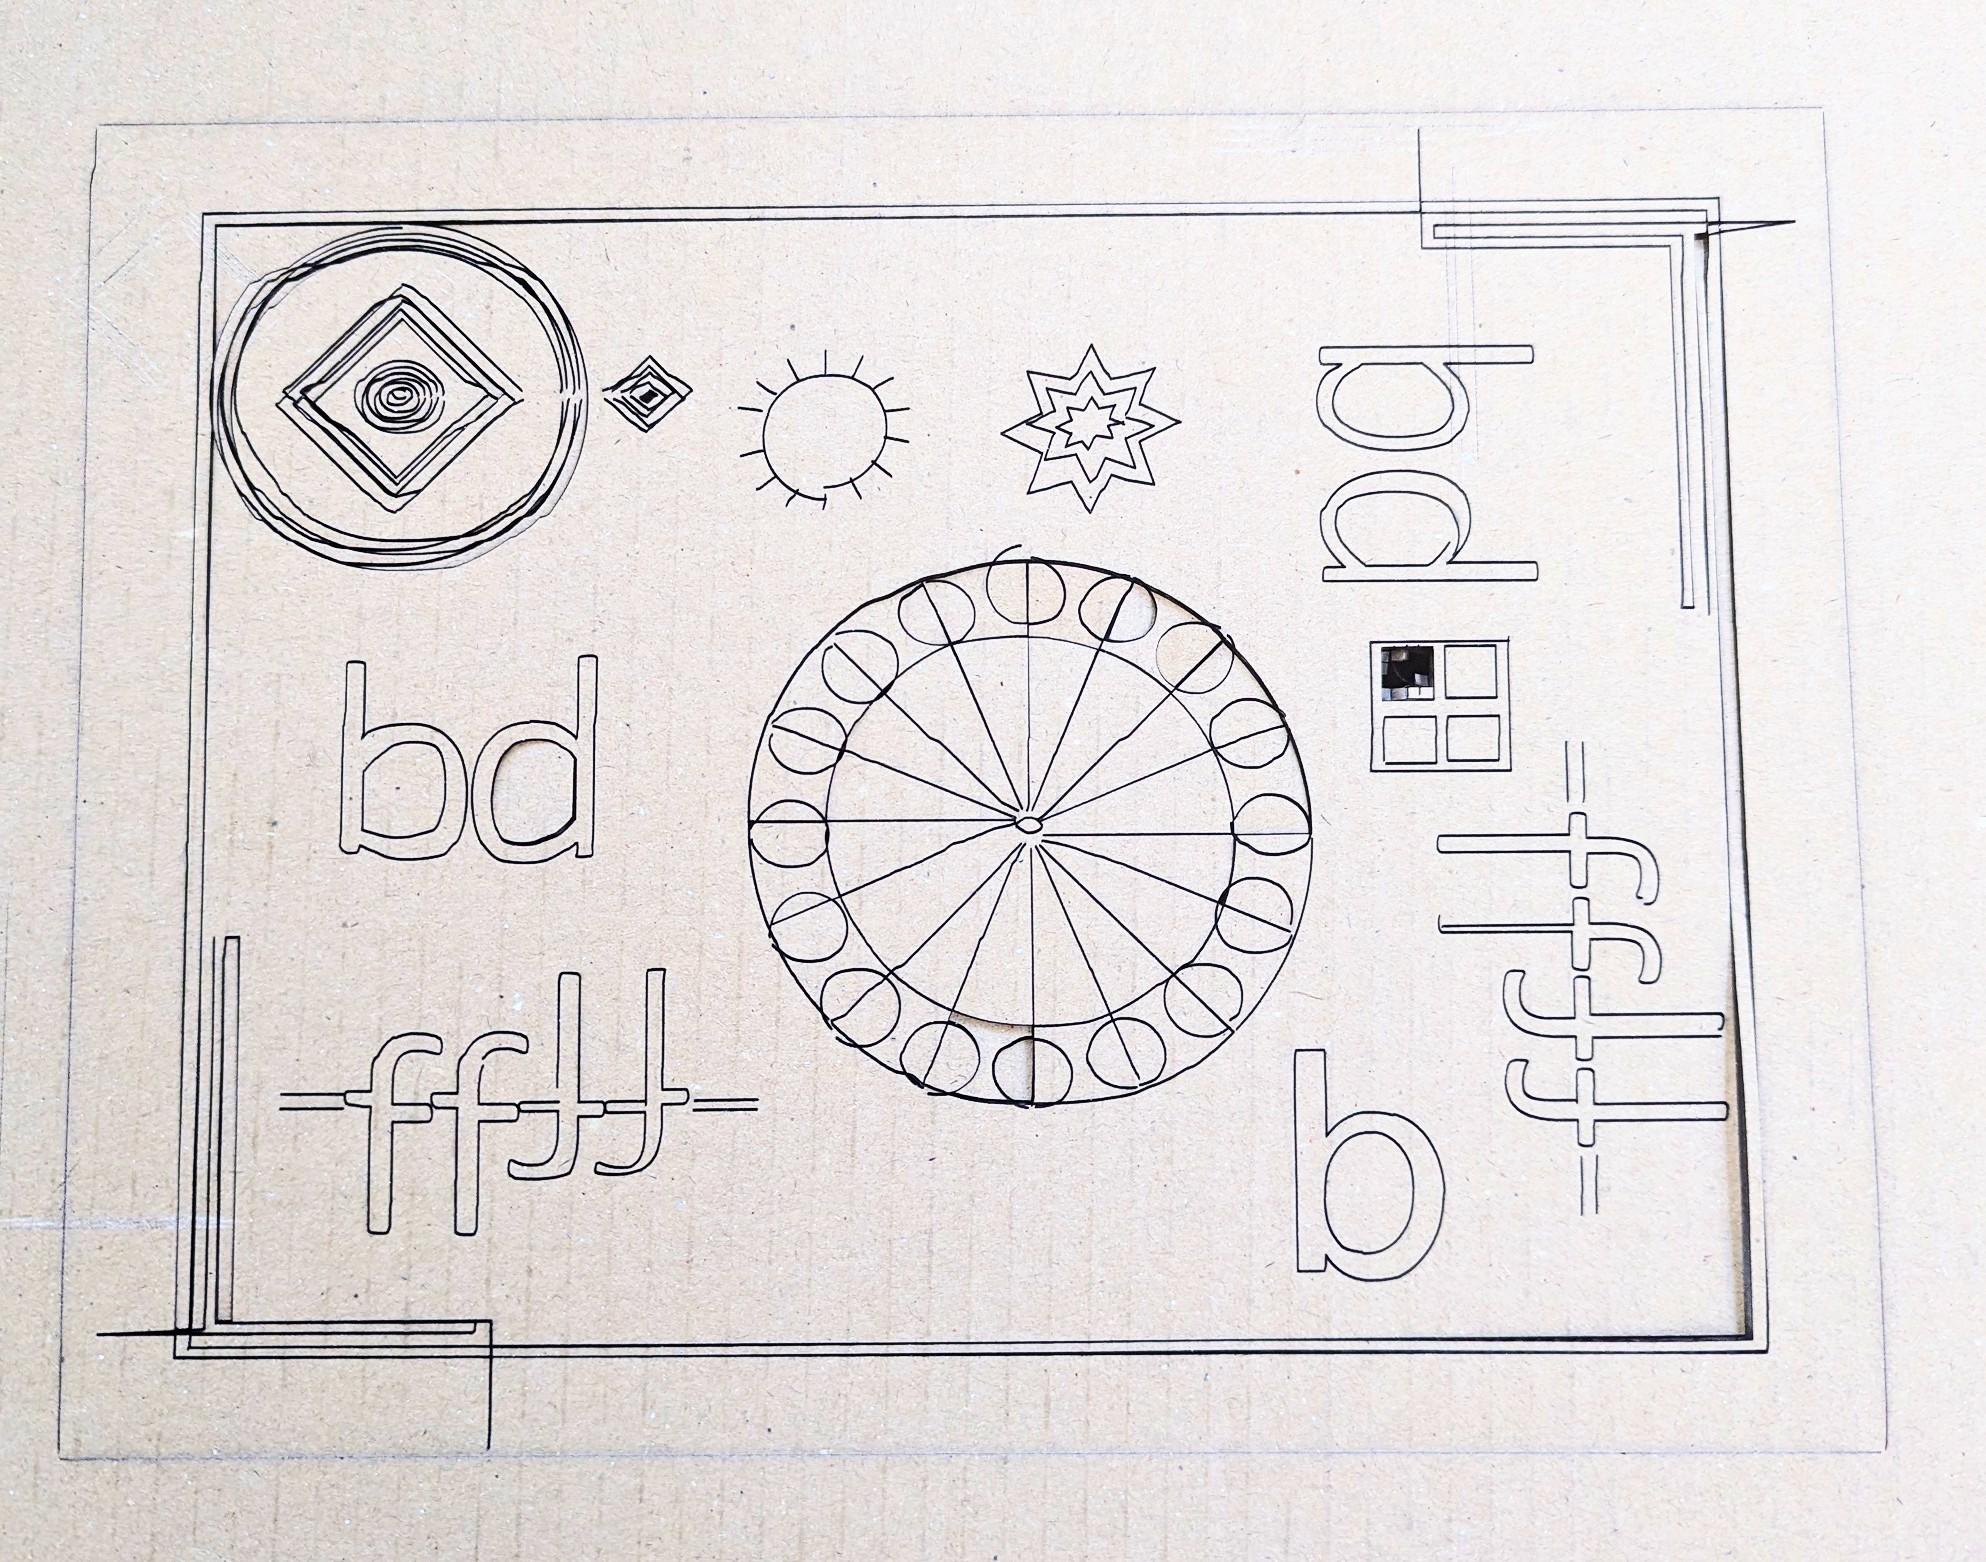
This test pattern helps identify mechanical problems:
Scale it uniformly to fit the platform and run it as fast as it will go in Line mode with optimizations turned off and power set to mark a sheet of cardboard. Any differences from the design will be informative; a photo will let us look over your shoulder.
Protip: Use cardboard / paper / whatever, rather than spendy stuff, until you’re certain you’ve found and fixed the problem.
2 Likes
Thanks. Seems it’s a belt issue. I’ve made some adjustments and it’s better but is there a way to calibrate it so that the belts are at the same tension on both sides of the machine?
AFAICT, all the advice on belts boils down to “when it feels right”, which isn’t particularly analytic. ![]()
The P2 seems to have good linear bearings that eliminate a whole bunch of potential problems, but make sure all the myriad screws are snug. If you can feel any looseness when you (try to) wiggle the laser head, find what’s not tight and screw it down.
Hi, so I’ve tightened all the screws (although not really finding any loose), adjusted the tension on the belts to align as best I can, and cleaned the laser, but I still keep getting wonky cuts.
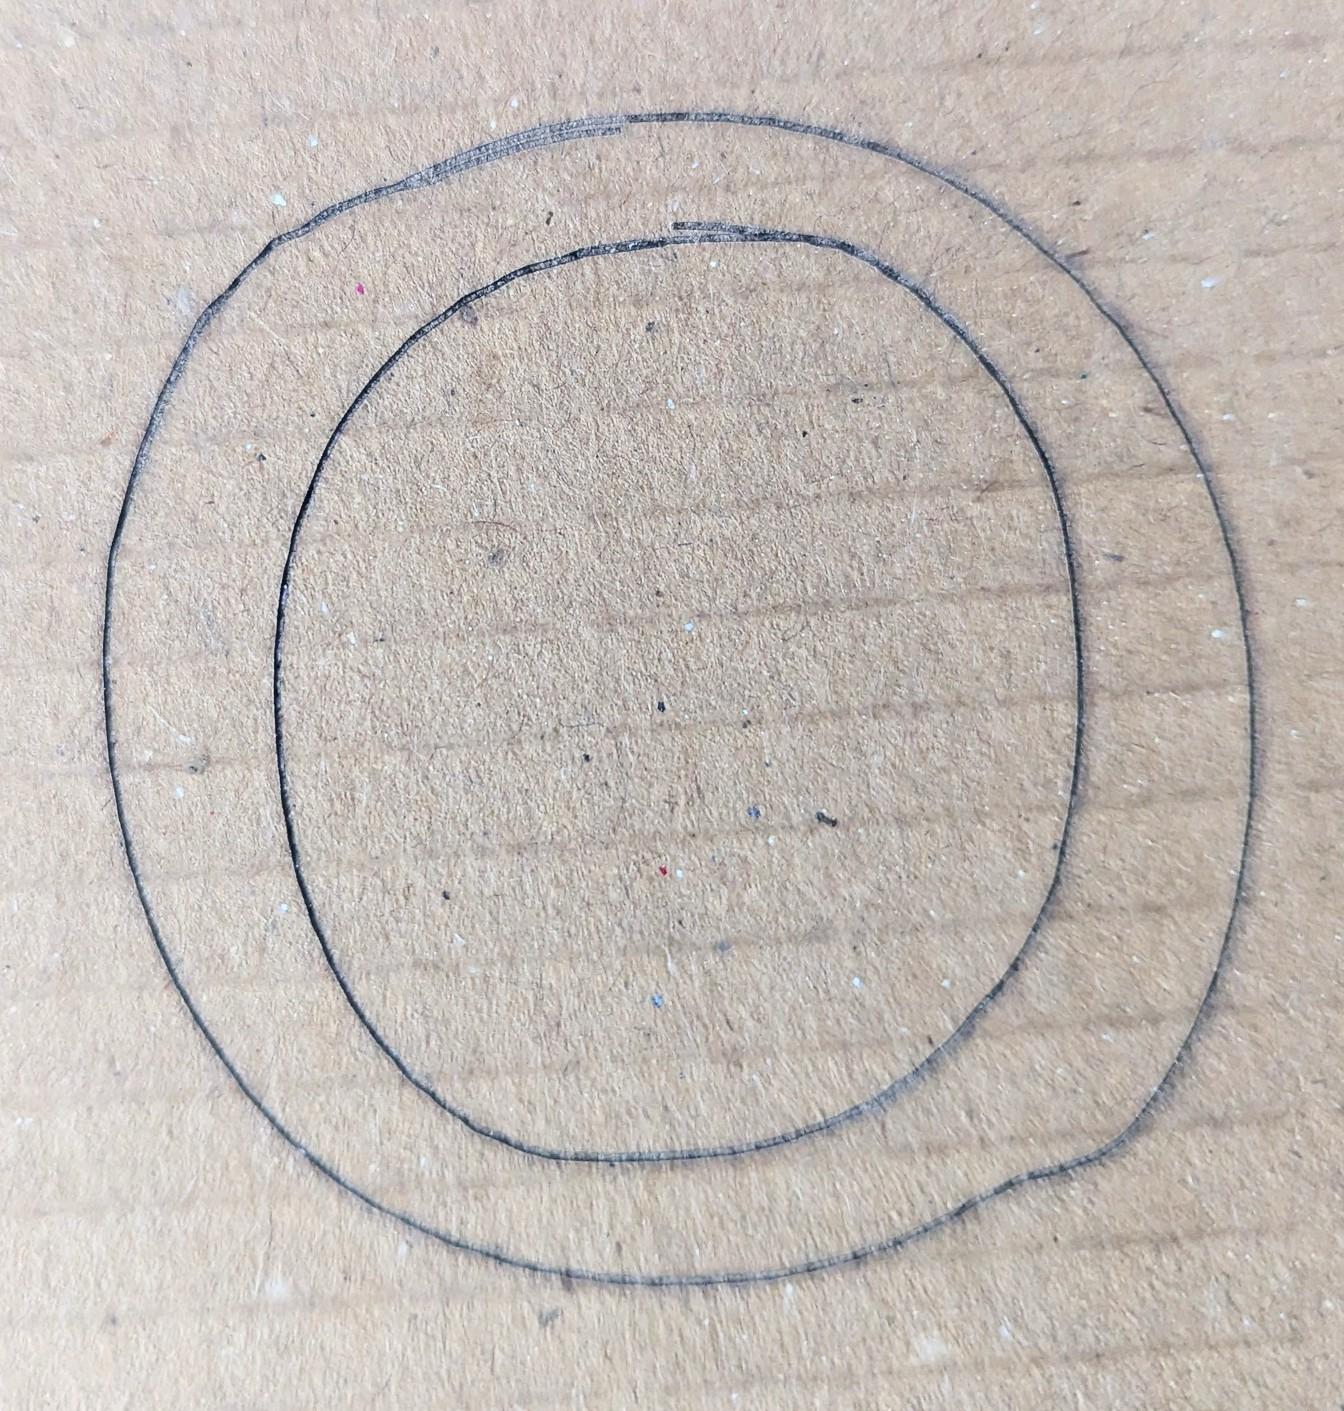
These are 2 separate cuts on cardboard of the letter “O”. Any other ideas?

I appreciate your help!!!
Which means there’s still some mechanical looseness to be found.
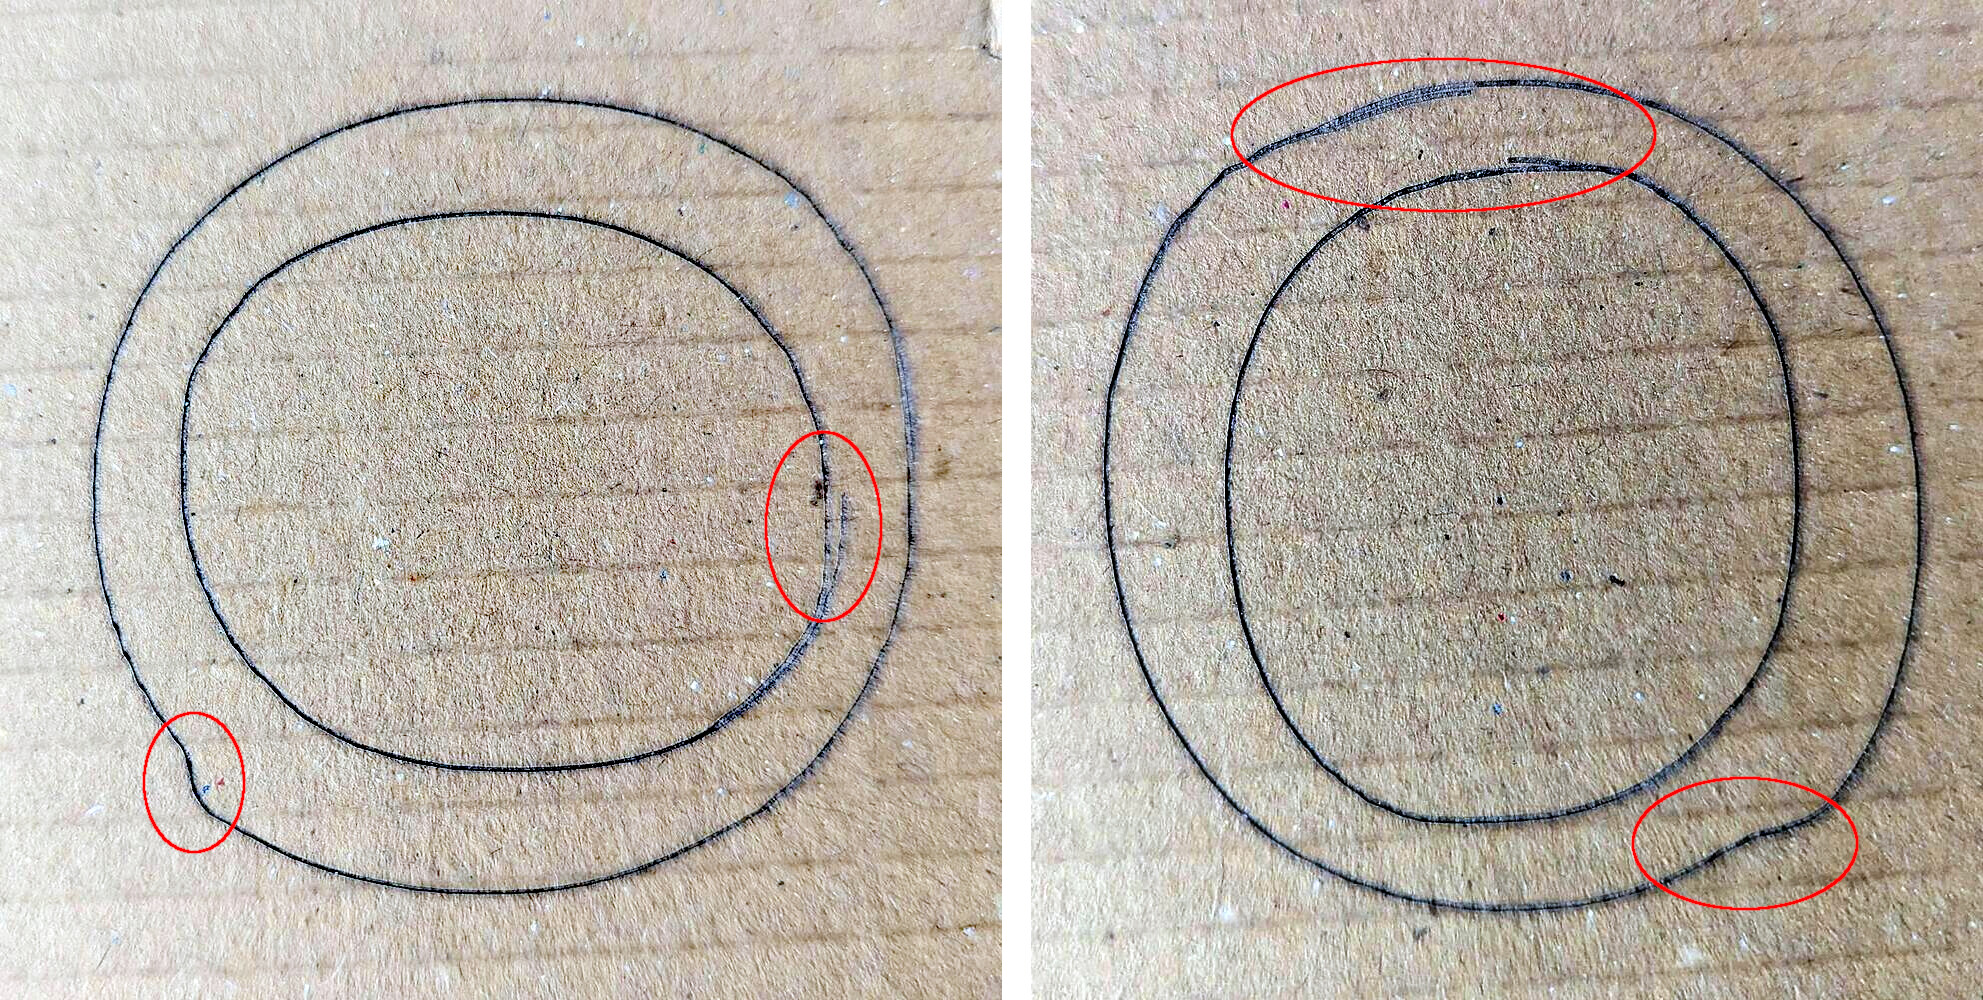
Assuming those pictures are oriented the way they were made, then the machine has a millimeter or two of backlash in both the X and Y axes:
The test pattern I linked to has backlash test patterns in the corners. Run that, take a good picture of the results, and show us what’s happening.
Running that same pattern as you find and fix problems in the machinery will let you compare the before-and-after results whenever you change something.
Although the sellers don’t tell you this, part of owning a laser machine is learning how to maintain it. In this case, you must train your fingers to feel a tiny looseness, which takes practice.
Some previous discussions may suggest other places to look and feel for problems:
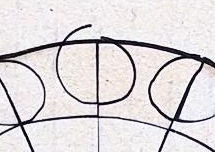
Hello, I’ve run the test. You can see how messed up it is. By the way, I forgot to rotate the pictures of the “O”. It seems to me the hiccups are only on the X axis.
Thanks!
Indeed!
Right now you know two things:
- You’ve adjusted All The Things
- The laser still has backalsh
The hardest part of getting these machines working properly is learning to see what the evidence shows, instead of knowing the evidence means something else.
Source: been there, done that.
Assuming the test design was done as laid out, rather than rotated, then the machine has bad backlash in the Y axis.

Start by looking at the belt pulleys on the Y axis motor shaft(s), as each will have a tiny setscrew holding the pulley to the shaft. Make sure that setscrew is centered on the shaft flat before you snug it down; loosen the screw so you can rotate the pulley, then tighten it gradually while wiggling the pulley to center the screw.
If that’s not it, then a good way to find the offending joint is to take the entire machine apart and reassemble it, because the problem may be tucked away in a part of the machine you simply can’t see from “outside”.
This probably seems terrifying, but the truth is the machinery is simple and straightforward: there’s nothing magic going on in there. If they didn’t include all the hex / Torx wrenches for the fasteners, twenty bucks will set you up in style.
Take lots of pictures while you dismantle the thing so you can be certain of how to reassemble it, then pick a good low-caffeine evening and have at it. ![]()
1 Like
In addition to @ednisley’s excellent advice, I recommend gently restraining the gantry and trying to wiggle the diode head itself. It should be firmly mounted to the carriage.
I have seen instances where you do all the belt fine-tuning in the world, but the head is loose, and causes issues like this. The belt should have a low ‘twaong’ when pulled and released. See here: https://www.youtube.com/watch?v=oeq2MVxE_H8
This topic was automatically closed 30 days after the last reply. New replies are no longer allowed.