About 10 minutes ago I decided that I was going to fix or destroy that thing.
And - WOOOOOOOHOOOOOO !! I fixed it ! As it turns out the air nozzle is a 3 piece fitting, the base of the nozzle screws on around the laser lens, then the air tube pushes through the side of the laser housing and into the nozzle base. Then you push on the air nozzle cone. That nozzle cone is held on by a rubber grommet. When I knocked over the laser head, the jar of the short fall caused the nozzle to come 1/2 way off. I could stick my finger on it and roll it around like it was ball mounted. Then I gave it a push,(firm push), and it pressed back into place. I couldn’t stand it so I pulled on the nozzle and it pulled right off and that’s when I saw the rubber grommet.
I’m good to go now !!
Well - my Z axis still does not work. I have triple check the phases, nothing wrong. Checked all the wiring with nothing wrong. Tonight I think that I have found the problem and that problem is the Maker board. Every time I would click / push either one of the Z control buttons I would hear clunk sound. After that you would hear nothing. Power down the Maker then power up again, click Z control and then you get another clunk. Tonight I started trying to trace out that clunking sound and I found it by feel. Yep, I would touch each motor and feel for the clunk and it was coming from the X motor !! I think that I have a bad controller. What I’m going to do is unplug the X motor and plug the Z motor into X socket and hit the X move button and see if Z moves, If it does then my controller is bad. We will see what happens and go from there. I still have a spare new Maker controller to use.
My controller board is bad. As far as X & Y, and laser, it works fine. Any time you click Z up or down, X drive goes clunk and it jumps or jars a tiny bit and you can see it. It even does this with nothing plugged into the Z socket. The bad news now, I HAD an extra brand new controller board. Before I plug any components into it I power it up for a few moments to make sure that all 4 leds light up and then I kill power. This time, as soon as I turned power on, the board smoked big time !! So I ordered new boards again tonight. I think that I’ll look for a hand crank handle for the Z axis.
A little update here, around last Feb. or so we all were talking about cameras
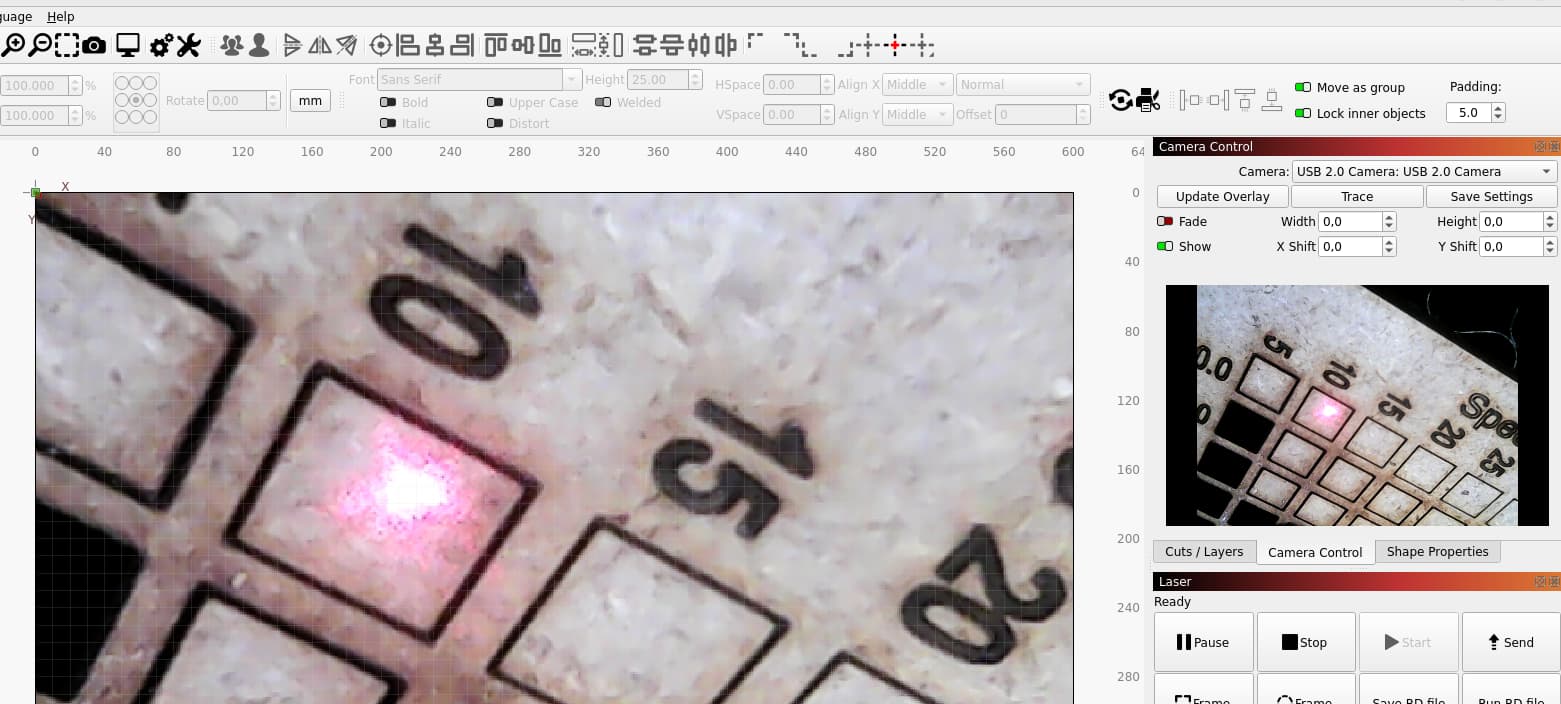
working with our lasers. Everything I have seen is no good for me. It appears to me that everything I have seen are cameras mounted hi in the air so as the whole work area can be seen. That’s not what I want, I want a super closeup
view of what the laser is burning. I want to be able to see a closeup of just how deep of cuts I make when burning a 3D board or something. Someone suggested that I might try out a back up camera. I didn’t give it much thought at the time. I few days ago I got my wife to put the car in reverse , (and hold the real hard) and I held my hand down over the backup camera in the car so as I could see just how close I could see my hand. At two inches away I could see the palm prints of my hand. (Smart butt wife said,“shoot” you a broken life line, I better get more ins. on you and fast.) I hate when she is a smart butt and it is still funny at the same time.
After doing some research on back up cameras I found one that I liked, I wrote the manufactures about how close their focusing was. Their replay was - buy one it will work! So I wrote them back and told that if they could not give me
minimum focusing distance that I really didn’t buy from them. They wrote back and told me that if I buy their camera and it does not work out for me then they would refund my money AND I could just keep the camera. Well I going to buy the camera and hope that it works for me, if not I’ll get my money back.
On the part about keeping the camera, my wife said if nothing else you can mount it on the back of your tractor, (1959 Ford N) The camera is from Amazonky, (amazon), it is the eRapta Backup Camera for Truck 7’'HD 2K Front Rear View Monitor kit IP69 for 50 bucks or if your a prime user you get 10 bucks off.
That’s all for now.
Randy
A few years ago I made a holder for a camera that was mounted directly at the nozzle. As a camera I used a small cheap endoscope camera. I got the result you are looking for and could use it further for laser placement.
The problem this time was that during glass and stone engraving and possibly laser reflections, this camera was destroyed - but it worked, almost like a live microscope.
See also Head-Mounted Camera Alignment - LightBurn Documentation
hello Bernd: I went the web site, never found a pic of the camera nor could I find anything about sales or pricing.

That’s a nice little camera, I like that better than the backup gig. I did see where it said compatible with Iphone/ Ipad. I use a galaxy A-13, most items that work on Iphones won’t with galaxy. I not sure if I would get one unless I know it would on a galaxy. I going to contact manufacturer to see what I find out. If it works on a galaxy I may get one. I wonder if it would work if plugged into pc with LB ?
I’ll find out soon!
Randy
what a bummer !!! everything I saw was for iPhone / iPad / Samsung. But nothing for galaxy.
I’ve never used a phone app for it, i use it directly per USB and select this camera in LB.
(Linux, Mac OS and Windows)
That is what I’m glad to hear. I going to get one, thank you !! No matter what kid of camera you have, (like you said) reflecting that bright light into the lens will kill any camera, unless made for that purpose or good filters.
Try a USB microscope? minimum focus distance a millimeter or 2. max maybe 200+/- Have one mounted on a boom for my galvo but same idea. I have an endoscope also but like the microscope way better.
hello bernd: well I ordered one of those endoscope cameras you talked about.
that outfit said I had to order $10 or more to place order, so now I have two coming. my brother gets one now.
My new controller boards came in a couple days ago, one complete kit with all the goodies and two spare controller boards only. I tested one of the boards, according to makerbase 13 page wiring manual and got all 4 leds lit up, means good board. I got the new board all hooked up and ready to do testing. After having several boards go bad, I’m a little nervous about powering this thing up with everything all hooked up. Only one way to find out if it’s working correctly.
I’ll give U.D. later tonight. I hope it works !!!
Randy I have learned one thing about these little stepper drivers over the several years I have used them. Never power one up without being plugged into the stepper motor first. To do so risk blowing the boards stepper drivers. Just thought you might like to know.
I never new that, thank you !!!
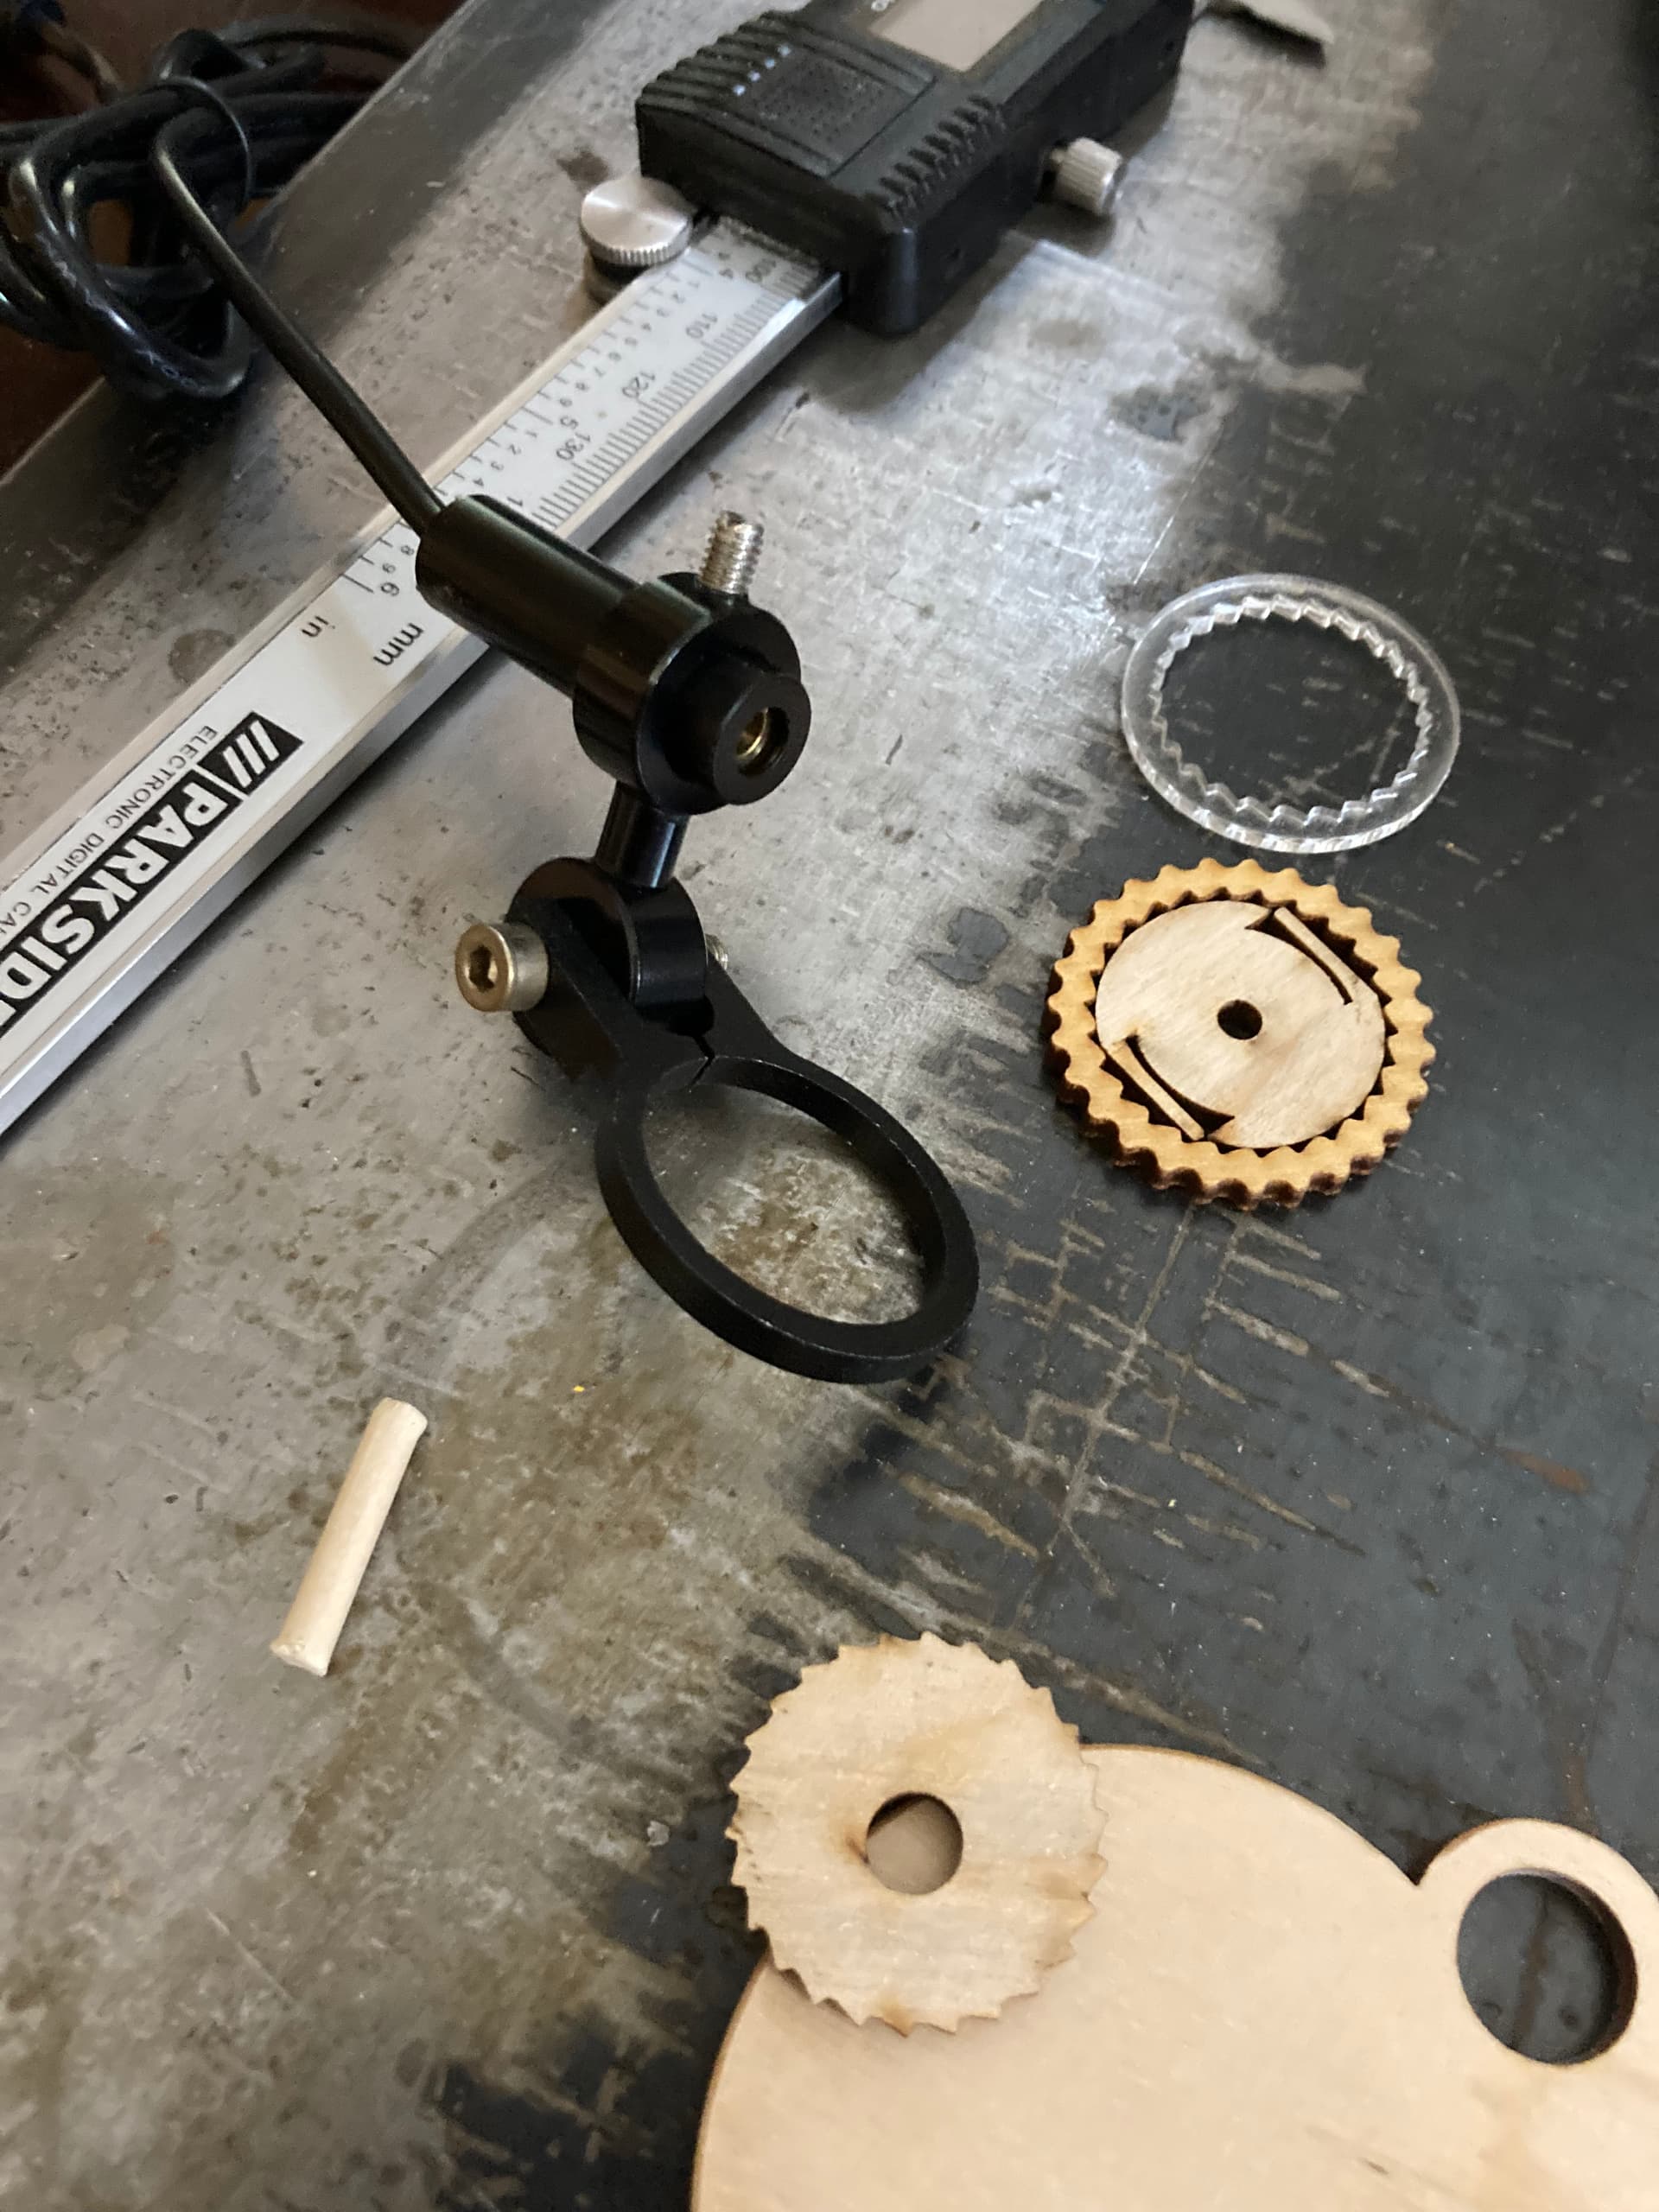
Hot dang and shiver me timbers !! I got “EVERYTHING” fixed and working, even the “Z” axis is working!! Tomorrow I have 500x500mm honeycomb thing-a-ma-jigg, (lol) coming in the mail. It’s way to small for now, but at least I can start doing something with it. Like make several power / speed charts. I got yelled at tonight by the boss lady, when I got everything working I started jumping around all excited, hooping and howling like a made dog. Boss lady told to shut and sit down before I fall and break my neck, and she was not smiling when she said that !!
Any way the Cherokee Beast has come alive, about time !!!
my router setup roared to life today also just need to do some vfd hookup to controller so that i can change speed through the software. i posted some info pics. I used the mks dlc32 on it as i have that running on a couple of my lasers already