I have a Monport GM 60 watt Mopa laser and trying to get it set up with Lightburn Pro but having no luck. I will be using this to engrave gun slides so I need to be able to see where the image will land before engraving. First, the system doesn’t seem to be framing properly, one minute it’s showing the red frame then the next it won’t come up.
Second, I got the Monport to engrave one time and it did fine and then the next times I tried to engrave with the settings set at the same thing, it did nothing but a light marking that you can wipe off.
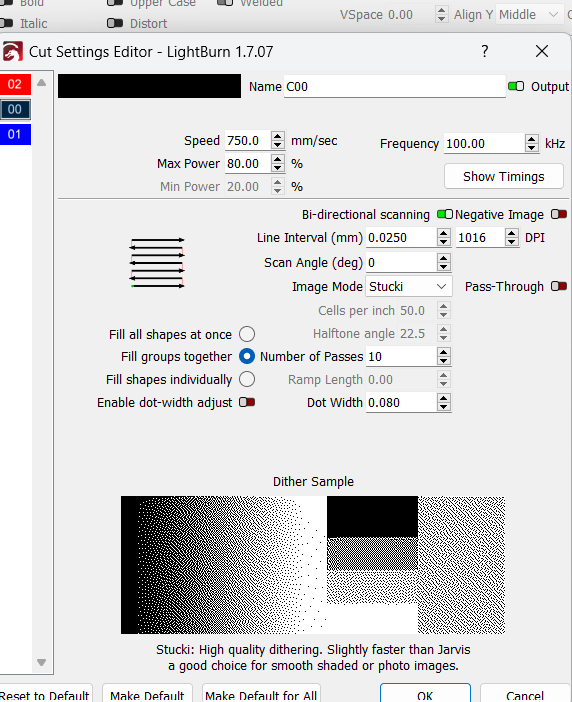
Currently I’m running the Power at 80 the speed at 750 and the frequency at 100. I have a 3 layer lightburn stacked file for the clean pass, image, then another clean pass.
I’ve installed everything correctly from what I can tell but still it just won’t work properly.
Any help is appreciated.
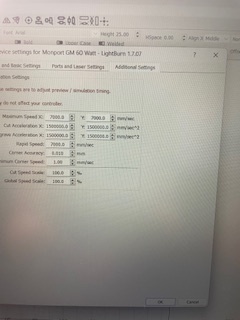
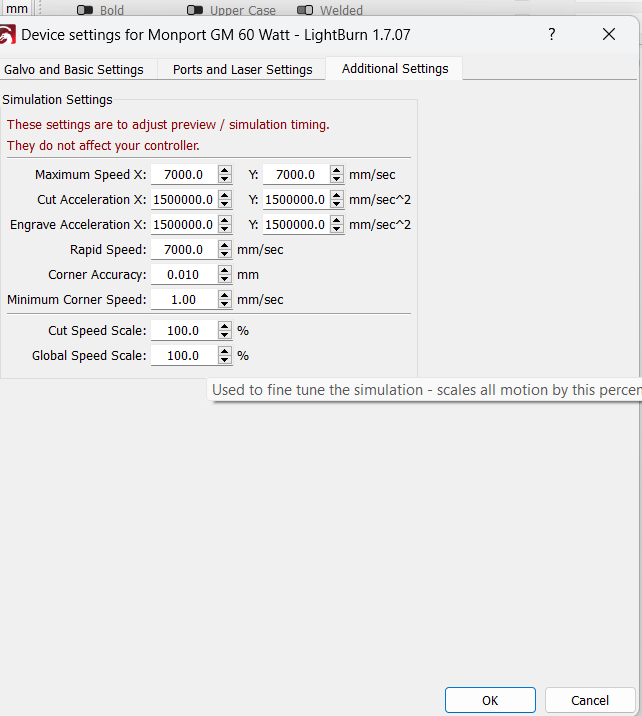
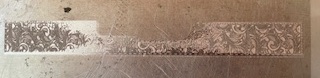
Thanks, I’m uploading the current setting that I have. I still can’t get the Laser to do anything other than a light marking. The last one is the image I did yesterday the one engraving did good with these exact settings. I can’t figure out what happened.
Thanks for the screenshots, unfortunately they are too pixelated for me to properly review. When you created the device profile for your laser, did you import your laser manufacturer’s settings as described in our documentation?
Do you have a COR file that you can load into your device settings?
Sorry about that. Yes, everything is imported in just as the settings say to do. I think I did see a COR file but it wouldn’t open. Is that the settings I need to import? Thanks
You don’t need to uninstall everything, if you’ve loaded your markcfg7, BslCAD.cfg, or LmcPar.cfg file when creating the device profile, that is correct. Load your COR file into your device settings. If you are receiving an error when you try to import it as described in the docs, please share the error you receive.
It’s engraving now, but it’s not even. It could just be because it’s on scrap metal and there’s something on the metal. But here’s a picture of what it’s doing.
The next engraving I done with the exact same setting, it barely engraved on the metal. I don’t get why it doesn’t do the same each time.
Also, is there a way to get the red frame to stay still in the contour setting so I can make sure everything is lined up correctly. It moves so fast it’s hard to see all the tiny details of what I have to engrave around.
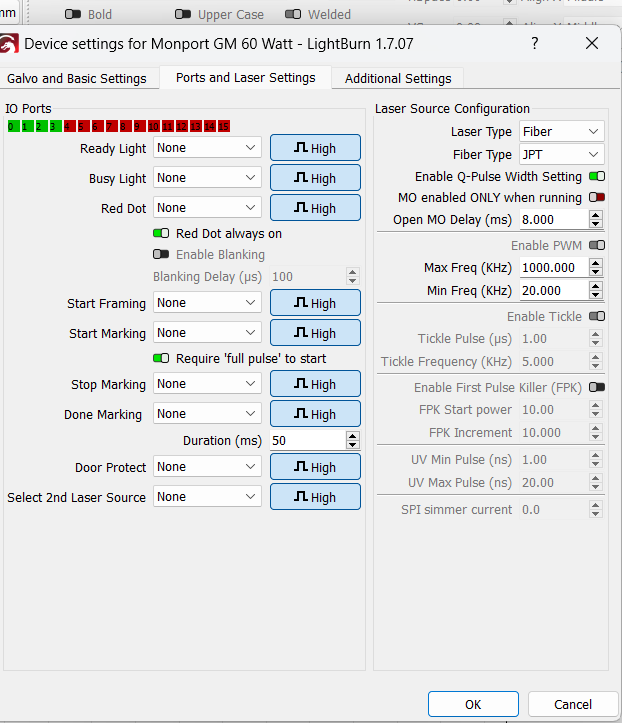
Based on the screenshots you’ve provided of your settings, your fiber type is incorrect. This should be set to IPG_YLPM for mopas. It’s not clear to me if you’ve imported the markcfg7 file yet.
Agree. IPG-YLPM.
If you don’t have the markcfg7 file you should:
Find focus. Make a focus stick.
Do a 9 point calibration.
Adjust scale (3 little dots).
Check skew, manually adjust if it is off.
Calibrate timing and delay.
Calibrate red dot.
You will learn a lot about your machine and it will thank you.
This will take a while, some black painters tape for the 9 point calibration and scale, and cheap shiny black aluminum business cards for the timing and delay adjustments will really help.
Laser Master Academy has lots of YouTube videos on most of 1 through 6.
Have patience. Be 100% on each step before proceedings.
There will be plenty of time for 1911s and glocks later.
Luck!
Get the machine really dialed in, then see if you have any issues.
Thank you both. It’s engraving now. Is there a way to get the contour framing to stay still vs. flickering? I’ll need to be able to really see exactly where the engraving will land once I get started.
Also, for some reason the image is horizontal on my Lightburn screen but when I frame it, it goes vertical on my practice metal.
Lower or raise your frame speed to suit your liking.
When you did the 9 point calibration you missed the direction the dragon’s head was facing. Run it again follow instructions carefully. Then do the scale utility again (3 little dots)
You could also change it manually here, but you may have missed other things as well.
Thank you for the help. I’ve got it working now but I’ve run into a new issue. I need my workspace bigger on my screen because the slide I’ll be doing is a little over 7 inches and it’s set at less than 7. I see where to change it (where it says field) but it’s grayed out so I can’t. Any help on how to get this changed?
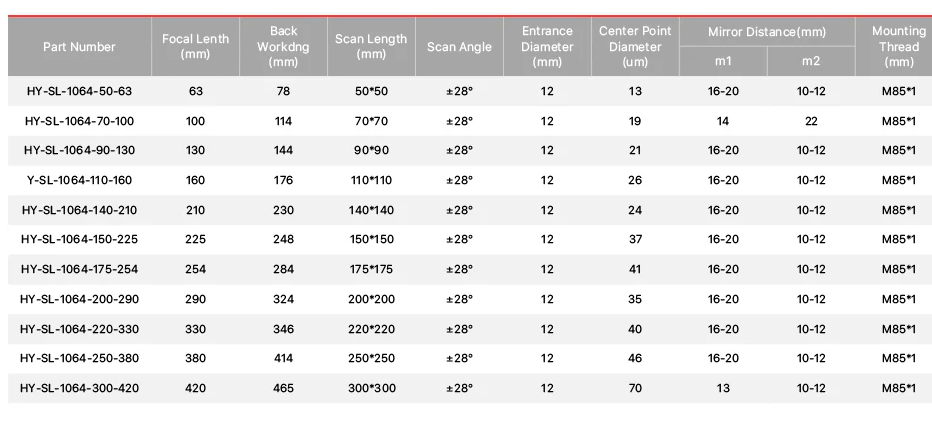
As far as I know the image boundaries are based on lens length.
One you create and load a cor file, you can’t change these values.
You don’t mention the lens you’re using (or I missed it) and as far as I know there is no lens that covers only 177.8x177.8mm area, except for a longer lens, such as an F330mm.
These are in metric, you’d have to use something longer than an F210mm to cover that area. The coverage is based on lens length and scan angle. An F210mm (with a +/- 31 degree scan angle) only does 160x160mm.