Please excuse my total ignorance, I have just acquired a Cubiko and I am trialling Millmage. I am using MillMage Core 0.8.02 from an Imac Seqouia 15.5 I have been unable to produce anything because any project I create always has negative Y coordinates so that when I come to frame it it starts at a point double the position it should do so eg., 100mm x and 50mm y will frame at, x correct, y 50+, then if I tell it to start it returns to machine home and starts from there… Help…
there is no ignorance here , we were all new
when you 1st start machine do you home , in the move tab what are the machine and workpiece numbers showing
can you take a screen shot of the below and upload so can see what yours ar showing

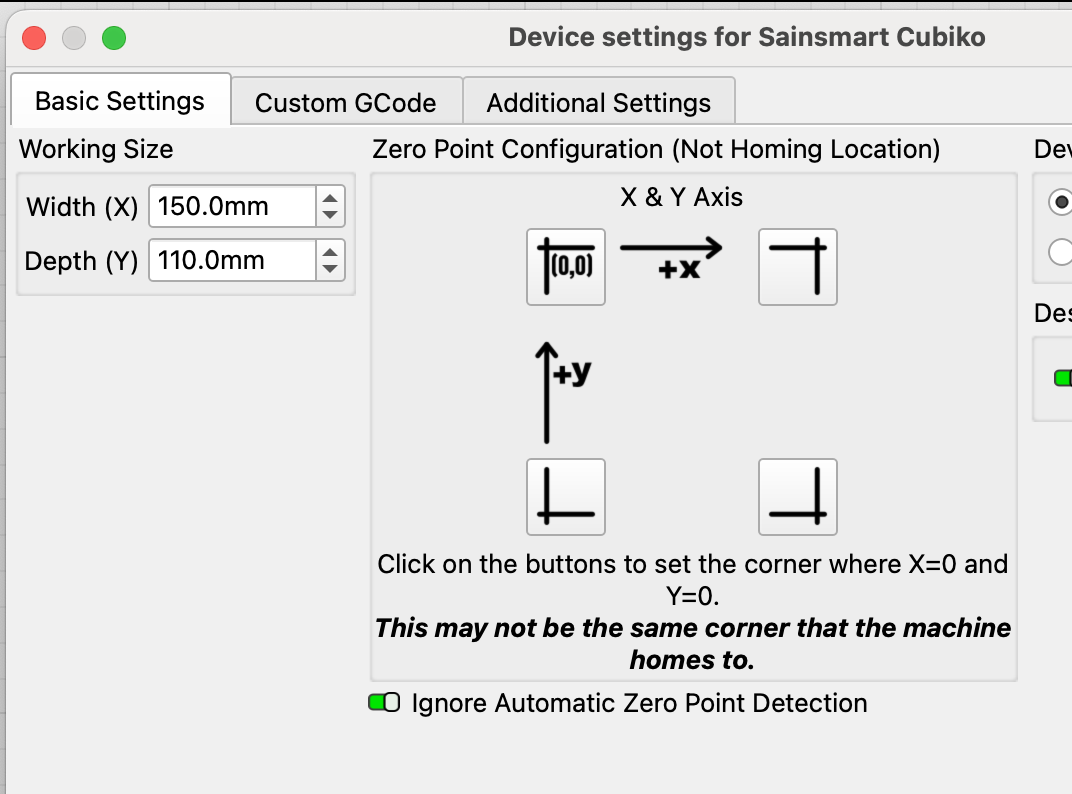
check the below make sure they match what your machine is meant to be
Thanks for your prompt reply Terry.
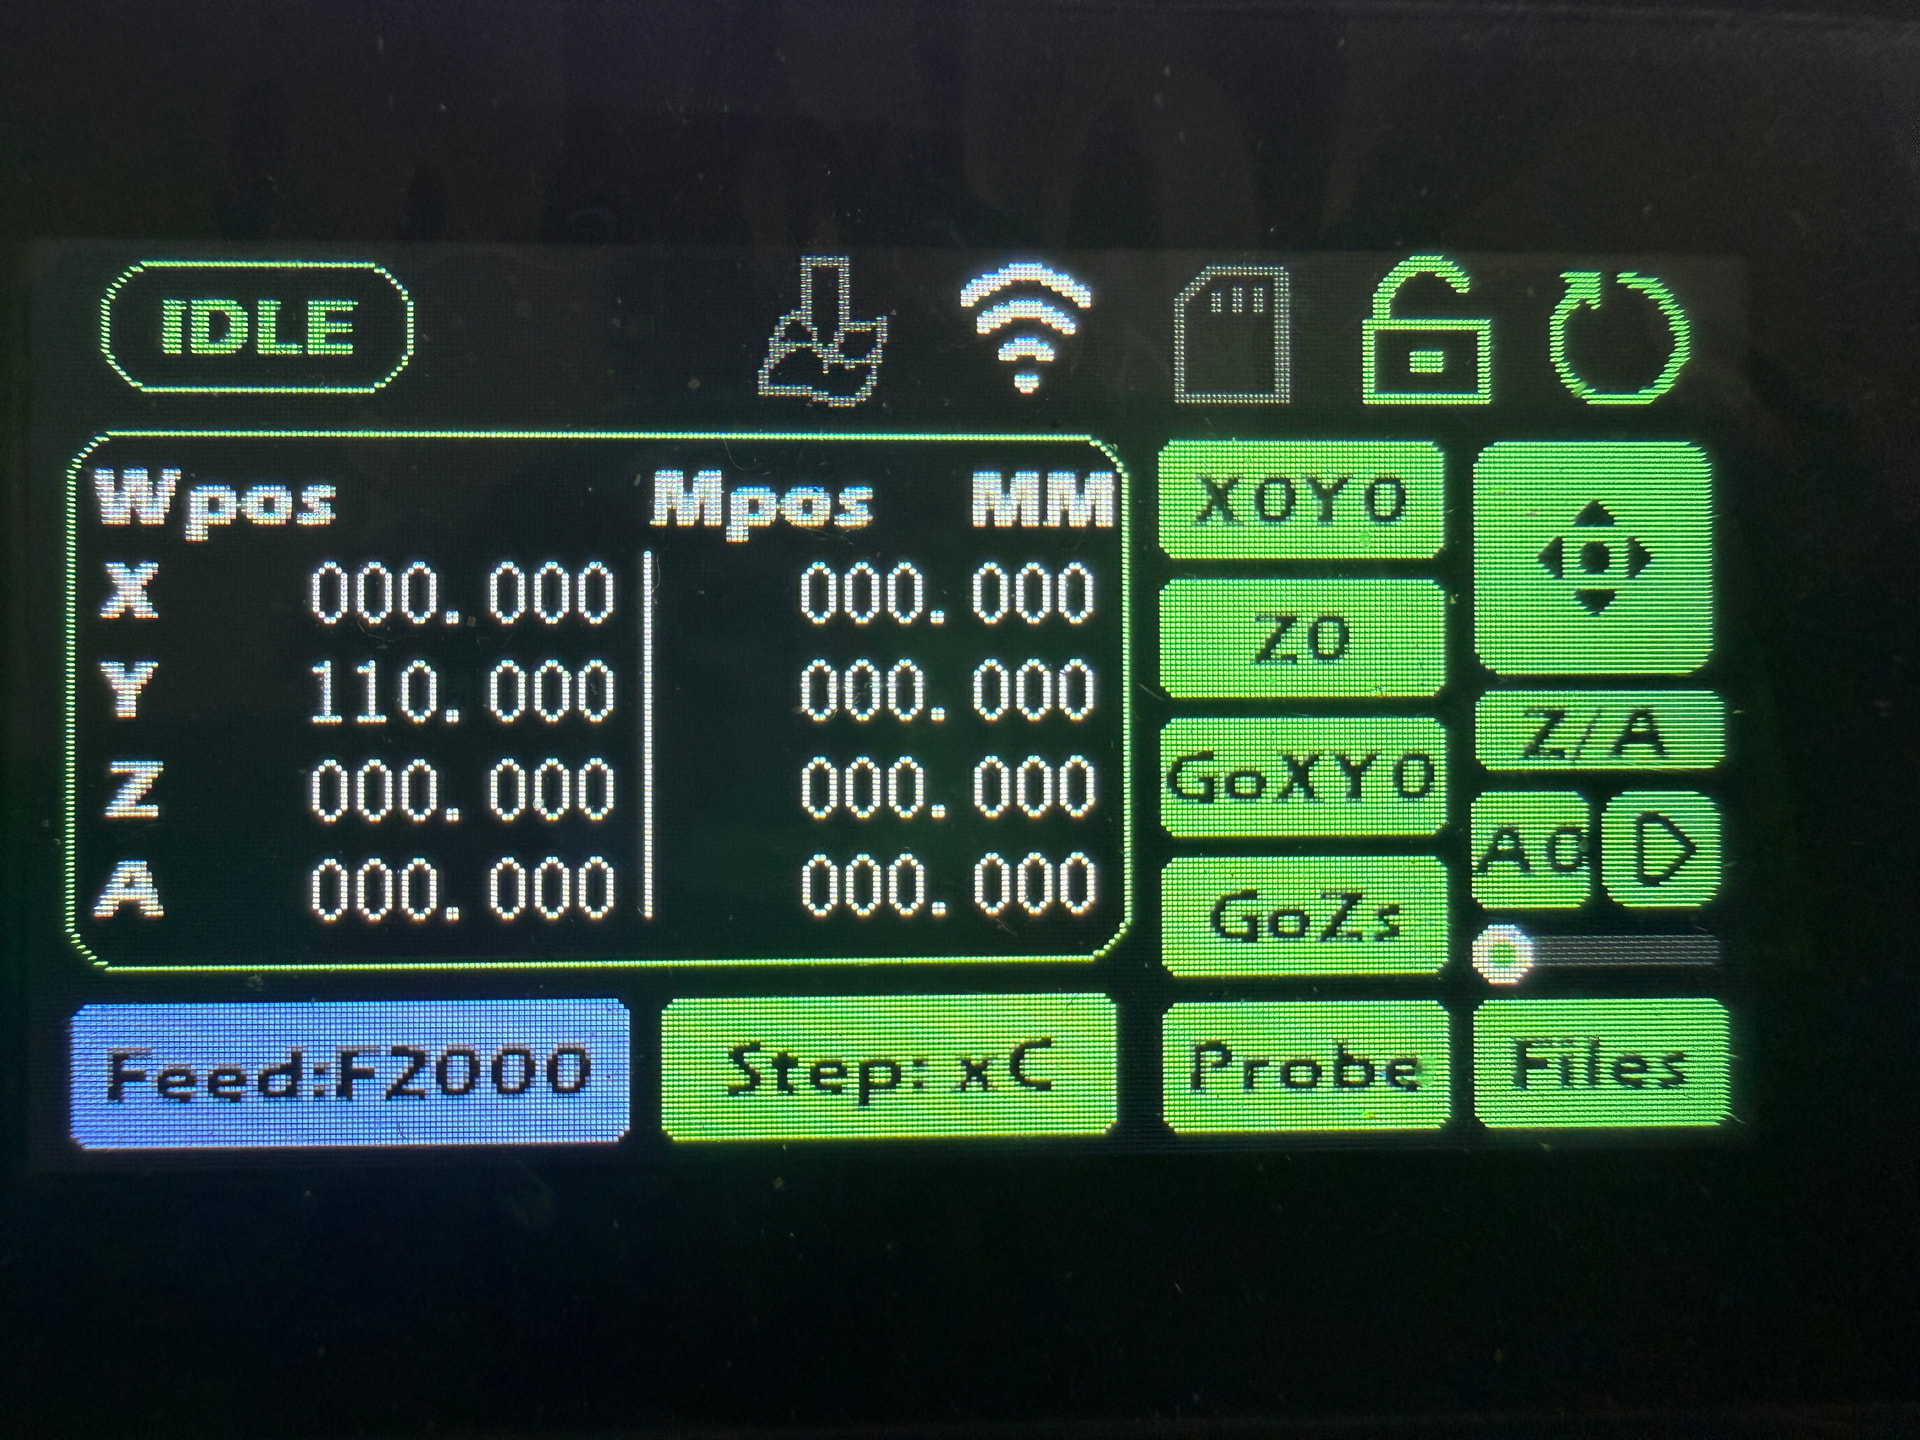
Yes I do home so that I am starting from a known position, here is an image from the offline controller
![Screenshot 2026-08-15 at 09.39.43|343x500]
(upload://xvpkXqPdcowvnXvad6PpAvmMWib.png[quote=“wanderingtruckie, post:2, topic:191832”]
check the below make sure they match what your machine is meant to be
[/quote]
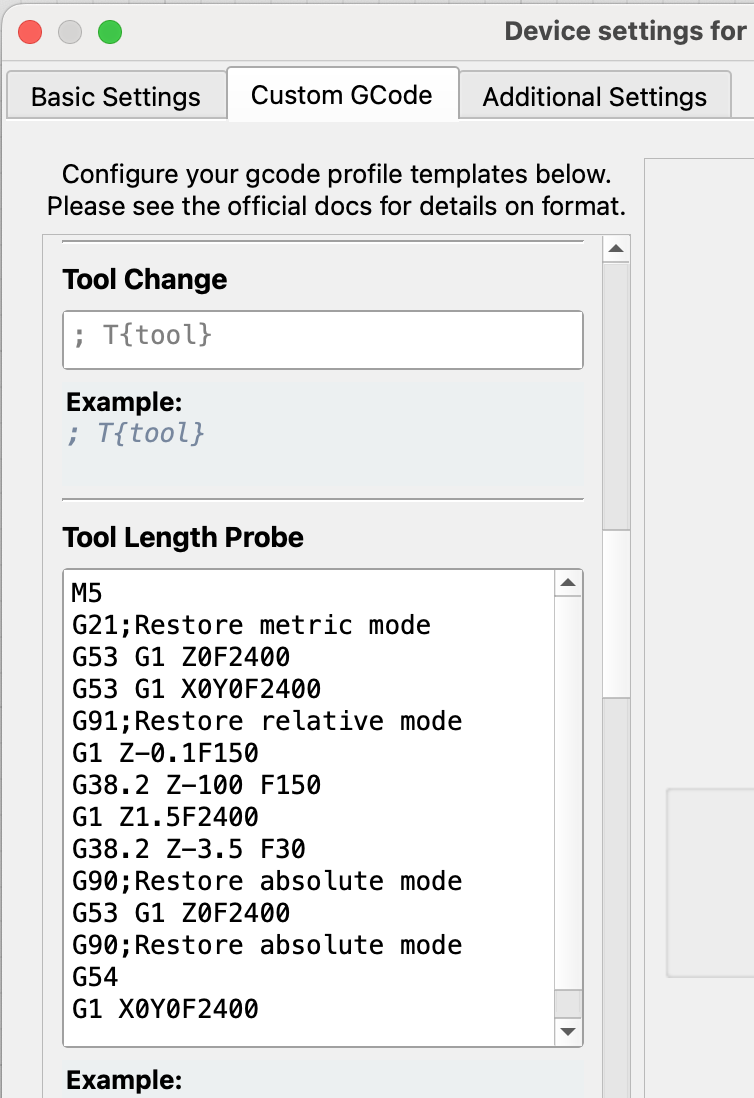
The bottom line is telling your machine where to start from.
deleting that line may cause issues it did for me when i first deleted it , say if you probe from x300,y0 set it to that.
you say image from the offline controller ? is this photo of led screen on the machine itself or from another software, is that your home position ,
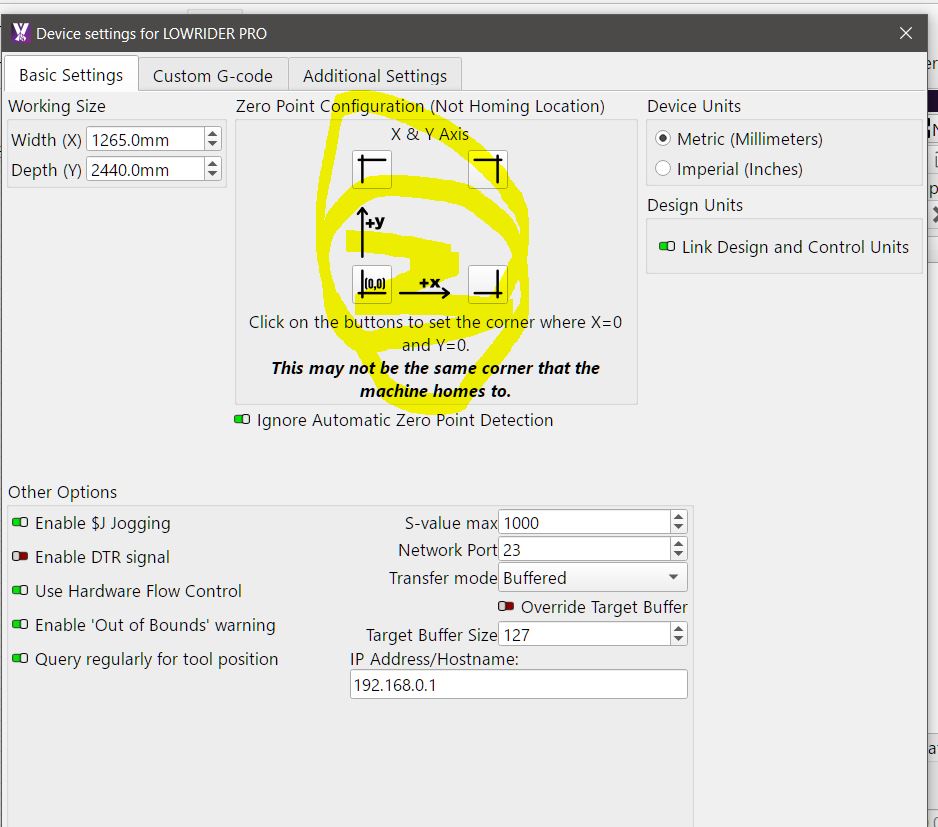
is home left front, if so change your xy axis in device setting screen to match left front you have it left back
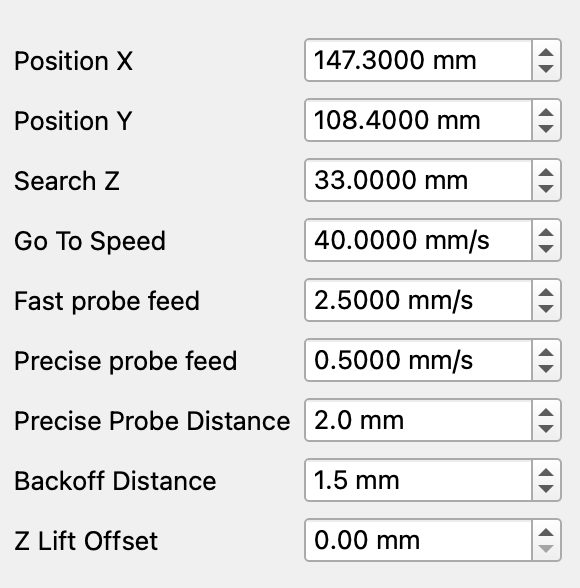
So, I need to edit Tool change similar to yours but with my parameters for tool probe position which are x 147.3 and y 108.4…?
Sorry for any confusion with my image it is the LED display from the machine itself and yes, that is the home position.
Home is left front. I am confused because I changed the xy axis from the front left to rear left in the belief that is the XY 0 for the workpiece, is that not correct then…?
With regard to the probe I have tried changing that with the Millmage probing wizard with only partial success, it moves to the right XY position but the Z never completes it always alarms, but this is another lesser issue, I am most concerned with getting the original problem resolved so that I can actually begin using the machine. Thanks again for your help…
I agree with @wanderingtruckie about your zero point not being correct. The machine position in your post is showing as zeroed in X and Y, so if the spindle was sitting above the front left corner of the working area when that photo was taken - then the zero configuration should be set at front left.
I notice that photo also shows a -110mm Y axis offset, but I think that will clear itself if you rehome and then just use the ‘XYZ 0’ button in MillMage:
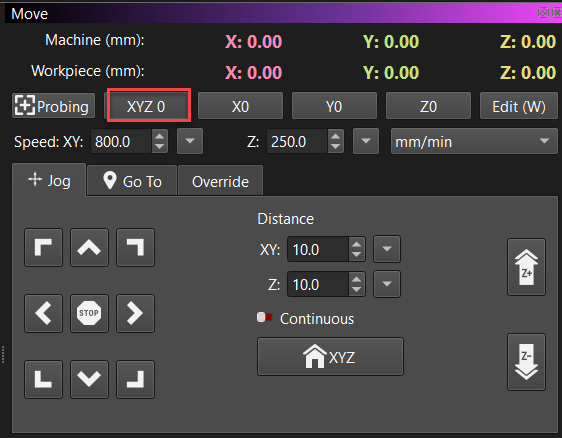
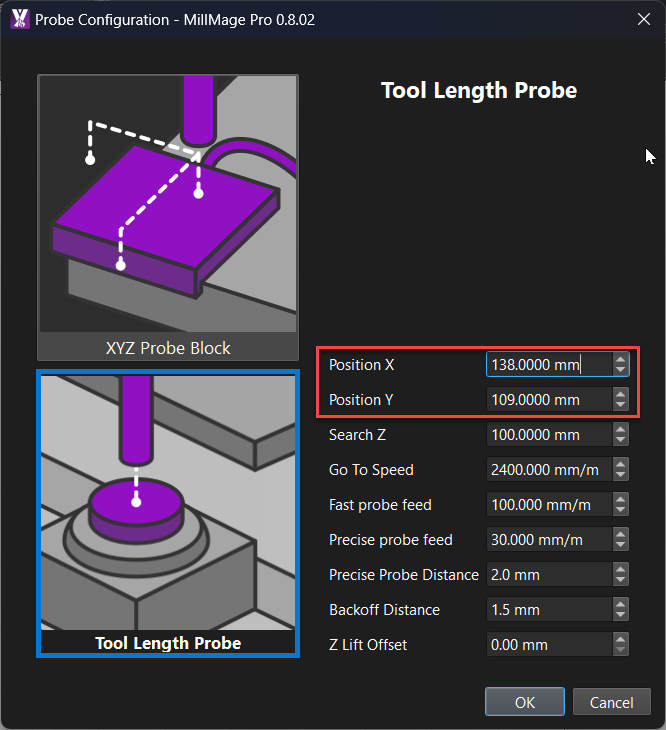
To setup your tool length probe, jog the spindle over where that probe needs to operate and then copy the machine coordinates you see in the top line of the Move Window to this Probe Configuration window.
The values for your machine should be similar to this but you will need to check:
I have changed the zero point configuration with no effect.
This is why I am confused about the zero point
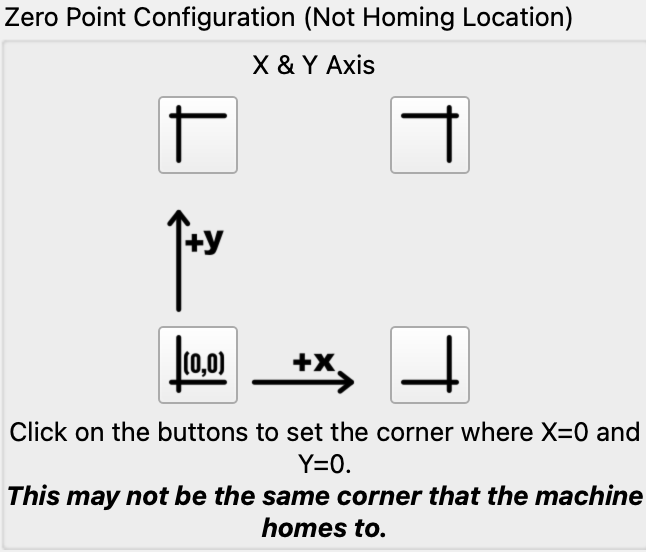
I have jogged to the rear left of the workpiece and zeroed in on that point and set workpiece zeroes. The screenshot clearly states not homing location and may not be the same corner the machine homes to.
It is showing a positive +110 offset, not negative
Regarding the probe parameters I have already set these, I took the exact location shown from the offline controller, namely, 147.3 and 108.4 and it positions itself correct, the problem is the Z axis, it touches but does not raise instead it alarms
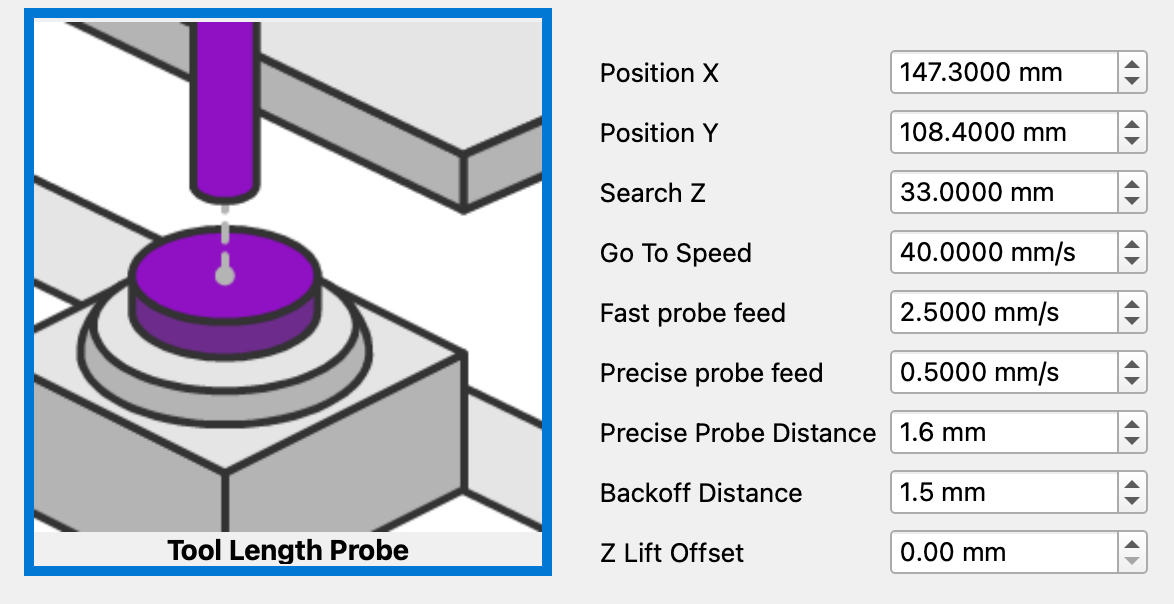
What alarm do you see? I notice that your Precise Probe Distance at 1.6mm is only 0.1mm more than the Backoff Distance, it may need to be increased to at least 2mm to ensure the precise probe always triggers.
Update:
When I said moving the zero point configuration had no effect I assumed it would alter the existing project, it did not. However, I can now create a new project with positive XY values!
I think I’m beginning to see where I’ve been going wrong, as long as I use the same corner as the machine home, its using positive coordinates and I can now get it to frame in the correct position. The problem I now have is that at the start of the job I am warned the z axis probe is incomplete, I have set it up through the offline controller and I am happy with it, I tell it to ignore it but it doesn’t it tries and fails to do a probe.
The Alarm nicholas is as follows;
ALARM:5
Probe fail. Probe did not contact the workpiece within the programmed travel for G38.2 and G38.4.
On or near line 6:
You either need to increase the ‘Search Z’ if it does not move down enough to make contact on the fast probe, or increase the ‘Precise Probe Distance’ if the second slower probe is not making contact.
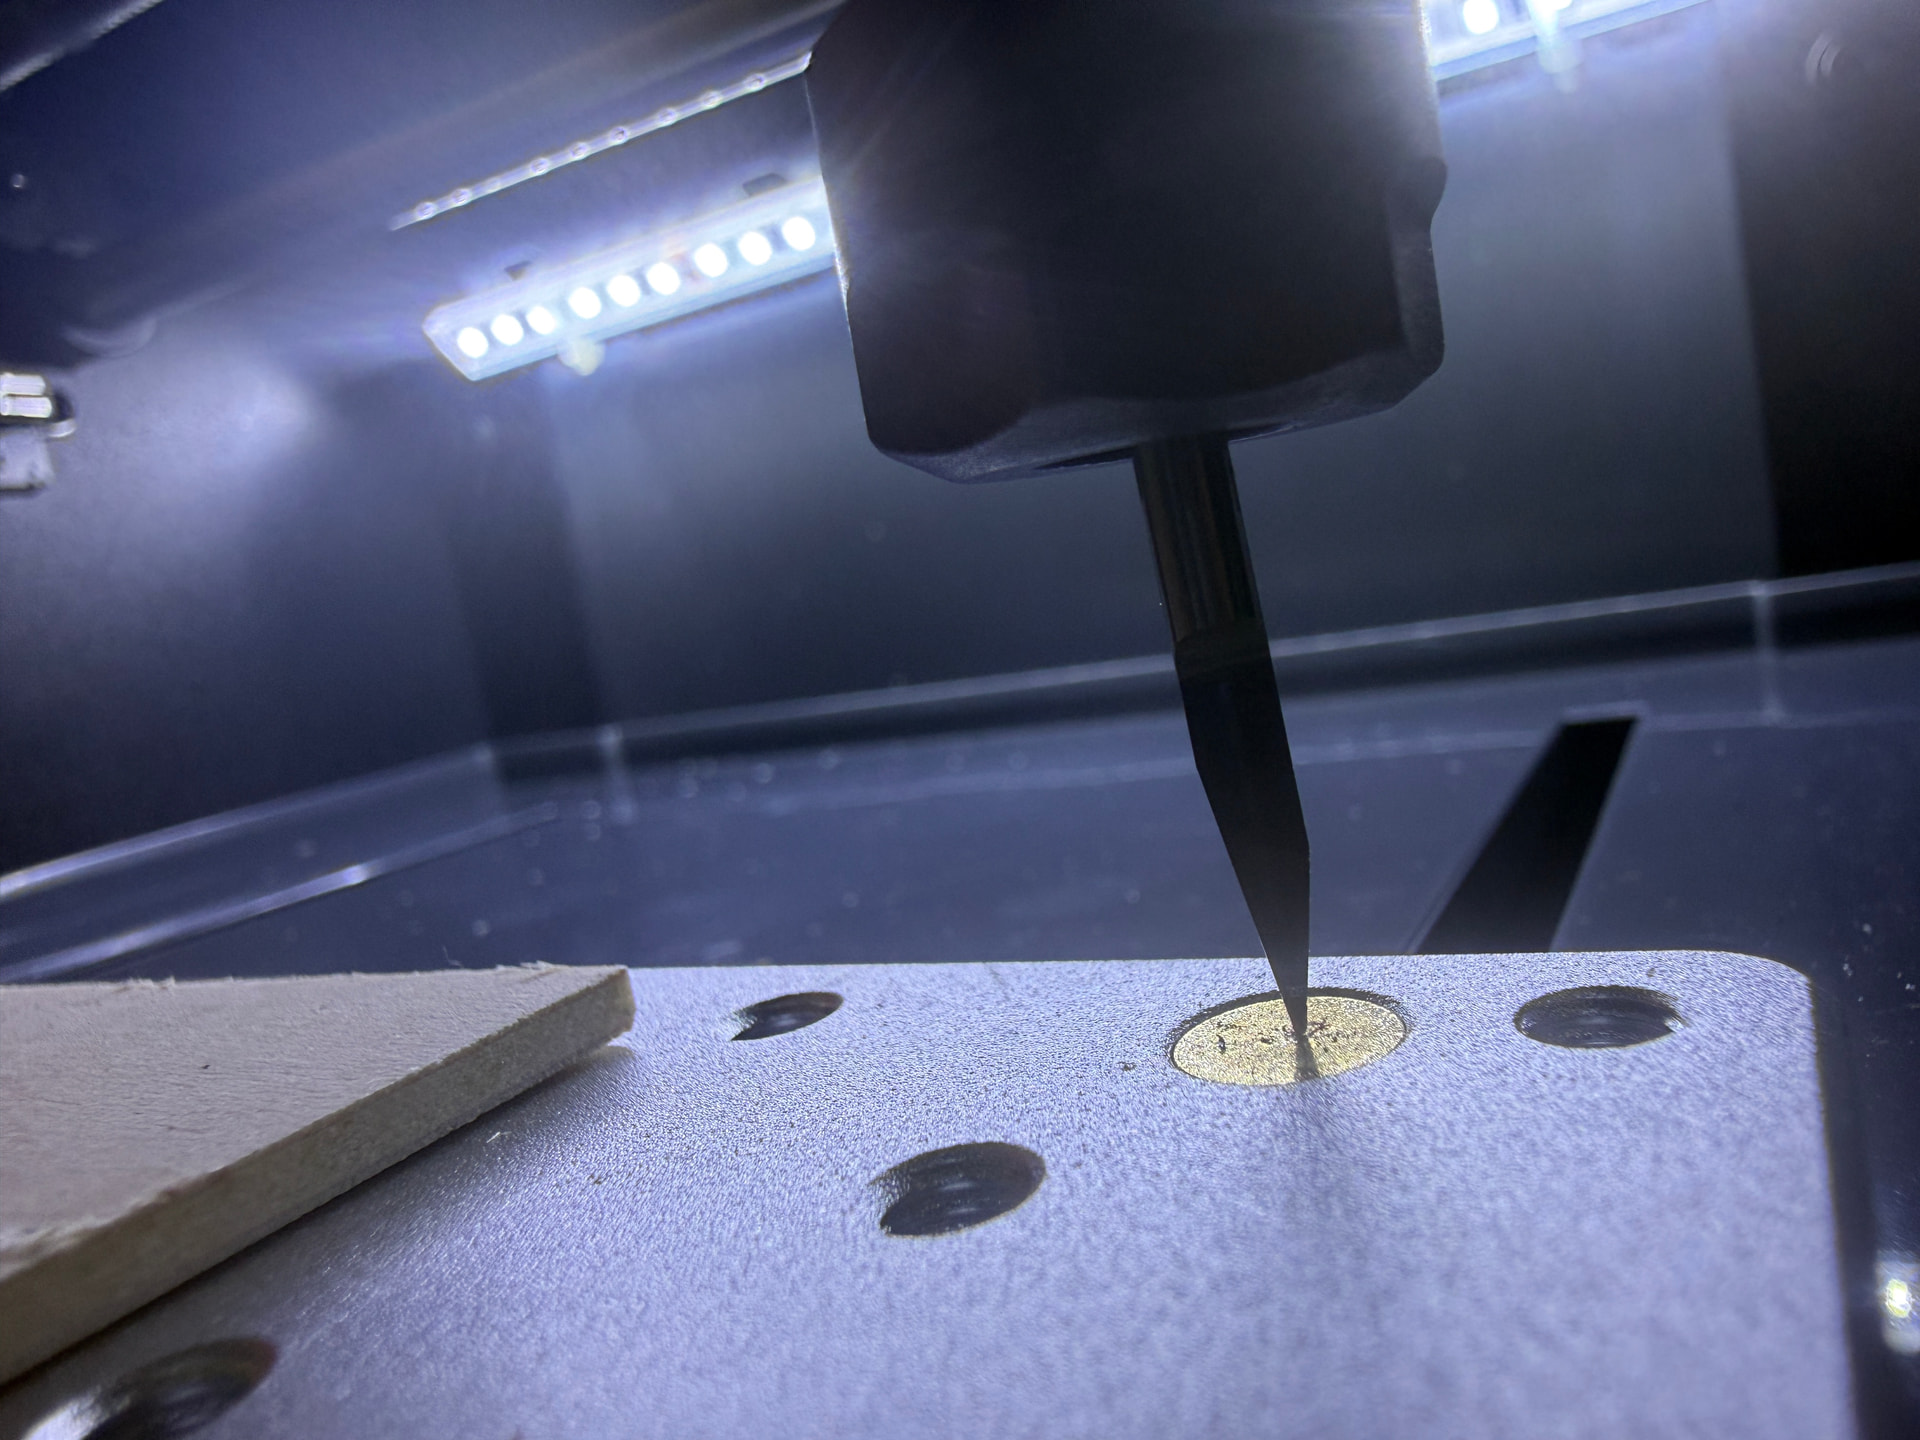
Is there a wiring clip you need to connect to the tool & workplate to ensure the probe contact completes an electrical circuit? or is the tool physically pushing on a switch?
Temporarily change the Backoff Distance to 10mm and the Precise Probe Distance to 12mm.
When the fast probe starts, if you physically push down that switch with your finger does the tool stop, lift 10mm and then start moving down slowly? And then if you press the switch again does the probe finish?
Ill try that Nicholas, thanks…
I’ve tried twice without success, it does not stop it caries on down to the pad and alarms. The alarm this time is different though;
ALARM:3
Reset while in motion. Grbl cannot guarantee position. Lost steps are likely. Re-homing is highly recommended.
That sounds feasible given what we are doing…
That’s more like a limit switch, perhaps thats the failsafe if the electrical circuit is not made? Are you absolutely sure no wire is needed?
it works exactly as it should using the offline controller and results in a precise z location…