Neje A40640 feedbacks

Hi,

I currently have an Ortur Laser Master 2 Pro S2 SF.
Pretty happy with it, I can do most of what I need, I’ve built a small enclosure for it.

But I recently wanted to cut something else than poplar plywood, and I wanted to cut and engrave 4mm birch plywood. My first tries were not very conclusive, even with a lot of passes, I did not manage to cut it without burning it too much.

I came accross the Neje A40640, with its optical power of 10w, which would be the double of what I currently have. I wanted to have some feedback on it. Is there some people who got it? Does it really have twice the power of a “standard” 5w laser?

Or do you have another one that would be especially recommended? I don’t have the space(yet) for a CO2 laser.

(I know that I would have to use a separate 12V power supply)

Go to NEJE.shop website, Products->Laser Modules, click on the A40640 module and NEJE provides a link to a youtube review of the module and why it’s pretty much the best there is for a diode laser.

Yeah, but I don’t know how much they might have been part of an operation.

Well, to be totally honest, I did order one, received it, had performances worse than my ortur laser, and after a LOT of discussion/troubleshooting with the customer support, they just ask to return it and provided a refund. I was thinking the module was defect, they were not sure about it.

Now I’ve the option to get a replacement, but I’m not sure if I my module was defect or if it’s globally what should be expected. I was unable to cut 4mm poplar plywood at 200mm/min while they recommend to use 360mm/min for this(at 100%)

my neje Master S2 pro comes with this module and works fine. → but ←
plywood 4mm 250/100/2 speed 250, power 100, pass 2 sometimes it works with 300/100/2 if the plywood is good quality. you need air asistent to get good result. without air i can cut only 3mm
and you need update to >8.2 and 4A power supply.

I don’t know if you’ve made a decision yet, but I’ve got an Neje A40640 and been very happy with it. 3d printed an air assist nozzle for it and regularly cut good quality 4mm ply at 240 speed, 75% power and 4 passes. I don’t generally run my lasers at 100% power. I have cut 3/8 pine with mine, so it will definitely cut some fairly thick wood. Also, as Stupsi mentioned, “good quality” plywood is pretty important. Occasionally I’ll run across a piece of 3mm that just refuses to cut and when I break it apart it will have some strange inclusion or garbage on the inside that laughs at the laser.

Thank you very much for the feedback.
Honestly, I don’t find 4mm ply 240mm/min 4 passes so impressive. My 5W Ortur LU2-4 SF does cut 4mm 200mm in 2 passes(yes at 100%, but I guess that at 75% it could also manage to do it in 4 passes).

I would expect the A40640 being able to cut the same thickness in ~half the time or passes since it 2x5W laser diode.

I mean, they advertise 4mm plywood at 360mm/min in 1 pass(okay, at 100%, but if you go 1/3 slower, I guess it should be possible to get through in 1 or 2 passes at 75% 240mm/min).

Am I missing something? I mean, the reference material of the ortur was a bit off, but not as much as the Neje.

Fair enough, my frame of reference is a no-name “5W” laser that would struggle with 3mm plywood and any attempt at thicker wood just resulted in charcoal along the edges. No way at all would the old one ever even think about cutting anything 3/8 inch thick.
One thing I forgot to mention is that I’d say over 75% of the time it cuts all the way through the 4mm in three passes, but I run 4 since I’m not in a hurry and I don’t like fighting with little delicate pieces of wood that want to break off and cause me to have to re-run a piece. To my mind it takes less time to run one more pass than to break something trying to get it apart and have to start over.
It’s entirely possible that the NEJE should do better, but I don’t have enough experience with other lasers to really know one way or the other. As far as compared to my old laser, the NEJE is definitely far more powerful. My (uneducated) guess would be that the NEJE could easily be double or more the power of my old supposedly 5W laser, but again I have a very limited frame of reference.

You may look into the Sculpfun S9 as well. I got that laser just a few days ago and I have to be honest, if I had bought that one first then I would probably not have bought the NEJE. The S9 is very impressive for a 5W laser and is usually about $100 cheaper.

Good luck with your decision,
Mike

1 Like

So, here I was happily using my 40640 and along comes this thread and makes me start questioning things… :slight_smile:

Turns out I had a couple of issues going on.

Apparently I was pretty badly out of focus, so got that sorted out.

Also, the plywood I am using is not actually 4mm, but ~4.6mm. Not a huge difference, but relevant I believe.

Did some testing, now I am cutting the 4.6mm plywood at 360mm/min and 2 passes at 75% power.

I cut the 3/8inch pine (~9.4mm) at 180mm/min, 3 passes and 75% power.

Anyhow, I hope this helps you or maybe someone else that runs across this thread.

1 Like

That’s already much better! Glad for you!
I’m curious, what was your process to adjust the focus?

Curious as well, also what focal length did you end up with ?

On the focus issue, in this image they show the focus distance to be 22mm, so I 3d printed a 22mm block and that is what I have been using up to this point. I assumed (incorrectly, which is pretty common for assumptions…) that the focus was fixed and 22mm was set.

However, in this video they mention a 17mm focus:

And finally in this chart, they show the laser dot as focusable:

Since at the time I only had my old and much less powerful laser to compare to, I didn’t question much but from your (jaytonic) comments earlier I went and did a ramp test and turns out that my focus should have been more like 15mm to get the smallest dot size.

The lens can be screwed in and out, so I screwed that one way or the other (sorry, can’t remember 100% if it had to be screwed in or out), but now the focus is really at 22mm and it definitely works better.

Thanks for the info :+1:

Okay good! I was wondering if you did found a “less fastidious” way of focusing than mine ;).
I must admit that the fact the lense can be focused is quite hidden and a lot of people don’t know it.

By the way, now that you know that your focus is at 22mm, they also recommend that the focus point(at 22mm) ends at the middle of your material. Meaning that if you cut something that is 9mm thick, the distance between your reference point and the material should not be 22mm, but 22mm - (9/2)mm => 17.5mm.

Ok, I tried to reply to this about an hour ago, but I apparently got some kind of “Time-Out” for posting too much and had to wait before I could get back to you. Oops, that didn’t take long to get into trouble… :confused:

You are 100% right on the focus, unless this conversation happened I would have continued on without looking any more into it and likely never realized that the focus was adjustable. Makes me wonder how many other people aren’t getting all the efficiency out of this laser that it is capable of.

Since this is also a CNC machine and I have Z-axis control I have Lightburn drop the Z-Axis by whatever is appropriate to keep my initial focus all the way through the cut.

As example, a 10mm deep cut in 3 passes I set 22mm to the surface and then lower Z by 3mm each pass. This seems to work ok so far.

But yes, looking at that first picture they also show the focus point to be the center of that board, thanks for pointing that out. So many details that seem small but can have drastic effects on the outcome.

So cool! I would be interested to see the CNC side of your setup too. You also use lightburn for the CNC part?

The machine itself came from the folks at v1engineering (https://www.v1engineering.com/). The machine is their MPCNC (Mostly Printed CNC)they provide files that can be 3d printed and along with some very standard bearings, electrical conduit and regular old bolts and nuts plus the expected steppers, wire, etc. you can build pretty much any size CNC machine you want. I’ve modified the mounts that they provide and printed custom ones to accommodate a dremel tool, my original laser, and now the NEJE laser. I’m looking to upgrade the “spindle” to something a little more worthy, but for now it’s actually working better than I expected. I’ve milled some wood, some MDF, and some acrylic successfully with it. I want to try aluminum, but haven’t had an excuse/opportunity yet.

I haven’t tried using Lightburn for the CNC work although as I get more experience with it I do think there might be some possibility there. Currently I’m using Fusion 360, CamBam, and Universal G-Code sender for the CNC work that I have done so far.

HI,
I hope some of you guys still use these lasers and might be able to help me figure things out better.
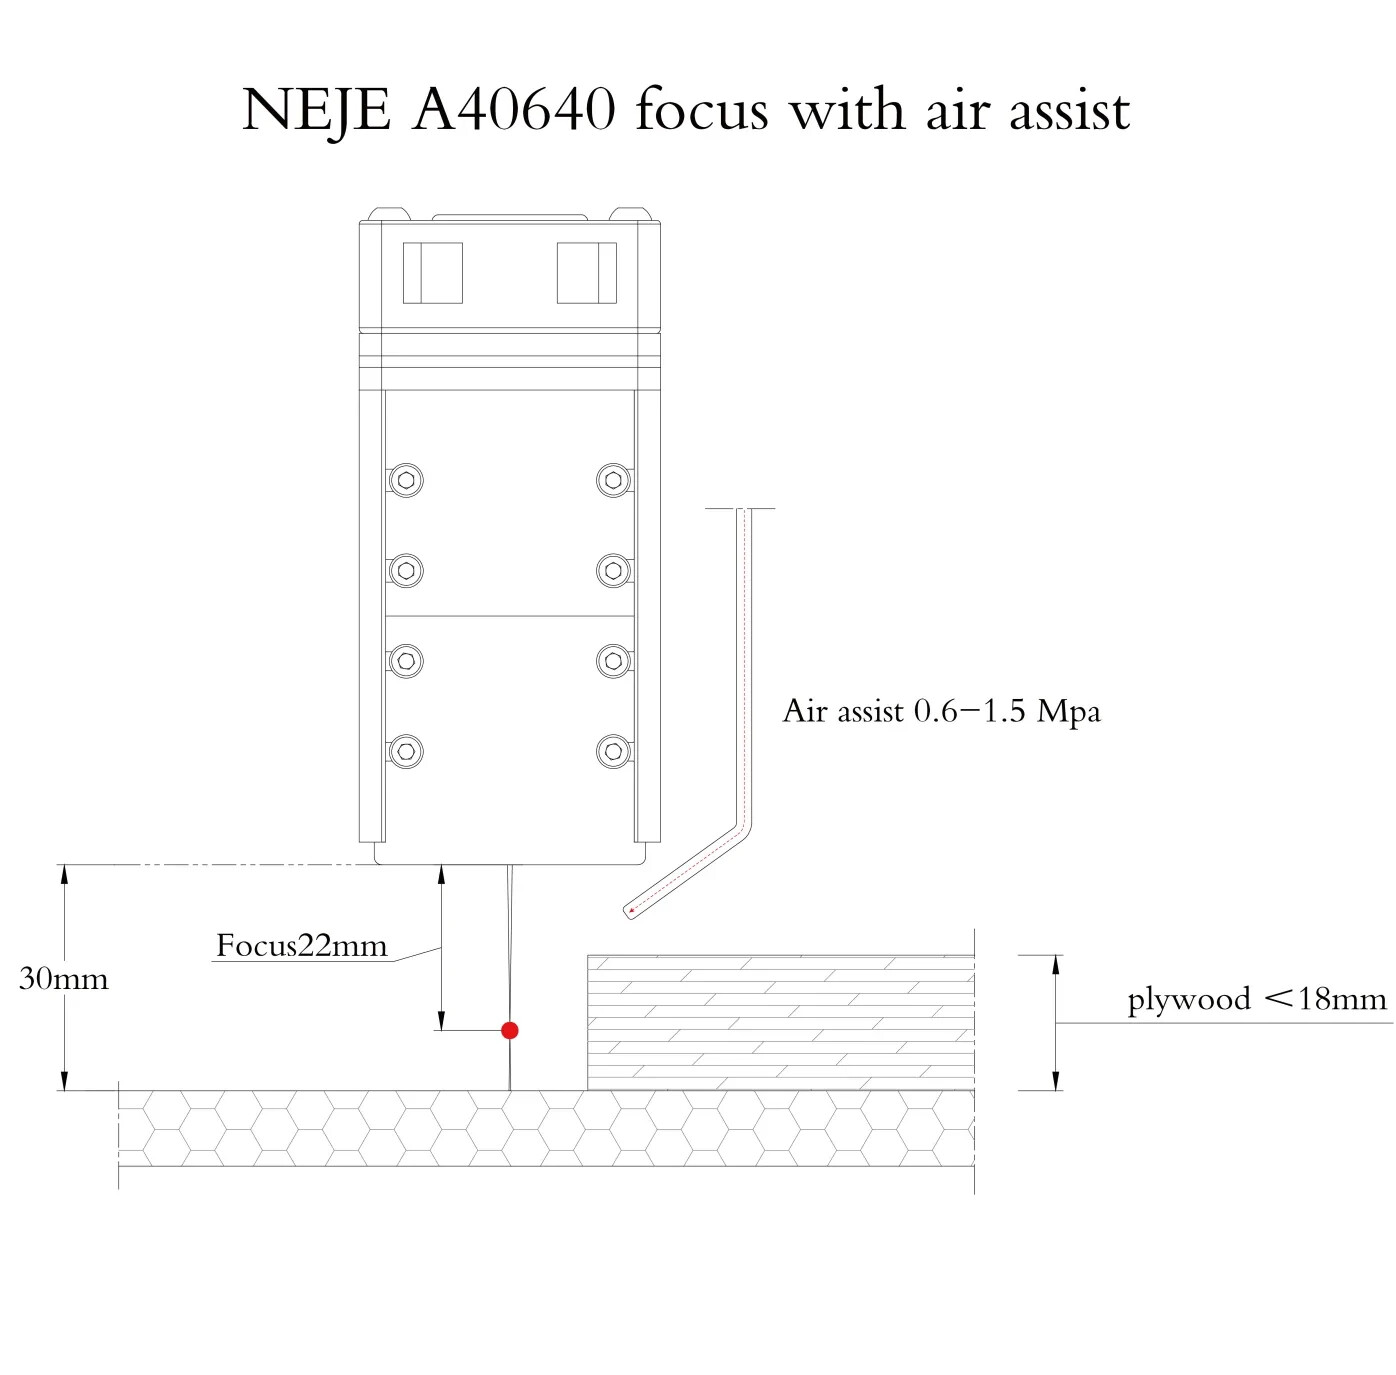
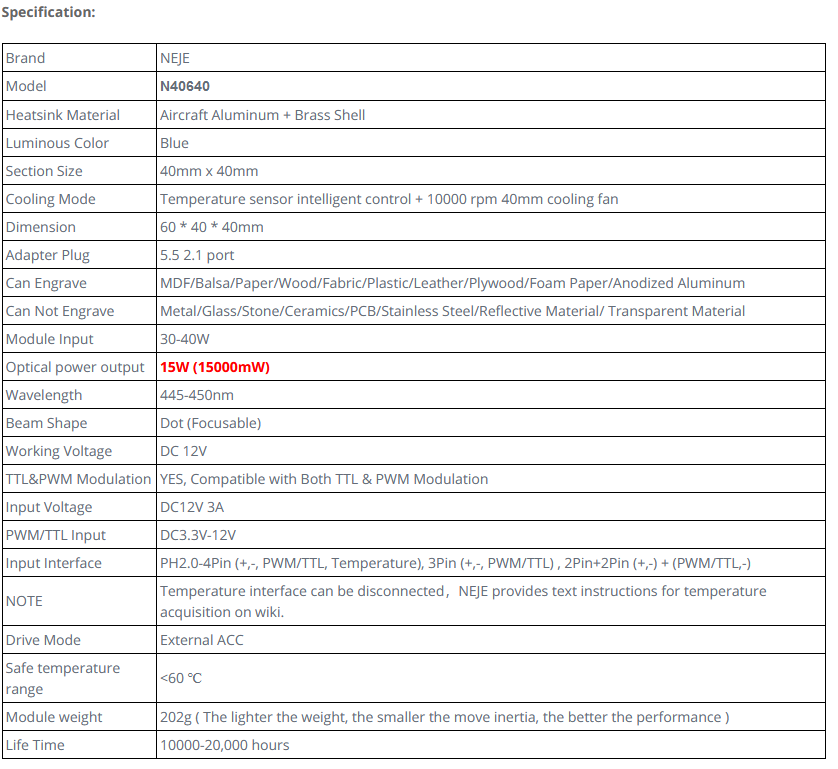
I just bought a “NEJE Max 4 A40640 Laser Engraver, 12W Zoom Output Laser Cutter, 29.6"x18.11” 4 Axis Industrial Laser Engraving Machine for Wood, Metal, Paper, Fabric, Acrylic, etc" about 2 weeks ago and its taken every bit of extra time to go from knowing nothing with a computer and design background to; I think I got this. I still don’t fully understand how you focus this laser and with the cool but complicating z-axis, I feel like its been a very complicated thing to figure out. You have a variable height to the bed, variable focus, and a moving z access. I’m getting there but its week 3 and instructions are not great.
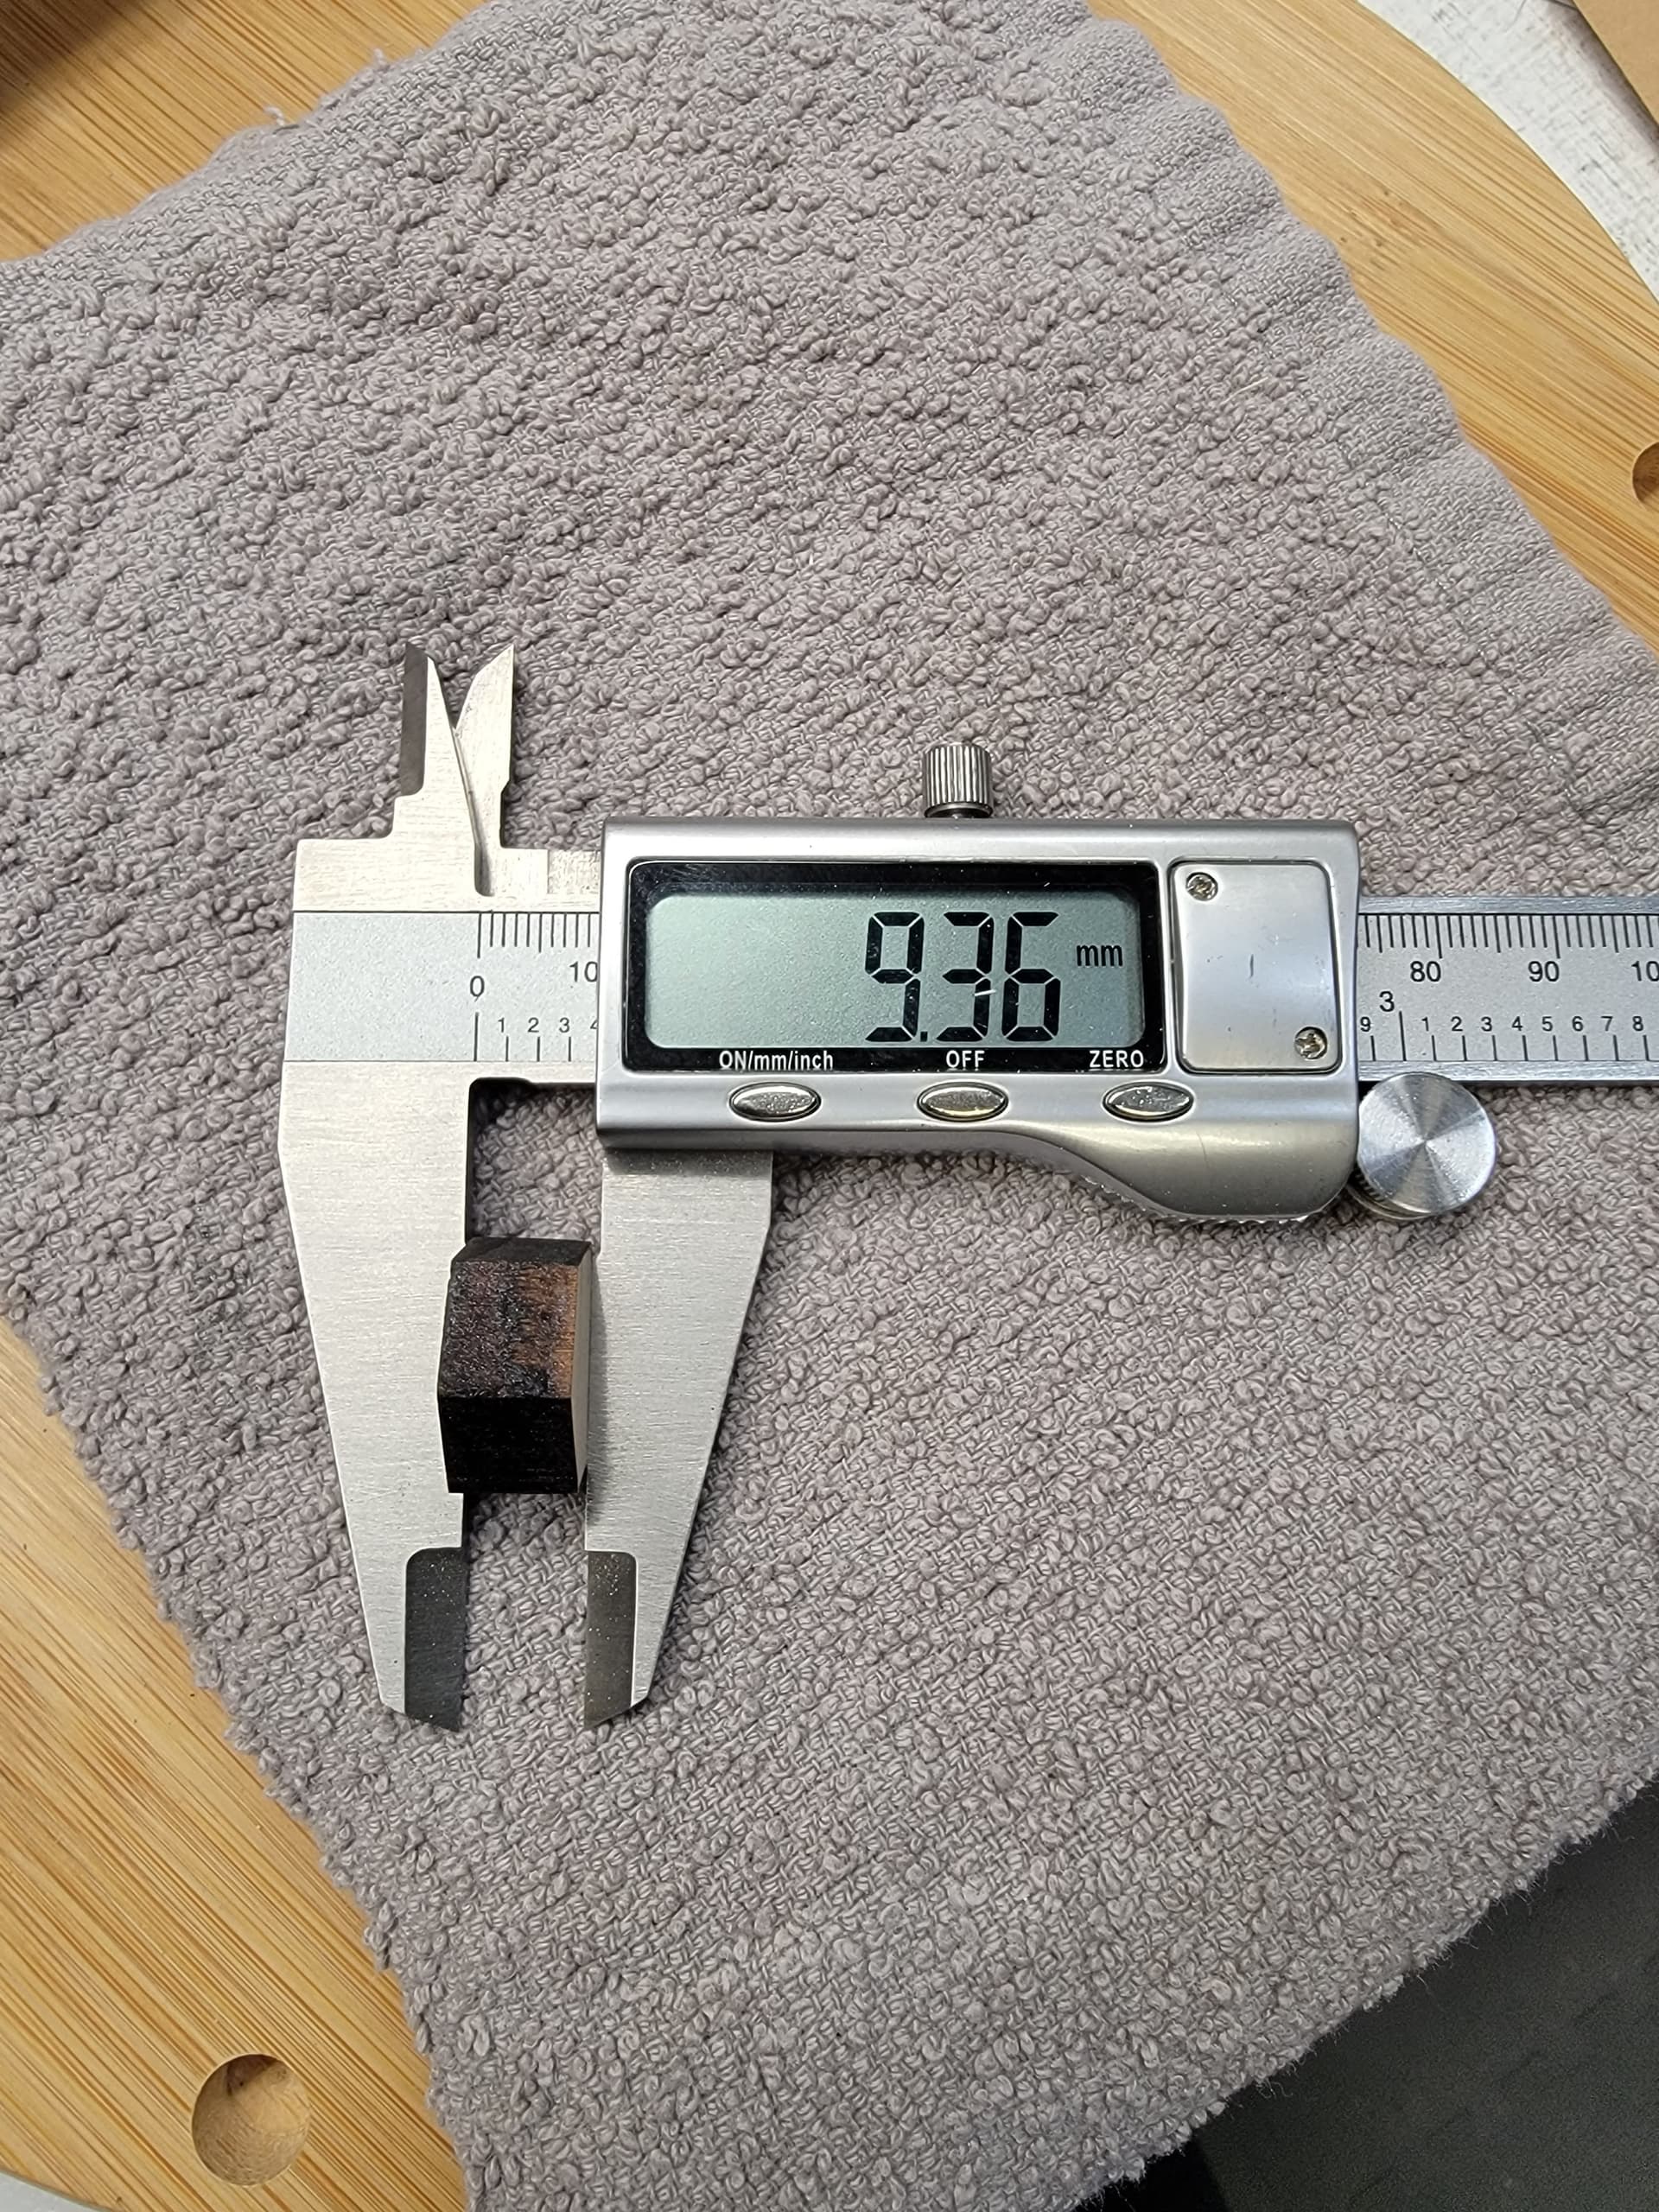
So, because I am new, it took me a week and a half roughly to figure out I should lift the material off the pine bed I have the laser on. NOW I bought little 41 ish mm wood blocks from Michaels and have these blocks sitting on a baking sheet under the material I intend to cut. This is version 3 of the bed.
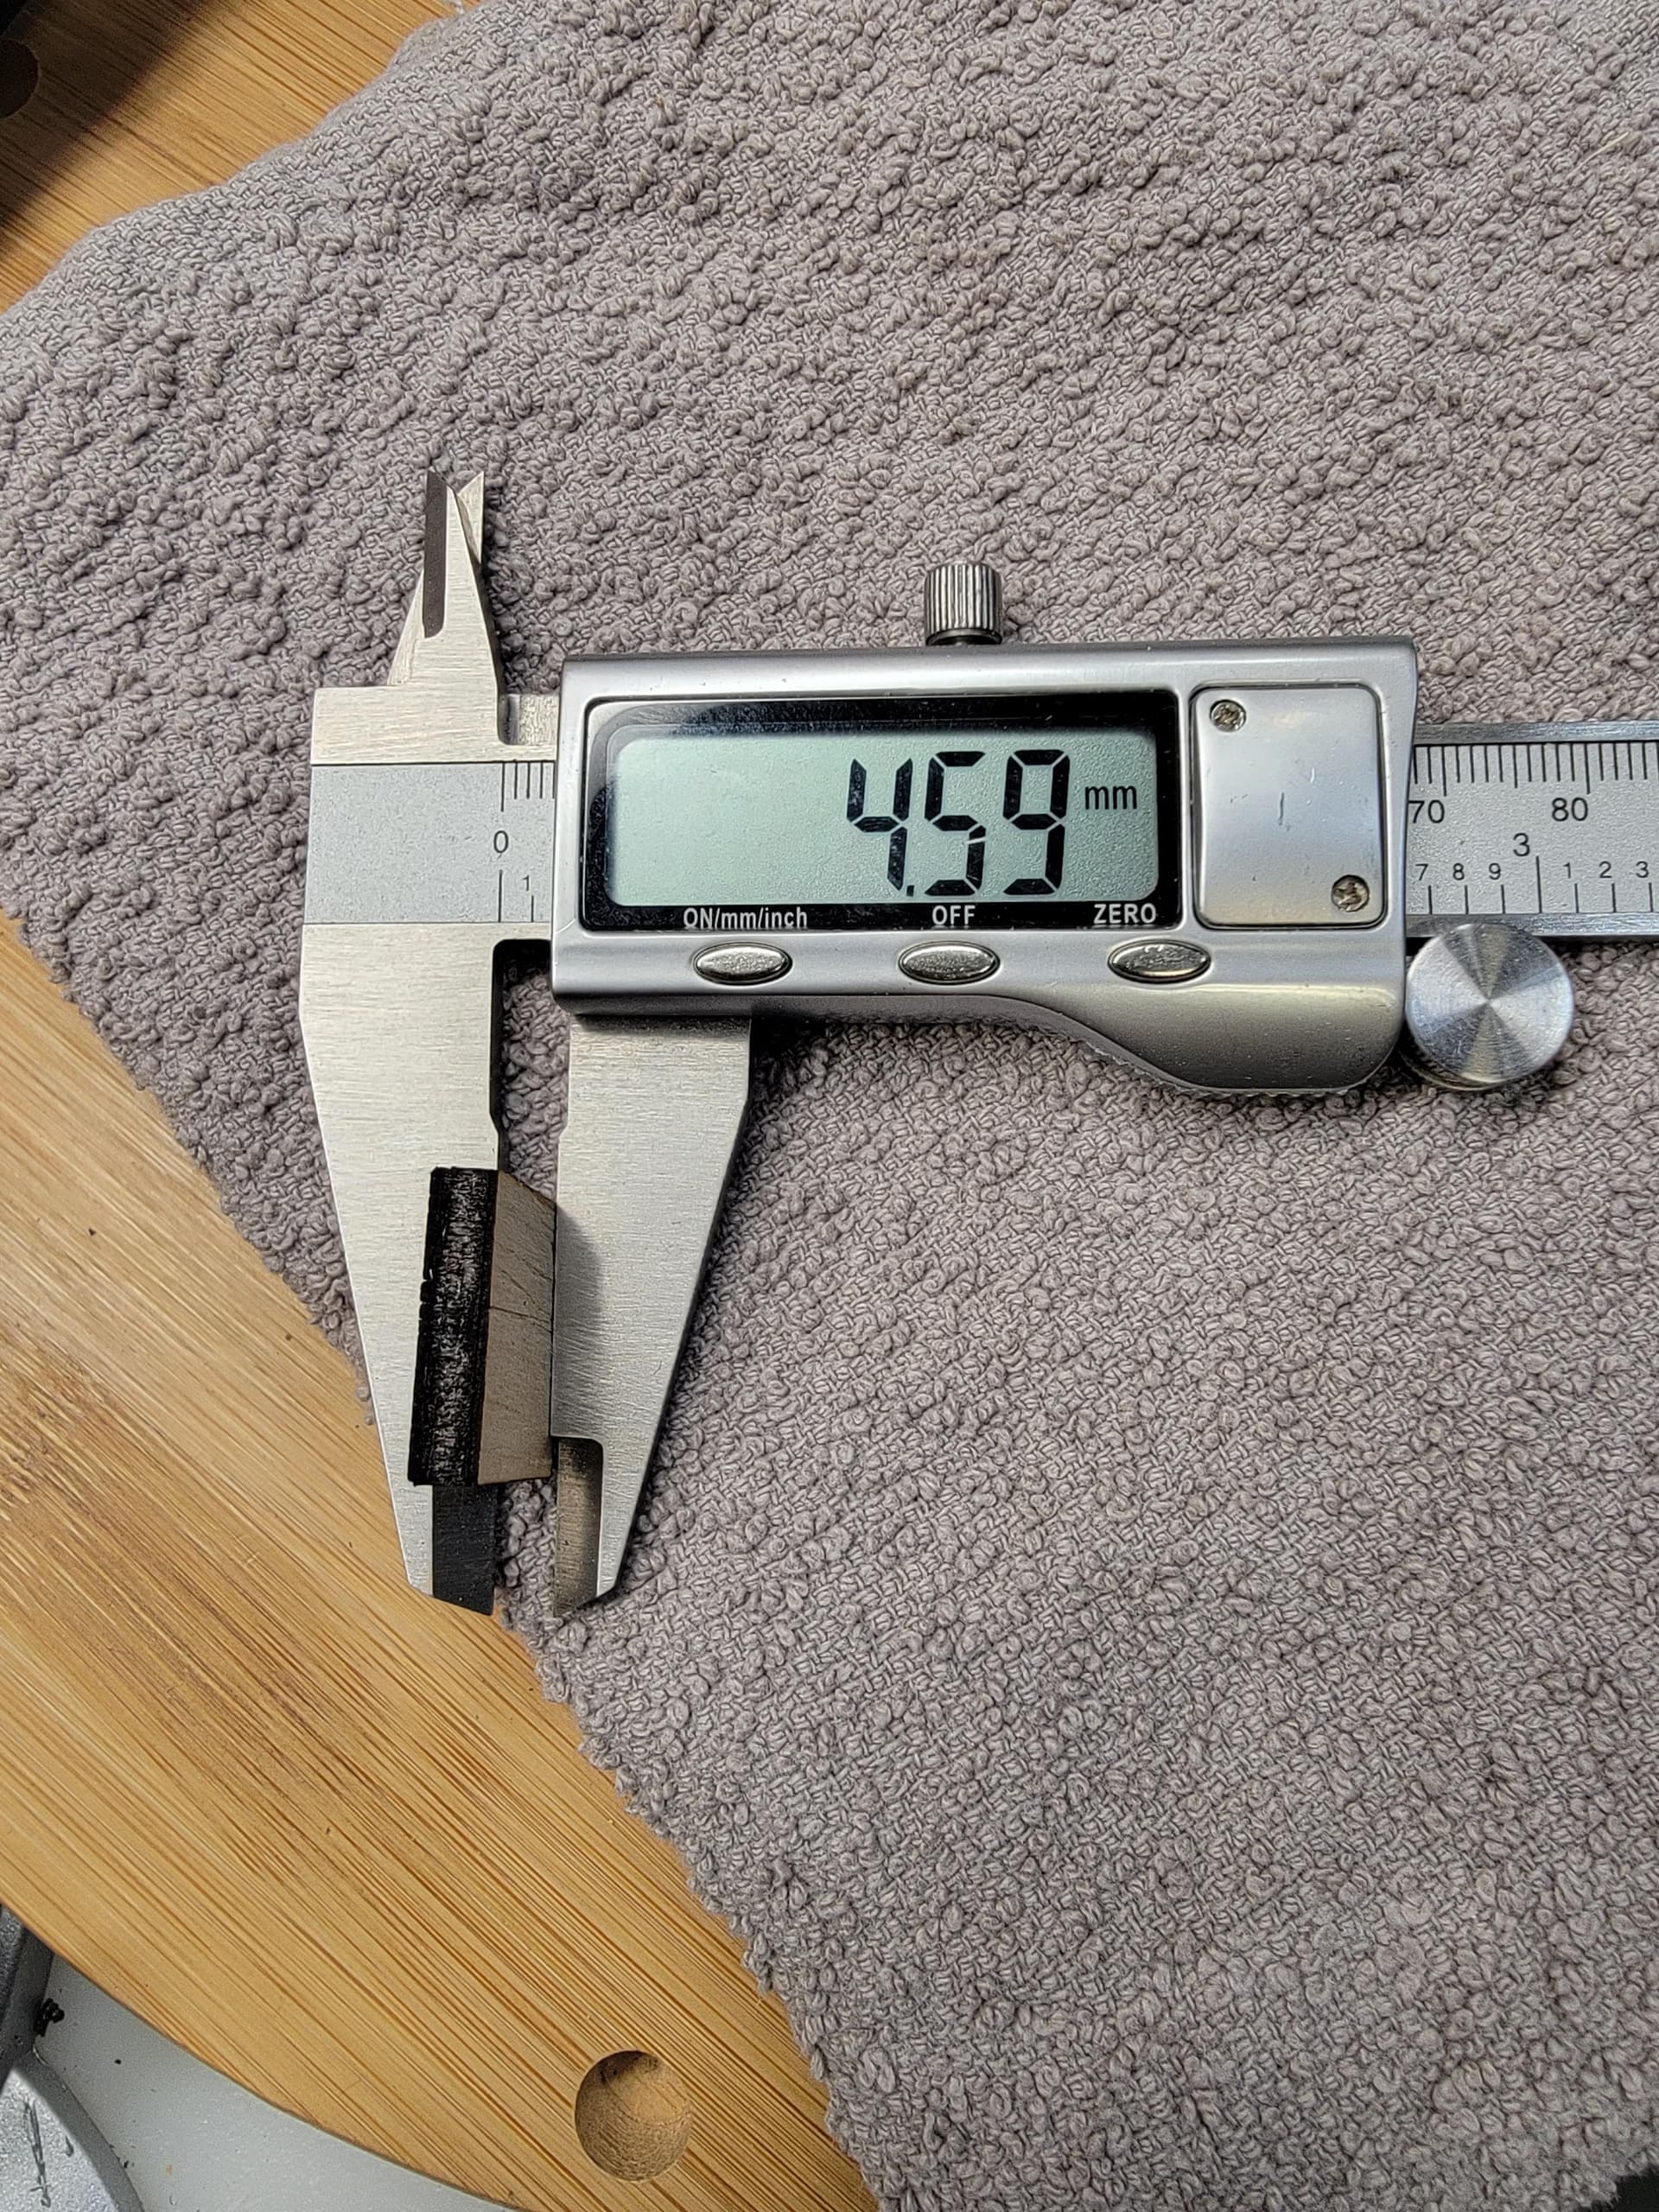
On top of these blocks I have placed some 4mm hardwood (not ply). Its the bottom of some old drawers and this is all I know about it. Its also kind of warped but probably not enough to matter I hope. Especially because I’m cutting small things at this point and I’m measuring from my cut location to the laser.

On my first attempt to cut in Lightburn (after some experimentation) I was able to cut an intricate design. The laser was at about 6mm from the material but the focus was tuned for that. It was the same 4mm hardwood mentioned above. I used these focus parameters based on a neje video I found but I think its just wrong or a different laser or something… It says to adjust the focus ring to 2.5mm (measuring from inside the laser to the focus ring back) to cut at roughly 6MM from the top of the material. This took a ton of passes and I ended up bottomed out on my Z because my bed was lower. I then lifted my bed with some scrap wood and discovered why you should not cut wood directly on top of more wood. It burns.
So, then, I suspended the wood to cut on top of the scrap wood with an air gap and it worked for the most part but I had the z almost bottomed out at -44 ish. Some areas did not burn through after like 100 passes at 85MM/s speed and 95+% power. I even bumped some things to 100% for 25 passes and they still didn’t cut but the scrap wood underneath was getting burned like crazy so I ended up having to finish it off with an exacto after it became clear something was not right.
In any case. I tried setup 4 last night.
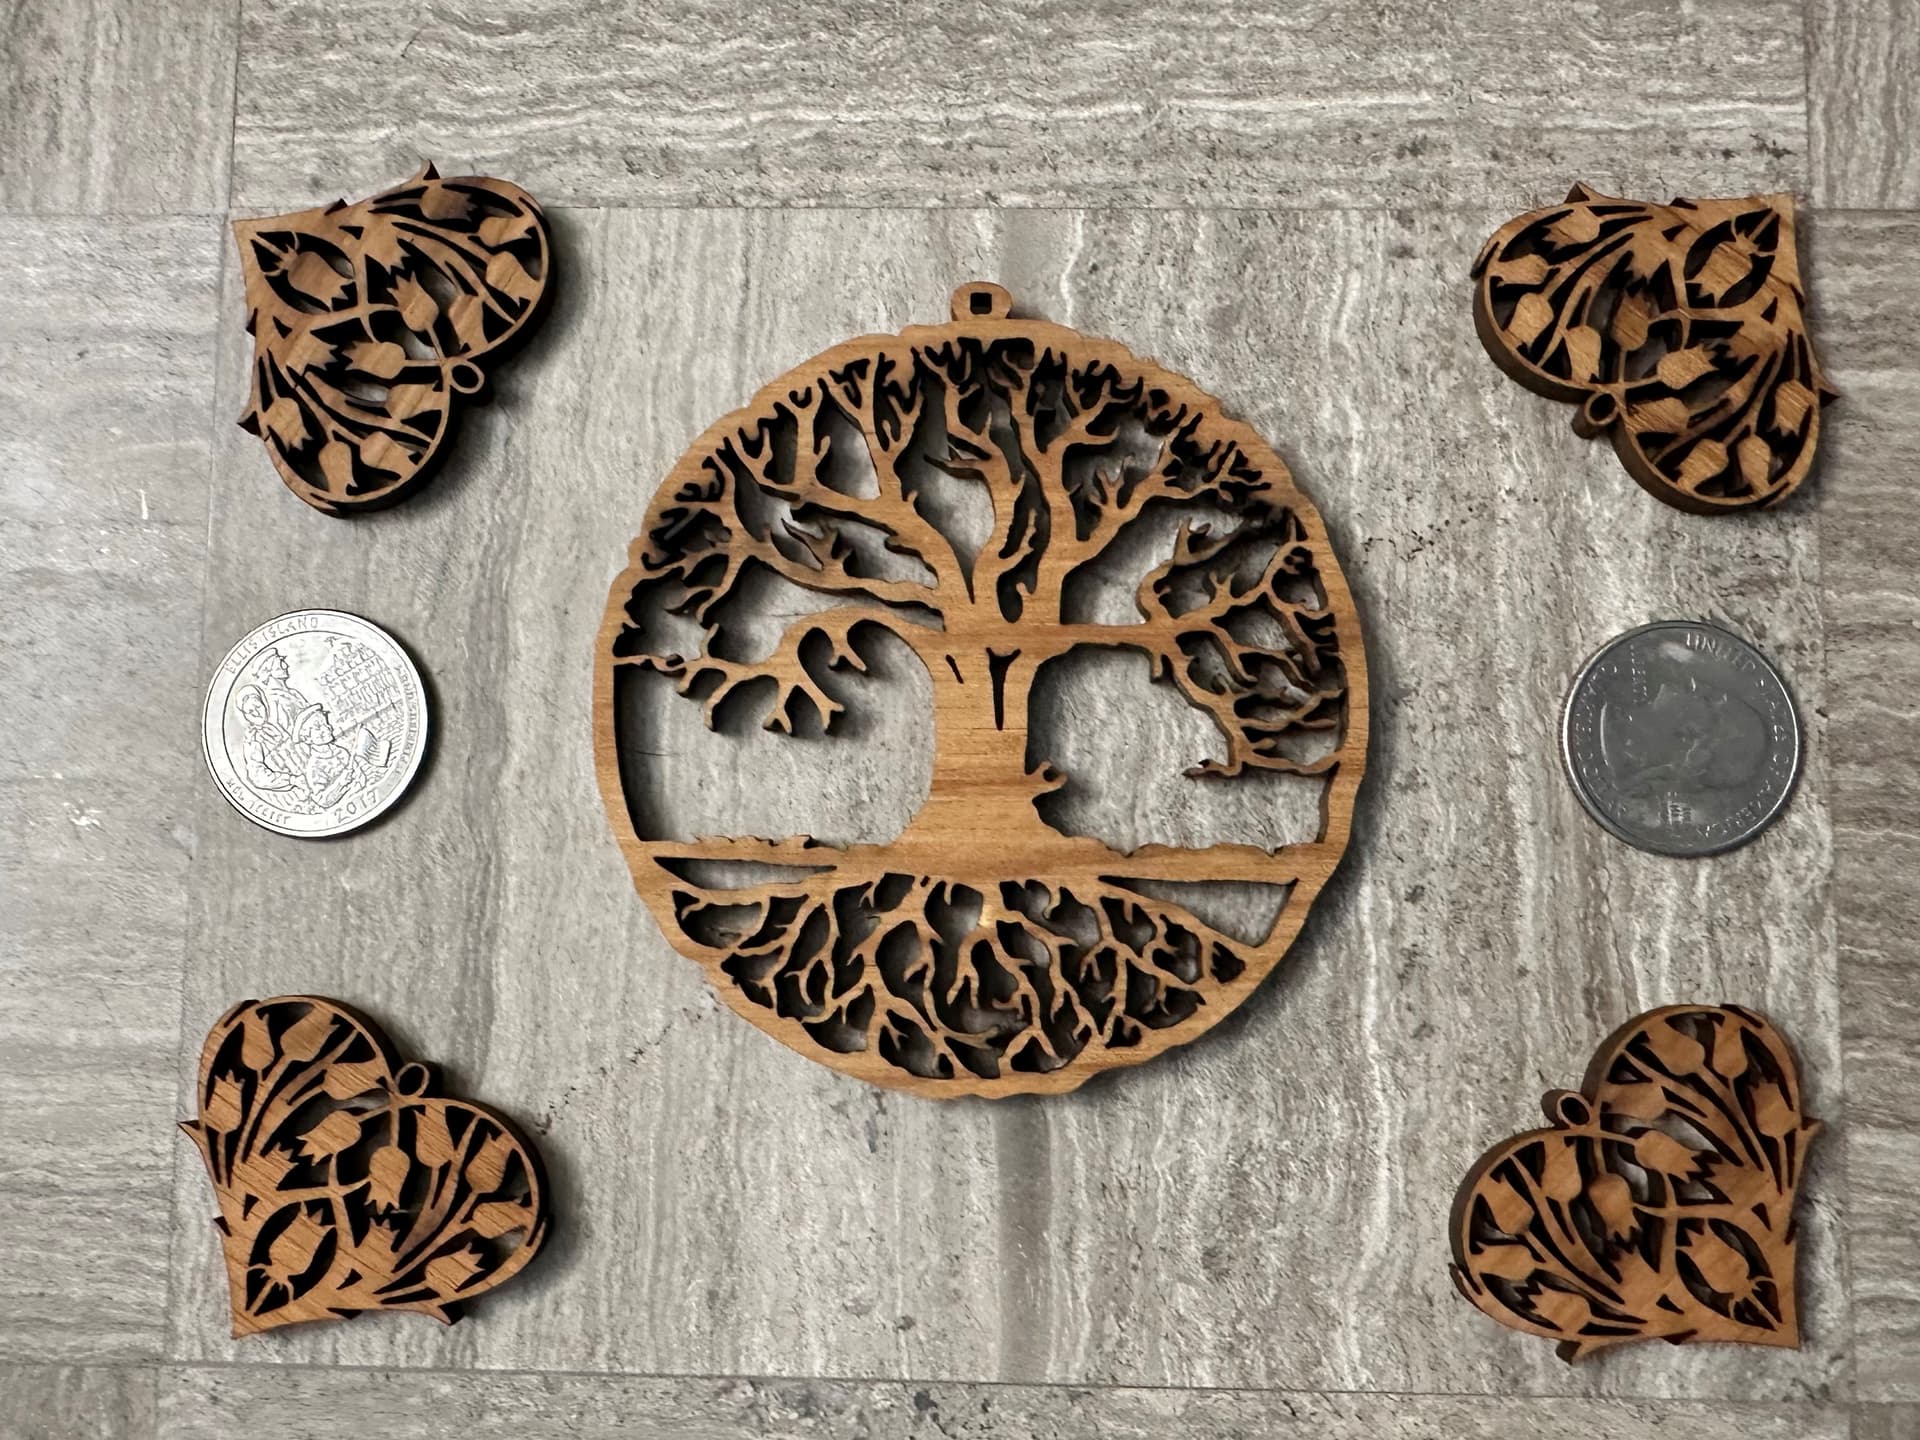
This time my laser started 18 mm above my material focused for that surface which is lifted about 45 mm off the bed. This puts my Z at -32 so I have some room but ended up going all the way to -42mm over a bunch of passes. My power ranged from 50% to 85% and speed ranged from 50-70mm/s depending on how much detail was on that layer. I still did 40 or so passed on everything when all said and done which has me questioning why I am struggling so much to fully cut my material. It gets mostly cut but almost nothing falls out. I eventually reach a point where it seems silly to just keep running the laser over and over but its leaving a good amount of work for me to get the piece free and push out all the little cutouts (not to mention I have broken both pieces trying to get them finished up so then I have to sped time gluing). I am cutting highly detailed things as small as I think is possible (example: https://www.vecteezy.com/vector-art/12004525-interior-tree-laser-cutting-design-square-templates). I cut this last night about 70X80mm.

BUT if I try to cut something with less detail (a hexagon or oval) it cuts clean and falls out with about 5 passes.

So some questions to start:
Are you guys getting this to cut fine detail in 3 passes? I feel like the minimum I could do is 5-9 with 70%-90% power and 70mm/s speed focused at 18mm from my surface and dropping the laser about 1mm per pass.

Am I approaching making detailed cuts right? The way I’m approaching it is doing 5-6 passes at 18mm above then dropping it 2mm and running it again, drop 2, run again and so on until I see the laser going through below constantly. Even then I tend to move the laser up a bit and run again, then down a bit and run again. Over and over just trying to get as much fully cut as I can.

Why might I be having such trouble with high detail cuts but not with straighter simpler cuts? Is there a setting or something I need to mess with to help this?

I am kinda jumping all over the place and I have a thousand questions but I want to see if people respond/talk here before I keep typing.

Any advise or pointers are welcome because as I mentioned above this tool and workflow is brand new to me.

Now I got it.
Just going to list everything out here because I pretty much had to figure this all out from scratch with a few hints lol.

Here is a set of beginner instructions on how to make this with the Neje 4 MAX

  1. Assemble your neje. Not going to cover this
  2. Get a cookie sheet and 4 X 41ish mm wood blocks from Michaels out of the maker wood area.
  3. Place your 4 mm hardwood on top of the wood blocks which are on top of the cookie sheet.
  4. I like to cut in the center of my bed so I created a saved position at X:375 Y:230 and noted the Z I should use to cut this 4 mm wood because unfortunately LightBurn seems to not be able to have a -Z as a part of its save positions.
    https://i.imgur.com/rRl6HJp.png
    5A. With a laser base like I mentioned above; you then should manually move the z to -30 and focus the laser by turning the ring around the lens. I took off the front red guard and just stuck my finger in from the side and used my nail to move the ring little by little as I watched the dot in the dark. Doing this should give you a focused laser at 20mm above your material. 20mm to the bottom of the red guard on your laser or 22mm to the body of the laser. Your cookie sheet might be warped and what not so the key is to move the laser down on Z until you get to 20mm from your material and focus there. Take note that the MAX Z on your machine is -46MM so make sure your base is tall enough to let you move down at least 10 mm. I assume an even taller base (50-70mm) would be better because it would give you more range on the Z axis but this is what I have for now.
    5B. Lastly I moved my Z down 1mm to have the focus just below the surface of my wood https://i.imgur.com/hsj8OgZ.png. I think I saw a recommendation for 2mm below the surface but Its hard to focus this A40640 that precisely. Maybe you could get rid of a pass or two through optimizing this more… Moving on.
  5. Set your details to a single layer and your boarder to another layer. You can also set the hole to its own layer but it will probably work fine on the detail layer.
  6. Set all layers to be 4 passes at 15mm/s at 75% max power. Set all layers to lower 1mm per pass.
    https://i.imgur.com/YFS11gT.png
  7. Turn off the output switch on the outline layer.
  8. Double check your position is 375,230,-31 (or whatever z height you came up with) and cut the detail/hole layer once.
  9. Move the laser down 2mm and change the passes to 2, double check you are at 375,230,-33 and run it again. This should be enough let the small detail pieces fall out mostly. If a few don’t fall out its probably not an issue. If most don’t fall out you might need to go 1-2mm lower on your z and run it again but if they are still not falling out just move on to the boarder and poke them out later. If you are seeing the laser beam go straight through the wood and hit your cookie sheet constantly while its cutting then you should be able to shake or push those little bits out once the piece is free.
  10. Turn off the output on the detail layer and hole layer. Turn the output on for the boarder layer.
  11. Move your Z back up 2mm or however far you lowered it getting the detail layer cut. Check you are back at 375,230,-31 where you started. Cut the outline layer and hope it does not fall out before the last pass.
  12. Assuming the piece didn’t fall out move the laser down 4mm to 375,230,-35 and cut a single pass. If it still does not fall out you can run it again and then try giving it a little tap. If it still does not fall out you might need to fine tune your focus or your starting z height a tad for your specific situation.

Took about 5 weeks to get here but now I feel I could cut these in batches. I am no expert so please feel free to educate me if there is something I can do better or smarter.
Graphics came from vecteezy.com. Converted to SVG using Illustrator then imported into LB and manipulated there.

2 Likes

hi, not been on for a while, bit late now but was wondering if you checked your air assist is going directly into the cut and not just blowing across the surface, makes a huge difference.
nice work btw. :+1:

I’ve got my air assist going in the cut but what I’m noticing is that as I lower z to cut through it does seem to get a little off the cut. It took a lot of time and effort to get the little tube as well positions as it is already so I kinda don’t want to mess with it but I’m sure I will at some point. Being said; the cuts above were done without air assist.