Can you guesstimate how much TiO2, water and tempura you used?
I have some acrylic titanium white that I will try while I wait for the tempura to show up…
Just picked up a case of white 6x6" porcelain tiles… third case of them …
![]()
Can you guesstimate how much TiO2, water and tempura you used?
I have some acrylic titanium white that I will try while I wait for the tempura to show up…
Just picked up a case of white 6x6" porcelain tiles… third case of them …
![]()
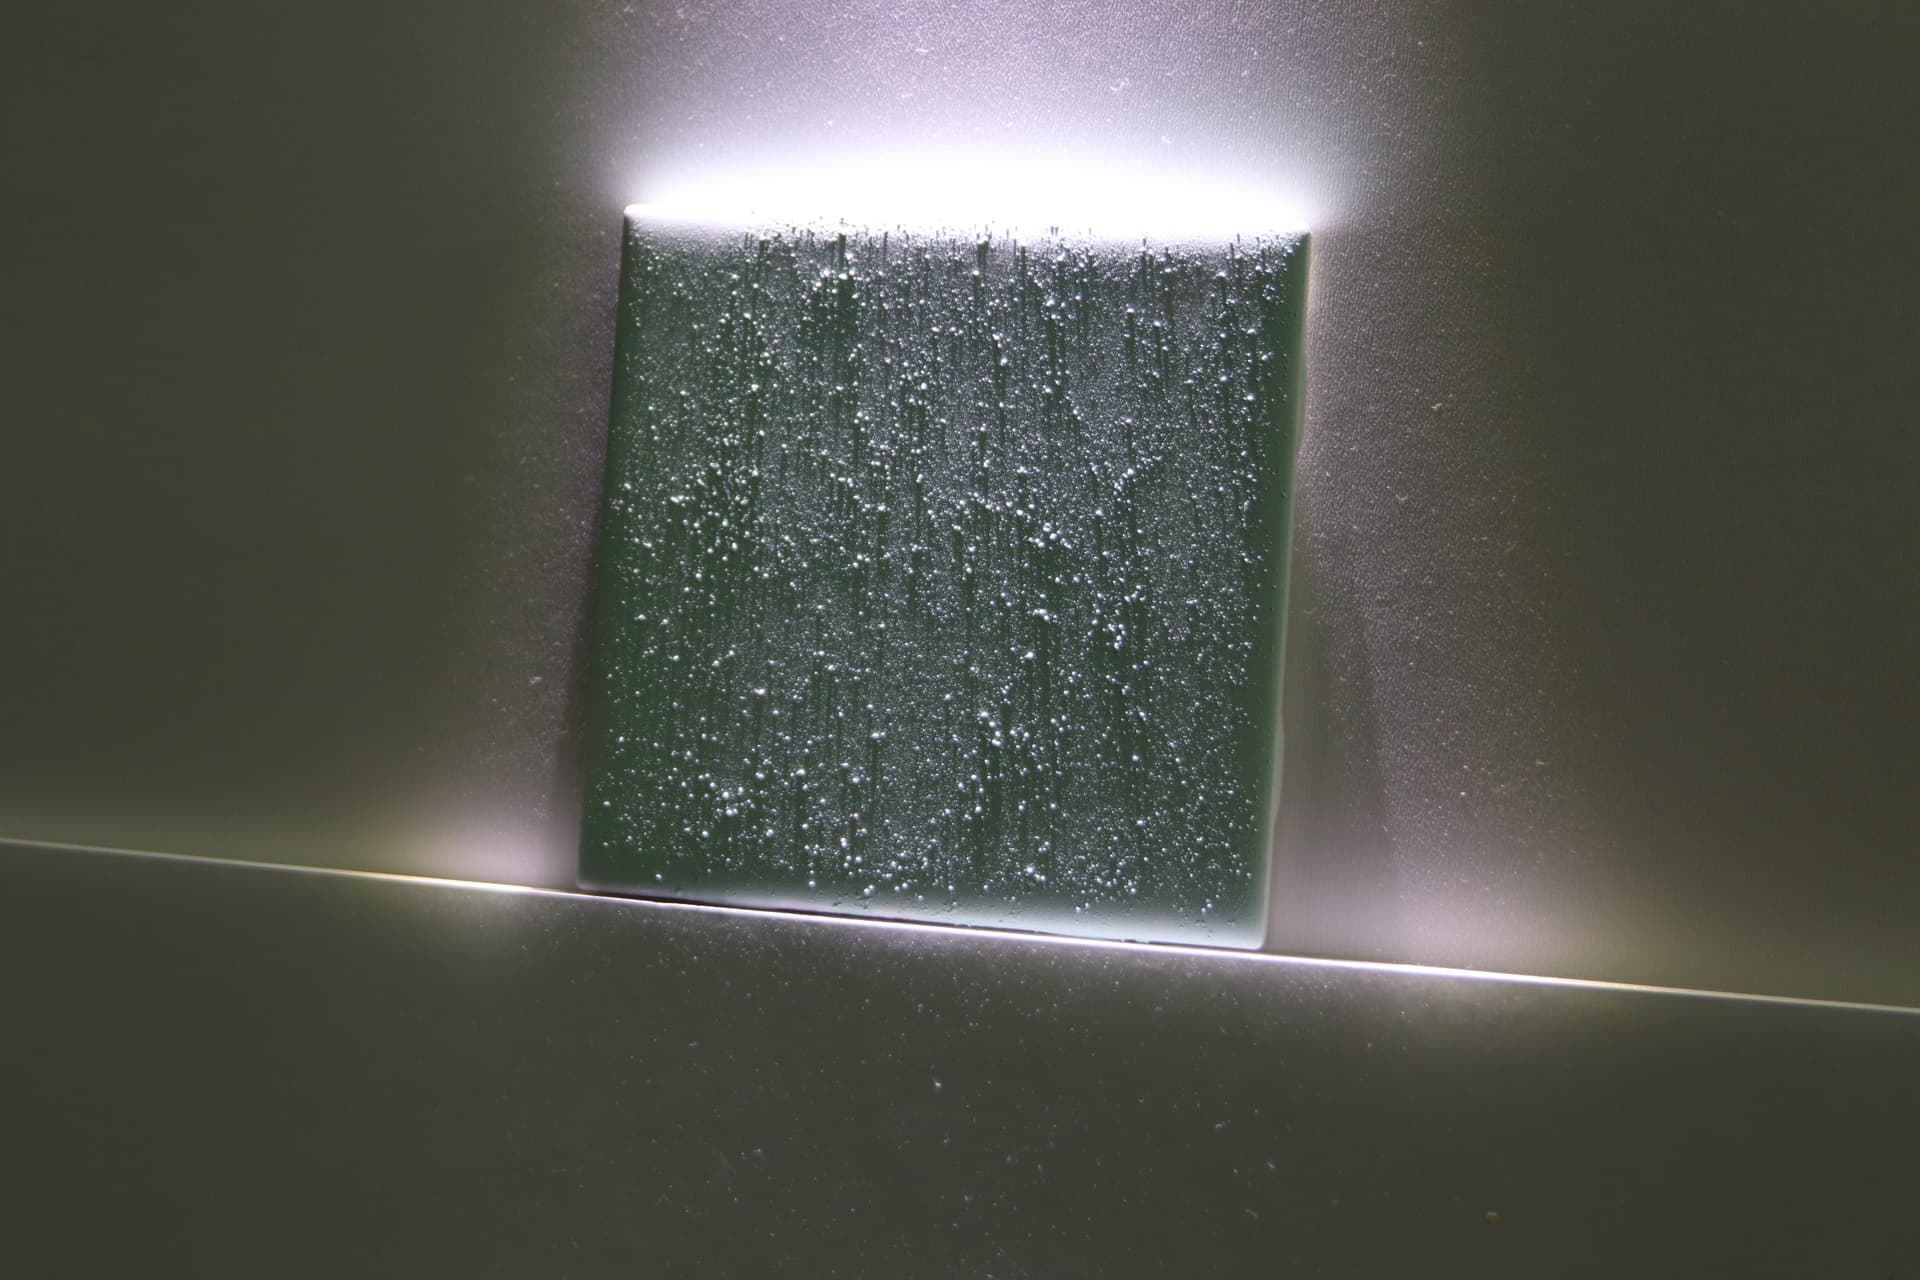
I use 4 level tea spoons of Ti02 about 2 TBS of Tempura paint from walmart, its like 2 buck and about 1.5 TBS of water. I spray it on to the point if they were not laying flat it would run wait a whole usually a few house you can see the color change when they are dry and then do another heavy coat. It took some playing around, and ignoring what I was told about a lot of things and just tried it. you want it thick but thin enough to spray. i have made it too thin and just did a third coat. What I like to do for test is take tiles i have already used and did not like or an old test tile and just coat them again you can see where the pervious burn is and i just do something simple to see how dark it is and if it looks good the rest of the batch should be fine.
I prefer the 6x6 myself. things just look better on them.
Thanks… I’ll try it out and see what happens… I’ll have to use acrylic instead of tempura, but I’ll order some…
Glad I didn’t get the 20oz hvlp gun ![]()
![]()
I would image it will work too i just like being able to clean everything up with the tempura and it is super cheap. If you look at it from an angle you can see how much is goin on. or ad a little of a color to give it a slight tint.
i only fill the HVLP reservoir about 2/3 full and i can do 6-8 tiles.
I’m assuming IPA is isopropyl alcohol. When I mixed the PVA with alcohol it created “slime”. I thought trying to spread that would be difficult to get an even coating so did not pursue. I have had some decent results with 50 grams 91% IPA, 8 grams TiO2, 2 drops dish soap. I sift the TiO2 into a mixing cup, add 35 g alcohol and 2 drops soap and mix with a small wisk. Then transfer (using funnel) mixture into small perfume pump spray bottle and use remaining 15 g alcohol to rinse the mix cup and funnel. According to my ‘precise miscalculations’ my mixture should contain at least 15% of TiO2. I put two small ball bearings in and shake it up. The little pump spray works pretty well to coat the tiles evenly. Sometimes the surface is a bit grainy which makes the blacks turn out slightly blotchy looking. I think some of my best results are with Rust-oleum Cold Galvanizing Compound. This paint contains zinc, I don’t think it has TiO2. Just out of curiosity I tried the above IPA/TiO2 recipe using zinc oxide but I didn’t get good enough results to experiment further. FYI here is a link to where I got my titanium dioxide: https://www.amazon.com/gp/product/B076DCTWDK/ref=ppx_od_dt_b_asin_title_s00?ie=UTF8&psc=1
man, I wish I was as precise as you. I am way too lazy, lol. I think the fact that I use HVLP gives me a lot of room to fix things. If I see any sort of sand paper-looking finish I spray more to the point of looking like it is going to run and that seems to make the “lumps” go away. I know from my experience if I have any of the little sand-looking particles and the laser hits it, it knocks it off the tile and there will be a white spot there. so I always try to have a nice smooth finish. waves are ok from what I have experienced.
as far as the alcohol, it seem to make the mixture bead up like a waxed car for me even with the soap. I’m thinking it might be something I’m doing in the prep or the tile itself.
keep doing what you are doing if it works for you
I can’t see why you are using alcohol. Have you read this thread from the beginning? Just clean the tiles and apply the titanium with water and PVA glue. See my instructions for mix quantities. I paint mine on with a 1 inch brush. Once dry laser and wash of with water. No alcohol used at all. I advise you scrap what you are doing and start by following the method as posted at the start of this thread.
I found and read through this thread back in May and had a reply with some of my results and other questions and I think it timed out before I could send and I don’t think my reply went out. I sure have enjoyed following this thread and trying the various methods. I have tried your recipe a couple of times and my test tiles did not turn out. The 3 Tbsp of water is about 50 ml so I use that amount. I measured a tablespoon of TiO2 a few times and I averaged about 9.5 grams so just rounded it up to 10 grams for easy measuring. I bought a nice little scale from Amazon that works well and was fairly cheap. Here is the link: https://www.amazon.com/gp/product/B08861RCGZ/ref=ppx_od_dt_b_asin_title_s00?ie=UTF8&psc=1
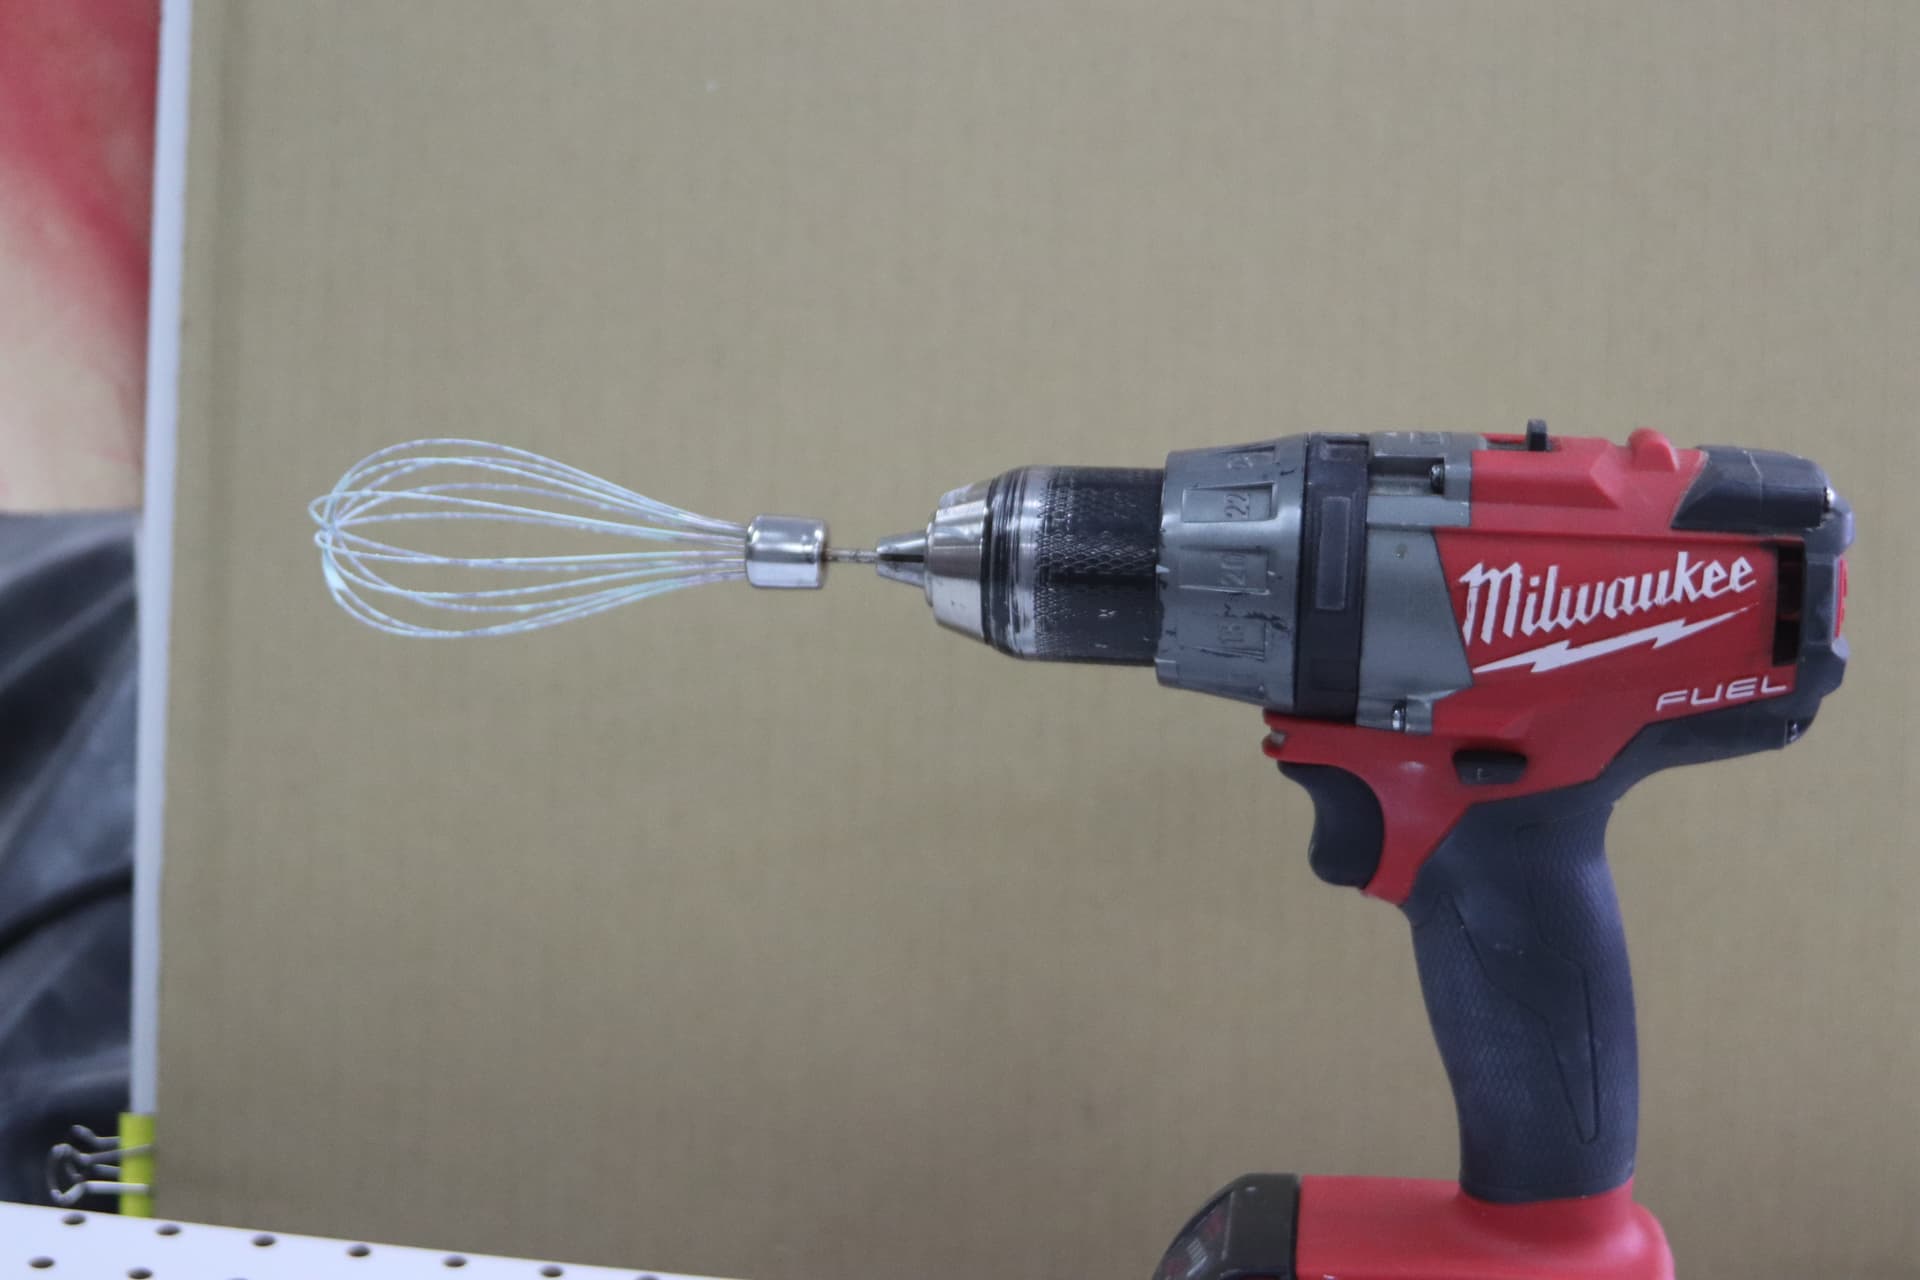
I mix the PVA, water and 2 drops soap in a mixing cup using a small motorized wisk. Then I sift the powder into the mixing cup and mix until fully blended. Maybe I’m mixing too much because it gets really foamy from the soap. I’m using 2 drops of Dawn dish soap, should I use hand soap instead? The batch I made yesterday has not settled down yet and is still very foamy
FYI here are a couple of my tiles with the TiO2/Alcohol recipe:
I want to keep trying the PVA recipe (especially since I went and bought a whole gallon of it) my next batch will be with the hand soap.
I don’t believe in failure, it is only a lack of successful attempts!
Cheers
Tried the formula, I have doubled the weight of the TiO2 on more recent attempts.
I think 10g is a little thin and and I don’t get good blacks. Under the microscope you can see the density doesn’t make for good coverage…
I don’t use soap, so I have no bubble problems… however I if you spray it, that will help with the bubbles… I don’t think sitting with it will change the bubble issue.
Just a though…
Good luck
![]()
I use washing up liquid, fairy dish liquid, and have never had any problems with foam. I add the soap after the main mixing and could be stirred in. It’s only purpose is to break down the surface tension of the tiles and give a smoother coverage.
From what I have read about custom mixing acrylic paints for airbrushing purposes glycerin is used. I think it reduces the surface tension of water and may help emulsify the recipe components. Liquitex makes some acrylic medium additives such as flow aid and slow-dri that may be worth trying. I will let you know what I find out after testing.
I used a 1" camel wash brush to apply the PVA/Water recipe and it is a really nice soft brush but I have a hard time getting an even coating without thick and thin areas where the brush overlaps. I used the same brush to apply tempera to glass for etching and had good results but I ran out of scrap glass to practice on and experimenting on new glass gets expensive. Ceramic tiles are way cheaper but it’s a different ball game. Has anyone tried spraying this? I don’t know if the glue will clog up the HVLP sprayer.
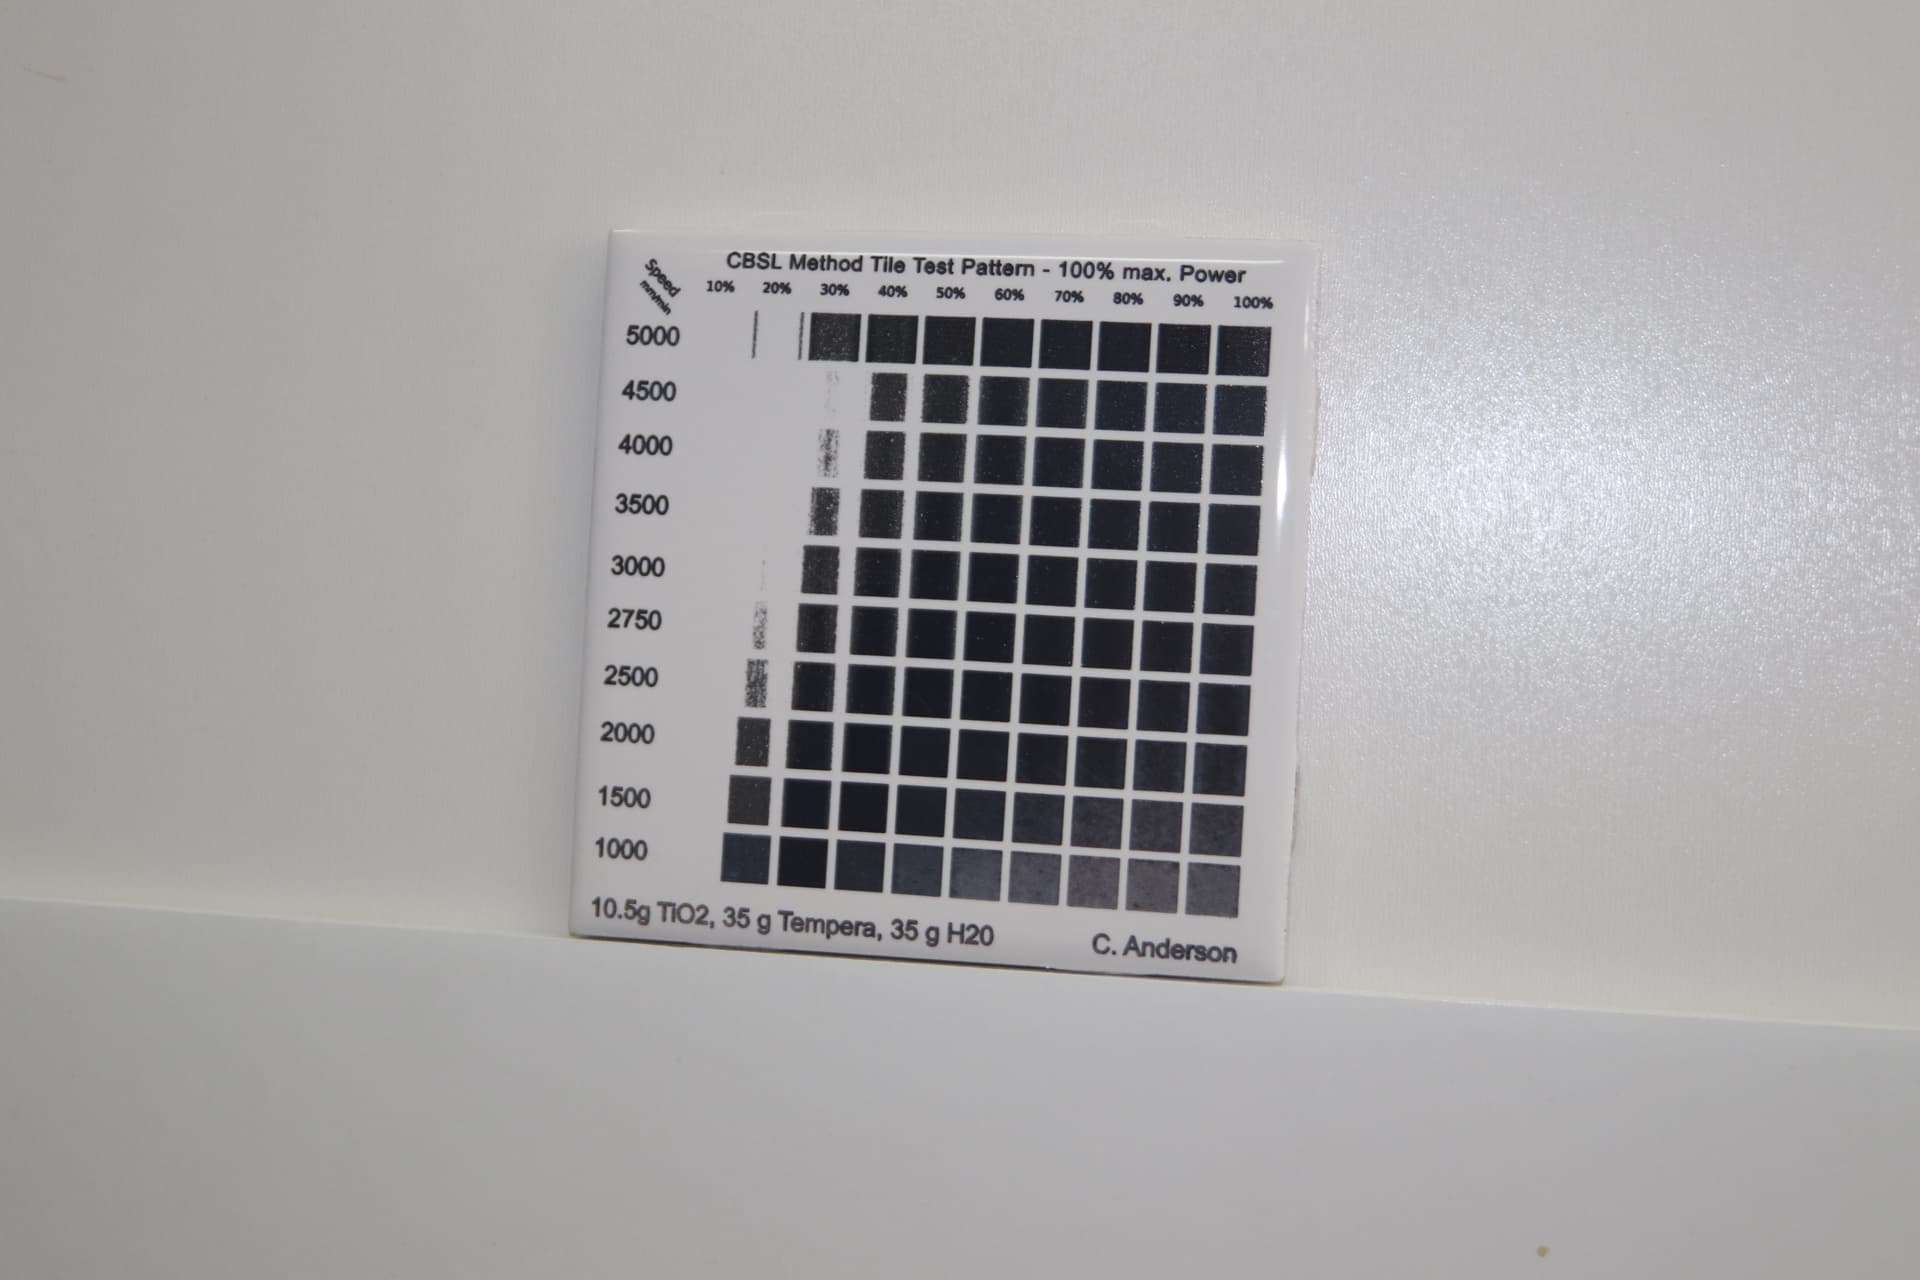
I did try the method described above by James. I used 10.5 g TiO2, 35 g Tempera, 35 g H2O. I sprayed a fairly heavy coat and the first test tile was blotchy at best. I sprayed more on the remaining tiles and the second test tile looked good with blacks from 2500/50% to 5000/100% (more to follow after next tile burn)
Here are a couple of tiles using the method that James described with Tempera.
Exactly! and my test with alcohol actually did the opposite my titles looked like a waxed car with water on it. I think people are trying to get things to dry faster.
I have found these spots are either a little nugget like a sand piece(looking) or and air bubble popped. for this reason I do two coats. I try and make them wet like it would run if it was paint. My last group I did had this on every one of them, I guess I did something wrong, lol.
I wanted to do the glue but I could not get it smooth and was afraid to put it in my spray gun.
my experience are usually: “I dont have that, lets use this instead” “well that didnt work!” “lets try it this way”. Im stubborn as they come so I figure something out sooner or later usually later, lol.
Hello again fellow tile burners. I tried another RClarke recipe today. I measured 100 ml PVA and 50 ml H20 into a jar. I added 10 drops glycerin, 10 drops Liquitex Flow Aid, 10 drops Liquitex Slow-Dri and 5 drops Createx #4011 Reducer. (Liquitex and Createx are the brand names, there are many others) I have no idea what all that crap is going to do for laser purposes, but if you are mixing airbrush custom colors the recipes use those additives. At least it looks good on the job site HaHa. Anyway, I mixed the above along with two drops each of Mixol 9 Blue and 7 Yellow to make a green color for better visibility on the tile. Using small wisk on a drill to mix. Then I weighed 25 g TiO2 and sifted it into the other mixture a small portion at a time mixing in between until all TiO2 was mixed in.
Hi Again, just wanted to share some learnings re TiO2
Granulation size is probably a relevant variable. I’ve checked a lot of TiO2 sellers on Amazon and have not found any that specify granulation size. One said 200 mesh which is about 74 microns. That is a big particle. The two products I purchased previously from Amazon did not specify granulation size, but I would be willing to bet they are both different. Then there is non-nano vs nano powder. Nano particles are defined as being < 200 nanometers in any one dimension. Nano TiO2 is research grade and expensive, with prices around $60 per pound or more. I found Essential Labs through google search selling TiO2 with a granulation spec of 0.262 to 1.233 microns. That is very good as compared to a 74 micron (200 mesh) particle. You have much more surface area and better dispersion with the smaller particle. I still want to figure out how to get the PVA recipe to work. I would rather clean up a little brush than the spray apparatus.
Oh, BTW a micron is 1000 nanometers in case you forgot the conversion. So from above, a 74 micron particle would be 74,000 nanometers. Compare that to the range of 262 to 1,233 from Essential Labs. (nano particle < 200 nm)
Thank you Mr. Science Geek!
the sandpaper looking effect in the picture is a problem for me. when i see those I always get unburn spots (white spots). Not sure if that is for everyone or not.
I noticed more lumps with the Ti/PVA recipe using brush than with the Ti/Tempera recipe using HVLP. Not sure what is going on there. Maybe the hand painting gene skipped a generation when it got to me. I have some of the Essential Labs Titanium ordered. Hoping the granulation size is smaller that what I have and maybe work better.