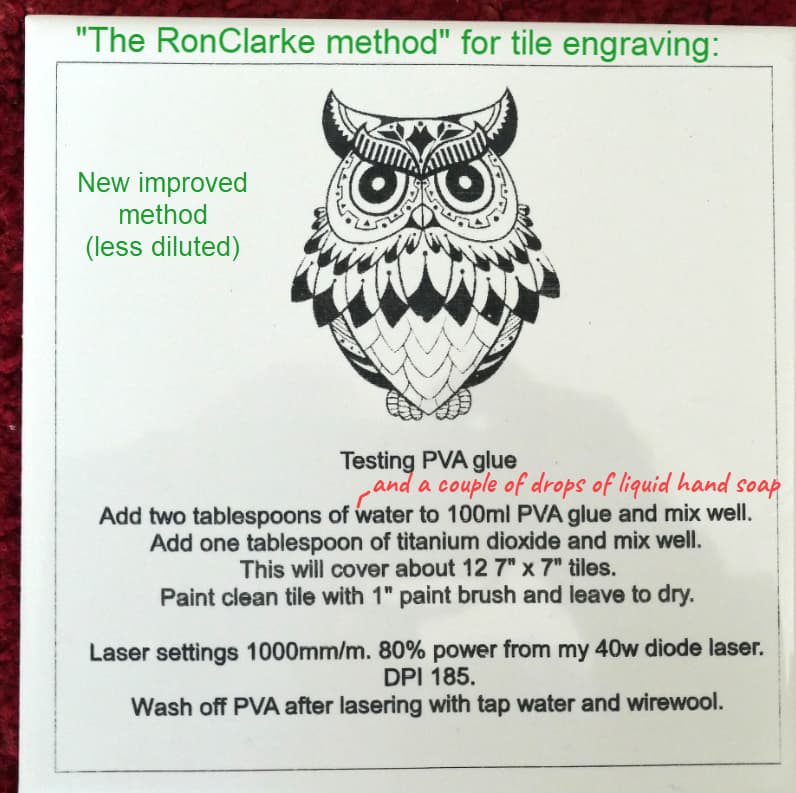
Hi Ron, thanks for your post, and the subsequent input from other members perfectly embodies the spirit of the forum. I have taken the liberty of updating your recipe so it includes your latest method - now officially dubbed “The RonClarke method” ![]()
Many thanks for your update. I do hope others find this thread useful. I can honestly say I now have no need to experiment any further and spend my time producing products of good quality. Lasering is such a rewarding hobby made even better by the Lightburn software and support.
Jack I may have the answer to your lines on the image you posted. I got the same and found it was due to the resolution and dithering forming these lines. Change the resolution very slightly and they are eliminated. Think it’s called diffraction imaging.
A picture is worth more than a thousand words…
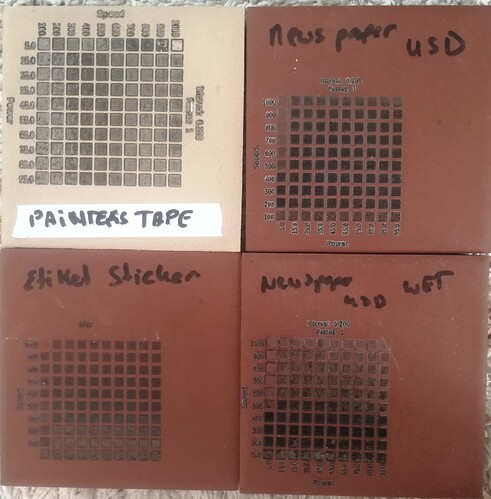
Attached a picture of 4 tiles. They are floor tiles, I picked up for free, so good to mess around with…
A) Top Left: Tile + Painters tape + paint
B) Top Right: Tile + (Newspaper + paint) upside down (so dry paint is on the tile)
C) Bottom Left: Tile + Address Etiket + Paint
D) Bottom Right is same as B, but to make sure the paper is more flat, I made the paper wet while on the tile with a spray
B) Seemed most promising but I will park this for now and start working with the RonClarke Method.
My machine is the SainSmart ProVER3018 with a 5.5W laser. Since I have my nozzle, I switch air assist always on, just to make sure no smoke reaches the lens…
We used to call that a Moiré Pattern, a rose by any other name …
I am running at very low power, that may exacerbate the problem… Next time I try it, I’ll adjust as you suggest…
![]()
Spot on Jack. That’s what we used to call them.
Yes- moire pattern. It happens when one regular pattern overlaps another regular pattern- creates an unpleasant pattern. You can see a moire when you look through one window screen and through another. That is why 4 color process printing on paper uses different angles for each color, if done correctly, you get a more pleasant rosette pattern of all 4 colors in a “ring” in the middle of the angles.
Colour TV screens also use the same system. ![]()
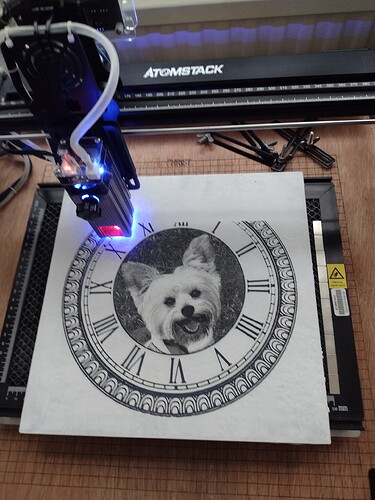
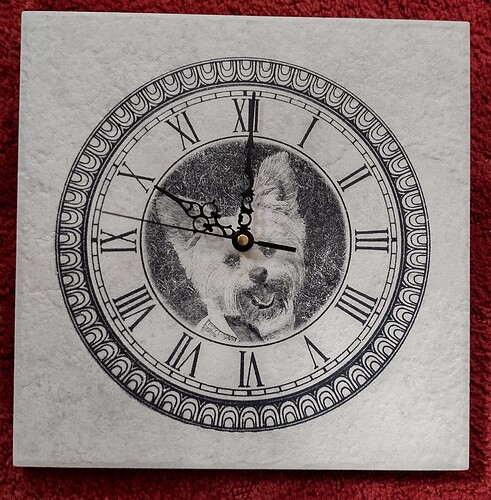
A friend see my garden clock and asked if I would do one for him with a picture of his dog. Here is a shot of it in progress using my new PVA method, my original was done the old NWT way. Will show finished clock once I have got the bits to assemble it.
Ok, I embarked on the RonClarke method. I use my Sainsmart 3018ProVer (5.5w) for this.
I used the “brush on” technique (so not airbrushed or sprayed on)
I have done a test tile ( use the brown floor tiles for my testing and I have a large number of beige ones which I will use for “production”.)
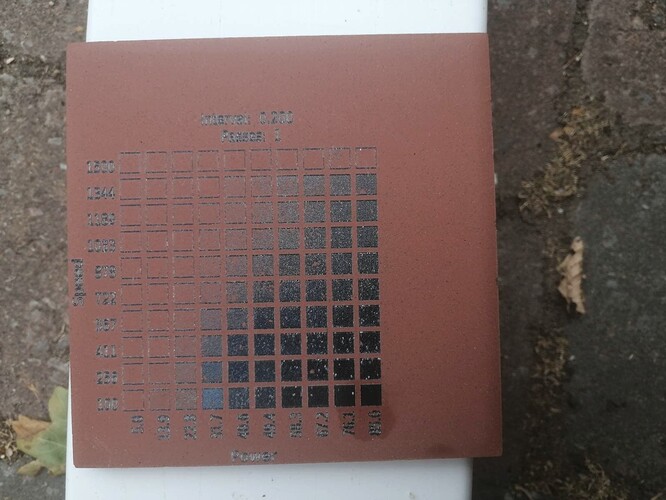
Then I lasered a tile with Speed 100mm/m Power 80%.
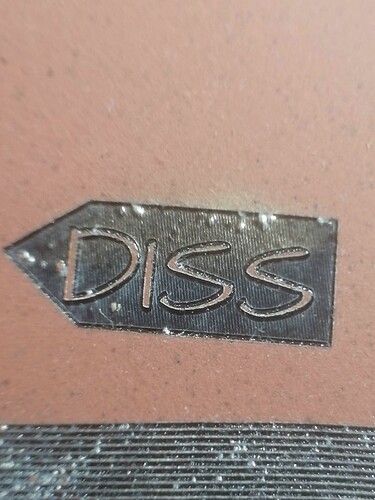
What you see on the test tile and the macro photo below are the white dots…
Is this a mixing issue or is it the quality of the Titanium dioxide?
Any thoughts?
Thanks
This is due to the mixing. Titanium powder clumps together and will block the laser path causing white spots. I had this when I chose to just use the brush for quickness to mix the solution. I now use a hand held food mixer and give it loads of time to really mix to a smooth paint type consistency. Try using a strainer similar to those used by cooks to sift flour and add titanium to PVA as you mix. If when painting the tile you see any little lumps on the tile, break them down or remove them asap.
Well this has turned out better than the one I did for myself so will now have to remake one for my own use.
My friends finished garden clock. I used my new method for this one. Etched on to a rough surface floor tile 30 cm x 30 cm.
Just to prove the quality of the coating I have tested two tiles each with the same laser settings. One tile had one coat of my PVA mix and the other had two. Both tiles etched identically, so one coat is all that is needed.
This is my test image
Still testing… Black and white pictures or line drawings the method works well, as all you want is a clear difference between the blacks and the whites. But it (or ?I )seems to mess around with grey scales.
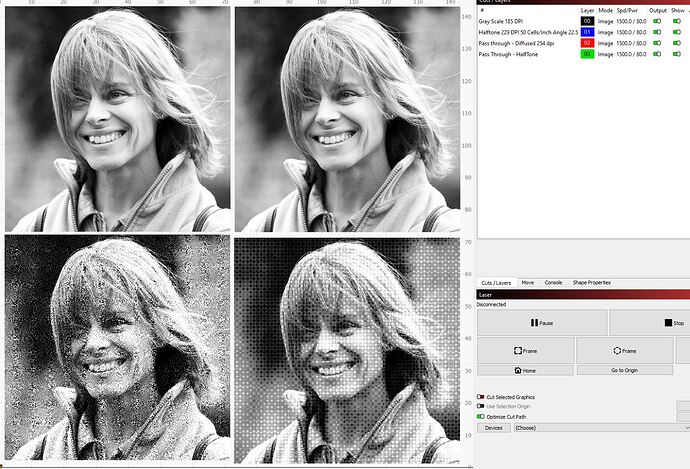
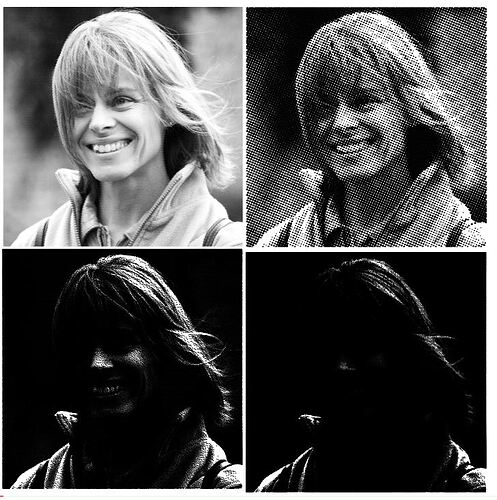
As a test I took a picture and have it 4 times on a tile. This is how the workspace looked:
Top left is Grey Scales, Top Right is Halftone, Bottom left i pass through, but in photoshop I used diffused and bottom right is also pass through and in photoshop I used halftone.
In the preview mode it looks like this:
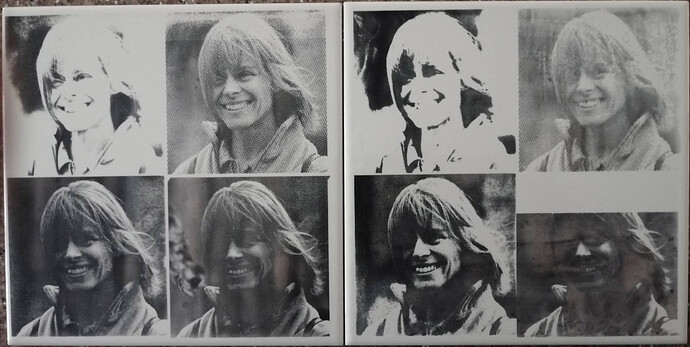
I prepared 2 white tiles, one with the RonClarke Methode (on the right) and one where I used water soluble white paint, which I diluted (with water) on the left.
This is the result:
My computer stopped halfway the last one, so that is why the top half isn’t printed.
But what I find interesting to see:
- What you see is not what you get… it proofs that the preview doesn’t represent the result on the tile at all. It is just trial and error and a bulk load of tiles, to get it right. And each photo might need different prep work and to see if you have it just right, you need to burn tiles…
- Between the two tiles, the difference in detail is interesting. The only difference between the tiles are the preparation! It seems I am losing details with the RonClark Methode.The blacks are more black and the whites are more white.
I would appreciate to hear your thoughts on the above
By the way, yesterday, I came across another method for white tiles, using Cold Galvernising Spray. The working element is now Zinc, stepping away from titanium dioxide… ![]()
https://youtu.be/LR9CDz8y_LA
The preview is showing you where the laser is firing and how the pattern will strike the material.
Using my led laser with Lightburn preview shows a great image with cut out… When I run it on clear plexiglass it doesn’t engrave or cut…? So the preview isn’t working?
Lightburn doesn’t know about tile, that you have a 1kW laser of if the moon is full. As you pointed out it’s totally dependent on the material or ‘coating’…
Take care with zinc, although not really toxic, inhaling much of it can give you "metal fume fever” , metallic taste on your tongue and headaches…
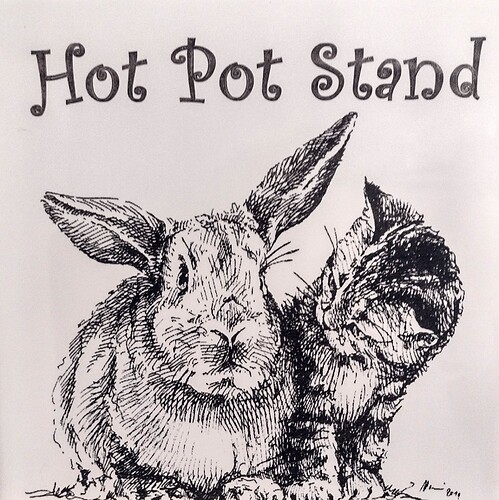
Keep them coming, I enjoy your experimentation and the ‘bunny’ - snagged it for myself ![]()
Take care
![]()
Thank you for posting these test results. I too have found that my PVA gives increased contrast. I have for photos reduced the contrast in Lightburns adjust image settings and got better results. Line drawings are OK as is. I’m begining to think the concentration is to strong. Too much titanium could block the lasers beam in the highlights and produce more white plus adding to the blackness in the shadows. My method needs a bit more development and I will try reducing the amount of titanium just for a test. regards the Cold Galvanising Spray, I have tried that and yes it works but not impressed with the end result. Each to their own.
PS I did not use Rust-olium paint. I find that where I live it is hard to get their products.
Living (also?) in the uk, I am planning to walk to Tool station (other shops are available) and get a can for 5.68 to try. With regard to the titanium oixide, do you spray it on or brush it? I used a brush as I haven’t got a good spray bottle at hand.
Also, if I am correct you have Titanium Oxide with different particle sizes, which may impact the laser result too ![]() .
.
With regard to the thickness of the coat, you might well be right. This guy was having difficulty with the thickness of the coating… https://youtu.be/t8iJ5Q5qlIU
I’m locked out of the workshop for the next few days (no, not because I was naughty) but some more testing will be coming.
@jkwilborn thank you for the warning re Zinc. None of this stuff is really innocent, even Titanium Oxide is no longer food safe https://www.efsa.europa.eu/en/news/titanium-dioxide-e171-no-longer-considered-safe-when-used-food-additive but I wasn’t planning to eat it anyway… ![]()
I’ve used both TiO2 and LBT100 spray for this. I do the TiO2 with water and an air brush, the LBT100 is just sprayed on.
LBT100 warns you about too thick of a coat causing not only a loss of detail, but requiring higher power levels. I’ve found the same with the TiO2, too thick, loss of detail, more power required.
The best thing you can do, IMHO, is to find a low cost microscope. If you look at it with high magnification you can see how it’s working on the coating and make much better decisions on how to change the parameters.
TiO2 got put on the list because some scientists have claimed it could cause genetic issues, although they have never seen any evidence of it. In my late 60’s, don’t worry too much about passing my generic information…
![]()
I have tried reducing the concentration today and found the blacks are now only grey. Next test is to add a little more water and maybe get a thinner coat that works without loss of the nice blacks I get at the moment. PVA dries clear so if I can keep the powder concentration as is the thinner PVA may just improve the results. Mind you I’m quite happy with what I have now.
Is this the original formula that you posted?
I’d keep the blacks…
![]()
