I’ve only been using LB for about a week so very much a newbie. I do like the software but have concerns/questions. It “appears” that if a create a perfect circle using the shift key, it works. However, it I wish to expand that circle, using the percentile settings, it does not maintain the perfect circle any more. Similar happens to various shapes.
Another thing I see a lacking in is some basic shapes such as a triangle, do not exist. Creating two lines from the center point, based explicitly on an “angle” is not there. So for example, I wish to make a perfect circle then subdivide it by 32 sections, each subdivision would be 11.25 degrees. Not an issue for the math but there’s no way to accomplish that in this level of software.
Yes, I understand that its not a full blown AutoCad type program and yes, I know the software is a work in progress.
So lastly, please pardon my ignorance as I’m still learning the software as I go. Thanks for understanding
Hey amigo, welcome to the fun of Lightburn ![]() There are some things that are not immeidately evident, but you will soon learn all the cool tricks. Spend some time reading the questions and answers on this forum - but dont hold back if you need help.
There are some things that are not immeidately evident, but you will soon learn all the cool tricks. Spend some time reading the questions and answers on this forum - but dont hold back if you need help.
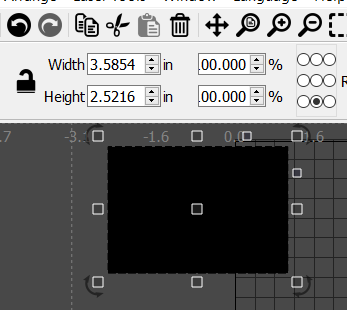
In this screen capture, you see a black rectangle, the drag handles (corner, center, pivot and strech) and you see the measurements of 3.5854 by 2.5216. Next to those numbers you see an open pad lock - you just need to click to lock the size ratio. You can manually enter the exact size you want to make the object.
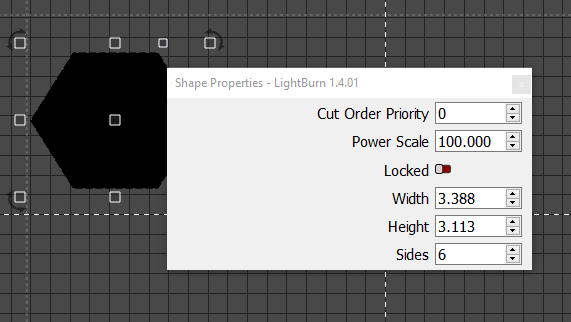
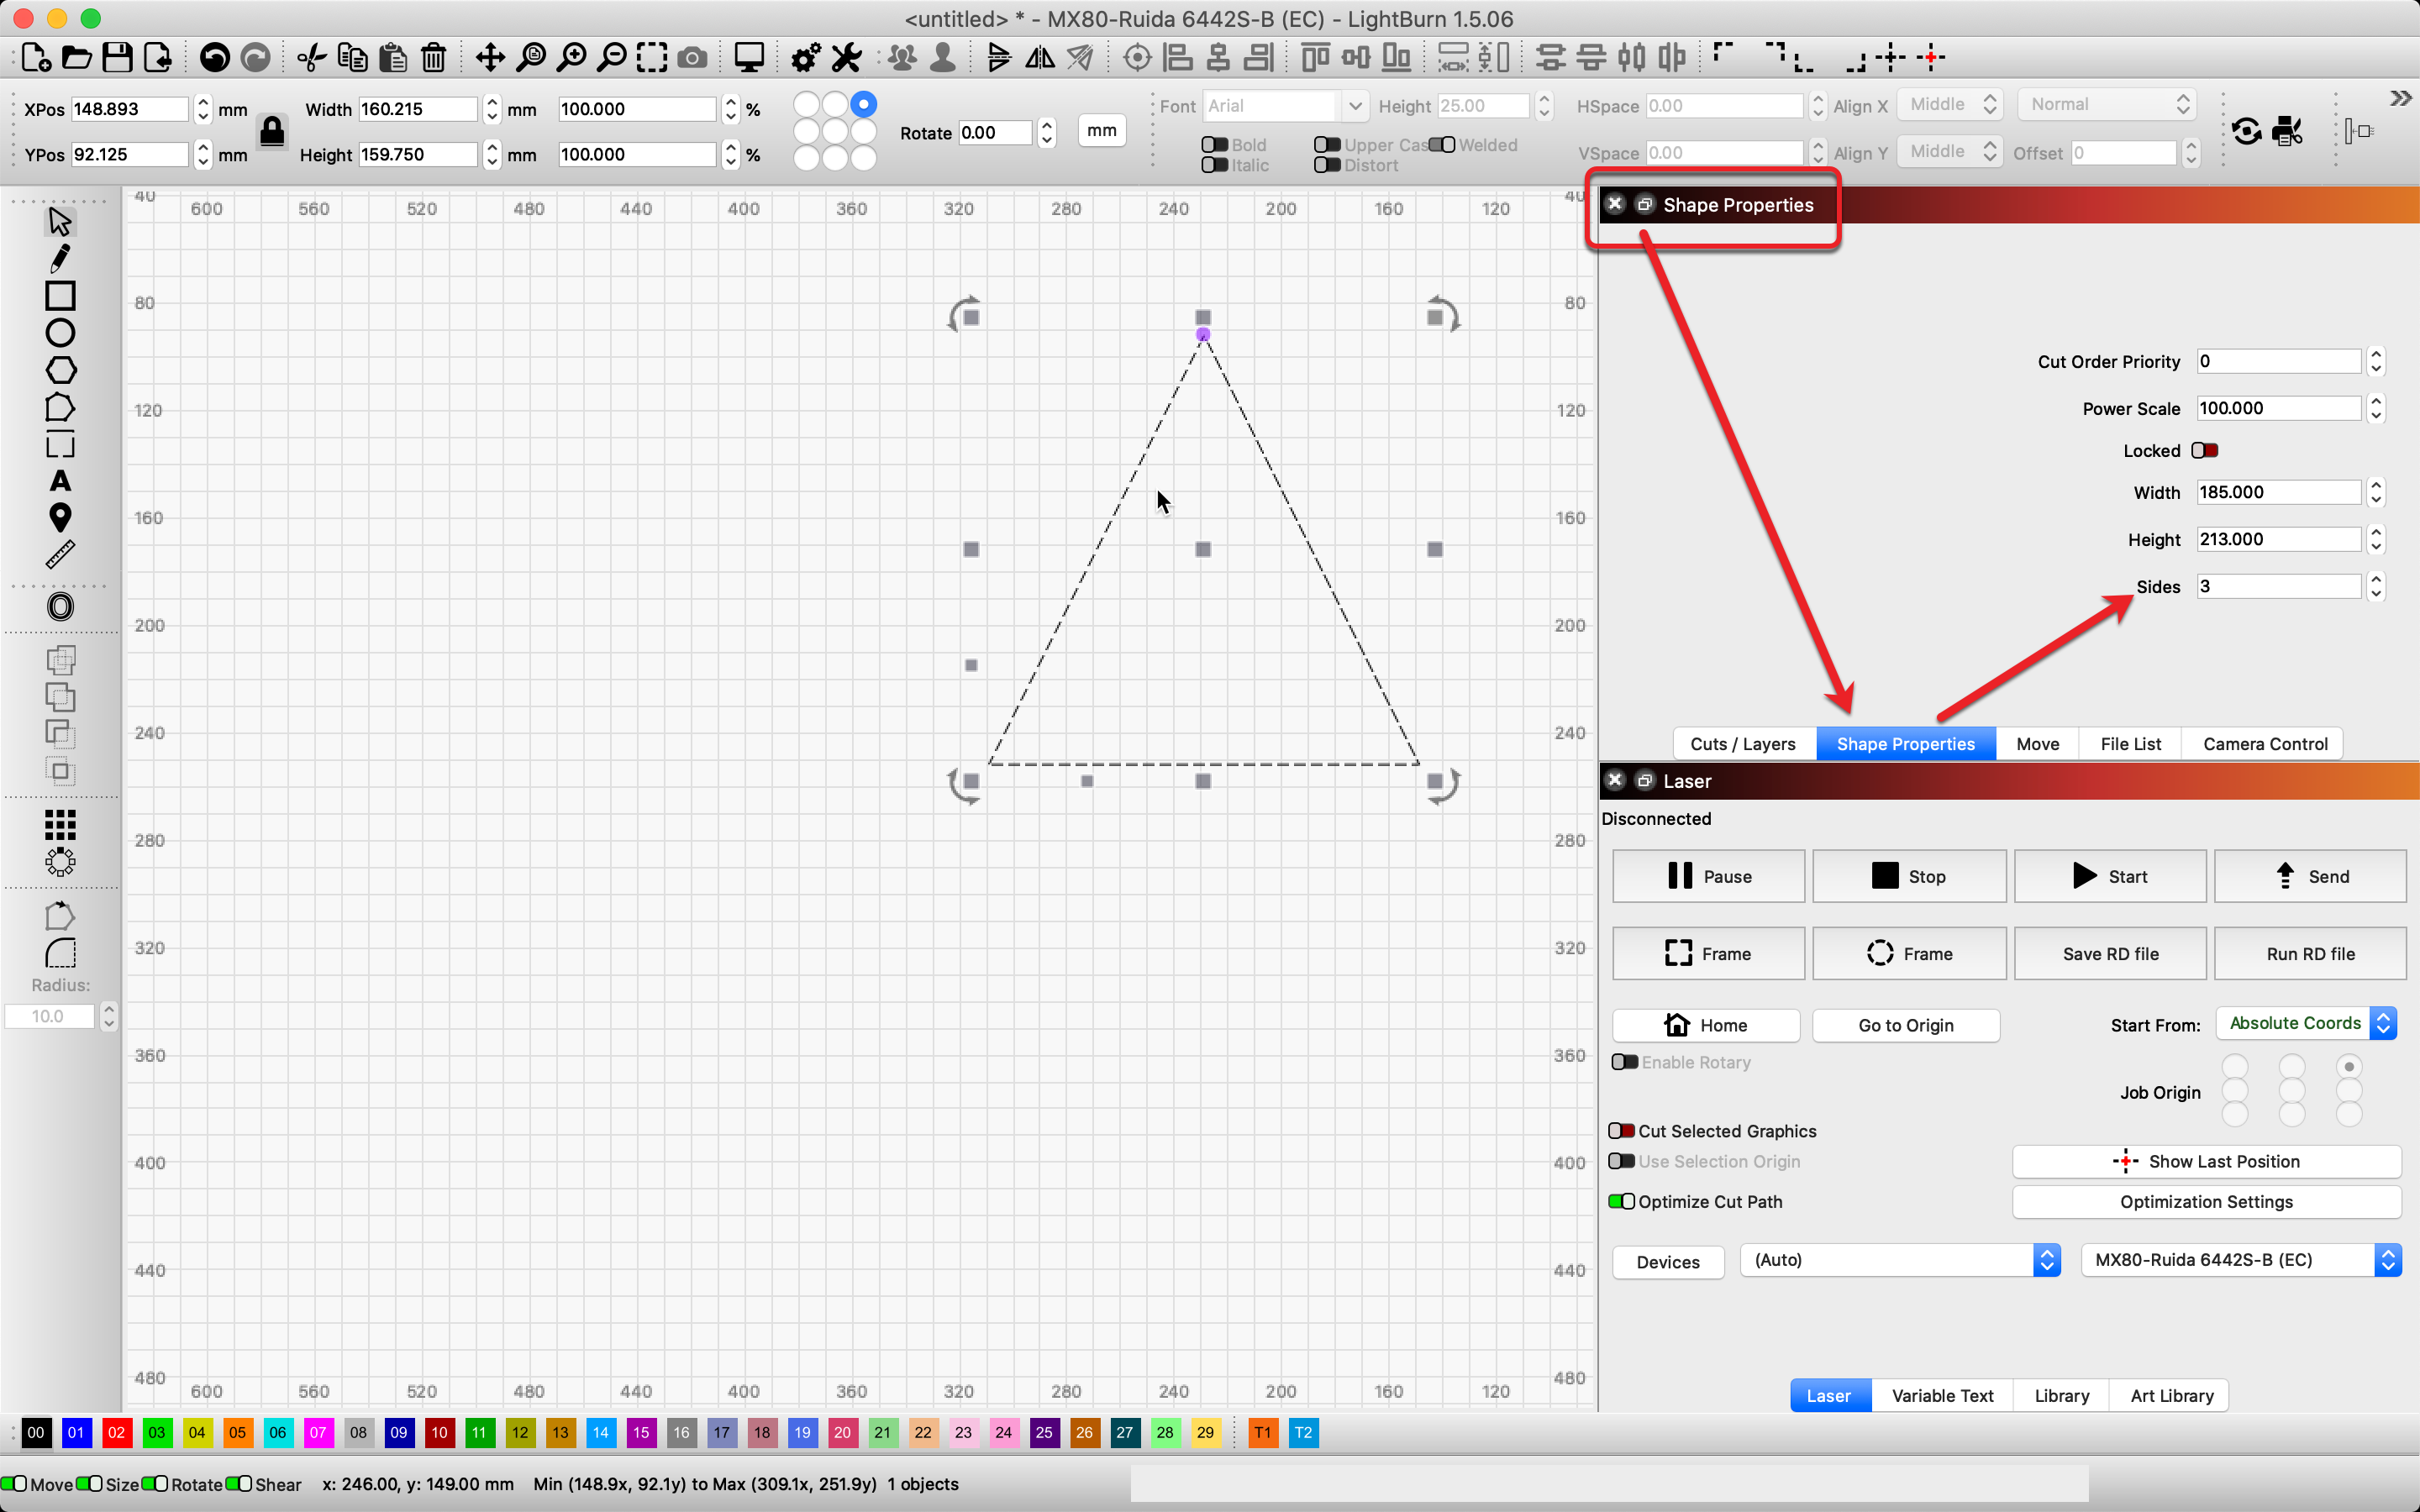
As far as trigangles go - make a hexagon shape first, then right click on it to open shape properties
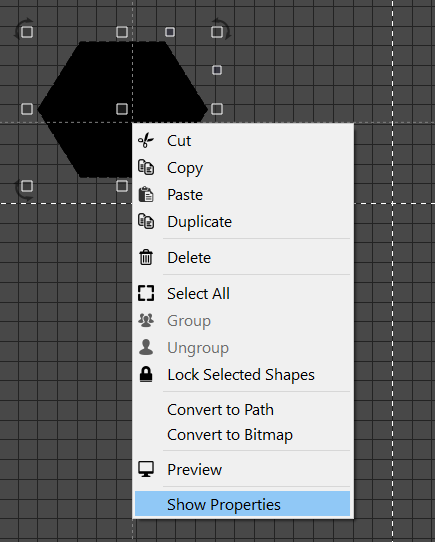
Then you can adjust the number of sides on your object.
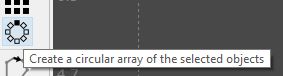
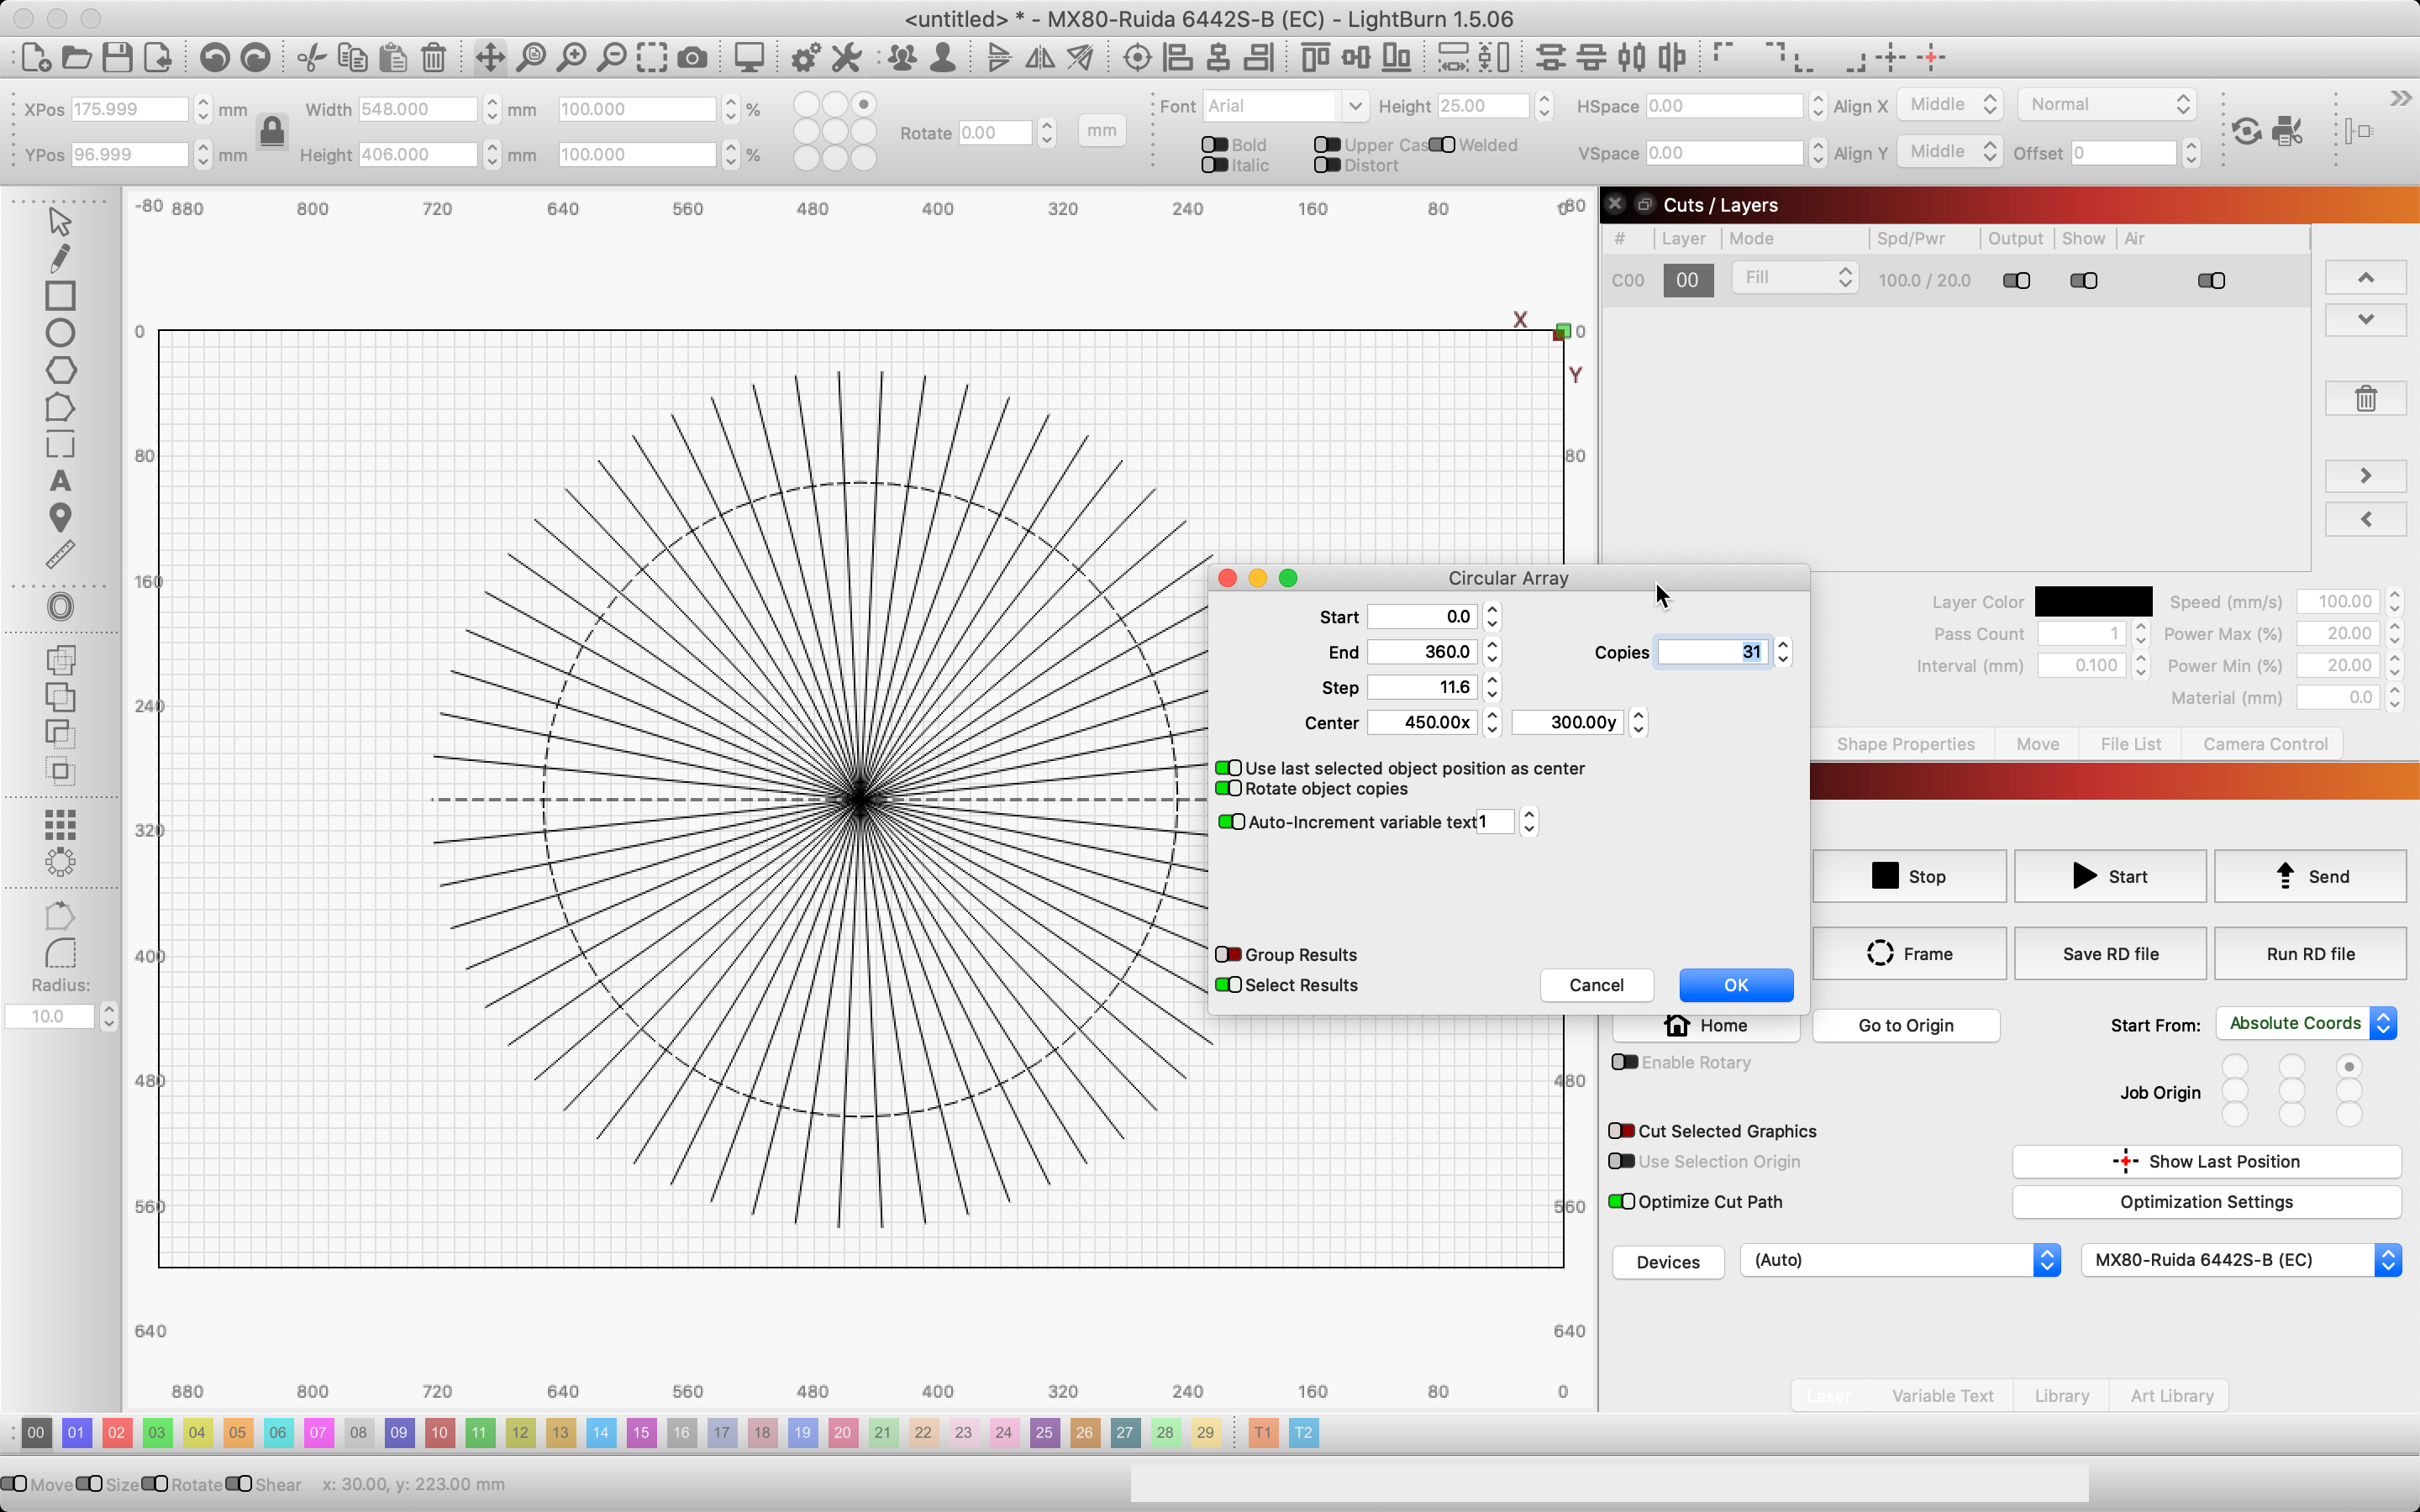
The circle subdivided there are a couple of ways to to that. Circular array is a great tool.
Good luck!
Welcome! ![]()
Check to ensure the Aspect Ratio Lock is on to keep the ellipse a circle.


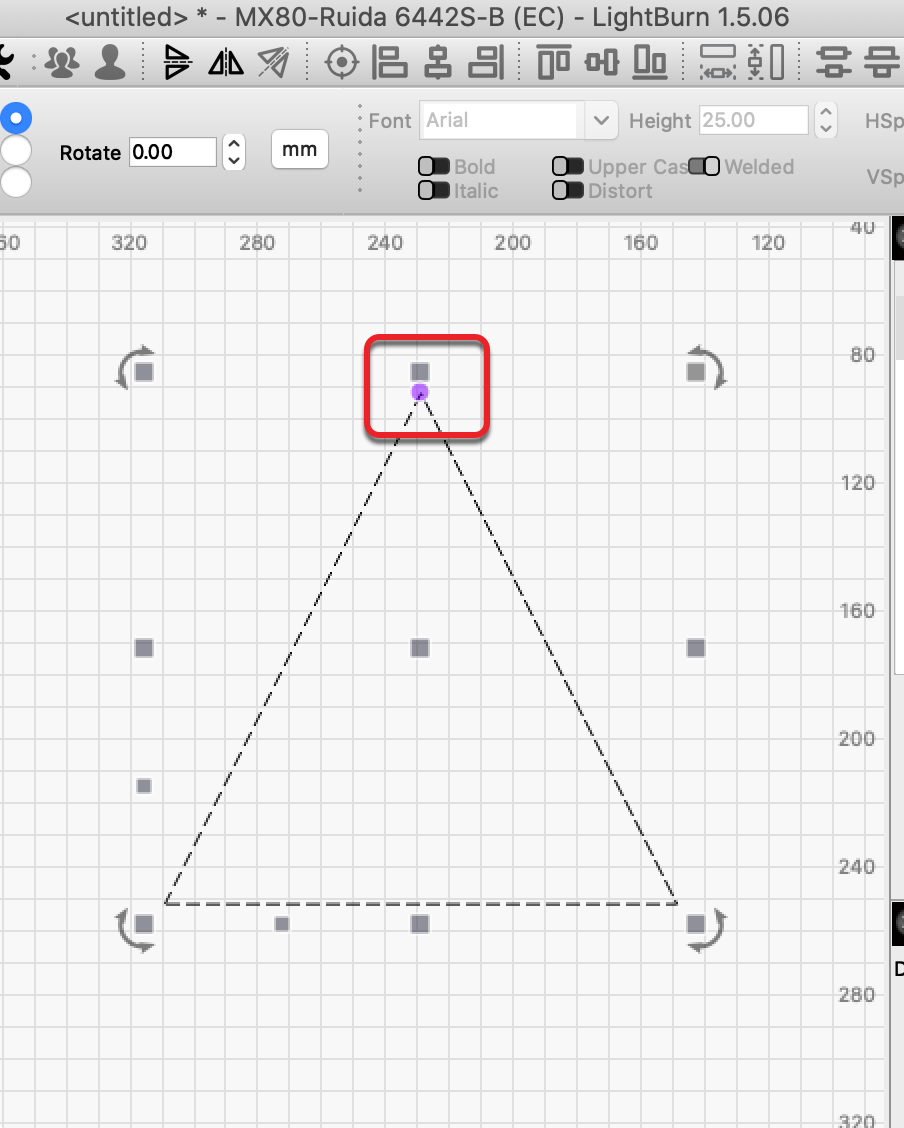
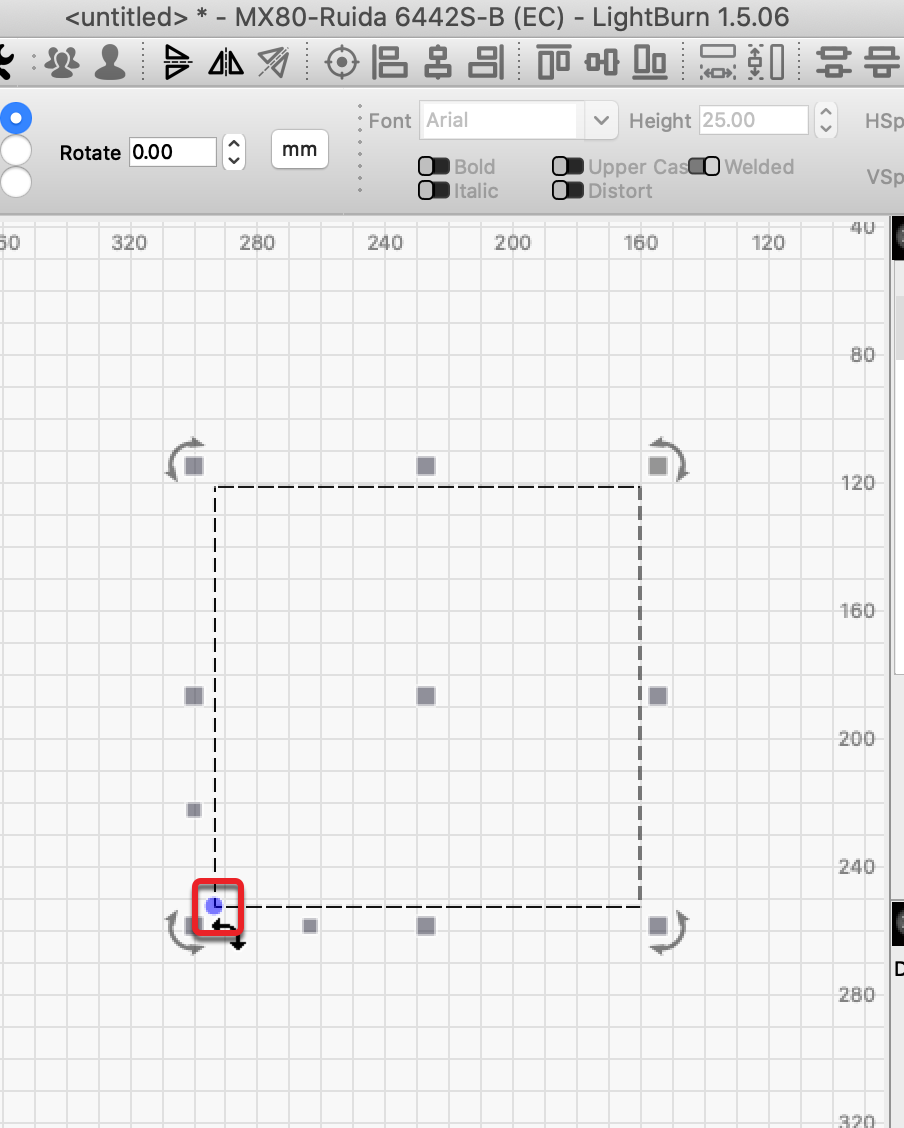
One can draw a triangle with the ‘Pen’ tool, or use the ‘Polygon’ tool, changing the number of sides to 3. Additionally, note the blue/purple dot on the shape when selected. You can drag that dot with a Polygon selected to change the sides. For other shapes, that dot will radius the corners. We will be changing the dot behavior slightly over the next major release, hiding it initially and having it appear when the shape is selected and holding the CMD key to expose.
-
To divide a circle into 32 sections, I would look to using the Circle Array tool to assist.
Asking “How do I accomplish X?” rather than flat-out saying “there’s no way to accomplish that in this level of software” will get you far more responses.
To wit:
- Have you investigated the
Shape Propertieswindow when you’re drawing a polygon? It’ll get you an equilateral triangle, as well as all the other regular polygons. - Use the
Circular Arraytool to duplicate a single line around a circle, as many times as you want. - Which produces non-equilateral triangles, too.
- Scaling seems to work fine on basic shapes, so you’ll need to show an example (screenshots,
lbrn2file) where it doesn’t
We all started there. Welcome aboard!
Thank you all! I will certainly try each and every suggestion. Its greatly appreciated. Hopefully the people writing the software will take notice and help us out with upgrades too!
Every message, I promise! They don’t always post something in a thread, but they always jump in when needed. Once you read the forum postings for a while, you will be amazed at how helpful they are.
I was, and I am hard to impress.
Thank You all again. I’ve been able to move forward thanks to all of your suggestions. Truly, they helped a lot! Properties, array structures and shape properties…so much hidden within. For the programmers, I might suggest creating these tools in a more informative format or mouse-overs that make things more clear. I too, use to write software for a spacecraft test laboratory. lol, they are still using it because they are too afraid to change it. My code was all done in NI Labview, just fyi but I have a background in C, C++, Assembly, Fortran, Fortran IV, 66, 77 and believe it or not, pure straight machine code back in the day. So yes, I do have a clue about how complex things can be for you and I appreciate your efforts. I’m sure everyone in here, do as well.
very good explanation, I need to spend more time here
Once you have a round circle by using the shift key, check the upper left where it shows the size, MAKE SURE the padlock is closed. Then when you change a dimension in the X (or Y) the other will change along with it and the circle will maintain the same aspect ratio and stay round. This of course applies to any & all shapes…
We are here. ![]() Is there a specific “upgrade” you are looking for or would like to suggest? To assist, we offer a Feature Suggestions site, where one can post an idea or feature enhancement they like added and others can up-vote showing support for that idea. We use this to help prioritize our efforts to provide the value folks are after.
Is there a specific “upgrade” you are looking for or would like to suggest? To assist, we offer a Feature Suggestions site, where one can post an idea or feature enhancement they like added and others can up-vote showing support for that idea. We use this to help prioritize our efforts to provide the value folks are after.
With your background, I know you can appreciate the challenges inherent in this ask. LightBurn supports a large number of lasing systems, with a very diverse user community, all with different knowledge levels and technical experience. Finding the right balance, sharing the required information without overwhelming the consumer of the information, is our goal. We do appreciate positive feedback intended to assist in making the best possible solutions for the group.
As for fly-outs or “mouse-overs”, in LightBurn these are known as ‘Tool-Tips’. Hover over most things in the UI to see a Tool Tip for that thing, and hitting F1 while hovering should take you to the documentation for that thing. Our documentation has evolved a lot over the last few months and that will continue. We now include videos in the documentation where most appropriate, bringing our video catalog a bit closer. We are also building out a site focused on learning the ins and outs of our products, so keep an eye out for announcements in this realm to show up soon-ish. ![]()
Cool! I just learned something new!
I doubt your programmers are ready for this yet but yes, I do have a suggestion(s). Use A.I. to import a picture, then create a vector or dxf file from it to allow us cut/engrave that image…into a 3D such as a wood puzzle creation. It would have to calculate the lengths, angles, mounting points, joining points and so on. It might simply not be possible yet given the current software out there.
Another thought would be an interactive box that we tell the software what we want, shapes, dimensions, alterations and so on, then it creates. Add to it to then make modifications as needed. Yes, lofty but may or may not be possible.
As I use it more I’m sure I’ll think of things. On my software, I had the unique capability to use my own software for real therefore I was able to identify areas that needed improvement. Next iteration of code would include those updates. Anyway, just thinking out loud here.
What??? Do you mean this old “A.I.”? ![]()
![]()
Here’s a suggestion and please remember, I’m a newbie. Add a “Pause” and “Continue” button to the laser process itself. The idea is to be able to stop, fix something, reload but continue where we left off. Now I understand that it might not be possible considering the GCode or whatever is running the process, but its a thought.

There is a way to restart in the middle of a job, already.
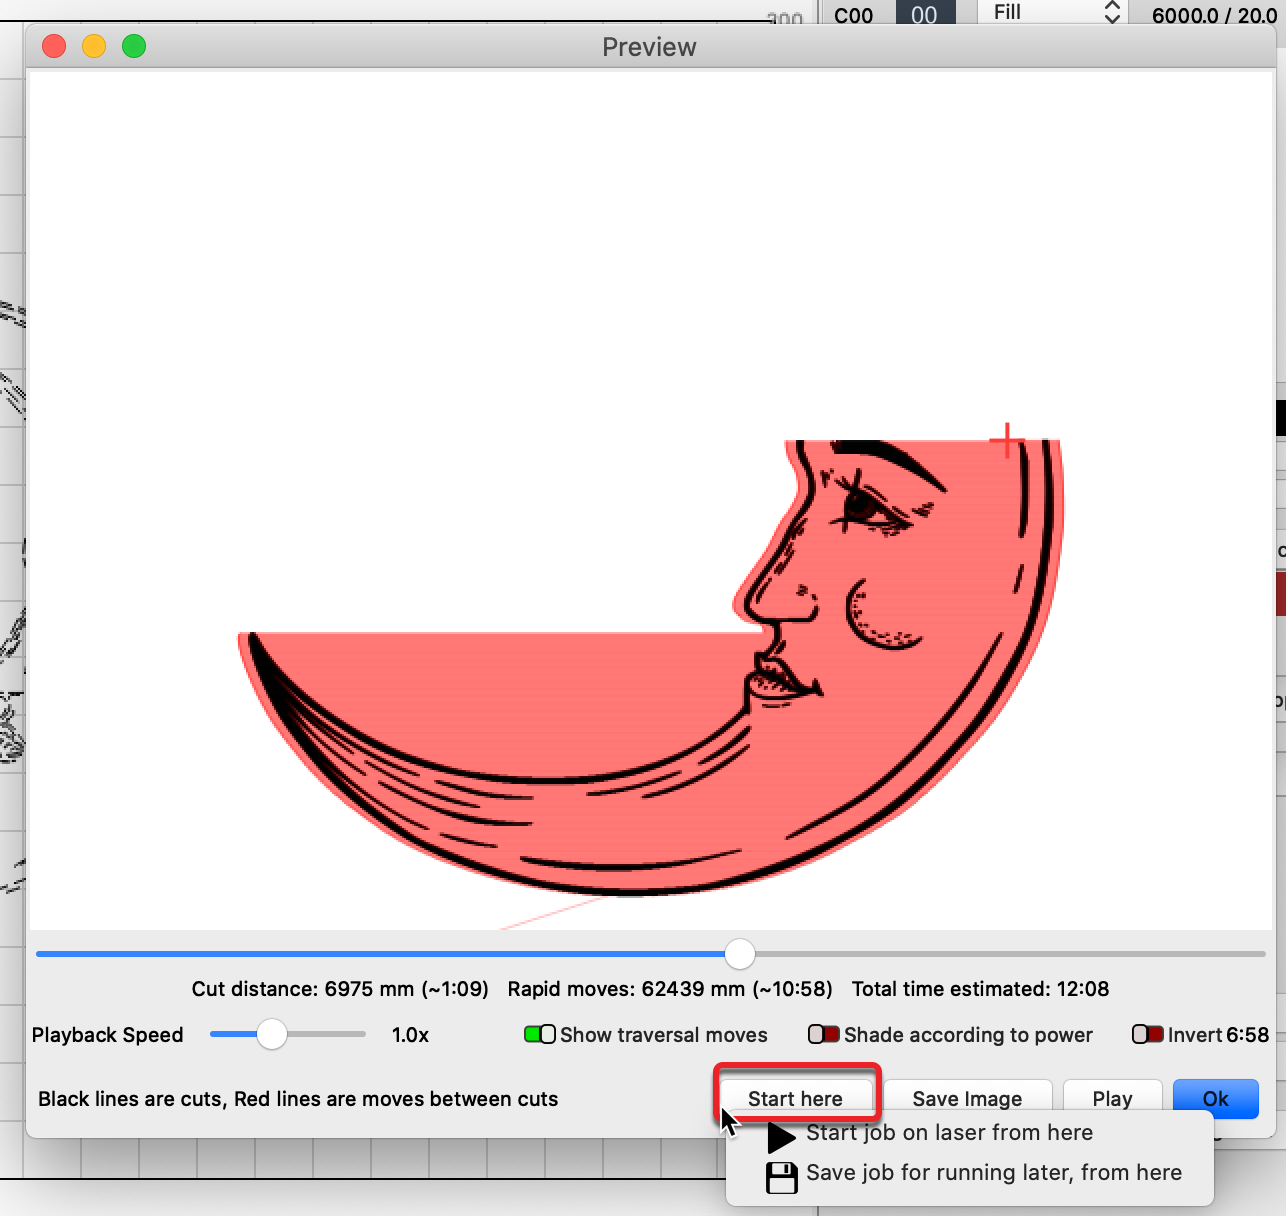
Open a preview window, set the slider bar to the appropriate moment in the burn job and click START HERE.
There are a few options to pause and resume when using a GRBL Device.
- From the ‘Laser’ window - Pause and Resume
- From the ‘Preview’ window - Start From and Save, from here, to run later

Ok, thank you again. I must be blind. Lol
Trying to figure out why it doesn’t like cutting gears. Seems to skew parts of the gears for unknown reasons even though the on-screen is very close to ideal. Gears seem to work in lasrgrbl just fine but so far, not here. Oh well, I’ll keep plugging away. Thank you all again
All good. LightBurn provides many features, and it will take time to learn what’s there and refine a good workflow for your needs. In most cases, there is more than one way to do the thing in LightBurn, but yes. We joke at times that we have gotten good at hiding things in plain sight. ![]()
If success continues to evade, create a new post, as that is a different set of issues. Include screenshots, illustrations and as much detail, showing current settings for the device and layers used along with the resulting produced thing - we can take a closer look. ![]()
As @Rick mentioned these different devices vary greatly in how they operate. A grbl machine usually has the control codes sent on a serial asynchronous line and can only buffer a couple three lines. These machines usually have a pause available.
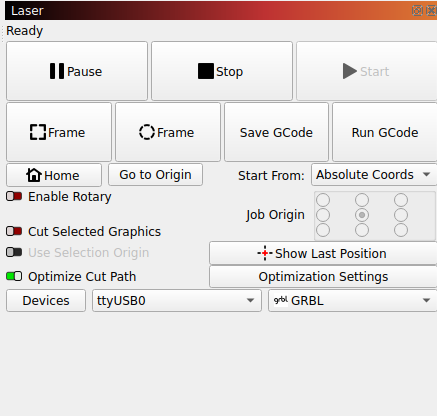
The dsp, such as the Ruida store the entire file on the device. Since I run it in the garage, away from the actual computer used, the really only operational pause button that I use on these is accessible from the machines console. These devices use UDP over your lan, but can be usb connected…
![]()
Whenever I start running a new piece of software, I immediately start a list of all the things the programmers who have worked with it for years need to change. I am sure they appreciate my unparalleled viewpoint.