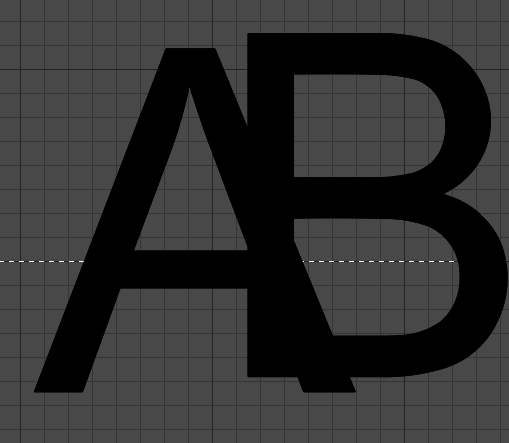
Hi all! I just started using a laser a few days ago. I’m trying to engrave a calligraphy letter I designed in inkscape. It has areas where the paths intersect each other, creating a box, and when I try to engrave it, lightburn skips over the parts of the letter where the lines intersect each other. There must be some setting I’m missing. I appreciate your help!

Can you upload the file?
This is the lightburn file:
letter engrave.lbrn2 (25.4 KB)
Welcome! I see that your design does have crossing paths. I might change that to have intersecting paths instead, to produce as you describe.
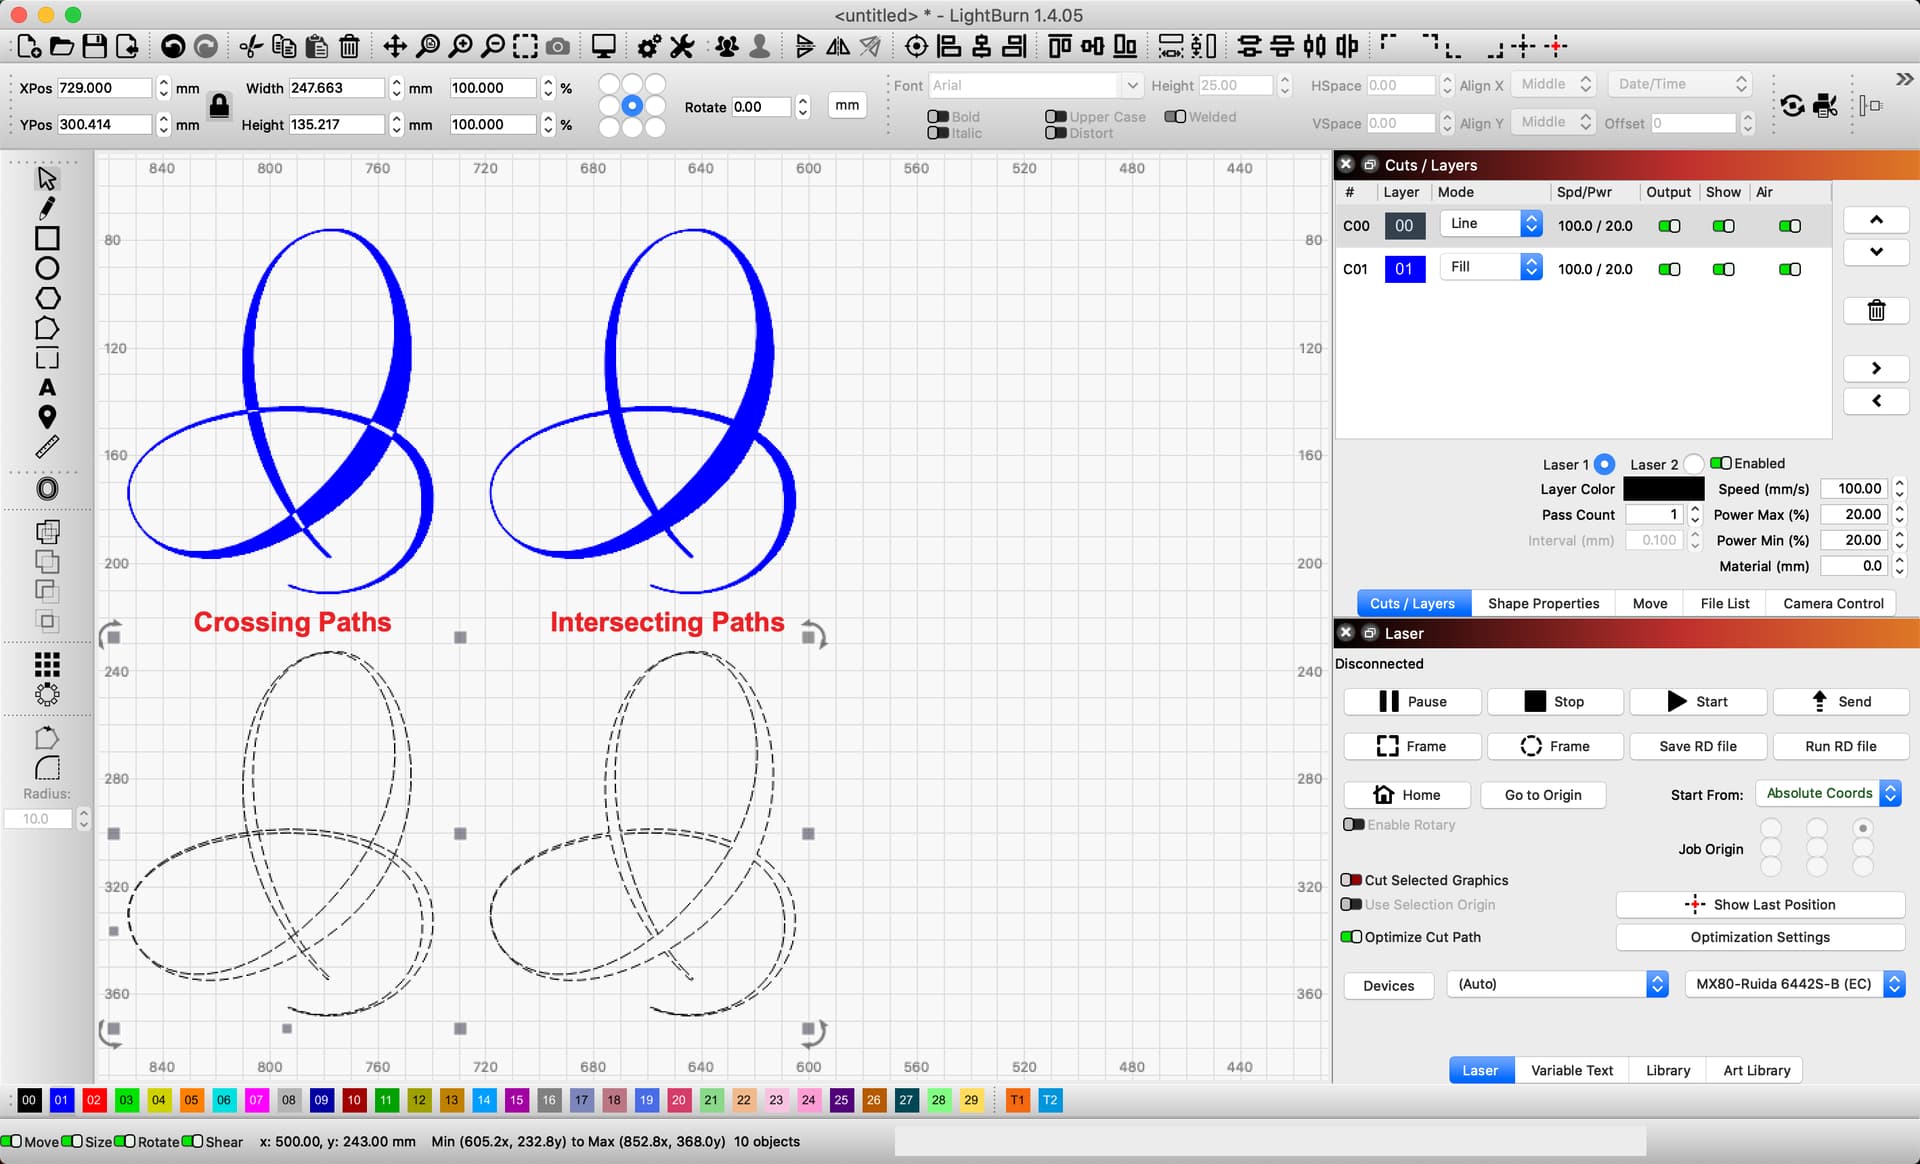
LightBurn uses the boundary of a shape to toggle the filling of shapes.
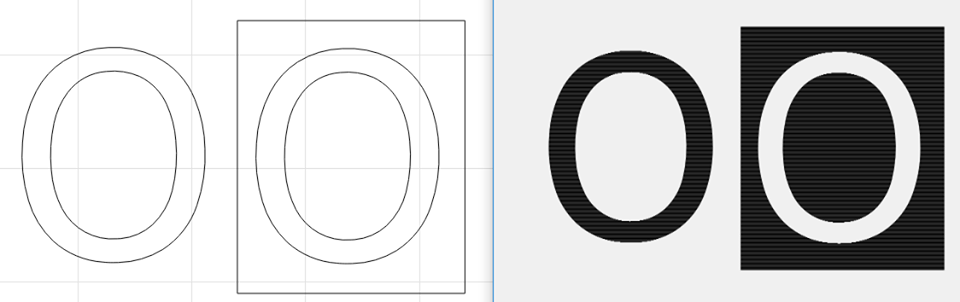
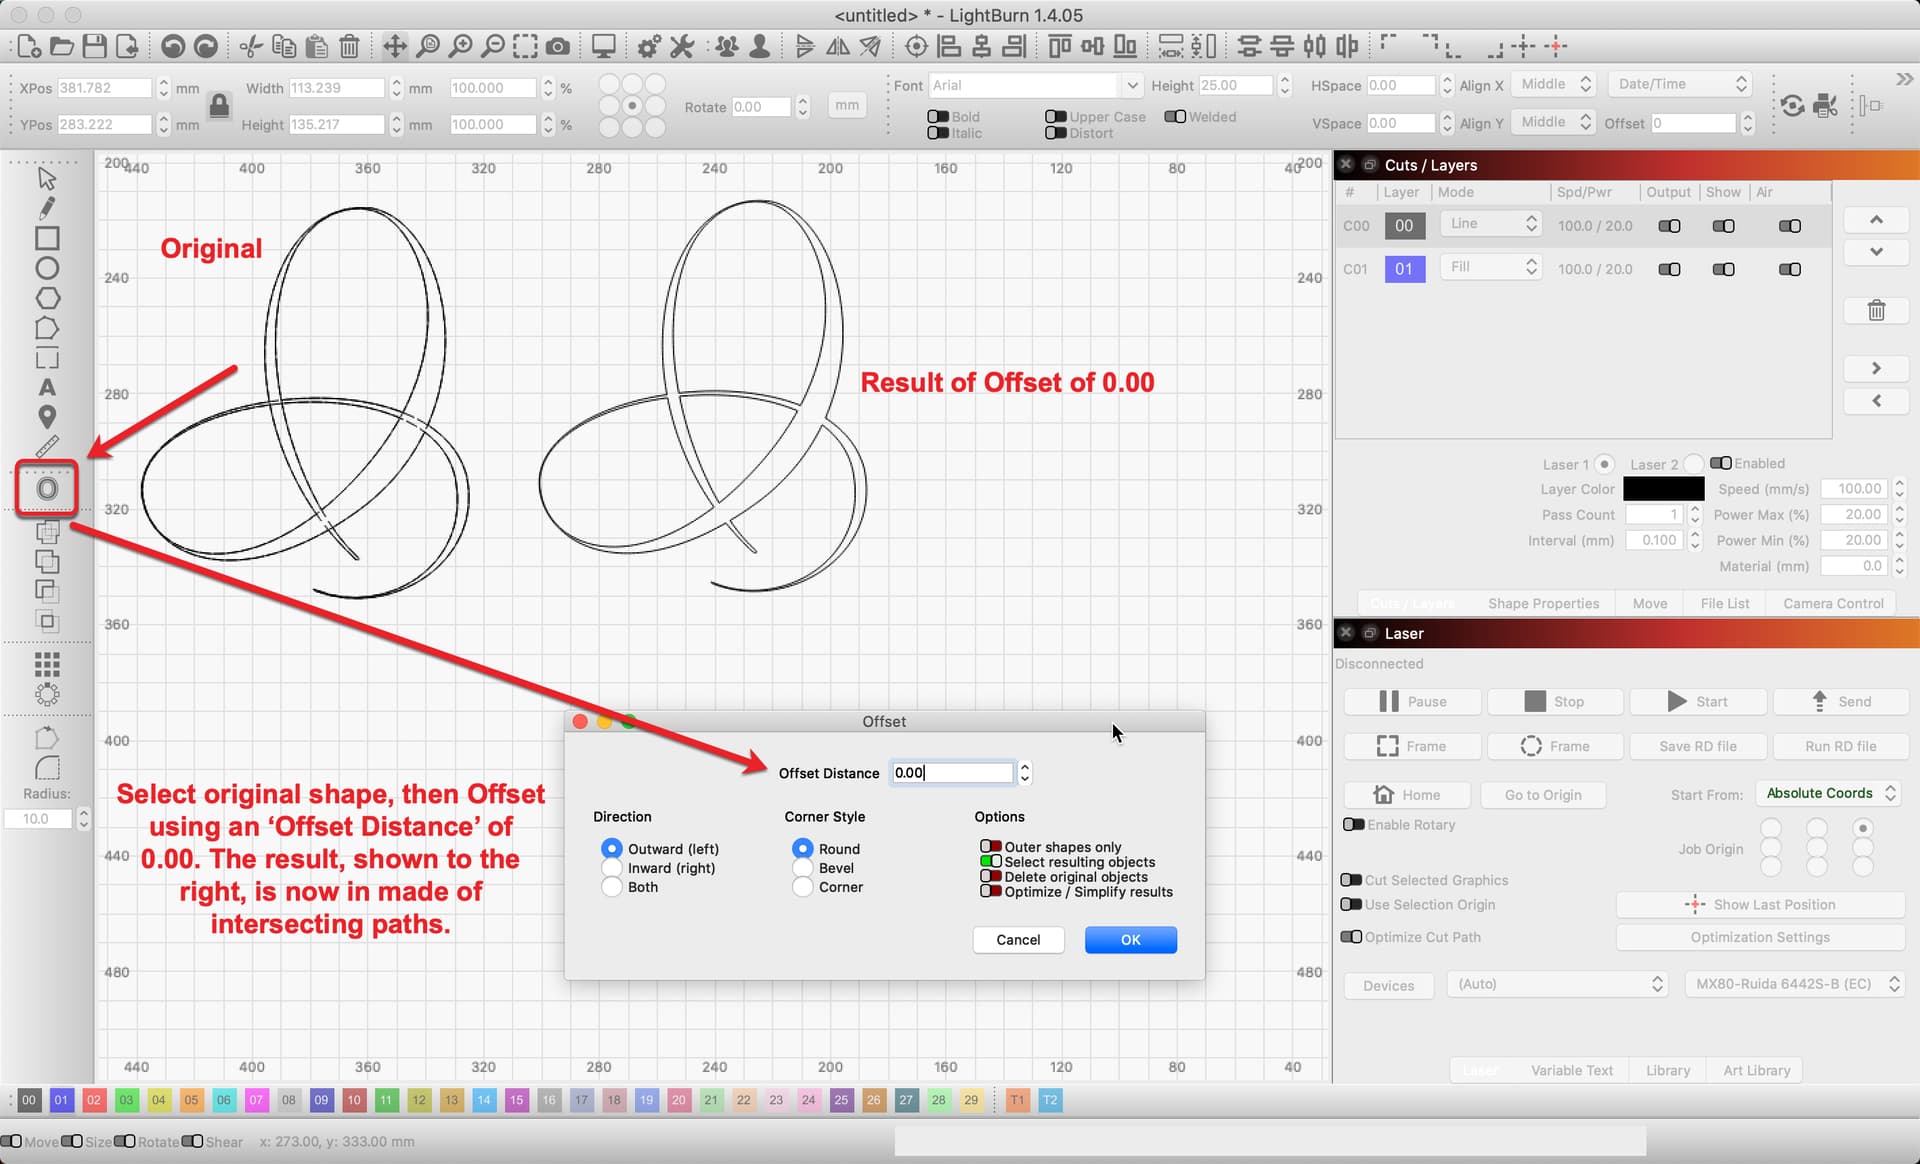
select image use offset shape tool set to zero
Apply
separate the two images - new one will print as expected
2 Likes
You hit the nail on the head. How do I convert the crossing paths to intersecting paths like you did in your image?
Thanks,
Darren
@dmcmd
To whom are you speaking about hitting the nail on the head?
@Rick shows what I want to do in his image above
Read this for more clarity.
Lightburn’s documentation is stellar IMHO. Available online and in PDF format.
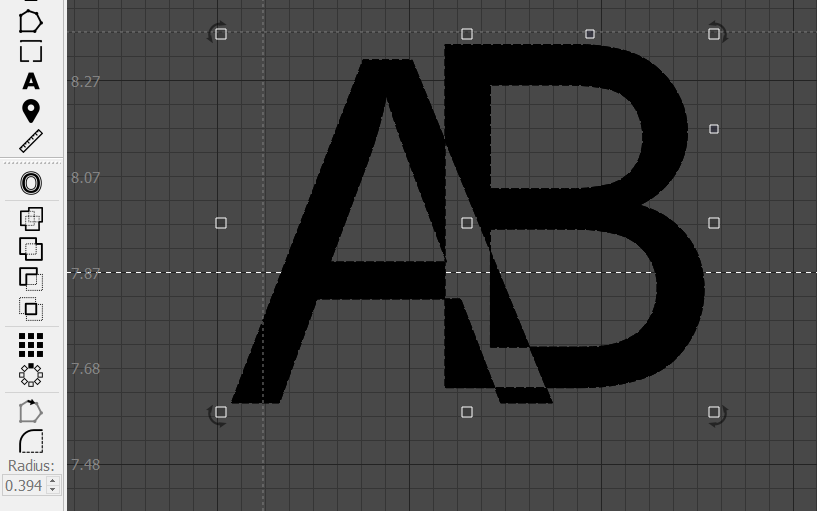
I did it with nodes tool.
I would use a boolean, but this is just a single object, so lightburn isn’t letting me weld it together.
1 Like
Do you have the lines grouped together?
Not at my PC so i haven’t opened up your posted file yet.
it’s just a single path that’s a loop that crosses over itself multiple times. I made it in inkscape. It’s not multiple lines.
Ok guys - I did it. It’s not a pretty solution, but it worked. This is what I did:
- drew a box around my letter shape
- did a boolean intersect
- went into node editor and deleted all the lines that were crossing, leaving just the outline
- this left open shapes, so I selected all open shapes
- then I did auto-join selected shapes
I appreciate everyone trying to help me.
Thanks,
Darren
ETA: I found an easier solution:
- use the offset tool around my letter at an offset of 0.01mm and check the delete original object button.
2 Likes
You can set the outline tool’s outline distance to 0.00, switch Corner setting to “corner” and set all Option switches to off except for “delete original objects”, you will want the original shape to delete when the new one is created. This will give you an exact duplicate of your original minus the crossing lines.
3 Likes
You have several options for modifying this shape to produce as you describe, but the fastest would be to follow @RaySmillie example.
2 Likes
An alternative solution:
- Duplicate shape
- Select both shapes
- Tools->Weld shapes
1 Like
I totally missed @RaySmillie 's answer above! He totally got it right and it went over my head when he posted it. I should have paid closer attention. It would have saved me a few hours last night.
1 Like
Hi Rick,
I think it’s important to note that the corner style switch needs to be set to corner to prevent the intersecting corners from being rounded.
2 Likes