Hi Everyone,
This is my first time poster long time stalker. I’m not sure if anyone has had this issue with their new laser, I know it’s a first for me.
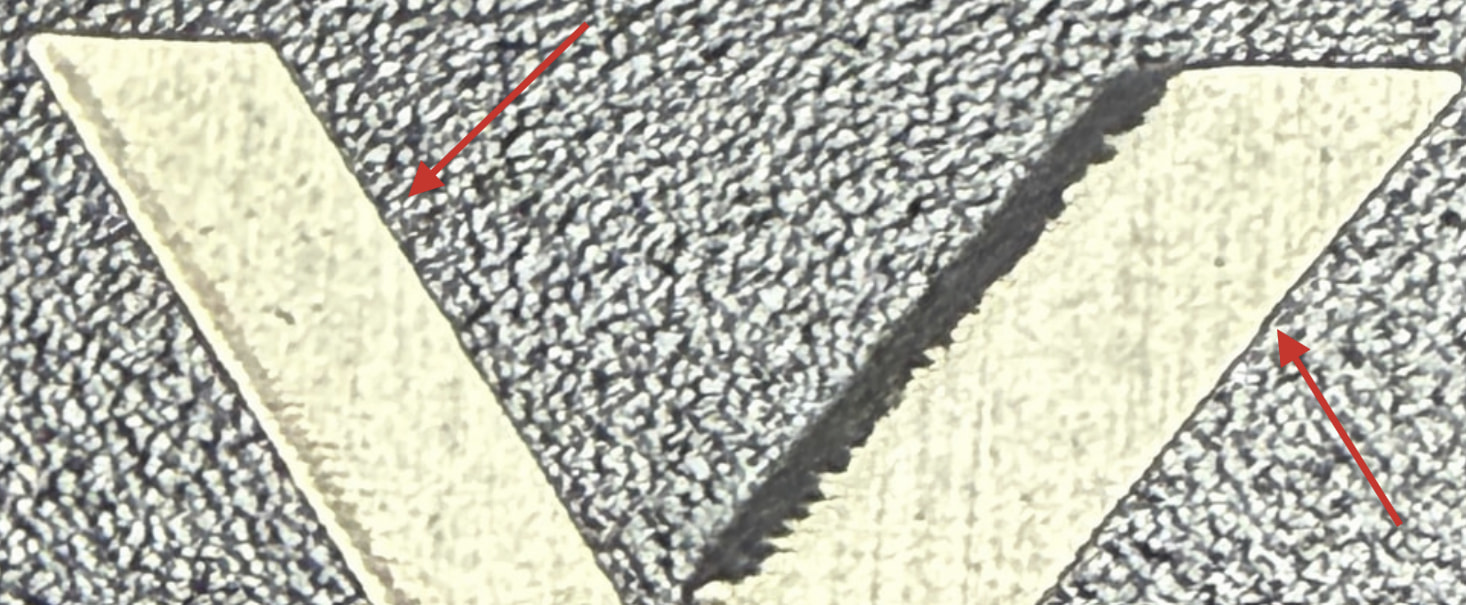
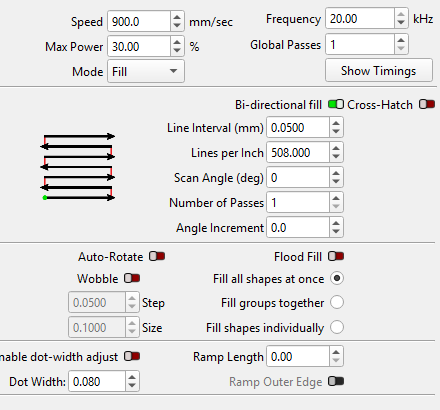
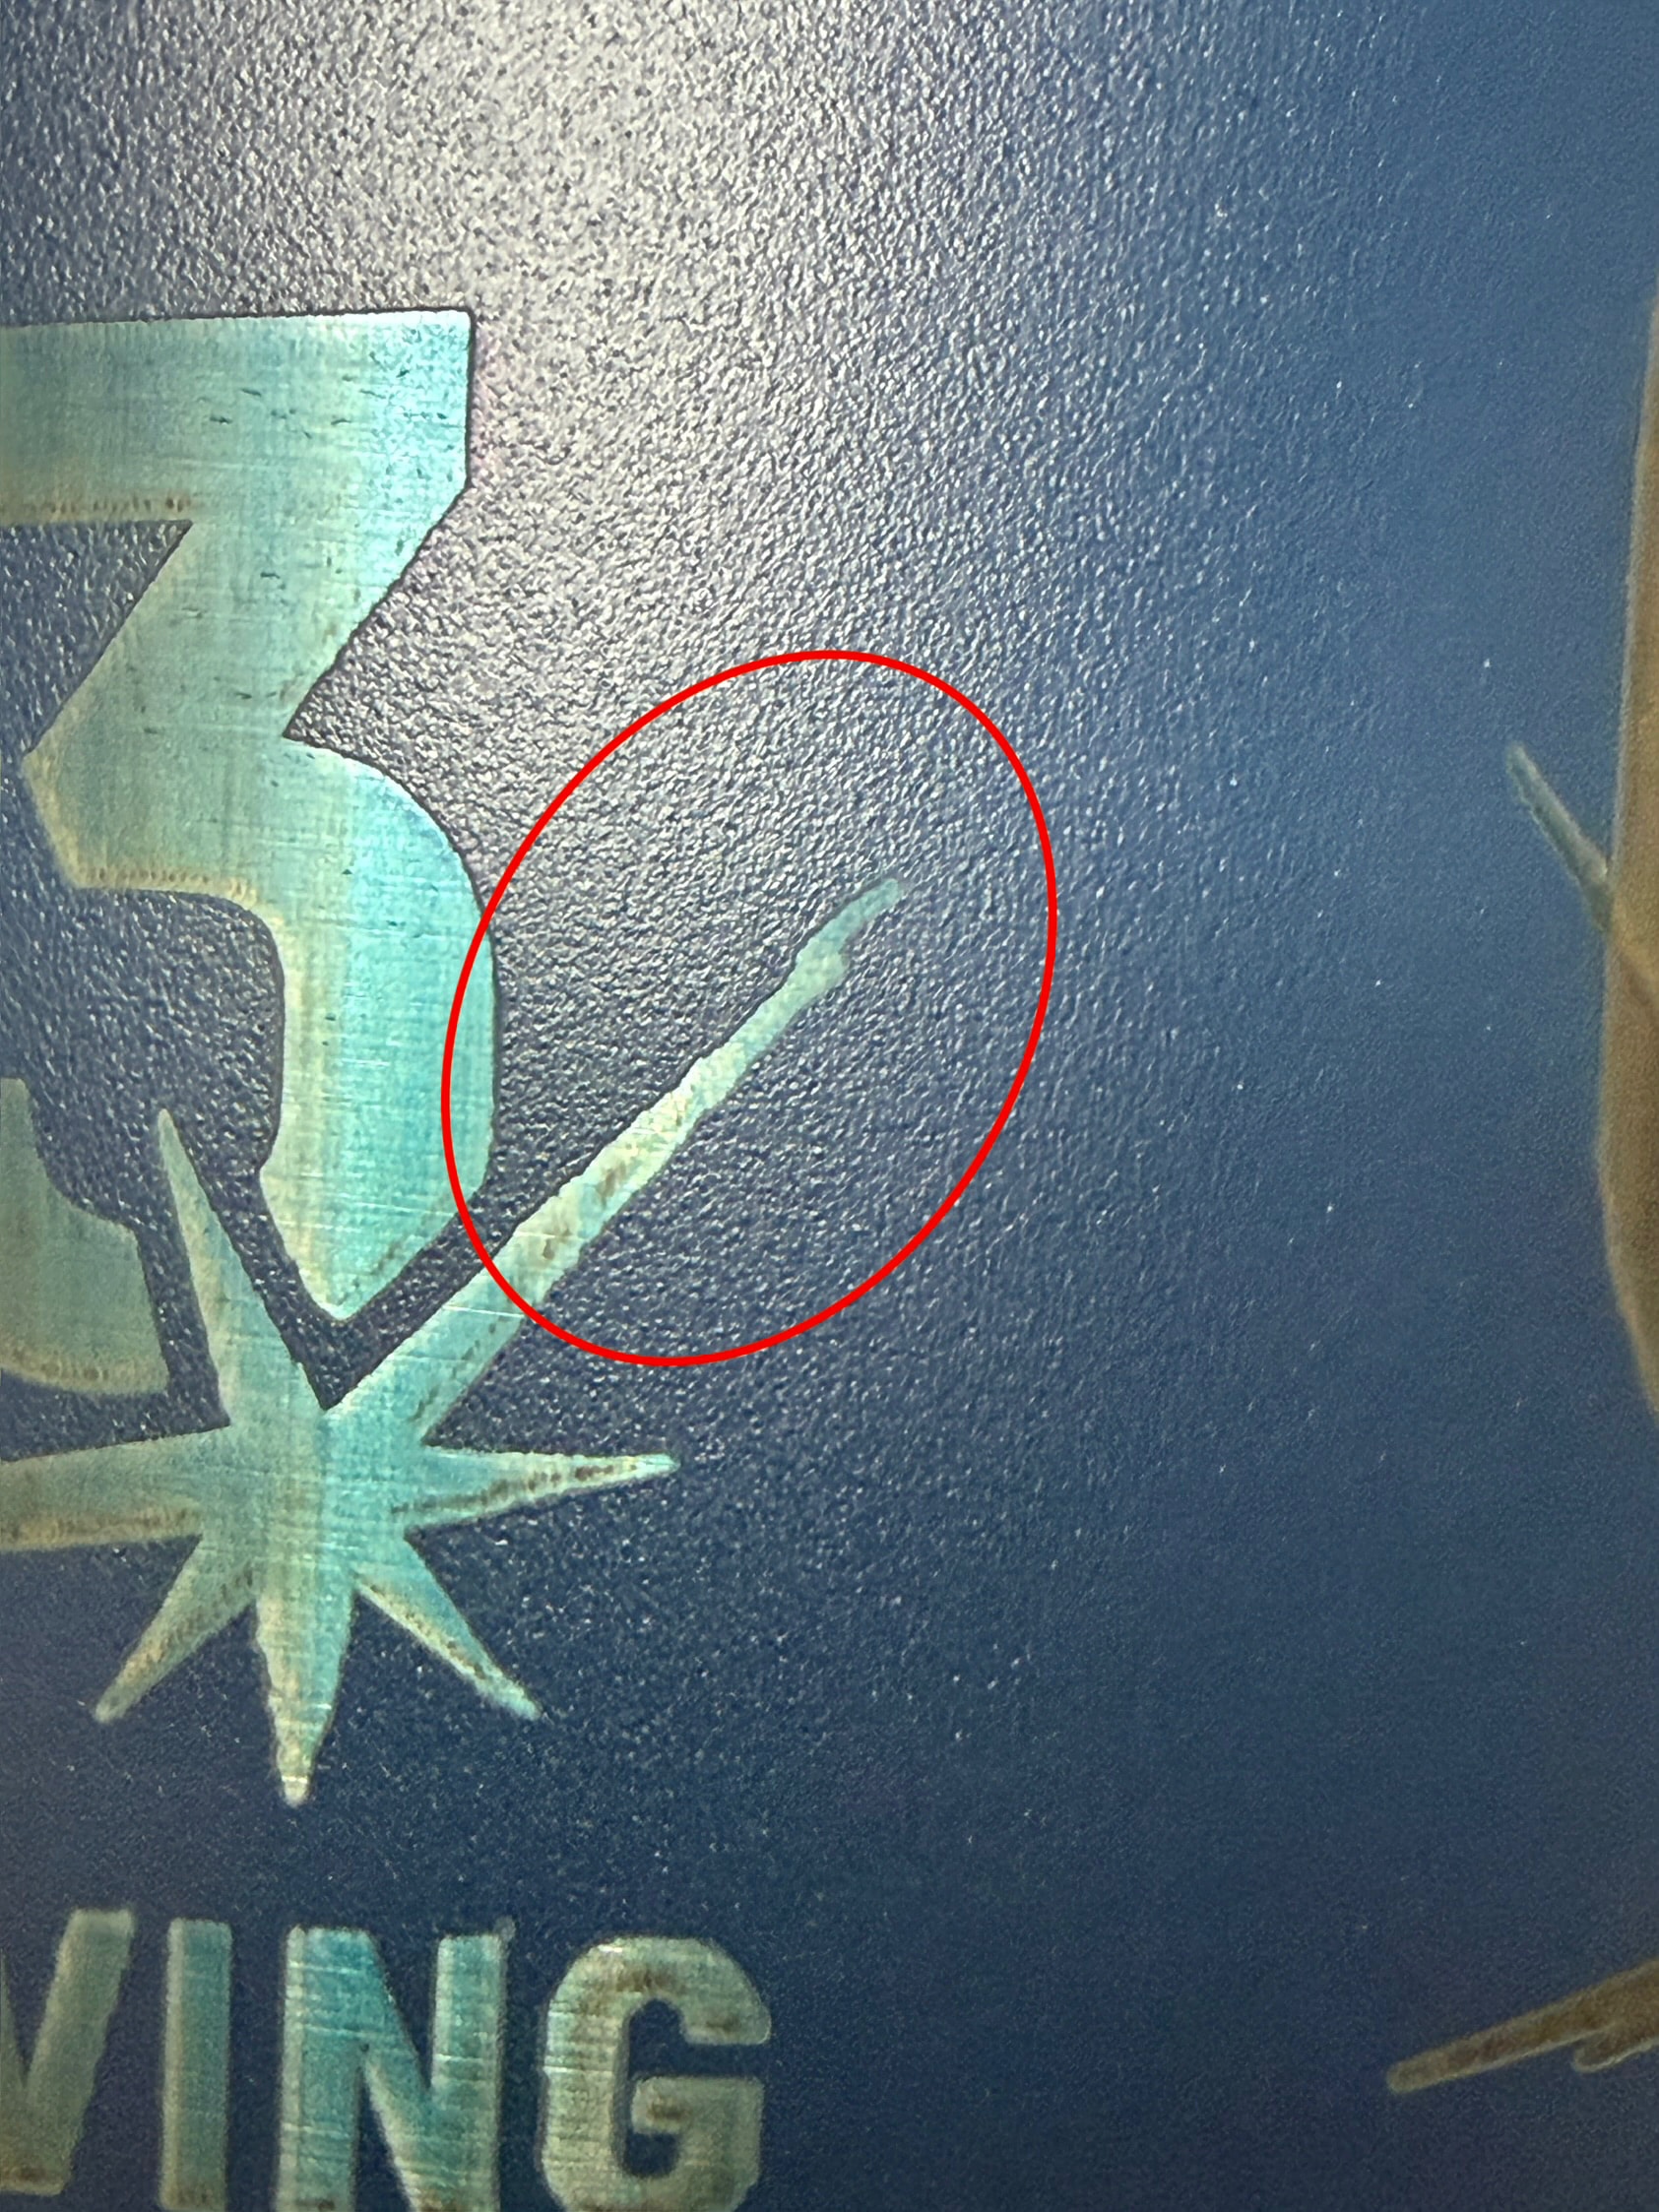
For some reason when I engrave with regular fill on its messes up the inside of the engraving and when I switch it to flood fill it has clean sides all around. I post a video of what I’m talking about. I kept the settings the same 900mm,60% power .04 interval, 40fq
This is on a 60w co2 galvo 20mm head, 8x expander
Let me know if you have any thoughts or if you need more info.
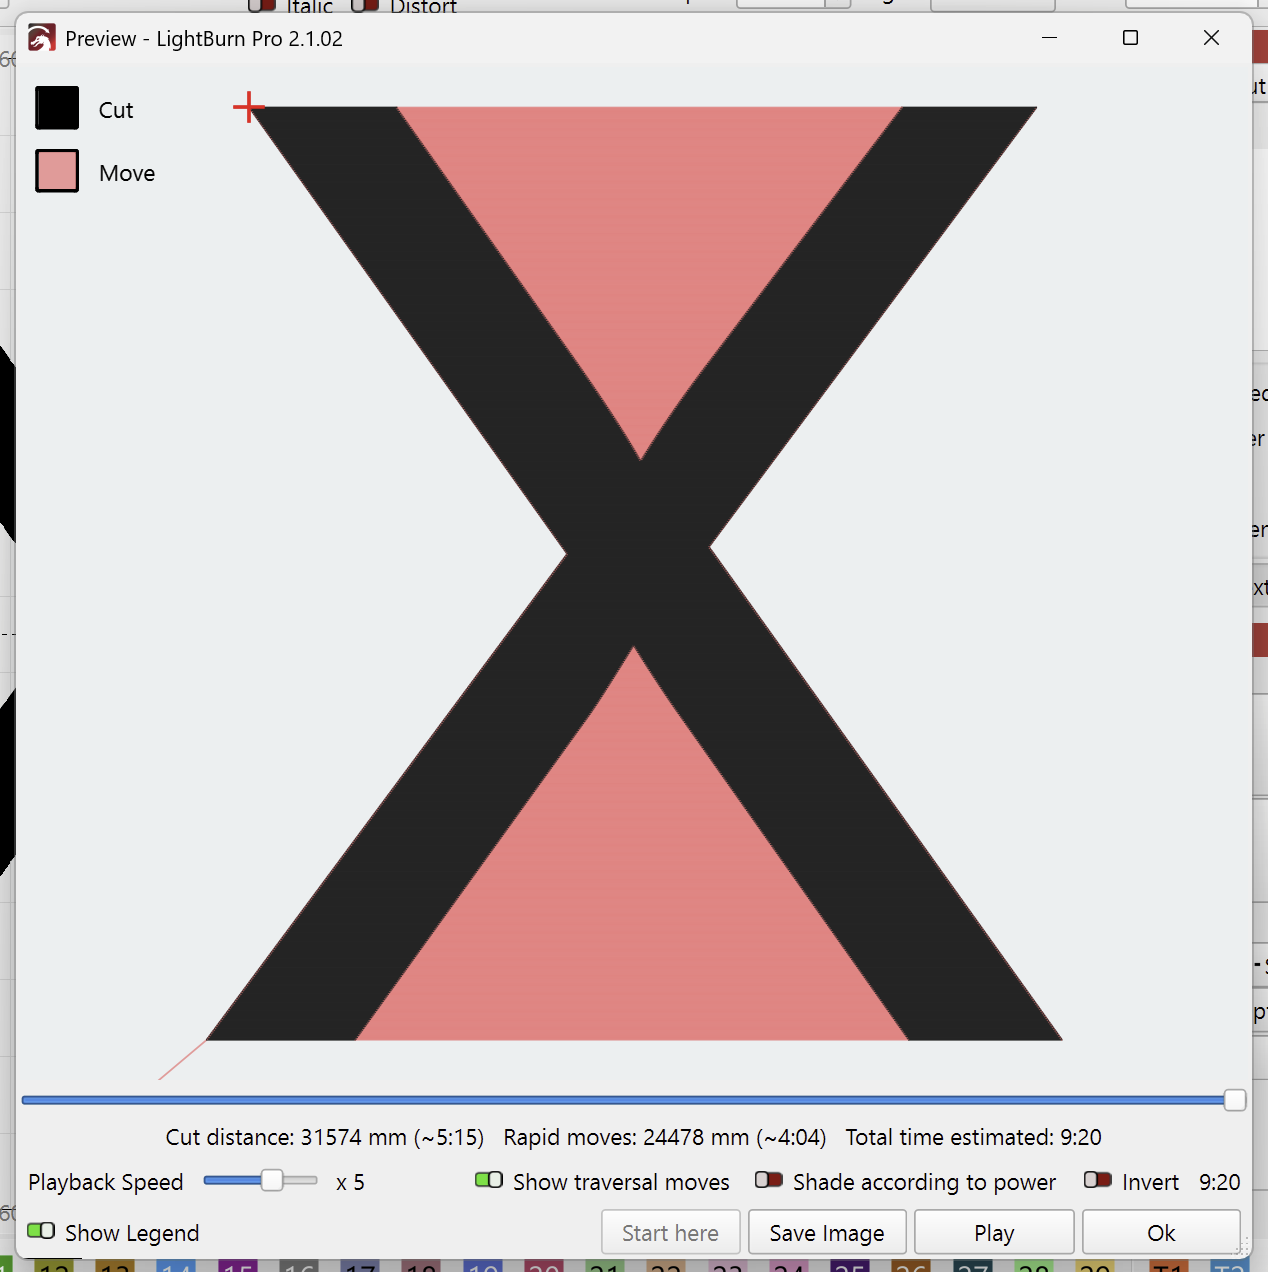
The fringes on the side of the engraving stem from a timing issue of the laser firing.
With Flood Fill disabled, the laser does travel moves between the legs of the X shape. This can be seen in the Preview (Alt + P) when “Show Traversal Moves” is enabled:
You likely have “Bi-Directional Fill” enabled in the cut settings. So we don’t know yet whether the laser is firing too early or stays on too late.
I bet the Delay Defaults in your "Laser Tools > Device Settings are all at 100 μs.
This is the default for when the config file loaded when adding the device doesn’t contain any timing information.
There are ways to calibrate these timings, but usually manufacturers provide those with a config file you can load when you add the device in LightBurn.
Can you upload the config files from your manufacturer, so we can take a look?
If your Galvo uses a BSL controller, you should have both a BslCAD.cfg and LmcPar.cfg file. I’ve seen cases where one file held the ports settings, and the other held the timing settings.
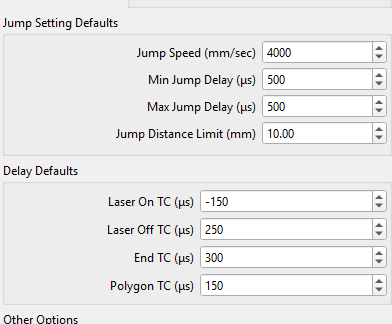
Hi Aaron! Thanks for the reply. This makes sense. I’ve looked at the files I got and I don’t see a bslcad or a lmcpar file. The settings for delay, on tc was -150, off tc was 100, end gc is 300, and polygon is 100.
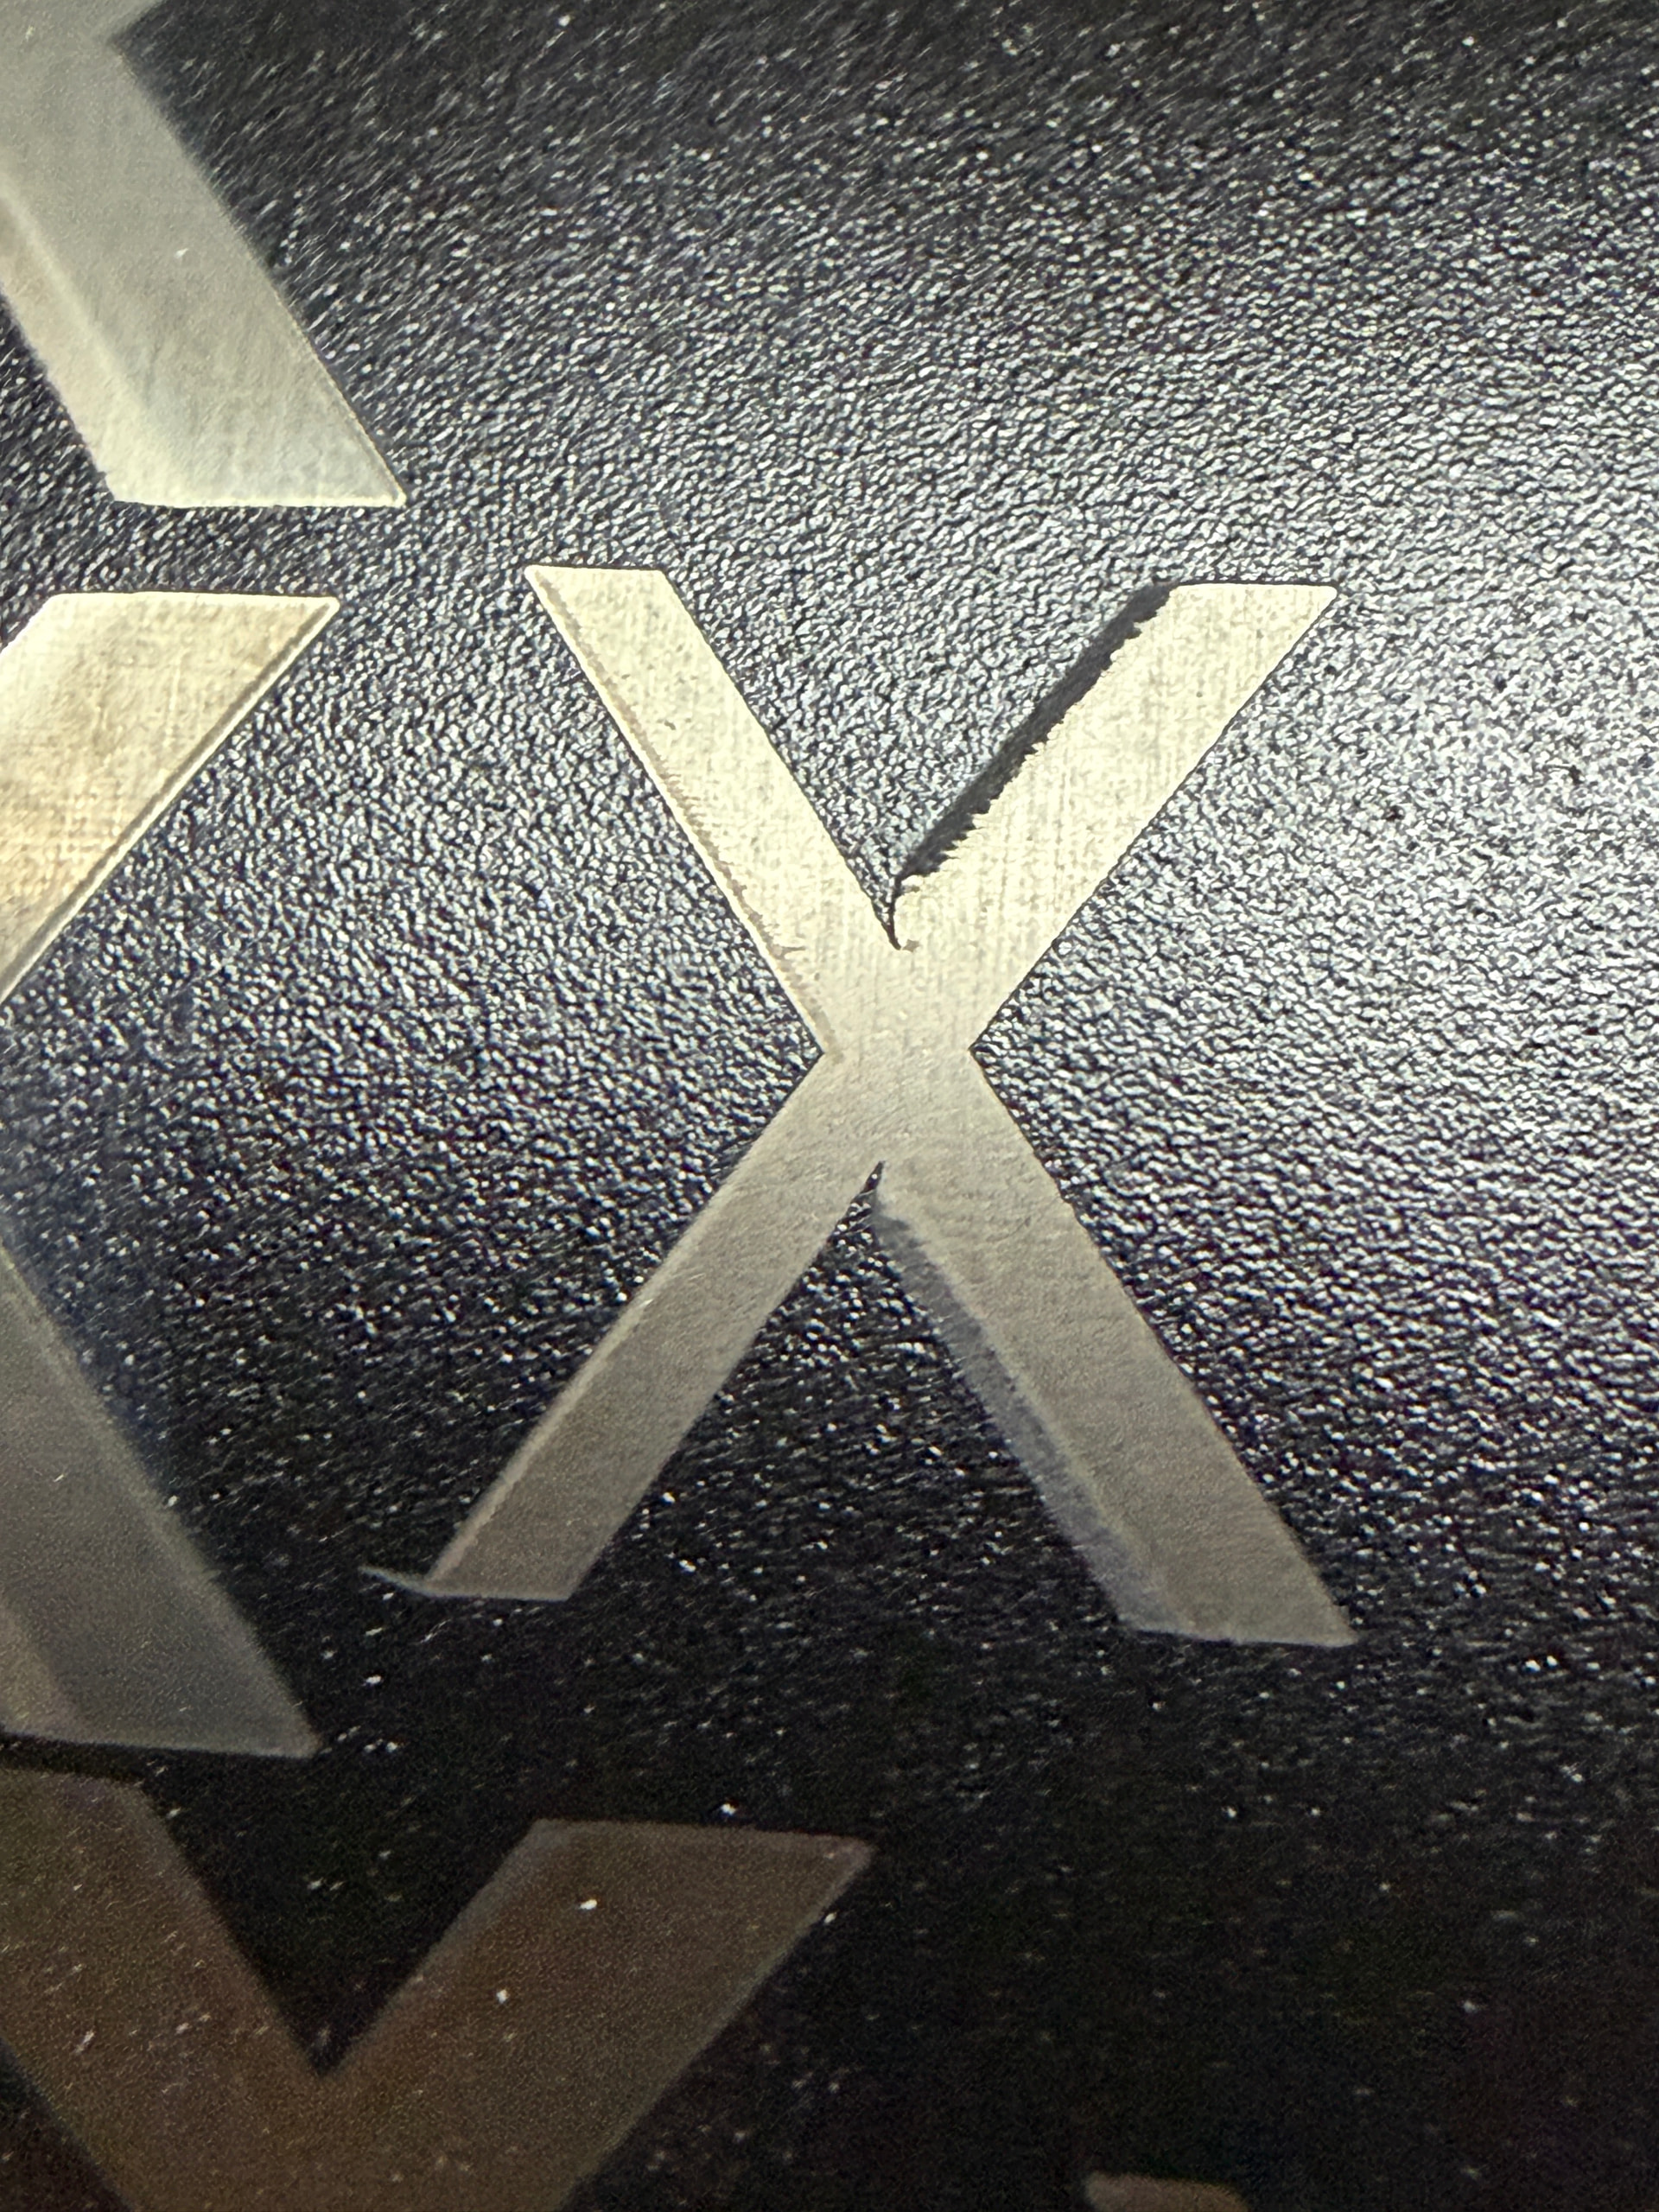
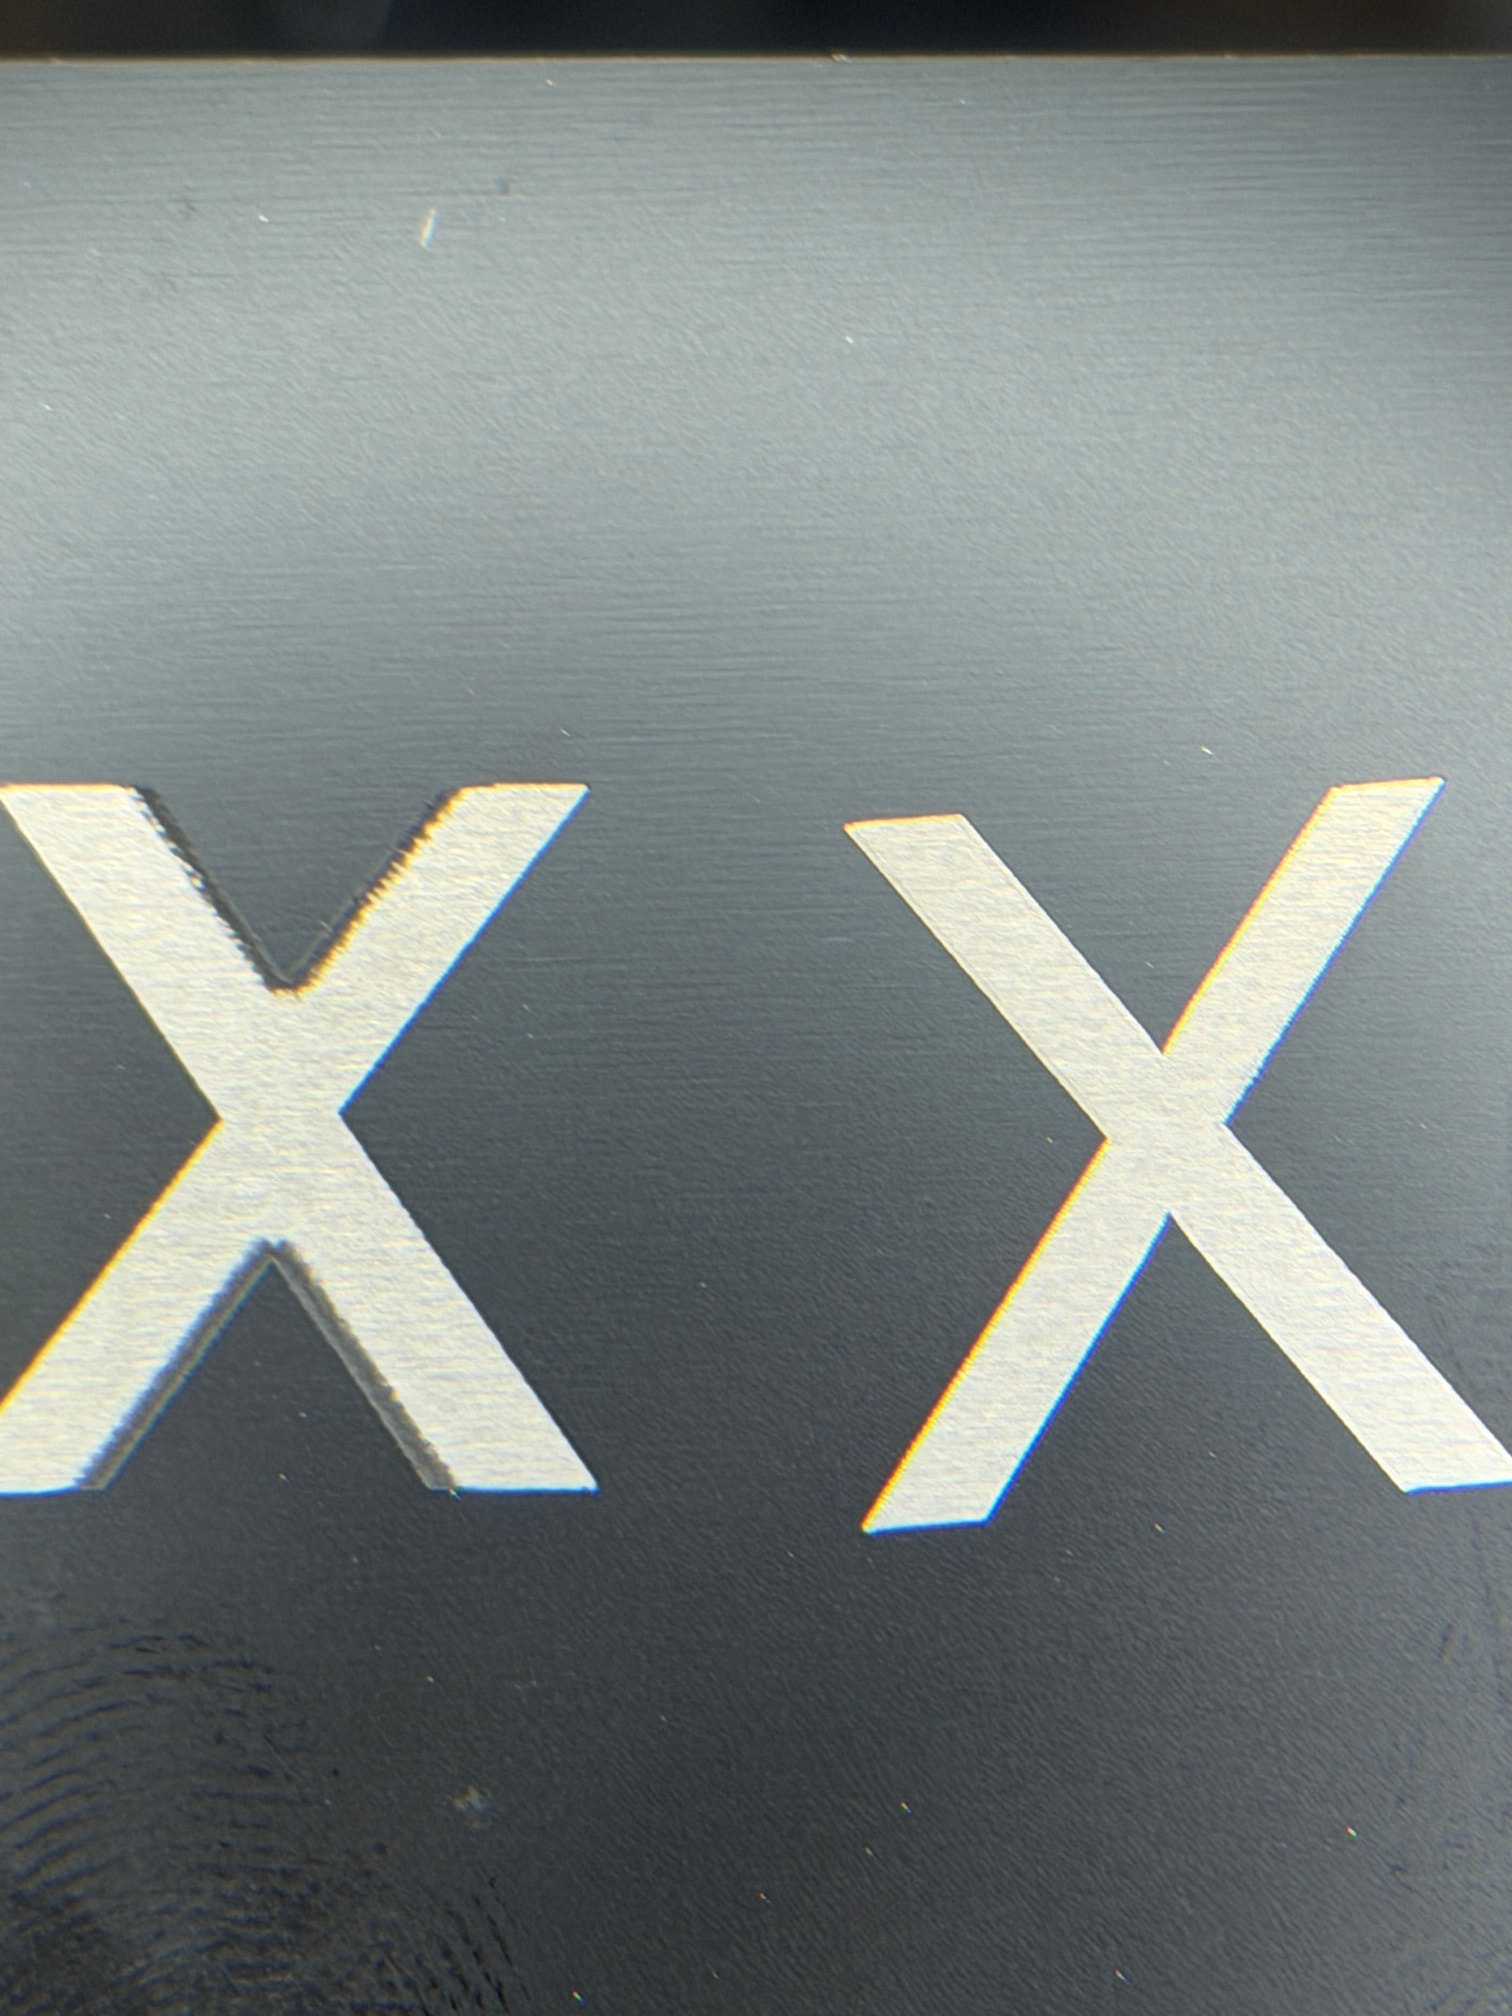
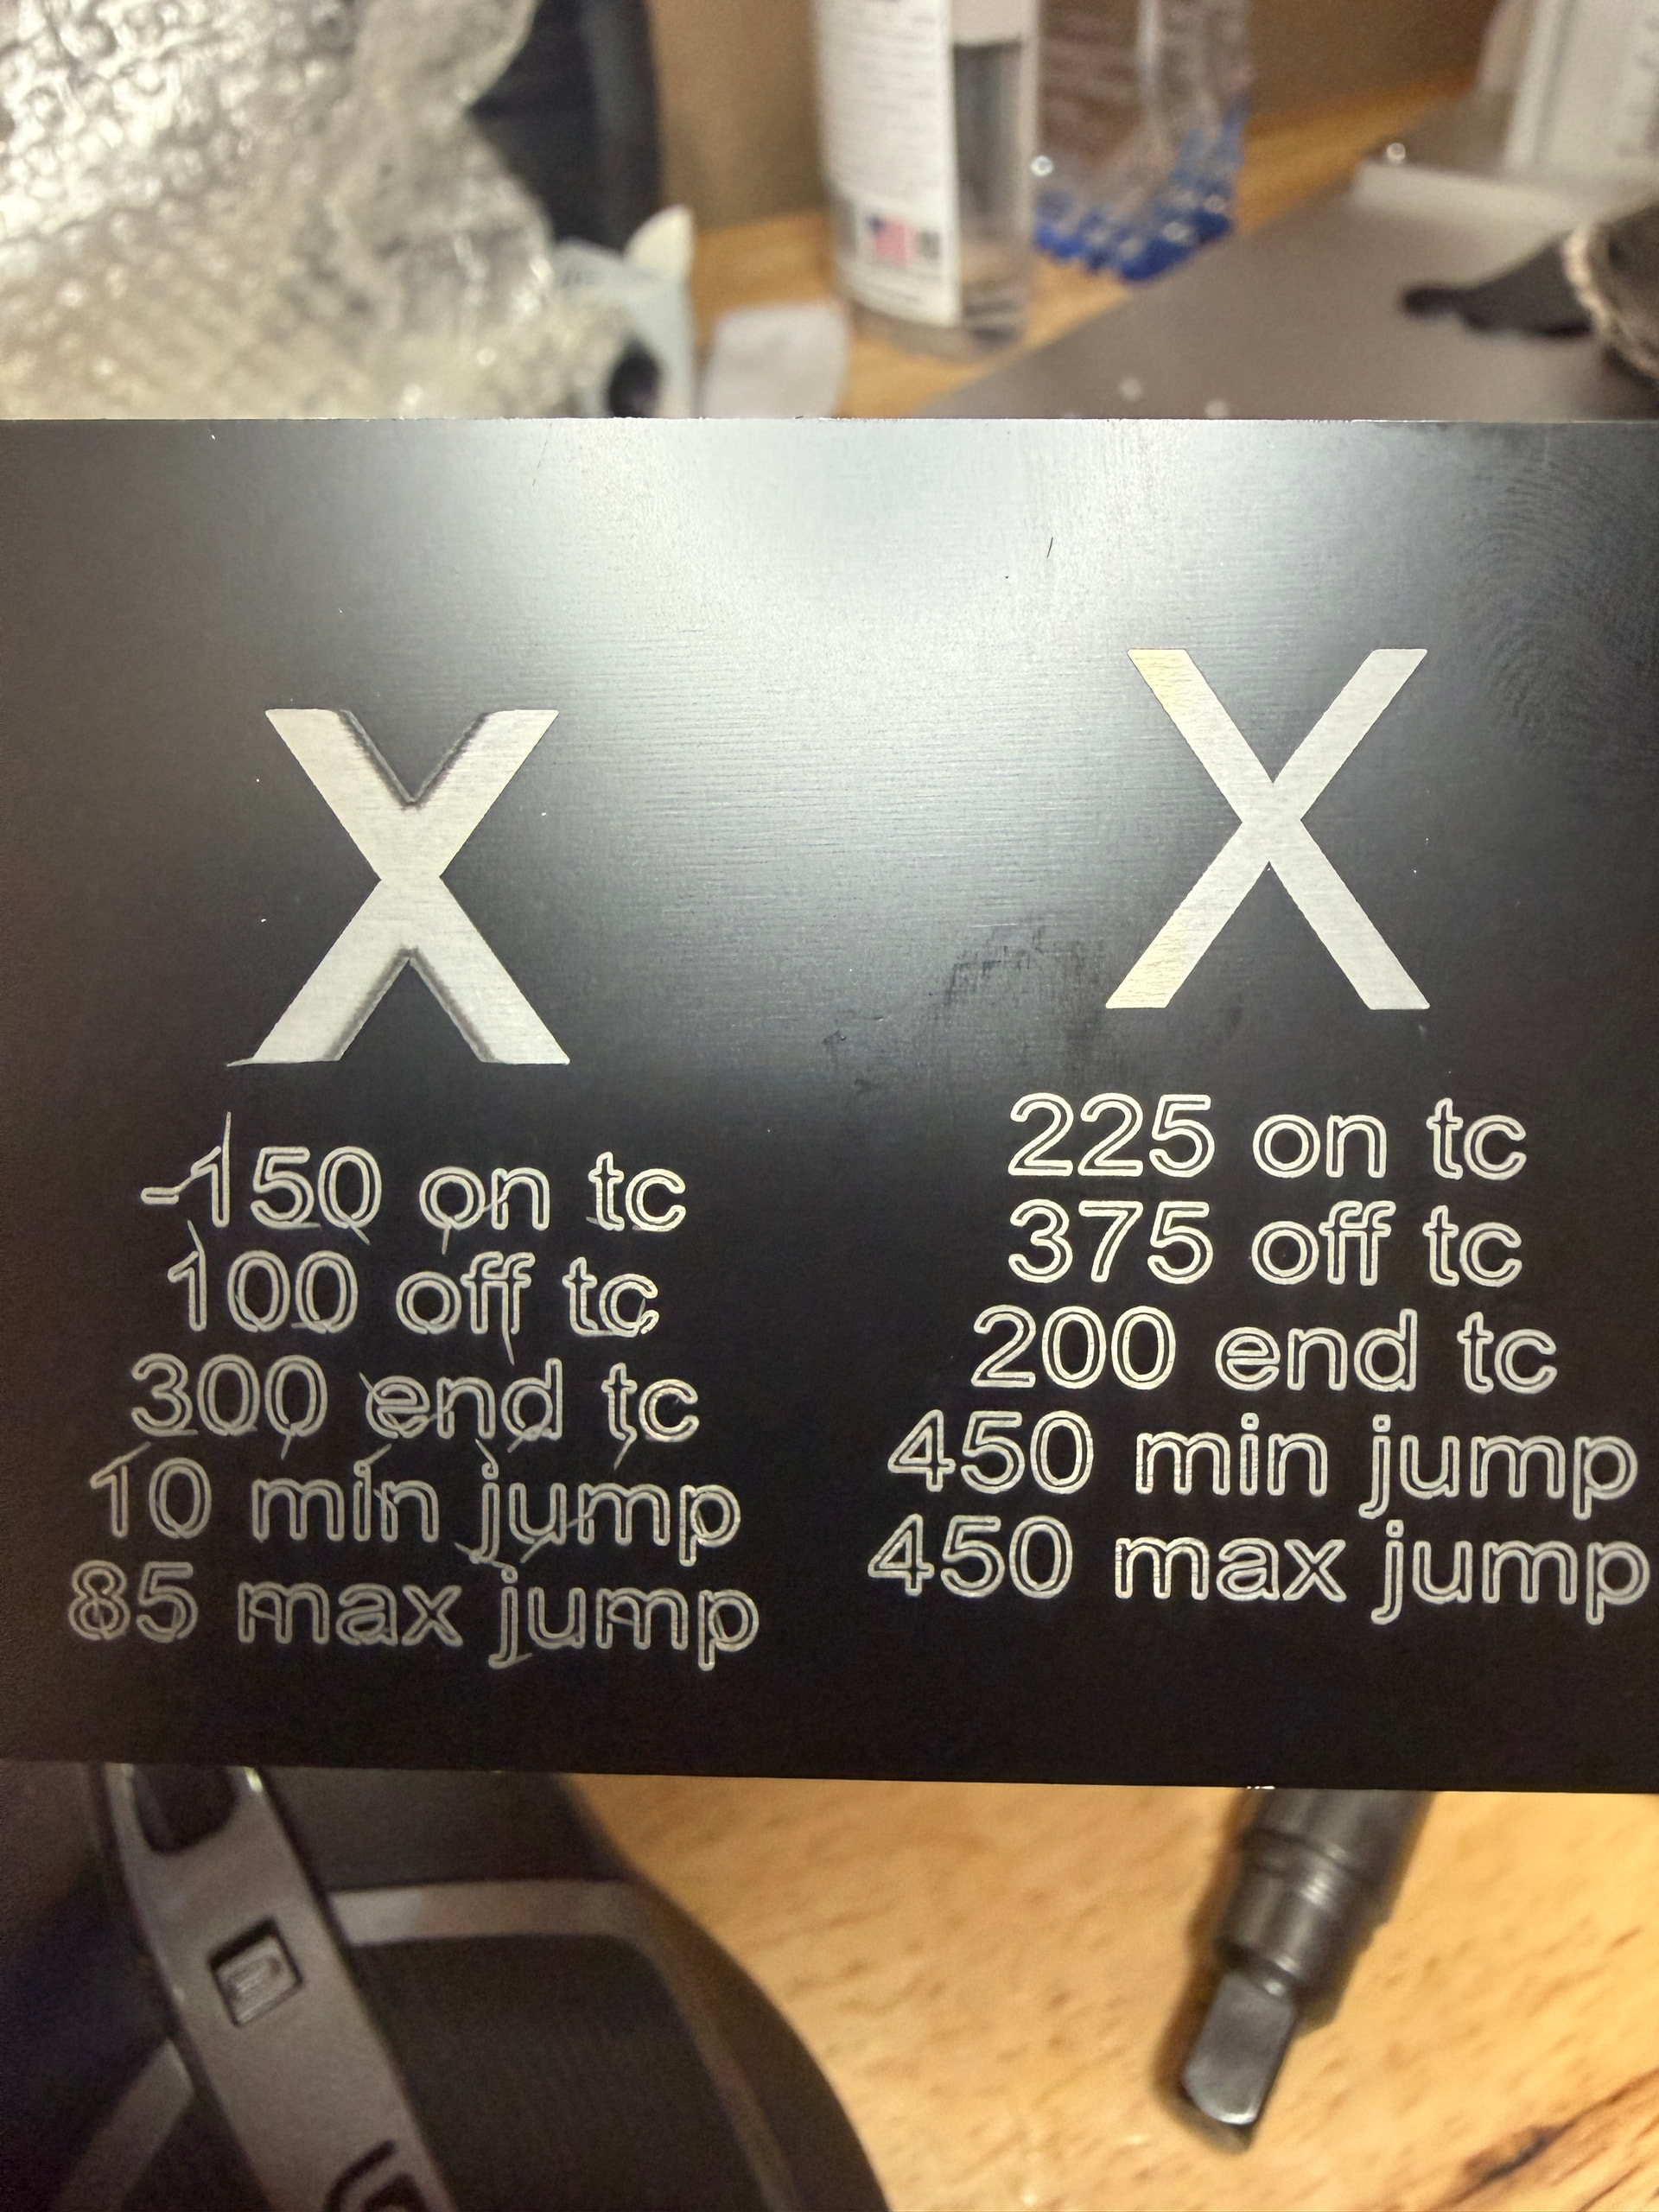
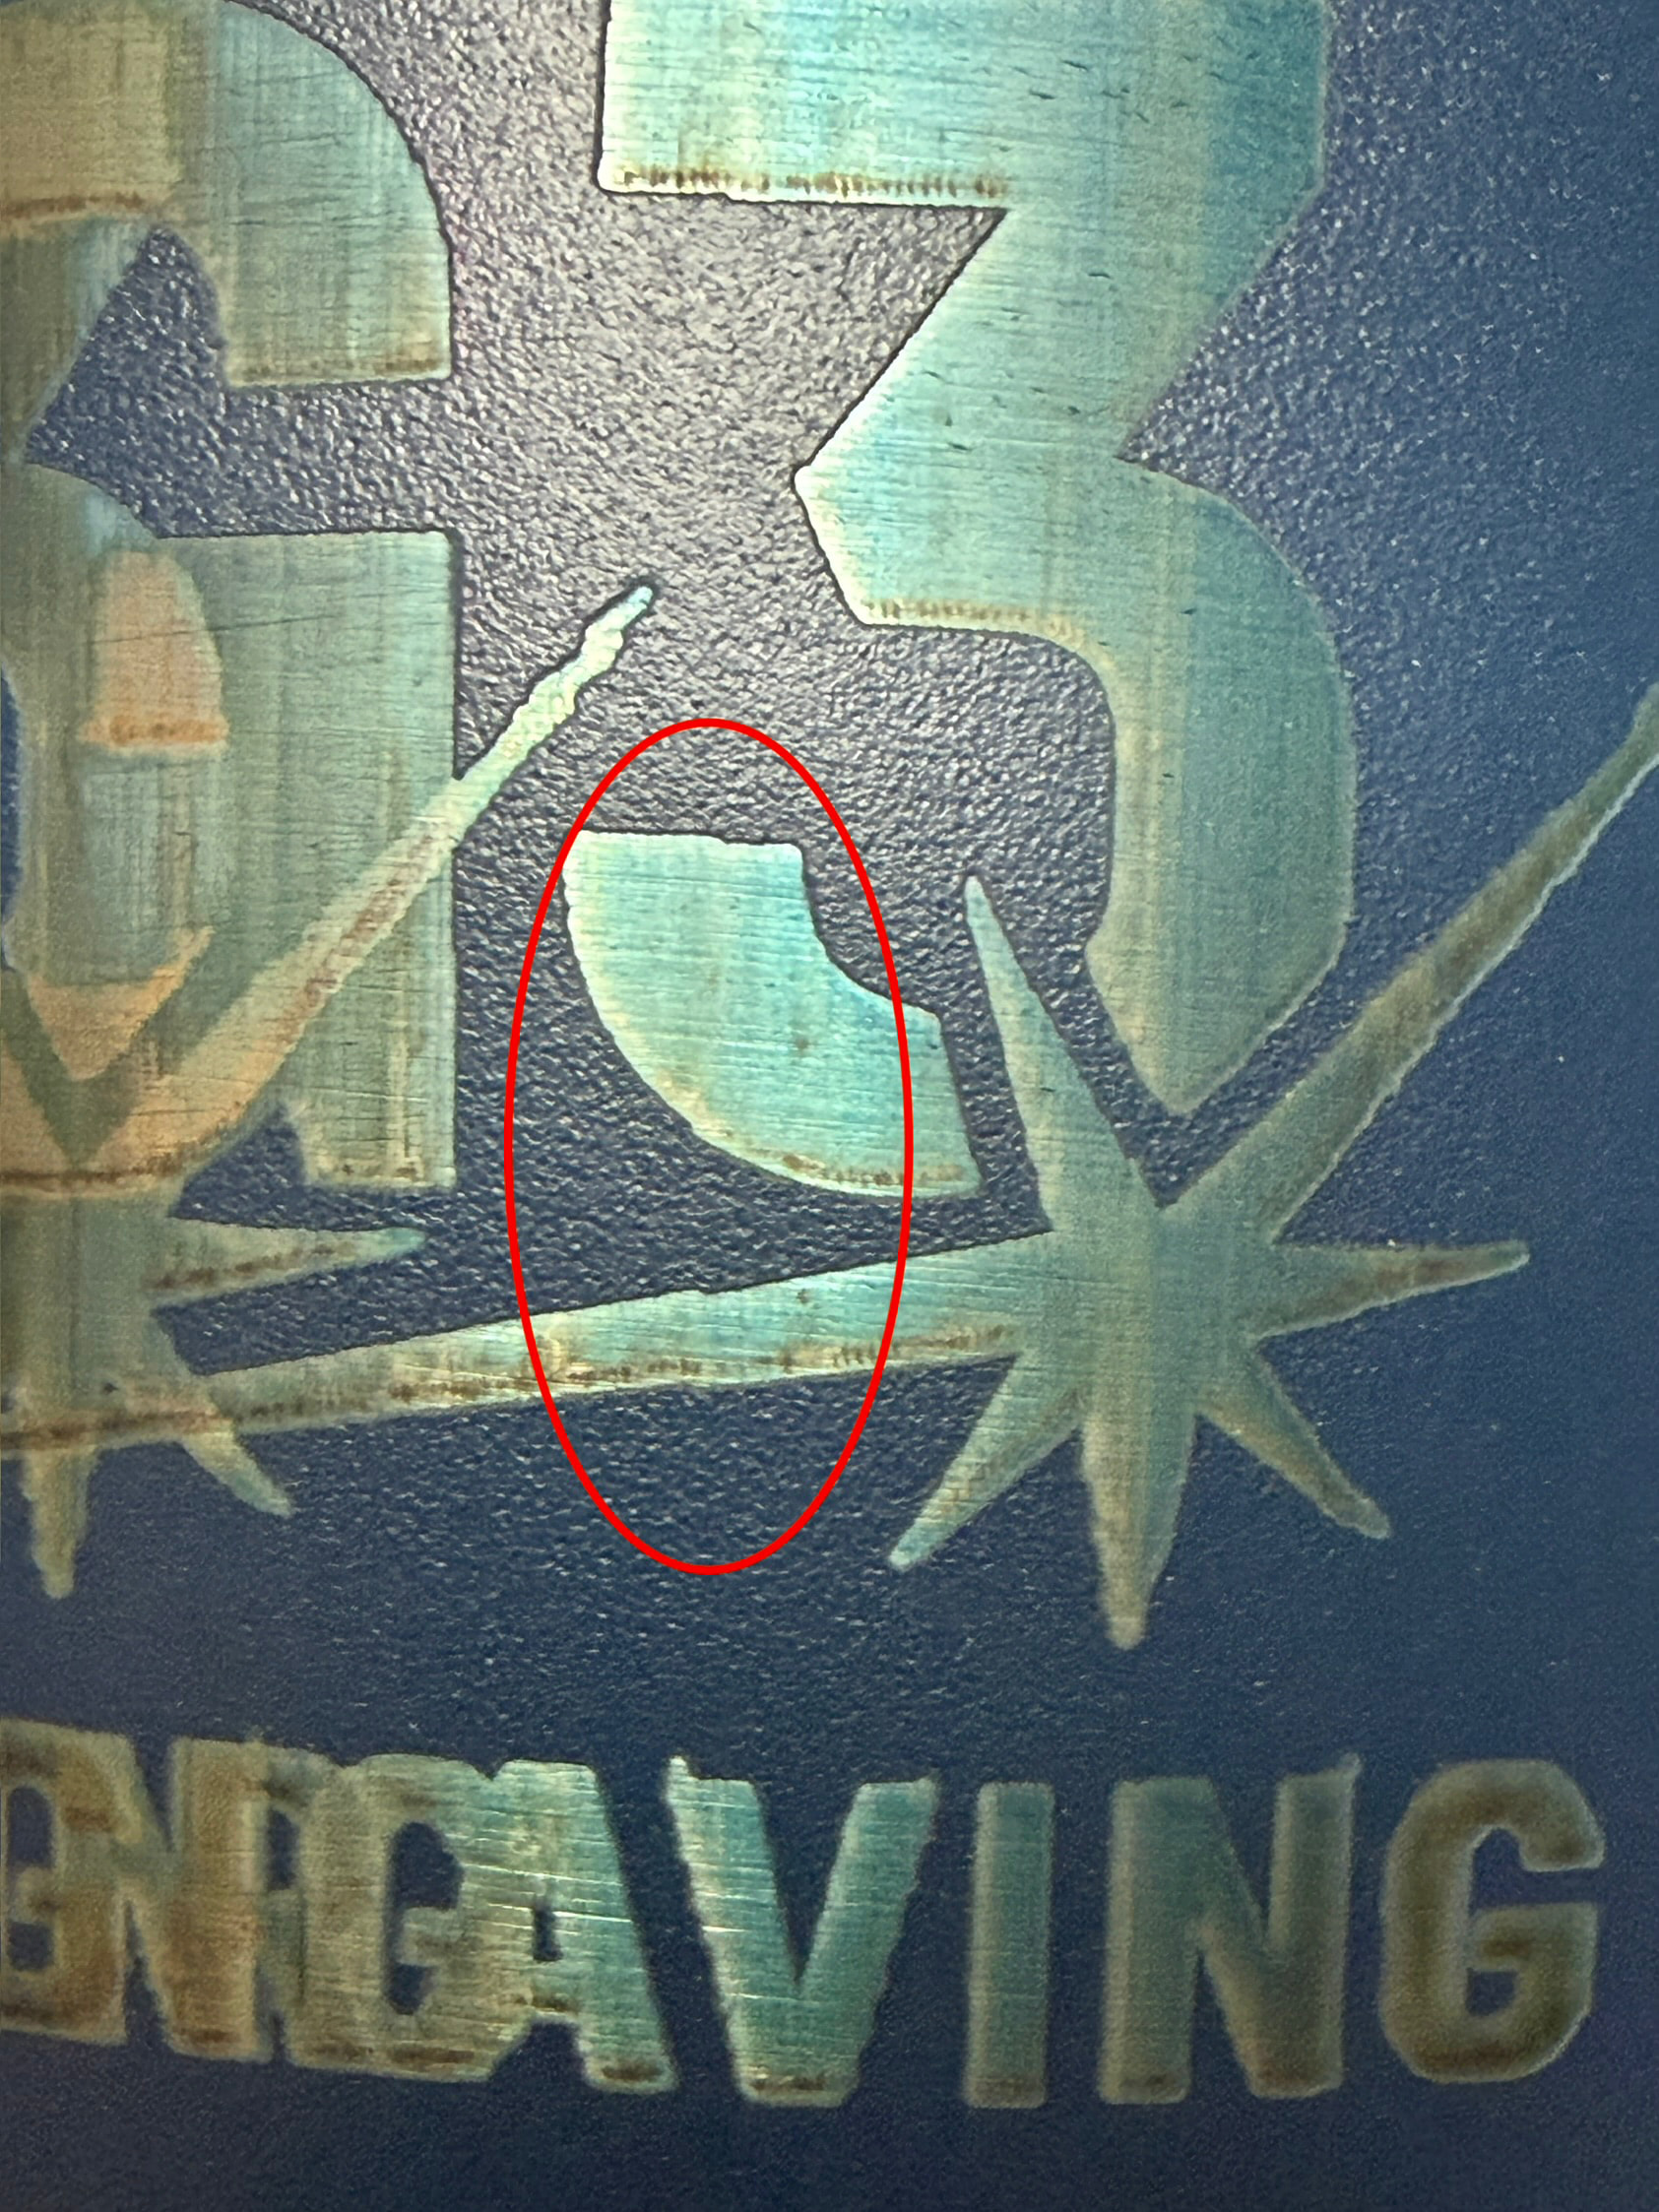
I did burn a test x with bi directional turned off and this is what my x now looks like.
It’s probably an EZCad2 controller, then. Since the delay values are different from the defaults that tells us that the manufacturer’s settings were, in fact, imported.
I would consider asking your manufacturer to send you a config file with more accurate timing values. Which exact machine are you using?
The results with Bi-Directional Scanning disabled are telling.
My suggestions to improve the results without going down the rabbit hole of a full timing calibration:
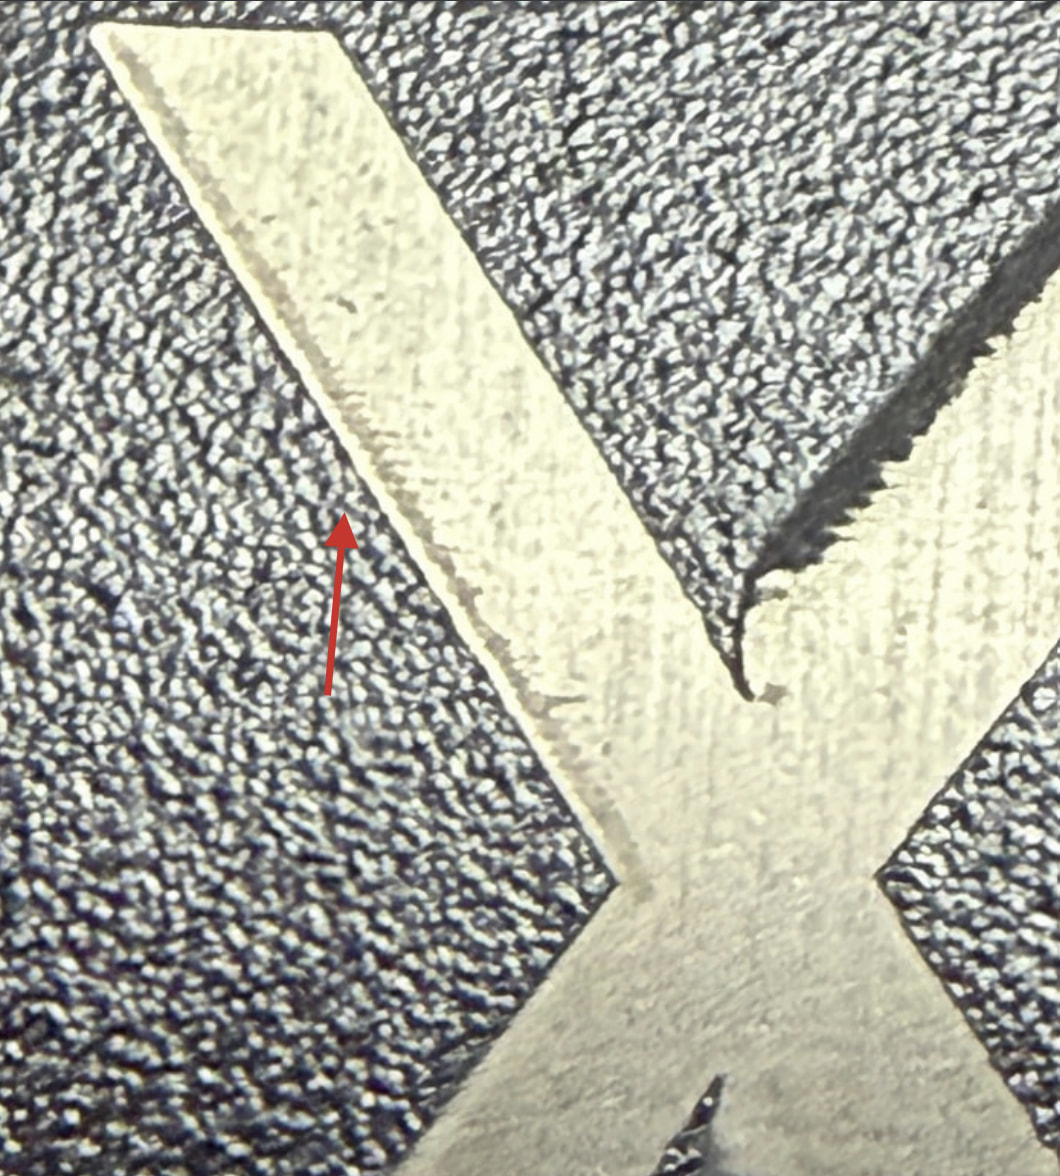
The leftmost side of the leg appears to show an excessive burn-in at the start.
Laser On TC is too early. The Laser On TC is the Delay before turning on the laser once a mark move has started.
Change this to -50 μs. This should make this section cleaner:
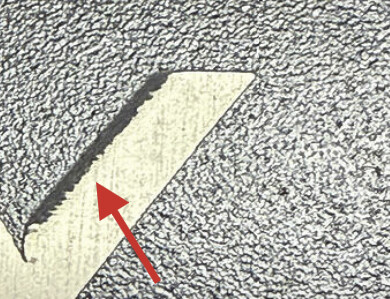
The right sides of both legs look alright to me. The Laser Off TC plays a role here. That’s the Delay before turning off the laser after a mark move.
Finding the perfect Off value is less obvious. You would need to add a sublayer in Line mode to see a “bounding box” of the shape and evaluate how far the laser is supposed to engrave.
Short version: If you can see a burn-in at the end when looking closely, increase the Laser Off TC.
Here’s the thread I’m referencing in my post. I don’t mean to scare you off We didn’t even start touching on the Jump Delay settings.
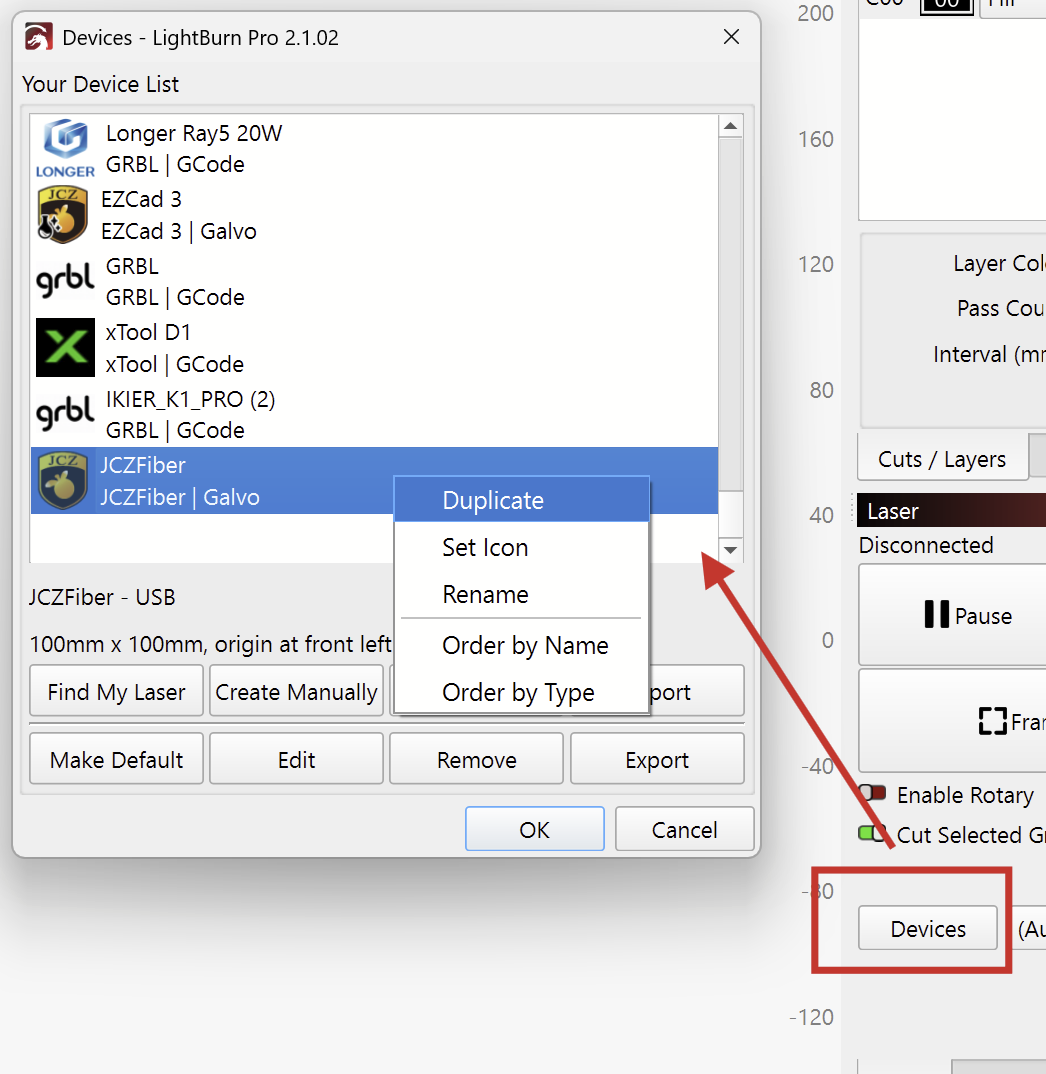
LightBurn automatically creates preferences backups that you can restore if the changes make it worse, but I’d recommend duplicating your existing device and making the changes there.
To do this:
Open the “Devices” menu from the Laser window and right-click, duplicate the device.
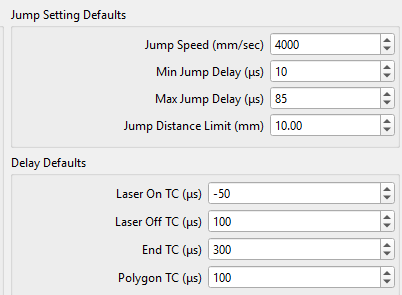
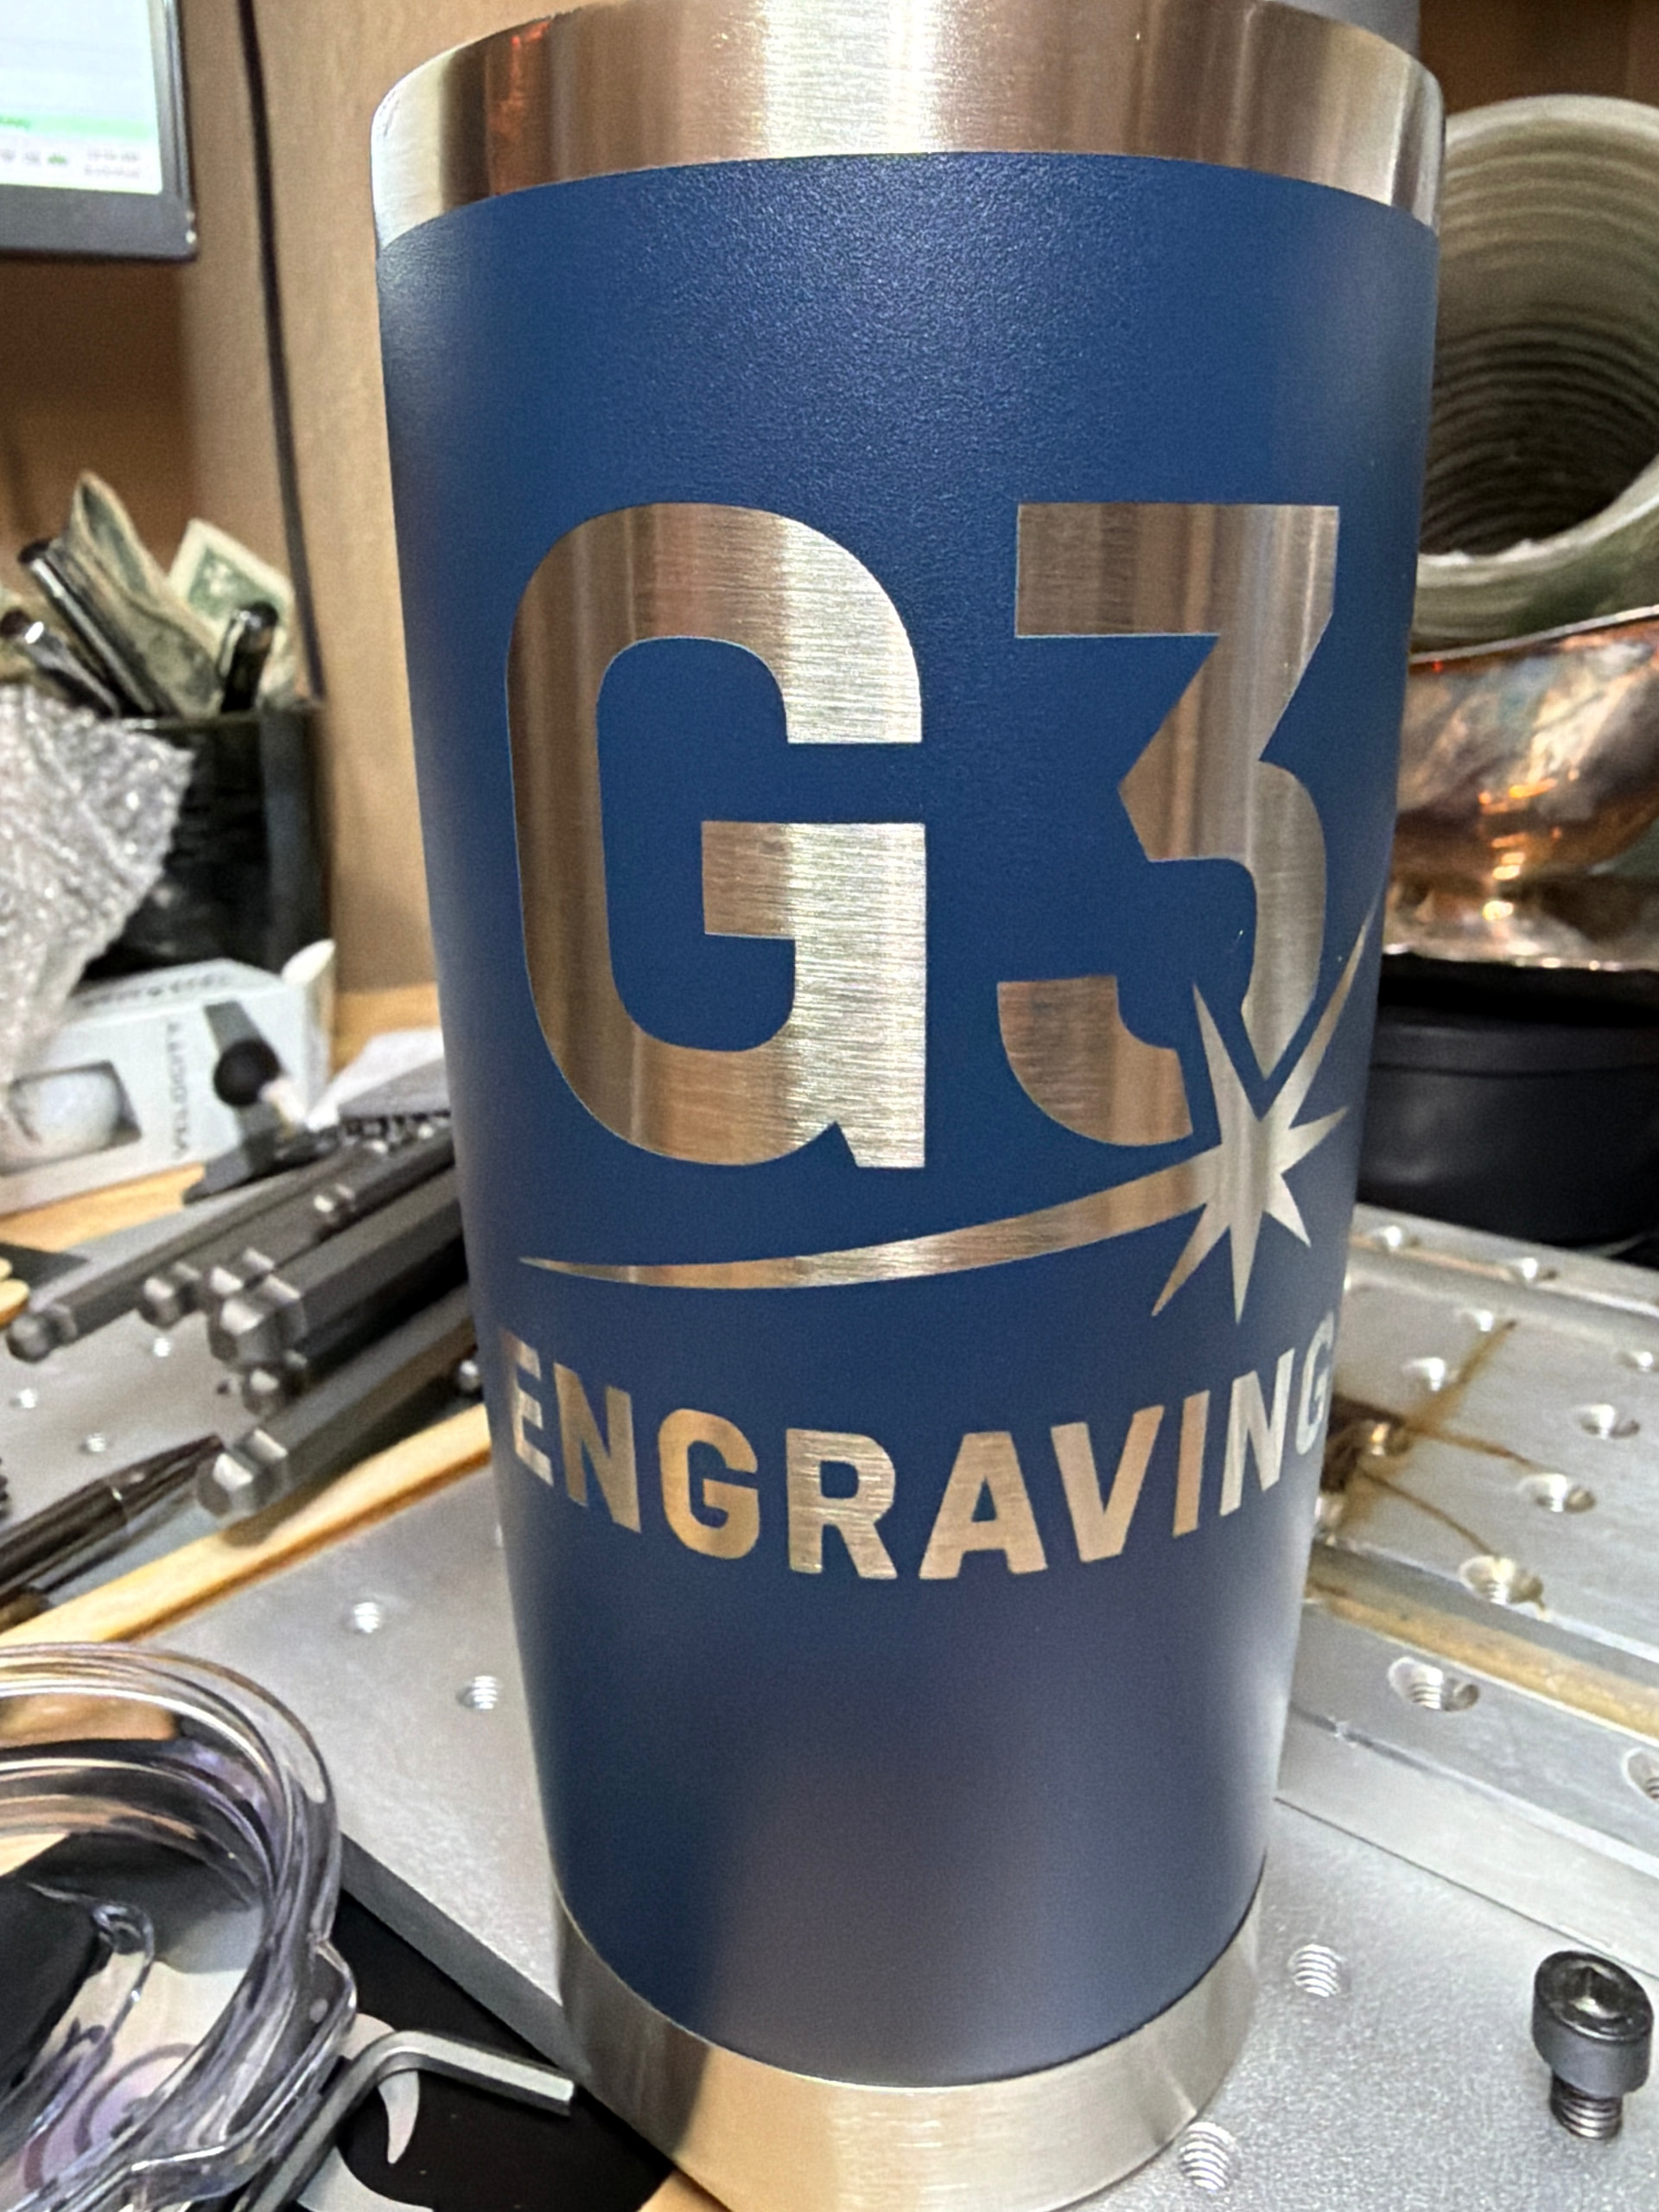
Thank you Aaron for pointing me in the right direction! I worked on the delay defaults and had them looking good, but then I was still getting the trailing from the jumps settings. The jump settings were super low like 10min 80max. I bumped those up I’m at like 500 now. I started at 100 and ended up at it looked good around 500. I might play with it a little more later on, but for now i think its in an decent spot.
I posted a before and after picture just in case anyone else see something similar. and the final settings that I think look good.
Shiny!
Thank you for the feedback. Happy to hear that, at least, I pointed you in the right direction.
I was quite confident that you needed a shorter ON TC. But comparing your settings from before and after, I see that you had to increase the End TC
So far, that doesn’t track for me. It could be that the long 500μs jump delay is “compensating” for this. Or that the scanning direction was inverted.
Anyways, happy to see your clean engraving!
If you ever feel like doing a full calibration, I can recommend the video from MakrTheory.
I’d be curious to see the final timing values if they change.
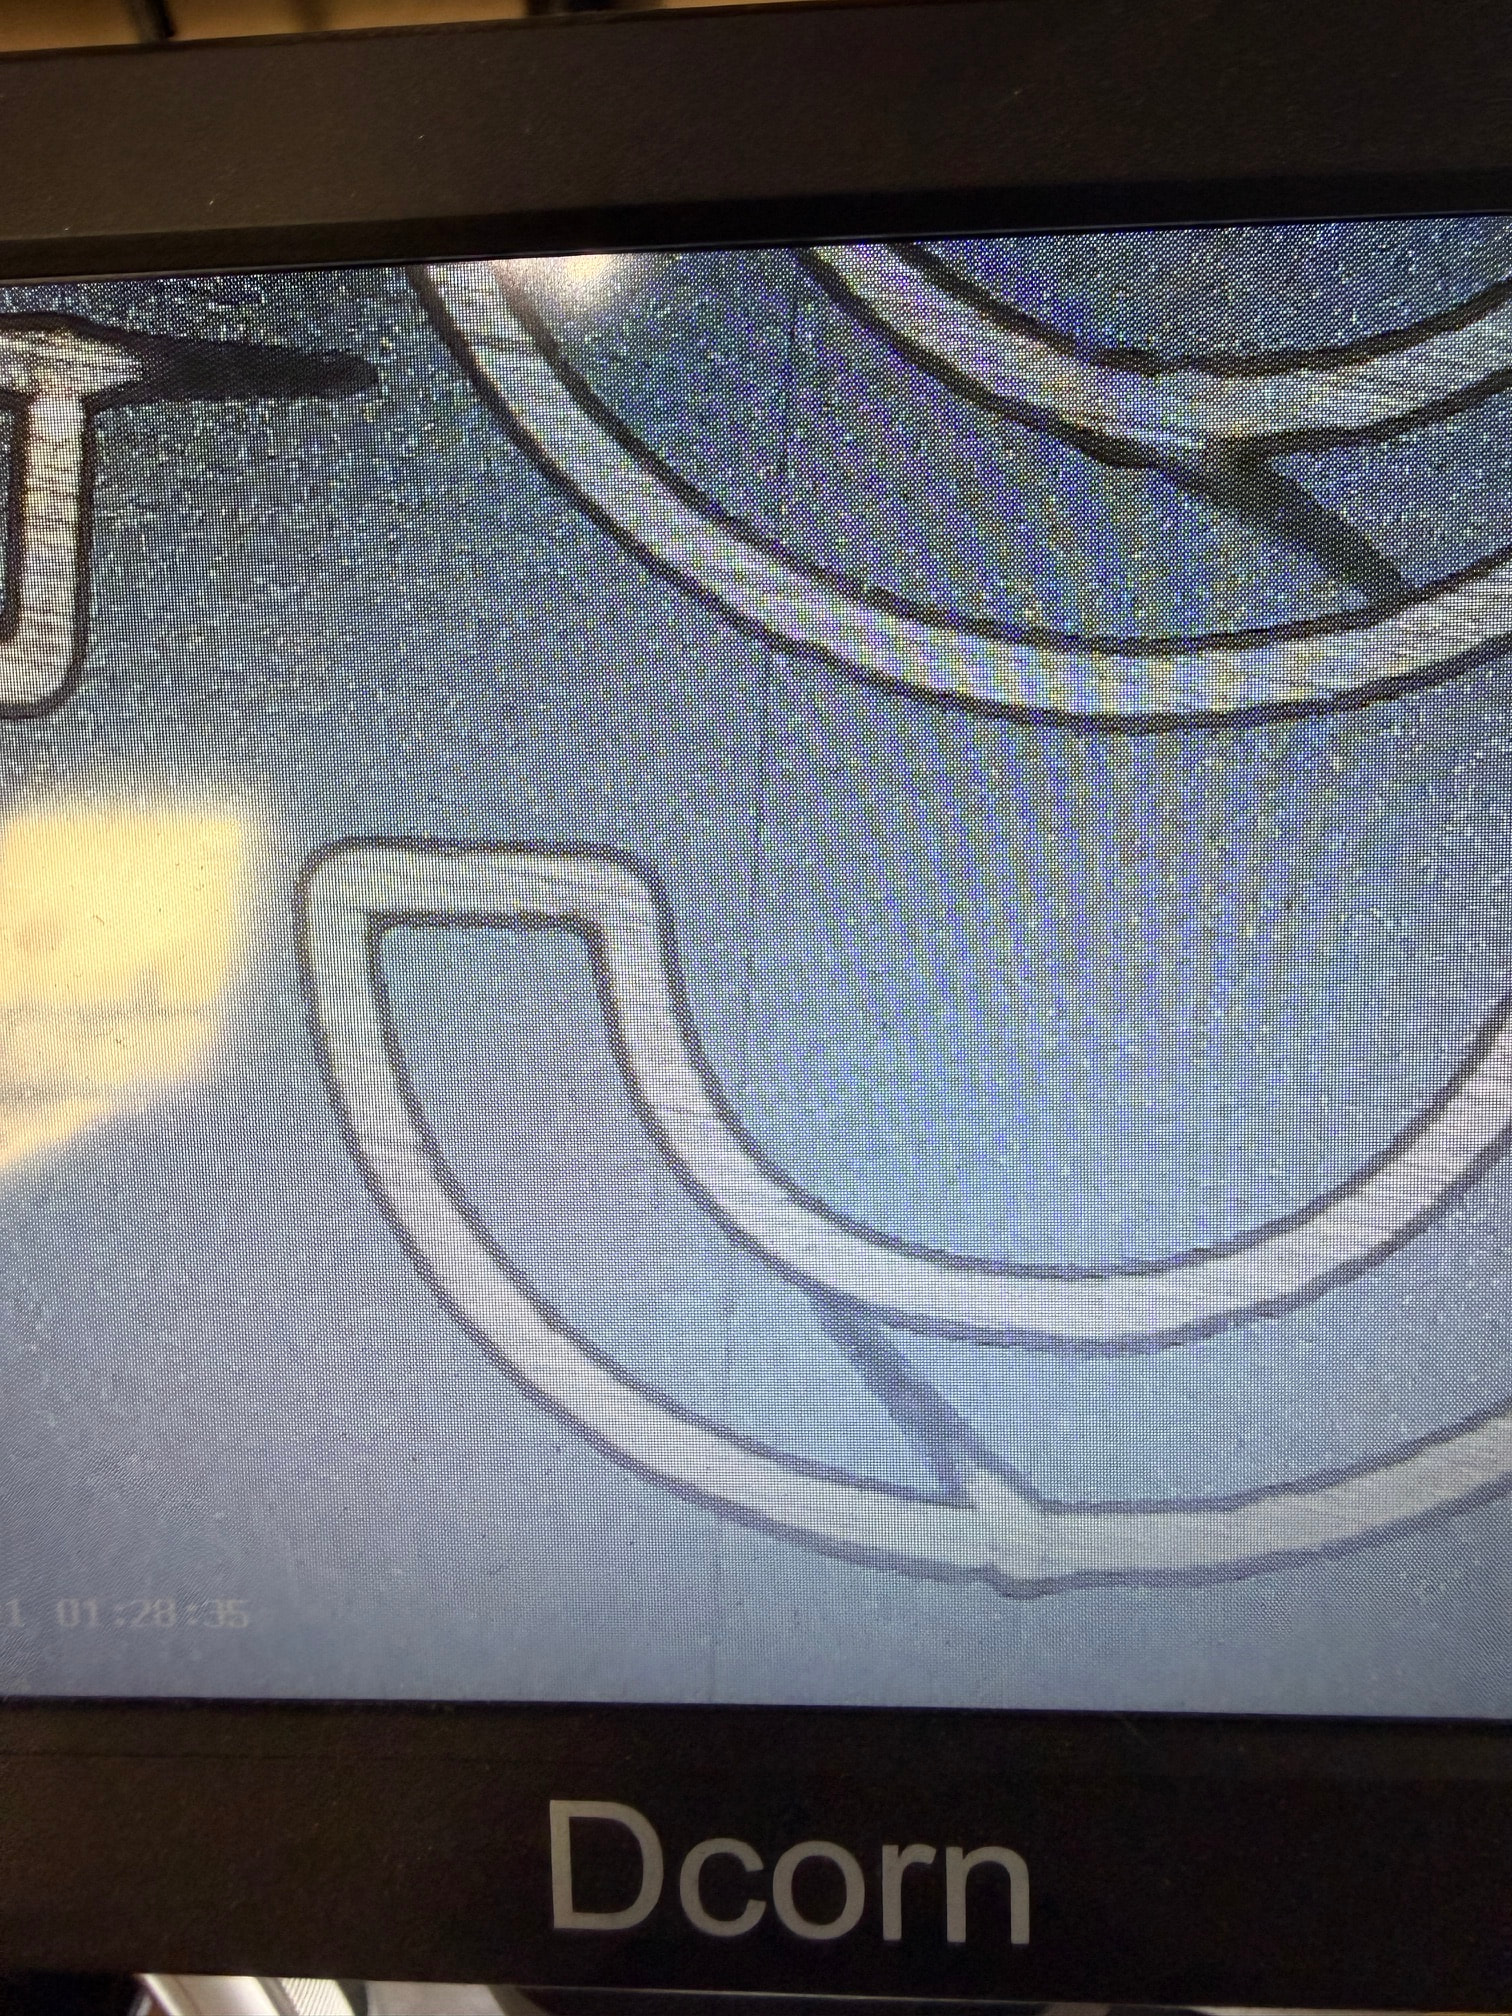
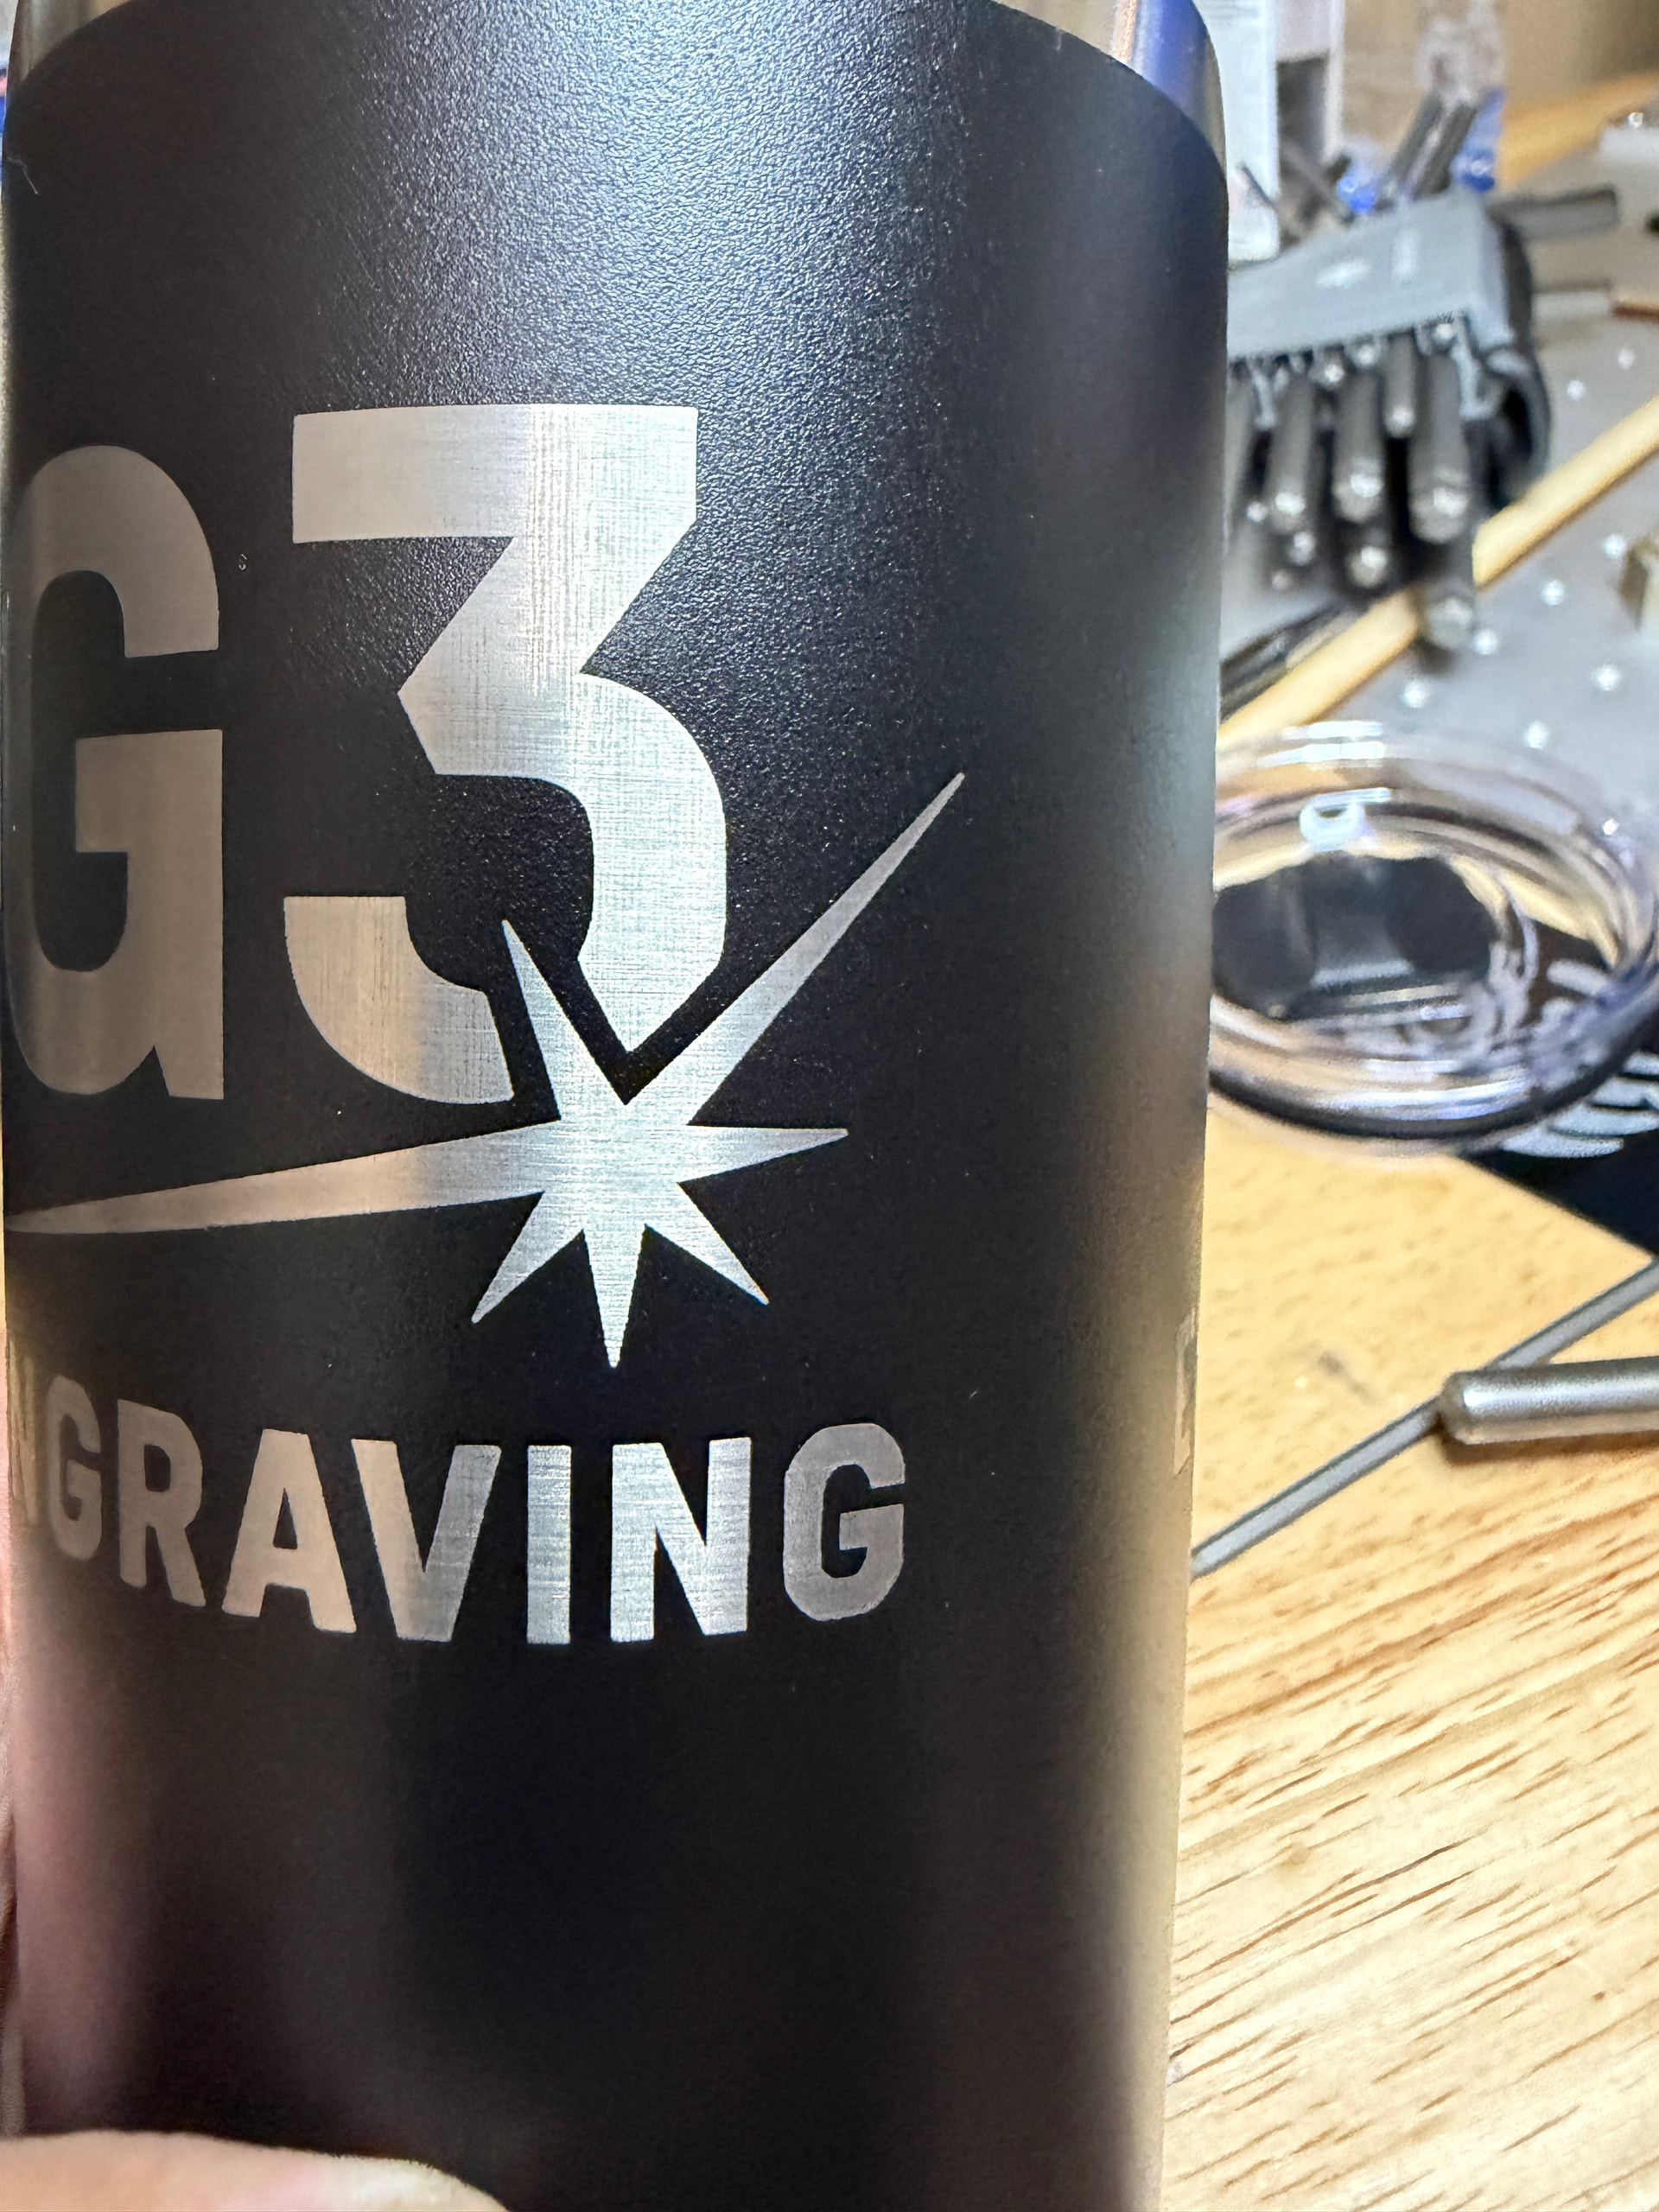
Ya I worked my way down on the Laser on TC like you mentioned. I’m not sure if I posted the original delays and jump settings, but here’s a screenshot of those and a screenshot of the laser settings.
Last night I was having issues with my rotary which had me rethinking my timing settings were still not correct. I think I went down the rabbit hole you were talking about.
I read your comments this morning, went back and retested everything and I think I got my settings looking decent. As always I appreciate your insight. Let me know if these make sense?
I went 450 on the jump to try and speed it up from the 500 before. I tested from the original 10 and 85 (you see the letters look terrible) and I think the 450 is the better looking quality (compared to 200-400) for the fastest time I can get. Any insight or theories, I’m all ears!
Let me know what you think. Now I need to figure out this rotary issue.
I don’t know if it made a difference but the motor says it’s a 4amp so I bumped up my drive amps output, but also slowed the rotary movement way down. I think I’m down to 225 min and max on the rotary settings.
I think it looks pretty good now… I think I’m 15 cups deep