It’s probably an EZCad2 controller, then. Since the delay values are different from the defaults that tells us that the manufacturer’s settings were, in fact, imported.
I would consider asking your manufacturer to send you a config file with more accurate timing values. Which exact machine are you using?
The results with Bi-Directional Scanning disabled are telling.
My suggestions to improve the results without going down the rabbit hole of a full timing calibration:
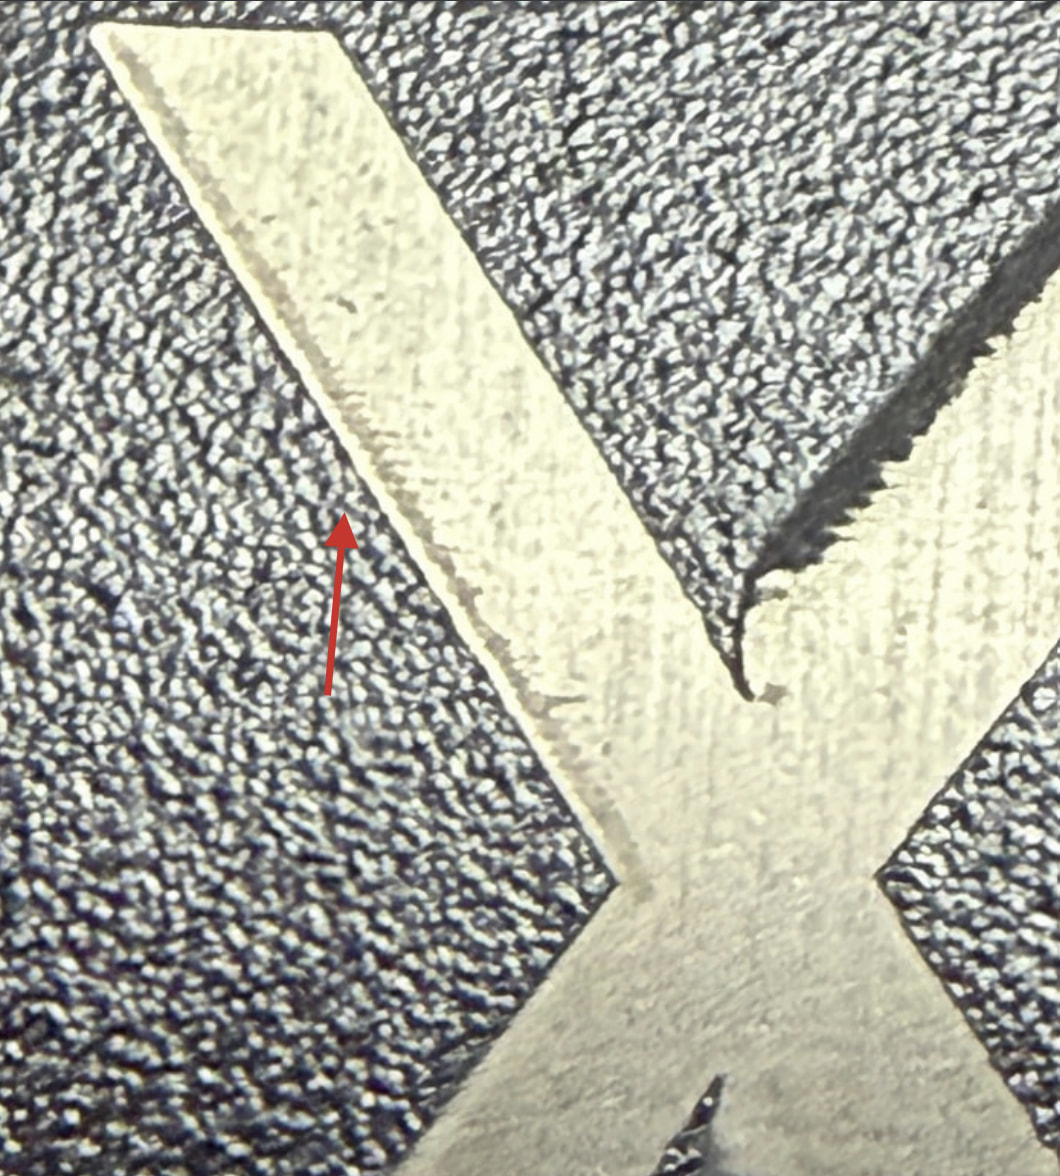
The leftmost side of the leg appears to show an excessive burn-in at the start.
Laser On TC is too early. The Laser On TC is the Delay before turning on the laser once a mark move has started.
Change this to -50 μs. This should make this section cleaner:
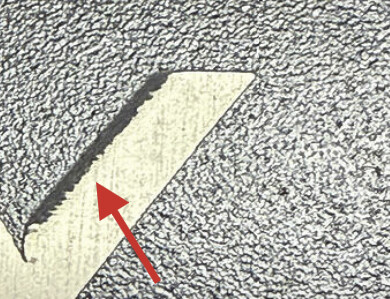
The left side of the next leg also shows the Laser On TC. But since the galvos are already in motion, we see stronger fringes:
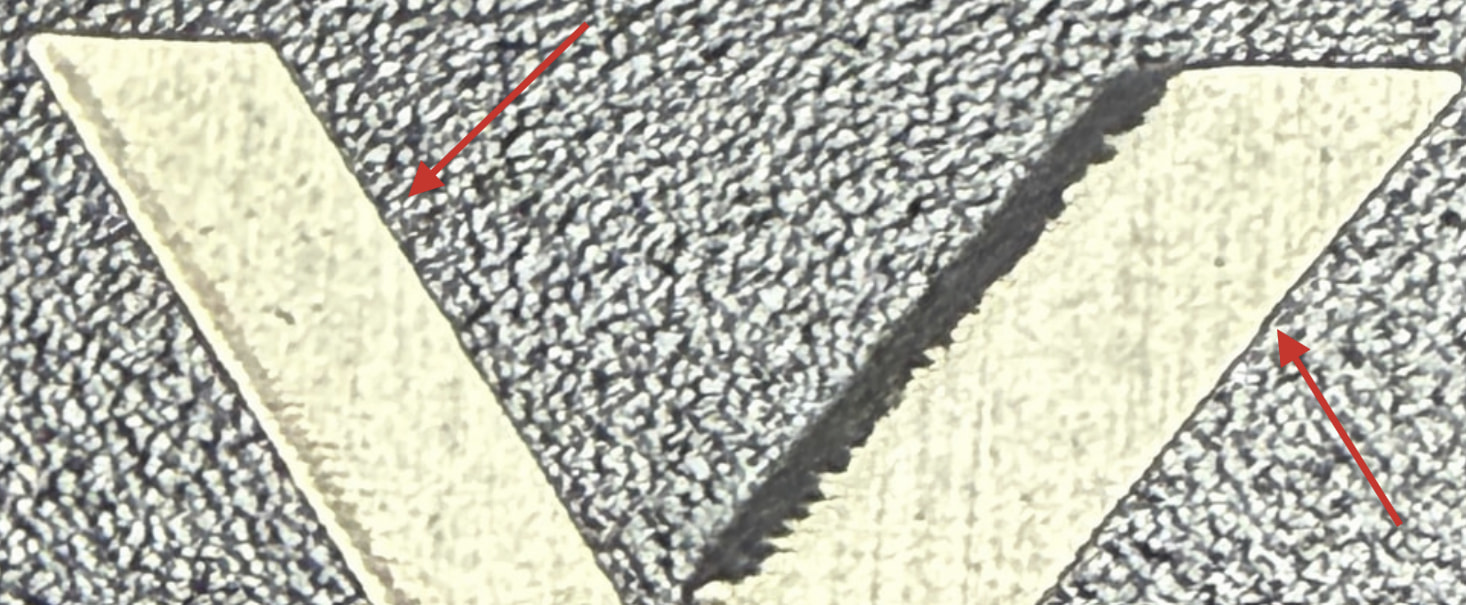
The right sides of both legs look alright to me. The Laser Off TC plays a role here. That’s the Delay before turning off the laser after a mark move.
Finding the perfect Off value is less obvious. You would need to add a sublayer in Line mode to see a “bounding box” of the shape and evaluate how far the laser is supposed to engrave.
Short version: If you can see a burn-in at the end when looking closely, increase the Laser Off TC.
Here’s the thread I’m referencing in my post. I don’t mean to scare you off  We didn’t even start touching on the Jump Delay settings.
LightBurn automatically creates preferences backups that you can restore if the changes make it worse, but I’d recommend duplicating your existing device and making the changes there.
To do this:
Open the “Devices” menu from the Laser window and right-click, duplicate the device.
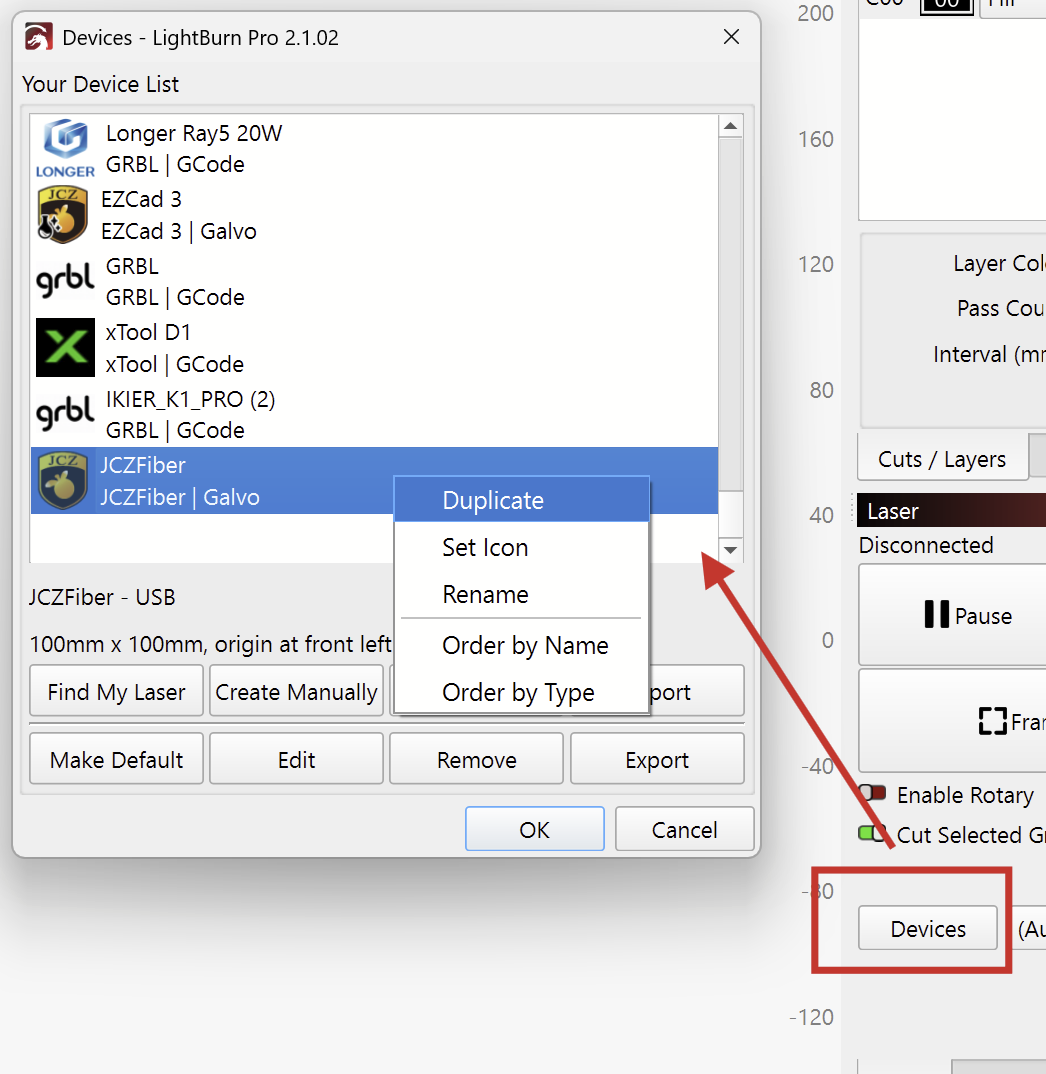
Click Next a couple of times and then Finish.
Then make sure you have the duplicated device selected in the Laser Drop-down here

I’m curious to see your results with the Laser On TC at -50 μs!