Hello all! I have an issue I can’t figure out. I attempted to engrave some small emblems yesterday but they came out TALL (they were suppose to be round). So I ran a tall rectangle (100 x 300mm) in preparation of making a Y-axis calibration and instead of 300mm tall it was 338mm. I was going to make the adjustment in the ‘Calibrate Axis’ panel, but decided to wait overnight before I did anything.
I was running the laser from a desktop pc.with LightBurn via wifi. So today before I made the axis calibration change, I decided to hookup my tablet to see if the file prints the same way from a different pc. I ran the file again from a MS Surface tablet also via wifi, but those images came out fine–both the emblems and the rectangle were the correct sizes. So next I shut everythng down (laser, LightBurn and desktop pc), then rebooted (shut down and restart). After the reboot, I ran the files again on the desktop, but as before they came out too tall.
I compared the Machine Settings from both pc’s and they are identical. So since it runs fine from the tablet, I didn’t think I should run the calibration on the desktop pc that would make changes on the laser controller (I assumed it would then affect my tablet).
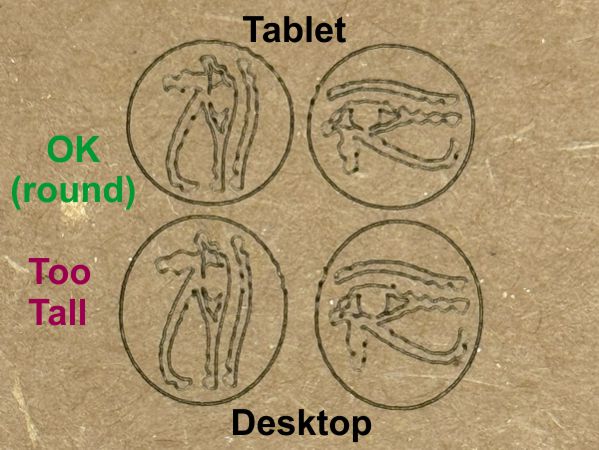
Any suggestions? Attached is a photo of the images. The bottom (oval) images are from the desktop, the top (round) from the tablet. I rotated the image to see if the issue was with the file, but as you can see it prints tall no matter the rotation.
Laser work area change… I recall yesterday when I pulled up an image in lightburn to work on in the OLM3 that for some reason the work area was too small and I had to change it (from 174 x 170 to 400 x 380). That shouldn’t have affected this issue, but thought I’d mention that i made that change just yesterday. BUT I have both USB and Wifi settings for the laser, and I don’t recall which one I changed (the smaller work area size is for my small Aufero AL1). But that’s the only difference I can say that I have/had between the two pc’s.
Squiggly lines… When I was editing the photo I noticed the lines are very squiggly. They’re smooth in the image file. And when I run the inside graphic as a FILL, the squggling is only in the circle at about 11:00 position. The image is pretty small (10mm dia). So iwhen I enlarge it, the squigging is confined to the upper 10-11:00 quadrant on both the circle and the image. The X-axis belt seems tight–no play. I have that issue on both pc’s, so I doublt the two issues are related. So any suggestion for fixing that issue would also be appreciated.
Thanks…JEB