I have an XTool D1, 10 watt, with the rotary.
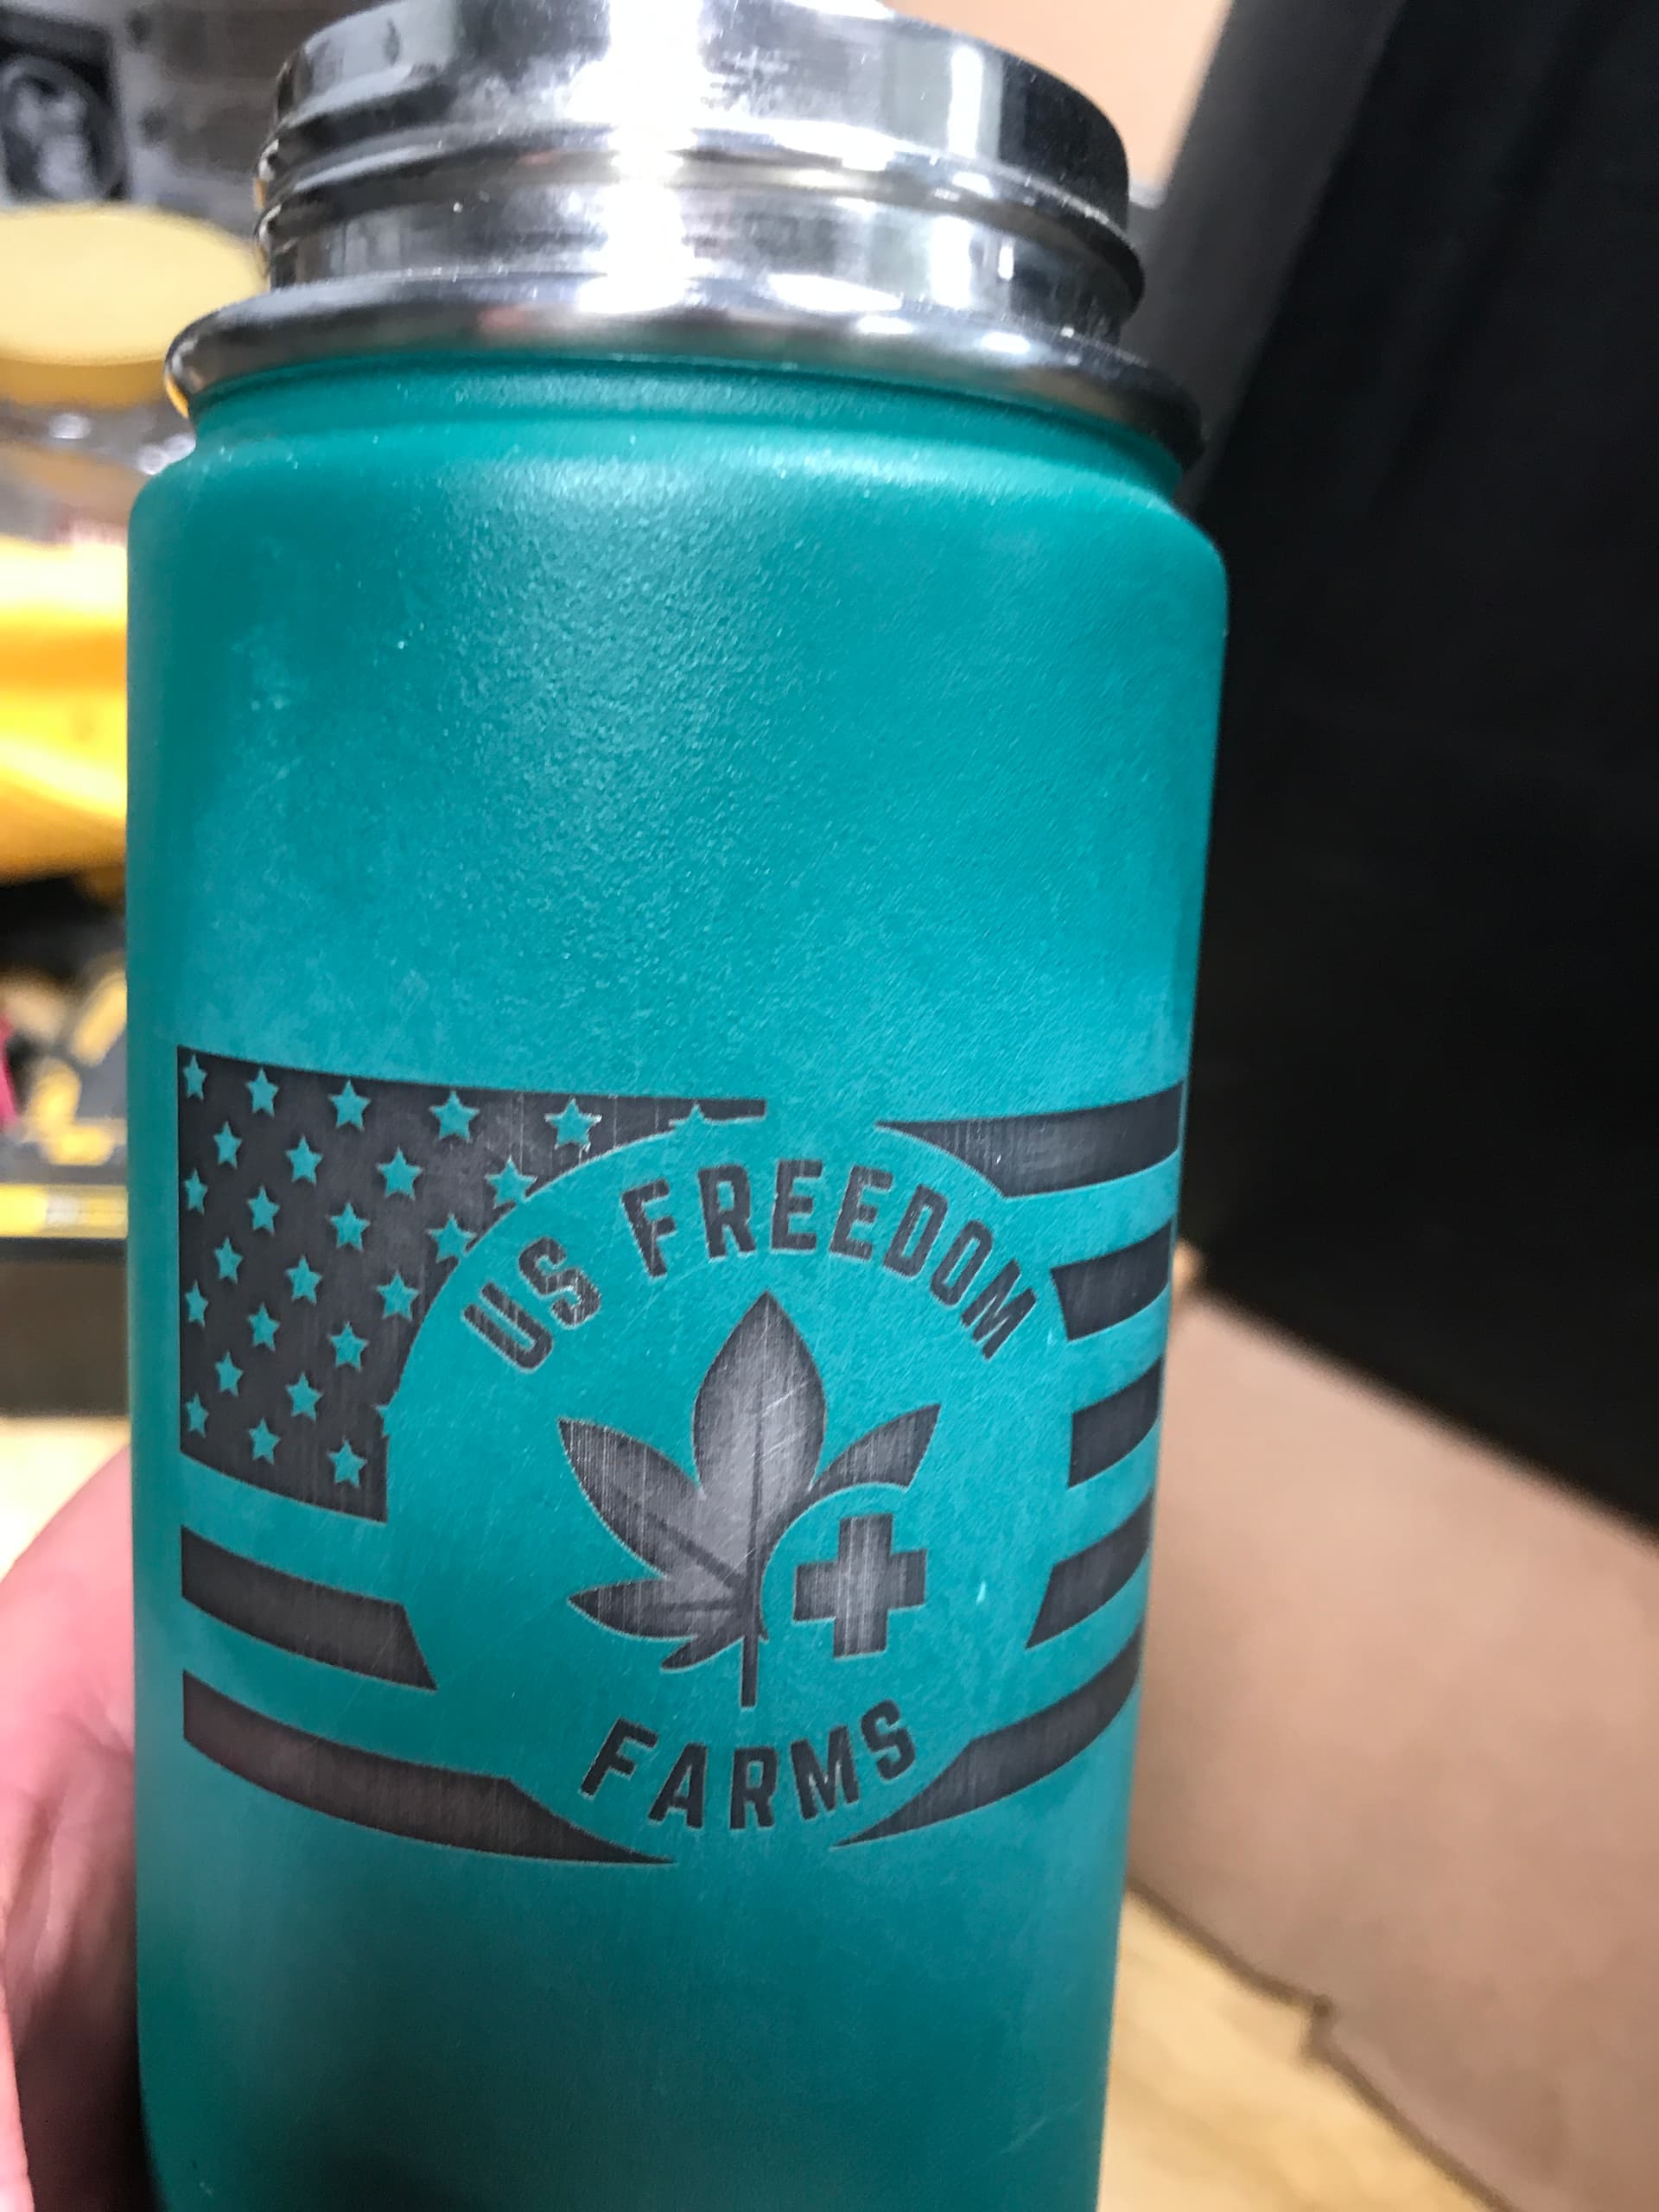
I tried a few tests with a Yeti or RTIC tumbler on the recommended Laserbox settings. 100% power, 70 mm/s.
The results are inconsistent at best. I am never able to clean the engraving fill to where it doesn’t look like the paint was basically burned onto the stainless. Some decent, but some just plain black/burned paint.
Will this unit do coated Yetis or RTICs? If so, is there a better setting/speed?
I don’t have a small led laser, but 70mm/s sounds a bit fast to get that coating off. I’m sure there’s someone around that has done this…
I have a 50watt co2 and I run about 300mm/s at 13% from my materials library settings. My output is about 5.7 watts… I use the ‘cheap’ mugs from the dollar store, so they may have less of a coating… It sounds like you should be able to do it…
Are your optics clean and focused…?
I’d drop the speed by 50% and see if that was an improvement. Sounds like you have a couple of mugs you can try it out with.
Sounds to me it’s not actually burning off the coating, just melting it…
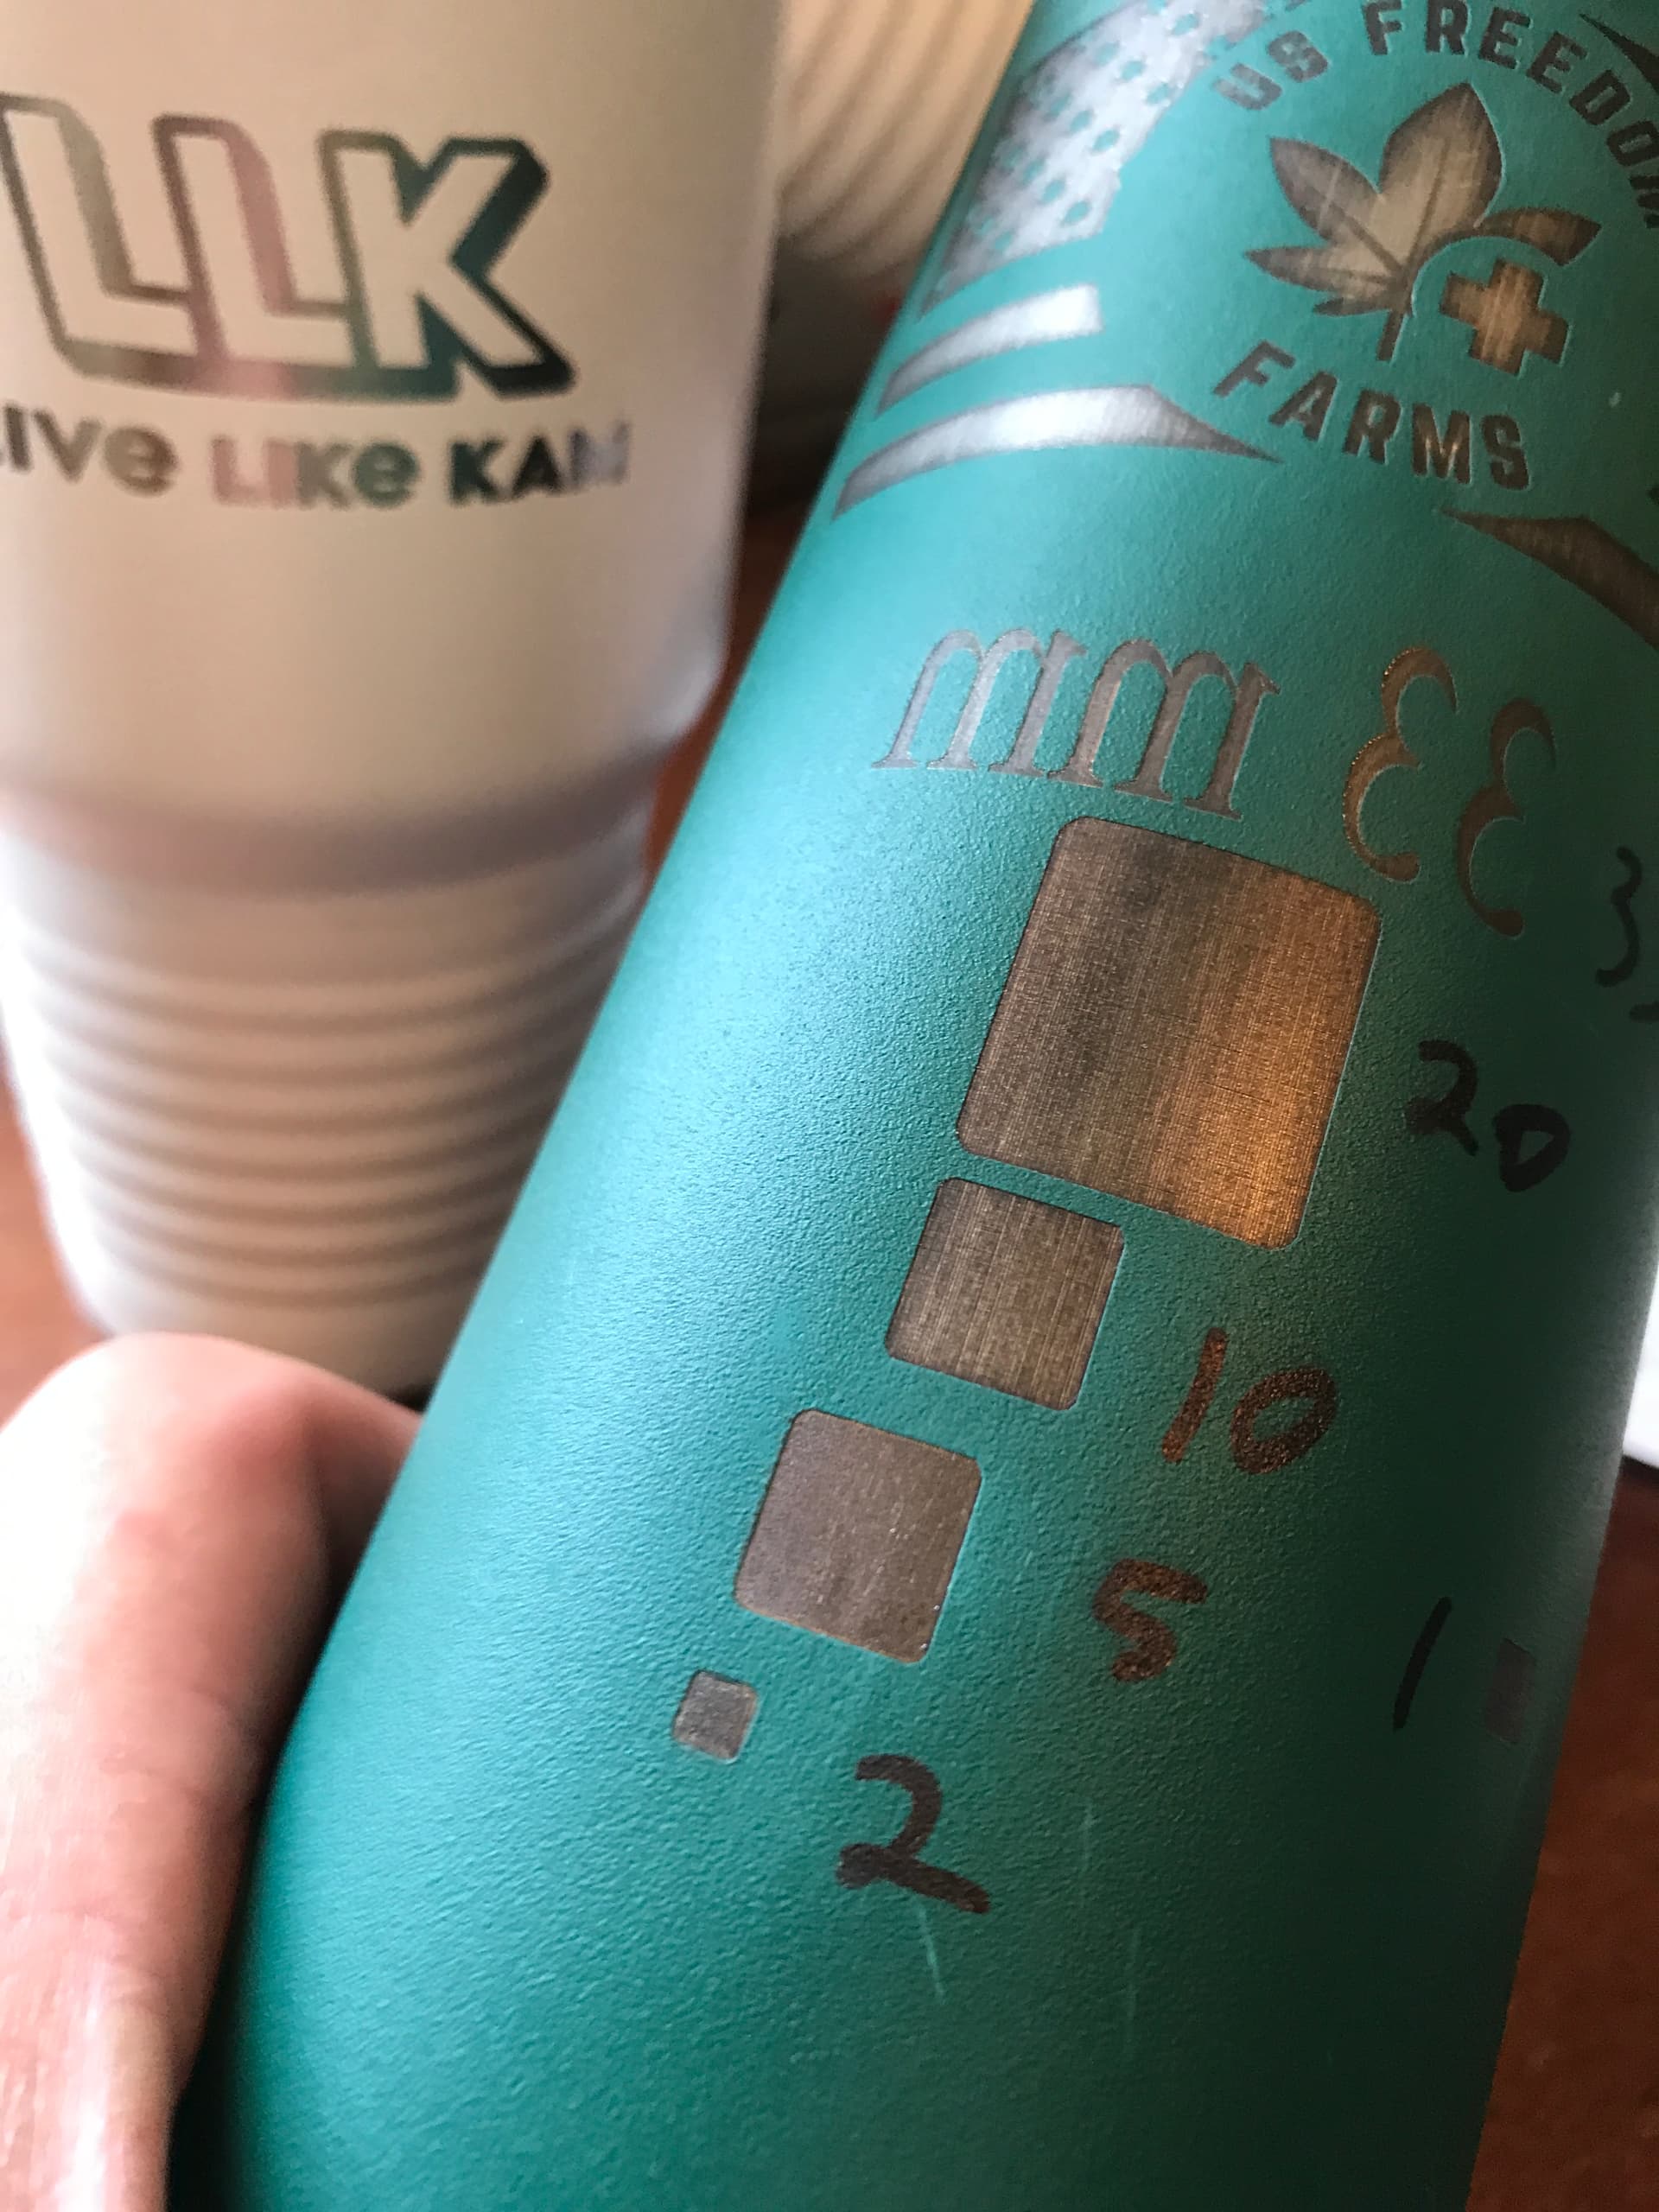
Slowed it down to multiple different speeds. 33, 20, 10, 5, 2, 1 mm/s. Was able to mostly just clean with water but it still looks dark. Not like the white tumbler I bought. Assuming they used. CO2 laser. Stumped.
Go into LaserBurn and set the line interval to .09 or .08. That might help. It will laser the lines closer together and you might get a more consistent result.
Great idea. Thanks! It does look like the lines aren’t close enough. I was also thinking of buffing it with a dremel and the buffer attachment. I couldn’t figure out how to get LightBurn and my Rotary connected last night, so I was using laserbox. Not sure that’s adjustable there, but will try when I get a chance. Just looked at my Lightburn settings on this project (even though I couldn’t get it to work and it was defaulted to .20 interval. Will lower that and figure out how to save it as a setting for rotary tumblers.
@eilerstg Run down to the Dollar Tree ($1.25 store now ) and buy a bottle of " LA’s Totally Awesome All Purpose Concentrated Cleaner" and some Majic Eraser sponges. They are very good at cleaning powder coated tumblers after engraving and shines the stainless nicely.
Hi Tim,
I have a Xtool D1 10W with the RA2 attachment as well. I had the exact problems you were having. After repeatedly cleaning everything in site, I finally wrote to XTool. If you are using Laserbox Basic with the RA2 attachment, make sure you are using version 1.3.0 and also make sure the firmware on D1 is updated to version V40.30.003.01B9. Here’s their exact response:
First confirm the software version used, if it is Laserbox basic V1.2.0, it is recommended to use V40.30.002.01B1 firmware; If it is Laserbox basic V1.3.0, it is recommended to use V40.30.003.01B9 firmware.
Then as you read the XTool site, it says to only use version 1.3 of Laserbox Basic with the RA2 attachment.
I also got rid of the air assist tool for burning tumblers - they seem to engrave down to the metal without it (100% power, 70 mm/sec - the preset for coated metal).
That’s very interesting. Printed out and I will have to try this. So I wonder if I should only use Laserbox for Rotary and not Lightburn.
I thought I saw an article Youtube post for Lightburn that shows how to get the RA2 Rotary connected and working. However, I already have the free Laserbox, so maybe that’s the safest way to go.
Thanks.
I have been using the RA2 pro in light burn and it works just fine, so you shouldn’t need to change just for that reason.
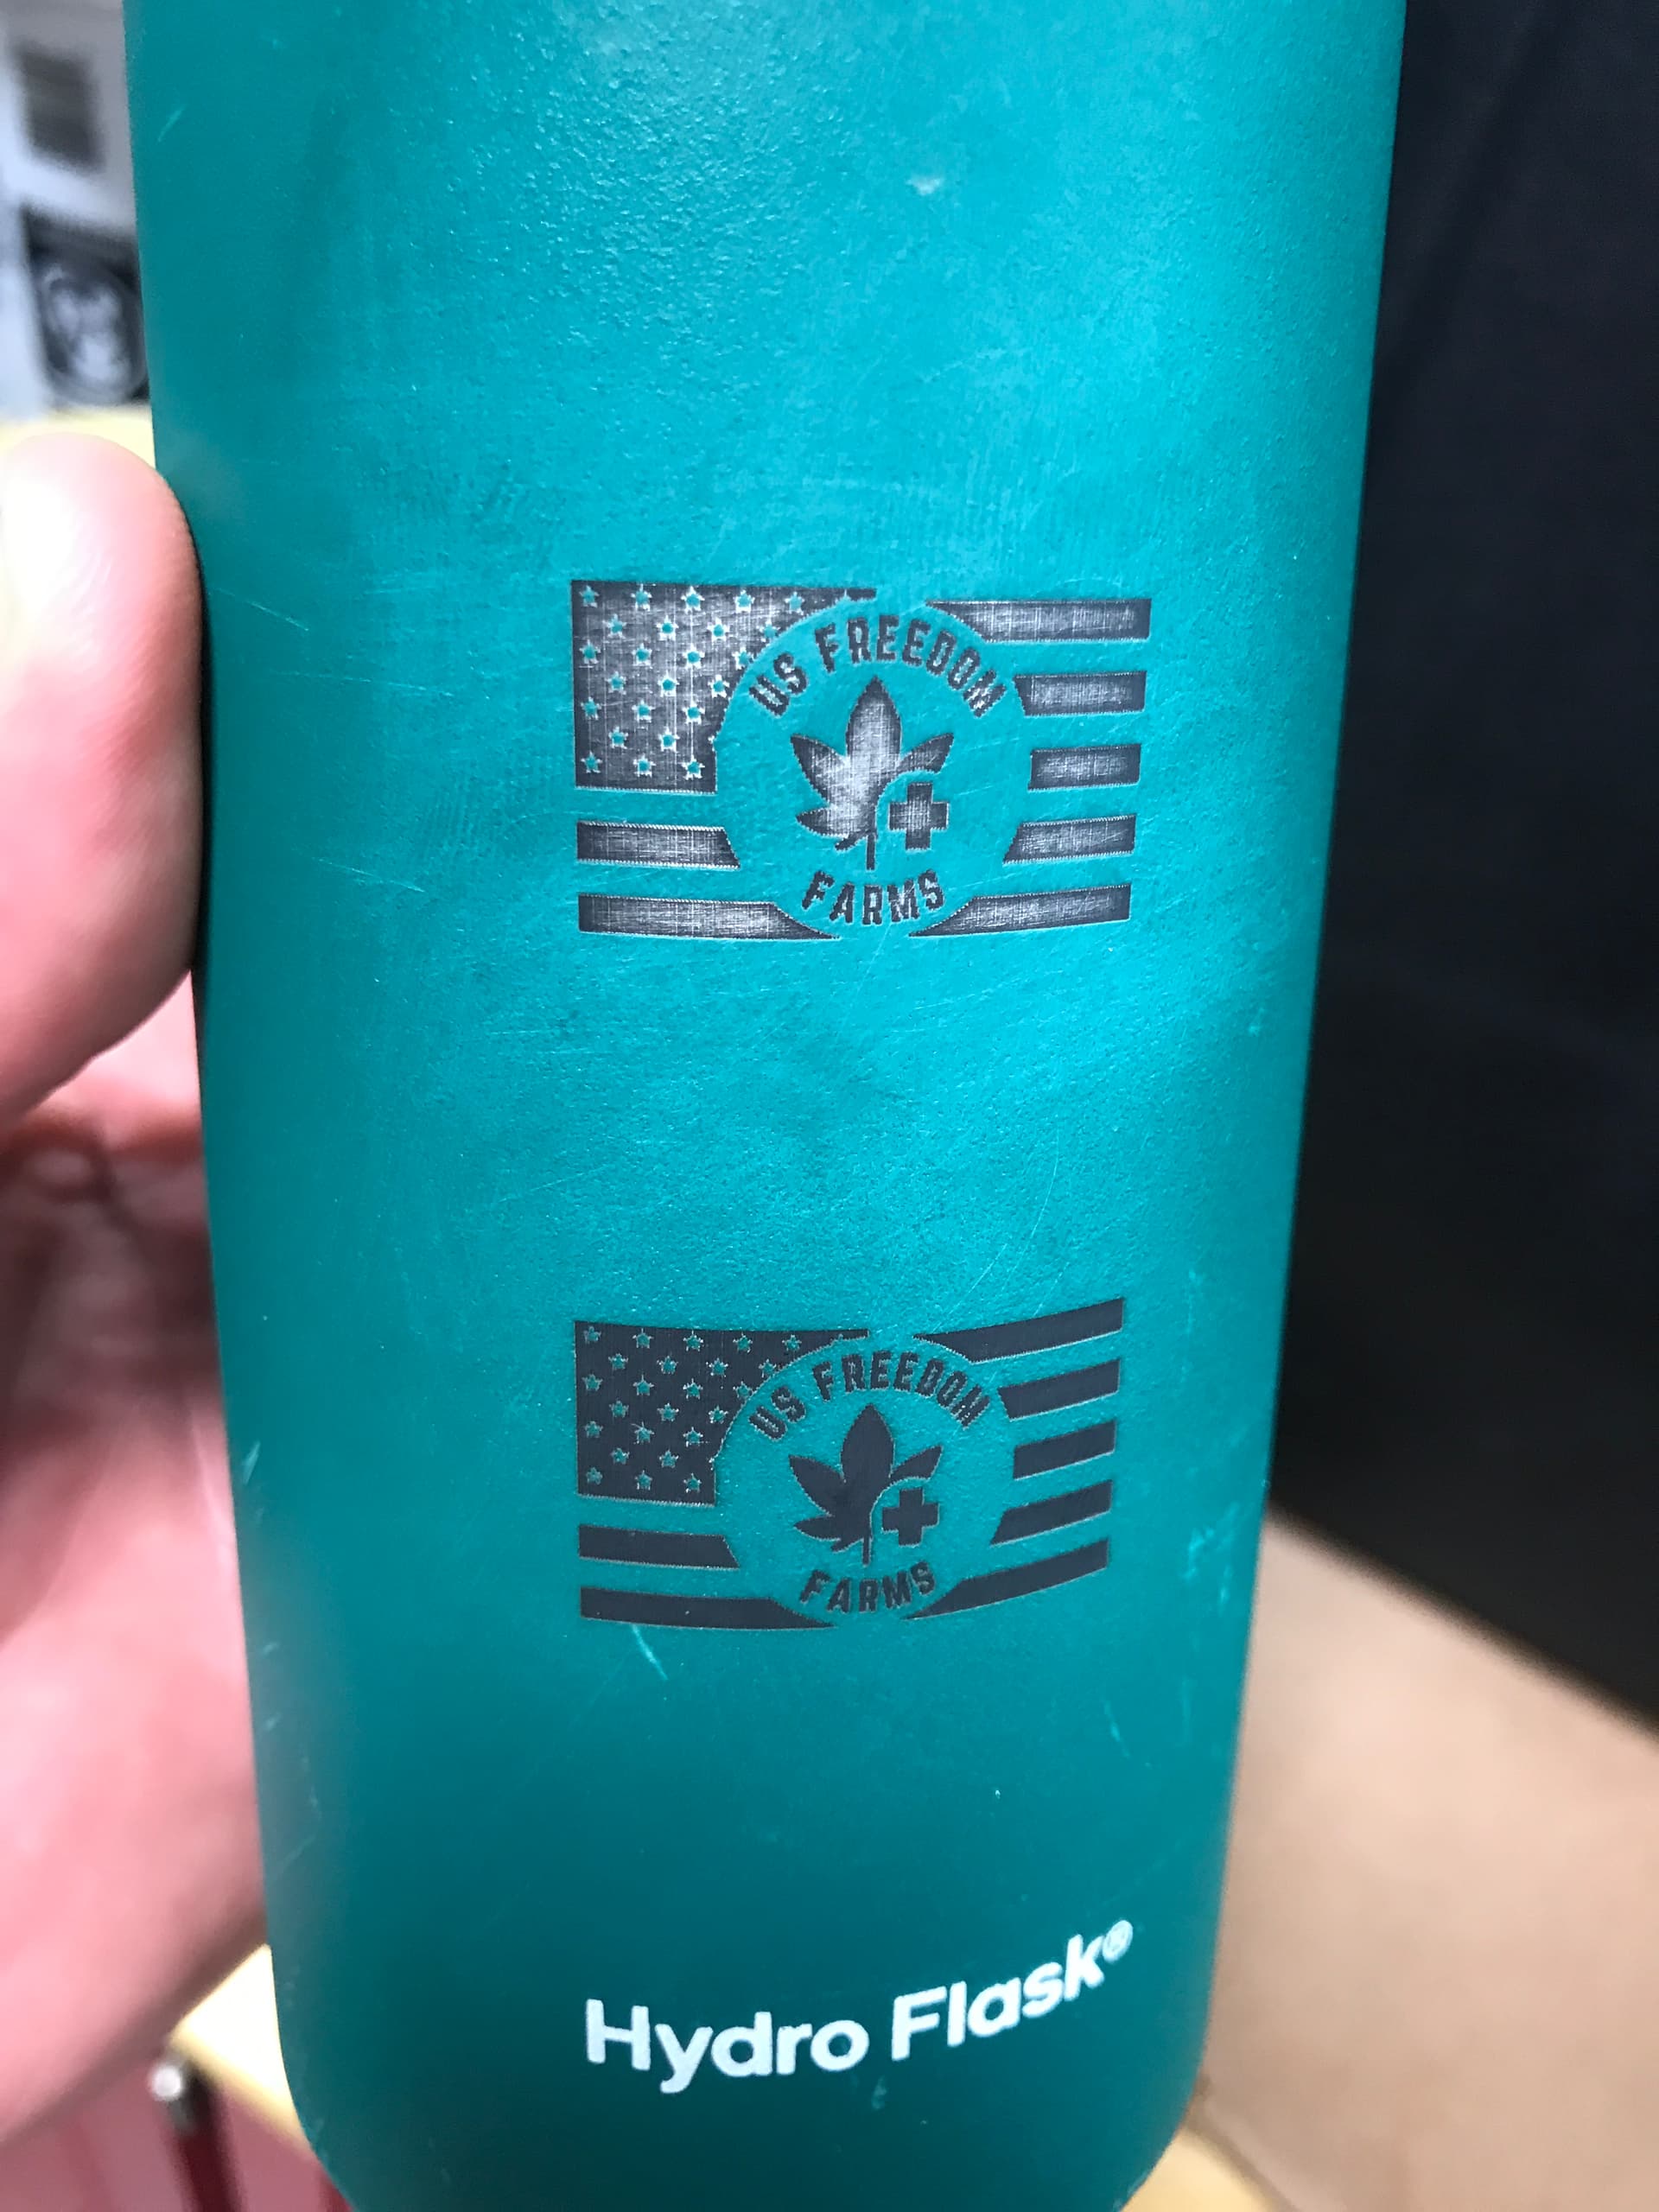
I noticed that your test cup was a hydro flask. I basically went through the same steps as you, and was thrown for a loop on the heavy duty powder coat of the yeti’s, hydro flasks, etc. I just wanted to mention that I have had the exact same experience on my d1 when trying to engrave hydro flask brand items. Yeti’s have worked really well, as long as you slow them down to 50-100 mm / minute. Yep, per minute. So, the question for me is whether this is just a property of the specific brand (hydro flask), how they prep their finishes, etc.
Probably a very good point. As you know every material ‘burns’ or damages differently. Don’t know if it’s prepping or just the material type.
What I find with coatings, from using LBT100 and TiO2 that thickness of the layer is critical to both how much power is needed and what kind of resolution is even possible. Thicker coating less resolution and more power to achieve similar results…
Granted the operation is slightly different, but the material not only has a component of thickness but of it’s evaporation temperature. There are more, but an LED might have a problem with a thicker more temperature conductive coatings… that may require a higher temperature
All of mine has been with a 50 watt co2.
Don’t have a rotary set up for the little guy… yet
I don’t know if this will help you at all – but I have been etching painted/coated tumblers from Hasle Outfitters with my D1 10Watt (non-Pro) and lightburn. I have been using the settings of 20mm/s, 100%, 0.159 Interval, with a 3% Overscan. Once the laser is done, I wipe with a Magic Eraser and Barkeepers friend. I don’t wipe very hard so as to avoid any scuffing of the paint/powder.
I do agree with previous posters though, that different manufacturers use different processes, thicknesses, etc. that will affect the ability of your laser to accurately burn away the coating.
For this reason, I will usually decline to use a customer provided item for engraving/etching. If they provide their own, I have to ask that they provide some extra items with which I can perform testing. They usually end up letting me provide the items to ensure predictable quality.
“$1.25 store now.” I’ve noticed that. Never would have thought that .25 cents would be such a deal breaker. It went from, “Holy crap! This is only a dollar!”, to “A dollar twenty five? Man, inflation is rearing it’s ugly head in the Dollar Tree. I dunno if I can pull the trigger on this pack of paint brushes for that much. Maybe if they were a dollar, I would buy them, but I’m not made of money. They can have that sh*t. Might as well go to a Michael’s and buy some for $8.99.”