I have been inspired by Bulldog’s photo posts and wasted quite a few tiles and wood but I think I’m getting close.
Any suggestions would be greatly appreciated.
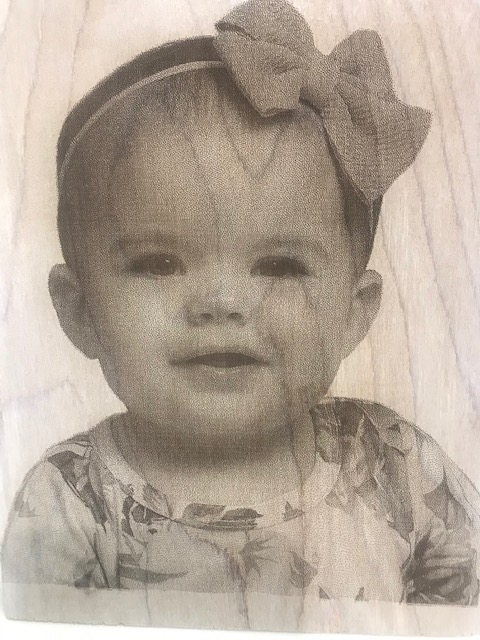
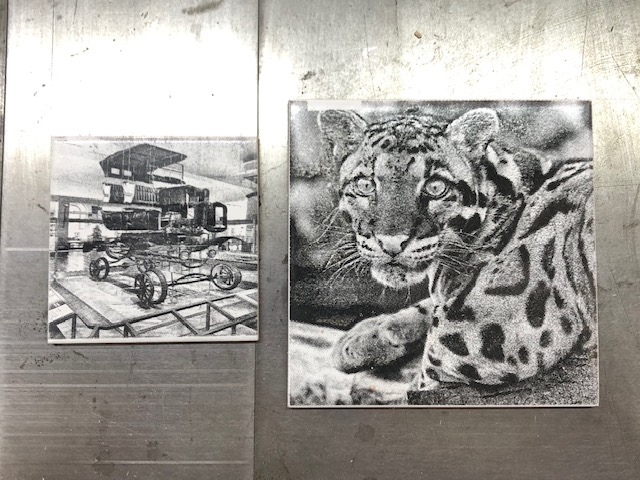
First one on cheap utility plywood slightly white washed.
Background removed with CorelDraw. Resample to 6x7 at 154 dpi.
Color photo imported to LB.
Set to Jarvis at 154 dpi.
40 mm/sec
max power at 9% (2.5 ma) min power 1%
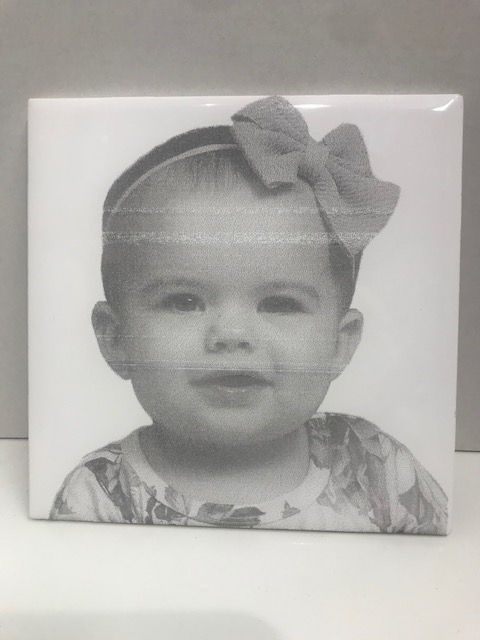
Second one.
White tile sprayed with flat white paint.
Same photo from CorelDraw.
Color photo imported to LB.
Set to Stucki at 154 dpi.
35 mm/second
Max power 12.5% (forgot to look at amp meter for actual power)
Min power 1%.
Will probably have to add air assist and more power on next one as the lines across the lip and forehead area were caused by pieces of burning paint balling on the end of the nozzle. Maybe switching from 1.5" lens to 2" lens might also be the answer but at the sacrifice of a larger dot.
Looking pretty good! I’ve also been doing tiles on a CO2 and our settings are pretty close to the same. I’m going a tad bit faster though, around 45mm/sec. Air assist seems to lighten the darks a bit, but I’ve got my regulator turned down to where I can “just” barely feel positive pressure at the nozzle, maybe that’ll work for you too. My reason for using any at all is just to keep my lens clear of smoke (albeit these don’t smoke much). I use a 50.8 (2”) focal length lens, curious as to why that would make my dot bigger assuming proper focus?
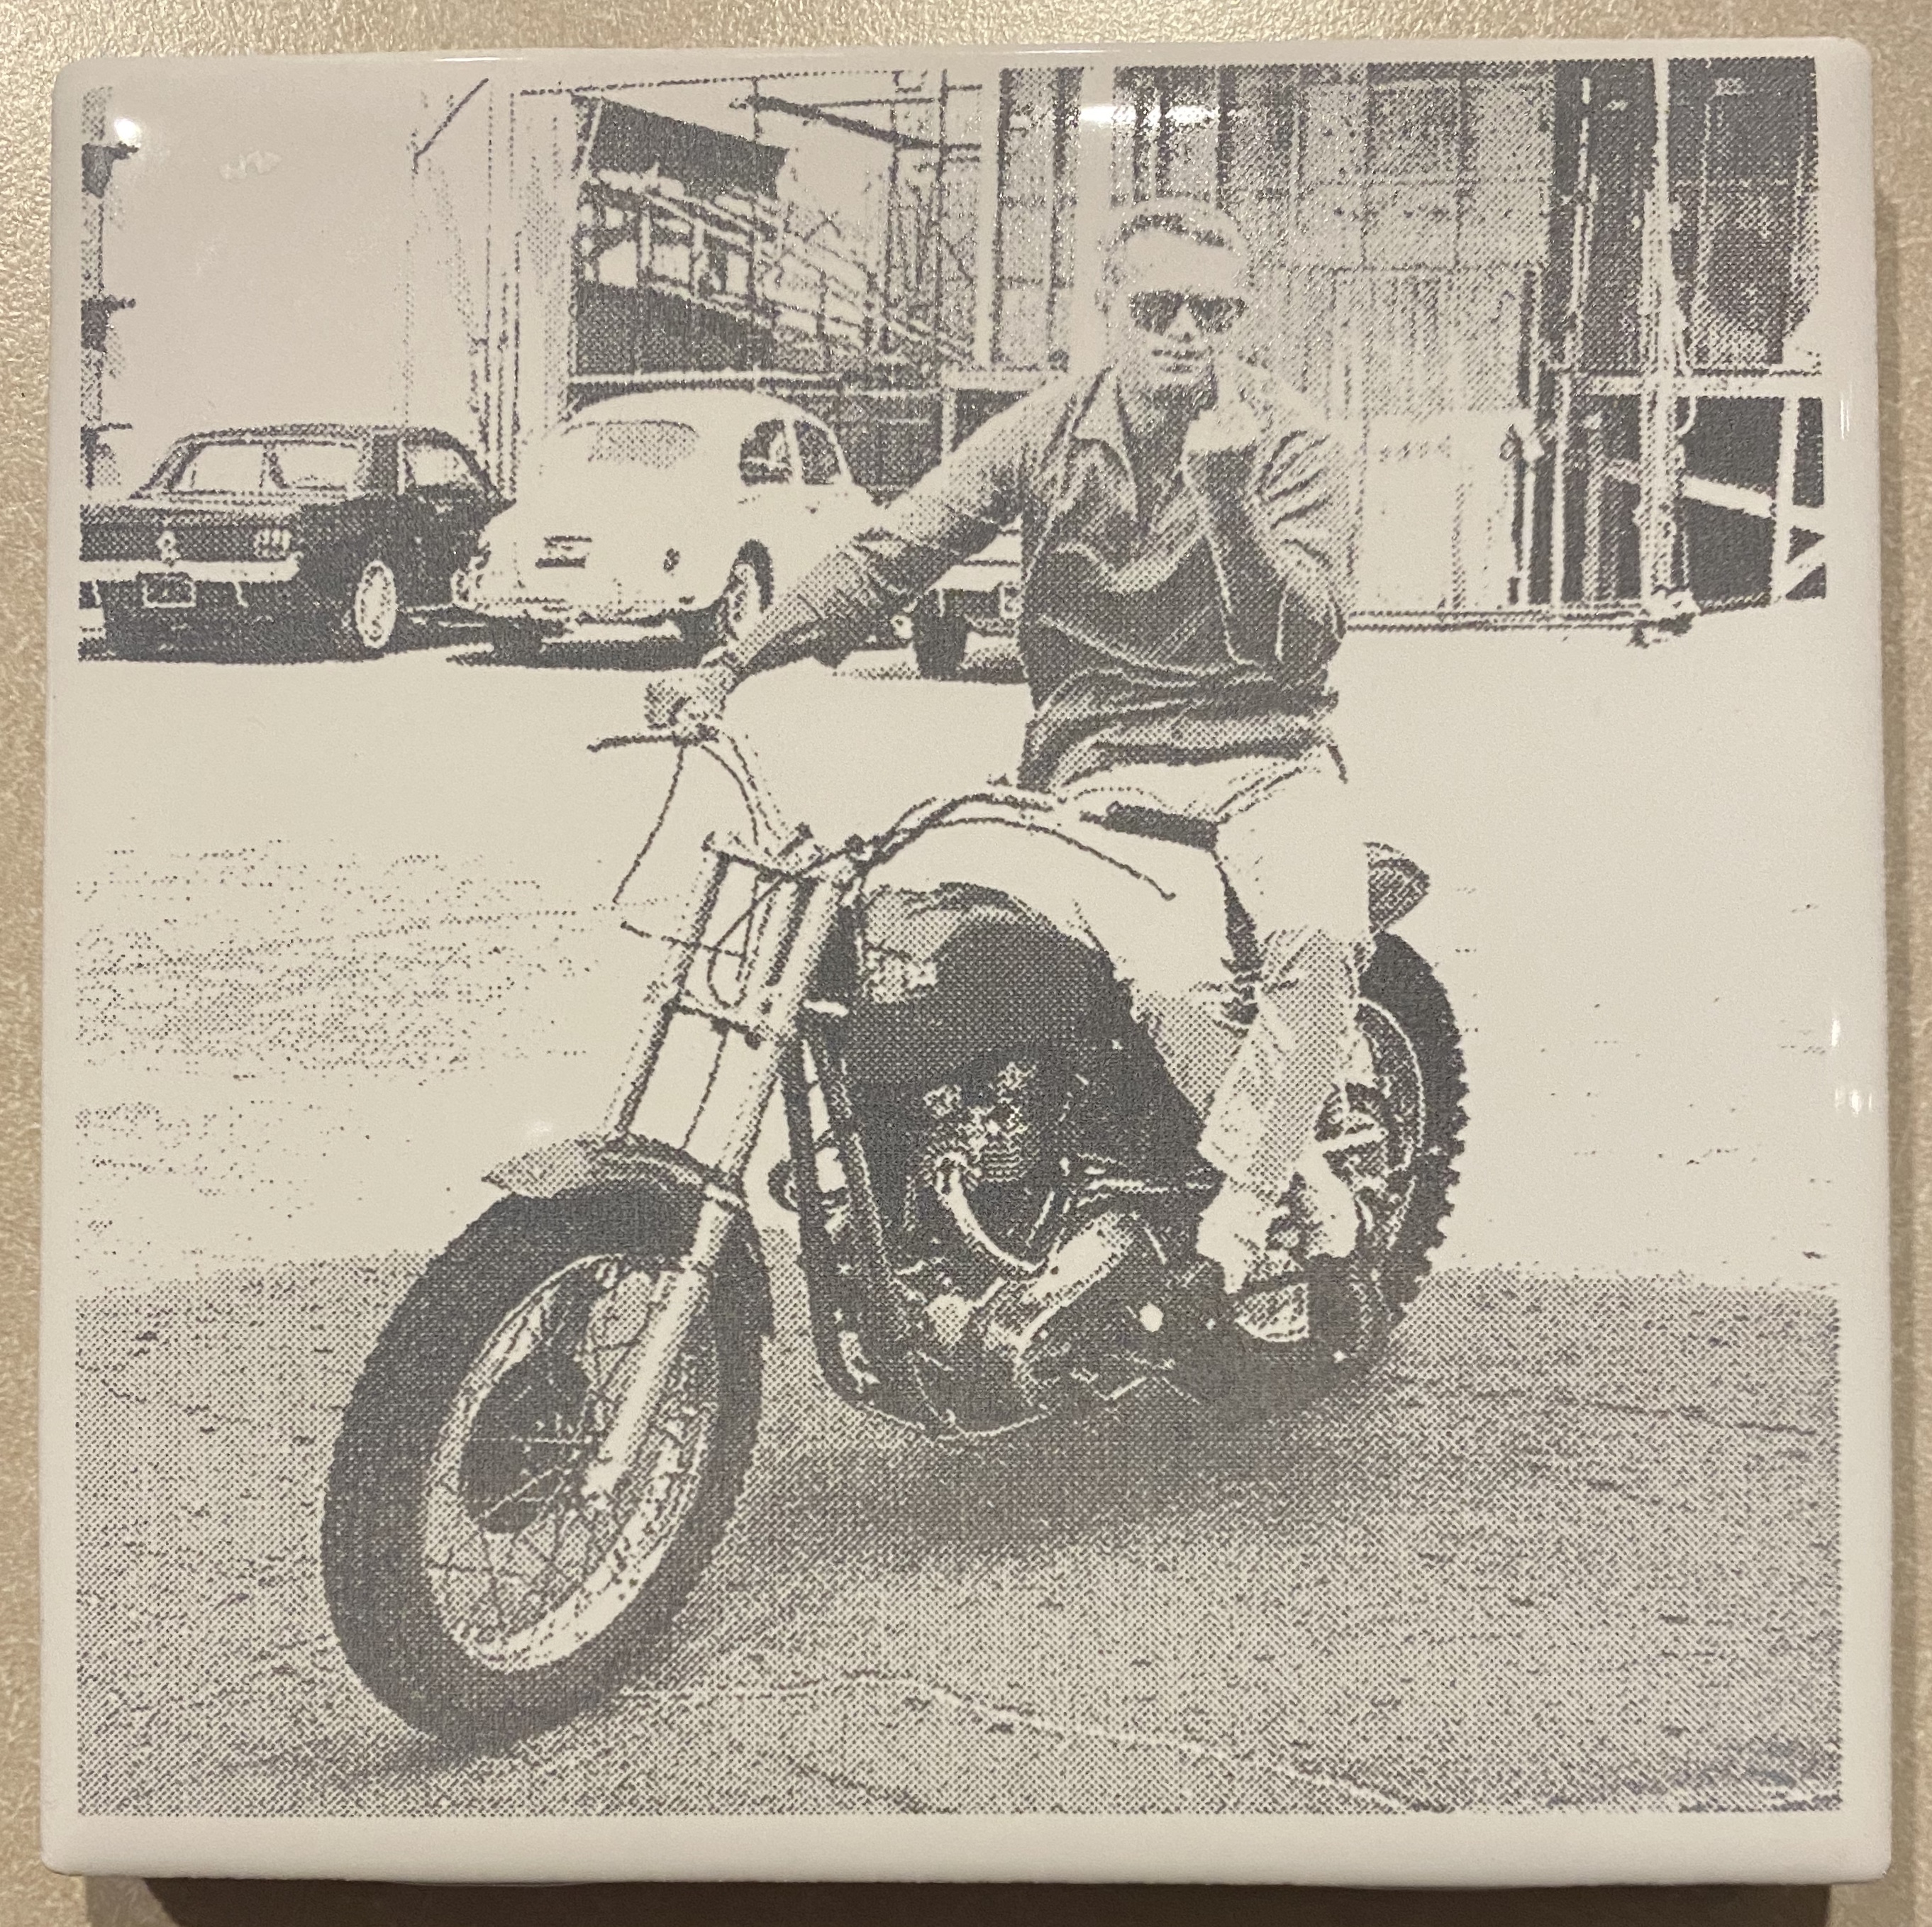
I have probably burned about 50 pictures now and although they have been getting better I still was not satisfied.
Today I rechecked my focus and alignment of the laser even though I just did this about 6 weeks ago. Bingo, I had a very slight tail at one side of my dot.
After fixing that, I did a focus test using the 2" lens and the 1.5" lens.
The 1.5" lens is only 1/4" above the material surface and gives a smaller focused dot on the material than the 2".
That being said, I am going to switch back to the 2" for my next couple of test because the beam adjustments should make a considerable difference and enhance the photos I have done in the past. Couple folks told me the ones I did before today were absolutely amazing using halftone but I know I can do better.
They look pretty good…On tiles at least with my diode Air Assist reduced the blacks…and resulted in a light grey…also on tiles only one light coat of flat white
bonjour à tous
j 'ai un laser co2 de 80 watts pour graver les carreaux blanc je regle ma machine en niveau de gris
vitesse 80mm/s
puissance maxi 13%
puissance min 9%
intervalles de ligne 0.05
le resultat est asser bon avec le logiciel RDwork
attention avec LBurn les parametres sont pas les mêmes
 will be trying wood next