I need to Master the technique of engraving pictures on wood and anodized metal. (I think I’m ok on leather tests I’ve been doing… for now)
So most especially my photo engraving is NOT coming along very well (I have used posted charts, posted speeds, power settings, from the forum, have tried Dither, Jarvis and Stuki filters, changed DPI trying various…no matter what I try is either too light, too dark, too deep a burn, and does not pass the test of good crisp clarity. I test and test and test on different settings and I just can’t dial it in, even writing down the settings I have tried and trying to work from that point…Hugely frustrating.
On a positive note, my font (I think) is figured out pretty good for wood. However, that I found that that setting doesn’t work for pictures. (Bummer)
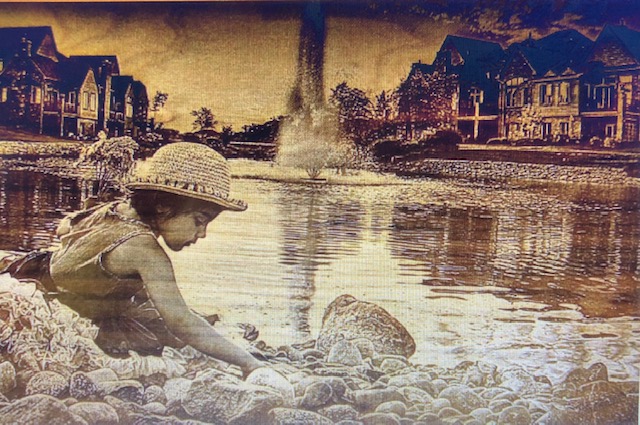
This is a photo engrave 1 Touch Software advertises… I would love to have the clarity of this… (btw… I have their software, and it’s definitely not 1 Touch if you don’t have their machine.
Anything you can suggest to help would be warmly appreciated.
Mira 7 Pro - 60 Watt
You will need a jewelers loupe to look at the laser engraving of the file
I’ve added a file for you to try to print and an out put to show what it should look like.
If the dots are to close then you will get the wood smoke which causes a blur in your final image out put. I’ve noticed that your tests showcase 300+ dpi that may be to many dots per inch and that’s why you are getting the “muddy” look on your images.
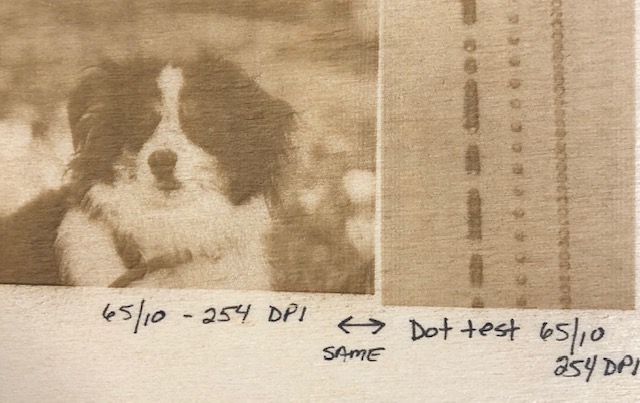
Try printing the test file above and see if you see dot separation . Print that at 254 dpi
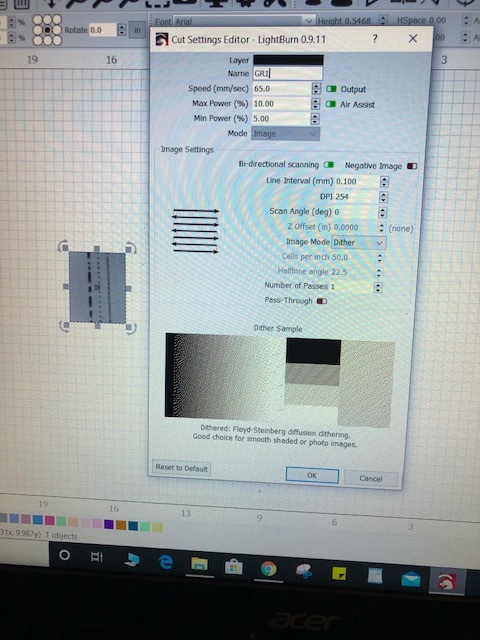
And I hate to contradict @Sasquatch here, but don’t print that at 254 dpi. Use the passthrough which will grey out being able to select the dpi. If you are able to select a dpi then lightburn is going to re-dither that file.
Hey guys - first and foremost thanks for all the replies… I’ve only had the laser less than a week and I’m super green, so your patience and help is very appreciated.
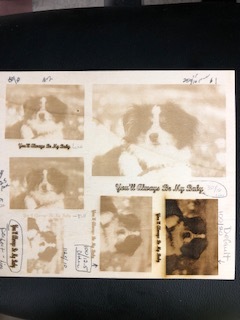
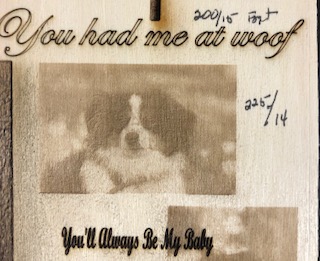
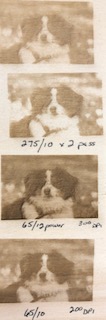
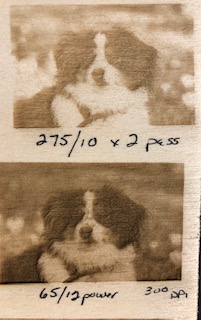
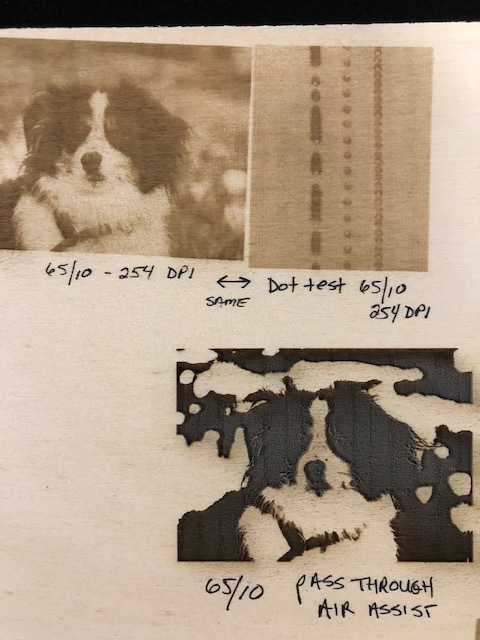
First up Sasquatch - photo’s attached at suggested settings you didn’t mention speed and power so I left them were they were for now…if I’m reading you right…I think the dot test came out OK? This was 65/10 - 254 DPI - air assist. (I’m guessing my speed needs to be adjusted up… I’ve tried various levels from 100 up.
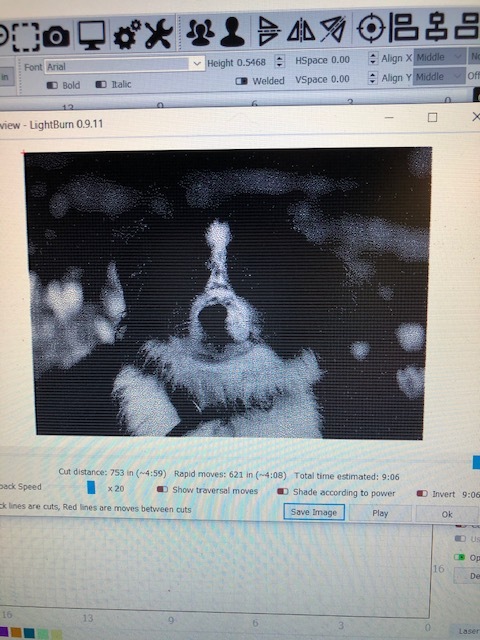
Secondly… just a question… does the PREVIEW act in a guide in anyway to tell you if you’re on the right track? I look at my preview… and it never seems to match which is engraved???
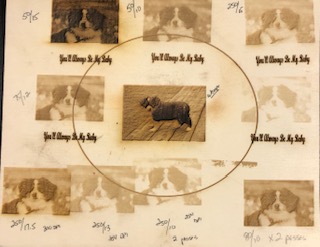
You never said what focal length lens you’re using but that dot test that you posted says a lot. Try running that dot test again at 45mm/s and 12% power and post it.
LOL… holy smokers. Well definition is definitely there… I had no idea the pass through would make so much difference. Whoa … speed is definitely an issue…
And what are the dimensions of the picture of the dog your burning? Like actual dimensions on the piece of wood. And if you have Photoshop, open your original photo and go to Image>Image Size and tell me the dimensions and resolution reported there.
If you are not using passthrough and have a dither option selected, preview will show you what the dithering pattern looks like if you zoom in REAL close. But it doesn’t tell you much about the what ouput is going to look like. It’s very dependent on speed, power, lens, and material.
Something else I just noticed, you didn’t run the actual dot test file, you ran the PICTURE of someone else’s dot test. Look below the pic of the dot test sasquatch posted, you’ll see a VERY tiny little image of the actual dot test file.
Yep, saw that you posted it but she didn’t see it. She didn’t try burning the actual dot test file, she tried burning the PICTURE of the dot test file. Look closely at what she posted an you can even see the circle you made on the image she burned.