Yup, I now see it, I was just replying to your post in my feed, sorry for the confusion.
Cheers
Sasquatch
Yup, I now see it, I was just replying to your post in my feed, sorry for the confusion.
Cheers
Sasquatch
@CustomCut, also post the original picture here.
Depending on the wood you’re using, it can be a challenge to get good contrast without burning deeply. A trick someone posted on Facebook is taking a bit of baking soda dissolved in water and spraying it onto the wood. Let that dry and then try your engraving again (with lower power than usual). The baking soda reacts with heat and gives a much darker burn.
This is an example done with a 60w laser, and the settings are included:
Sorry for the trouble… was having trouble with size… first few tests couldn’t even see them… hope I did right and sorry for the confusion on MY PART. I hope I performed the dot test right this time…
I tried the soda… it definitely makes the wood darker
The objective of that test is to keep going smaller and smaller until the first line of dots just bleeds together into a line. Image engraving is pretty fussy to get right, so don’t be intimidated by it - it usually takes a good bit of trial and error to find settings that work for you.
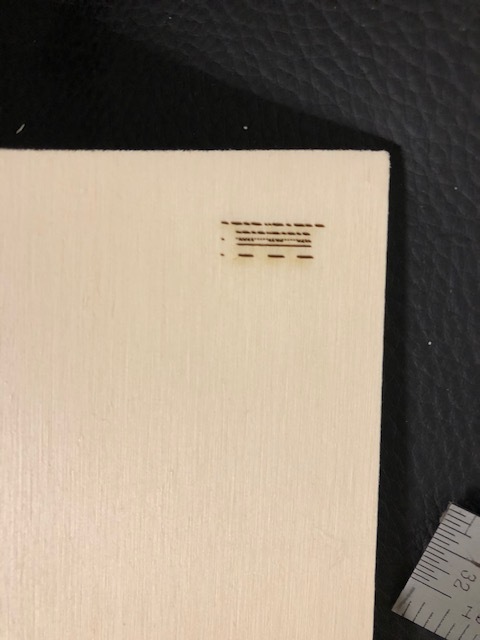
How big does that dot test measure on the piece of wood? In other words how long is it? The reason I ask is that I’m afraid you imported the dot test image into lightburn then resized it. Don’t resize it. It needs to be imported and printed at its native size. If you’re barely able to find it on the screen and can hardly see it on the wood, then you’re doing it right. On the wood it should be about 3/8" long.
That file is specifically sized so that each of the individual pixels/dots is .1mm. If you resize it then it defeats the purpose of running it in the first place. That bottom line of the file is a .1mm black pixel followed by a .1mm white pixel, etc.
oh crap… I did it wrong…thank you for the clarification… I’m sorry … will repeat.
Go to LB, choose File>New. Then File>Import and bring in that dot test. But don’t resize it at all. Just run it but make sure pass through is turned on.
The image below is on an 8 1/2 x 11 piece of card stock. Ignore the dog. Look in the upper left hand corner above the dog’s left ear and you’ll see three of the dot test images. That’s about the size they ought to be.
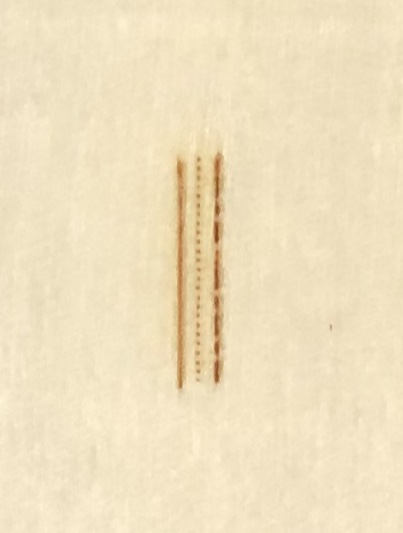
Thinking maybe you have two images on top of each other??? There should only be 3 lines.
So let me explain why all this matters and where you should be headed with this.
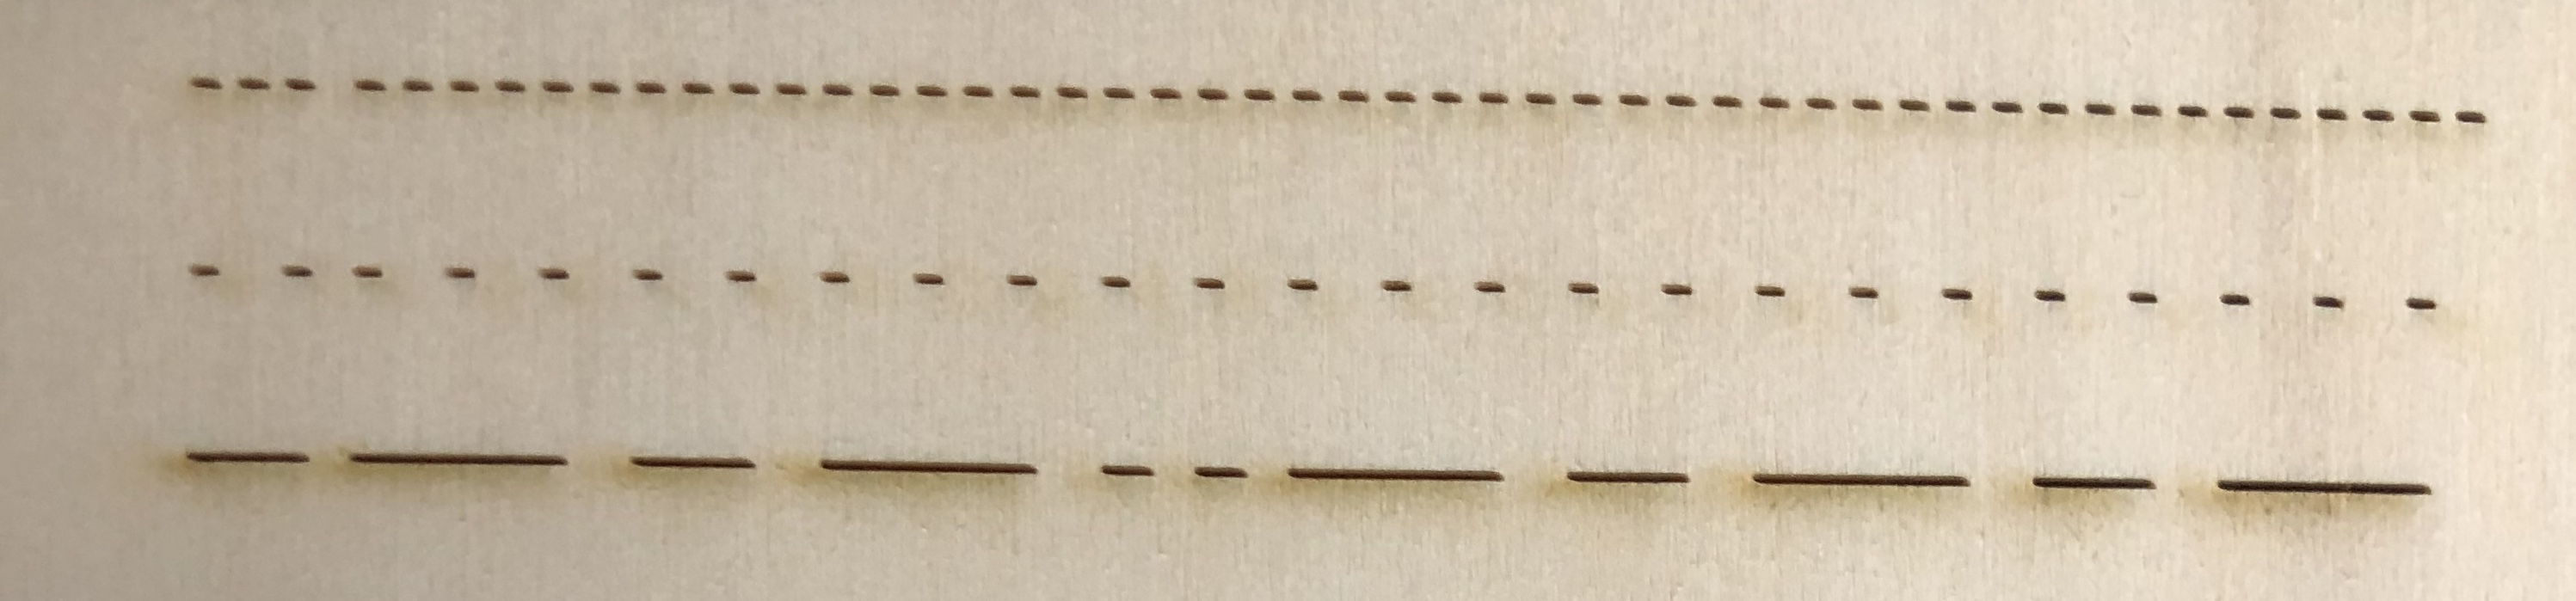
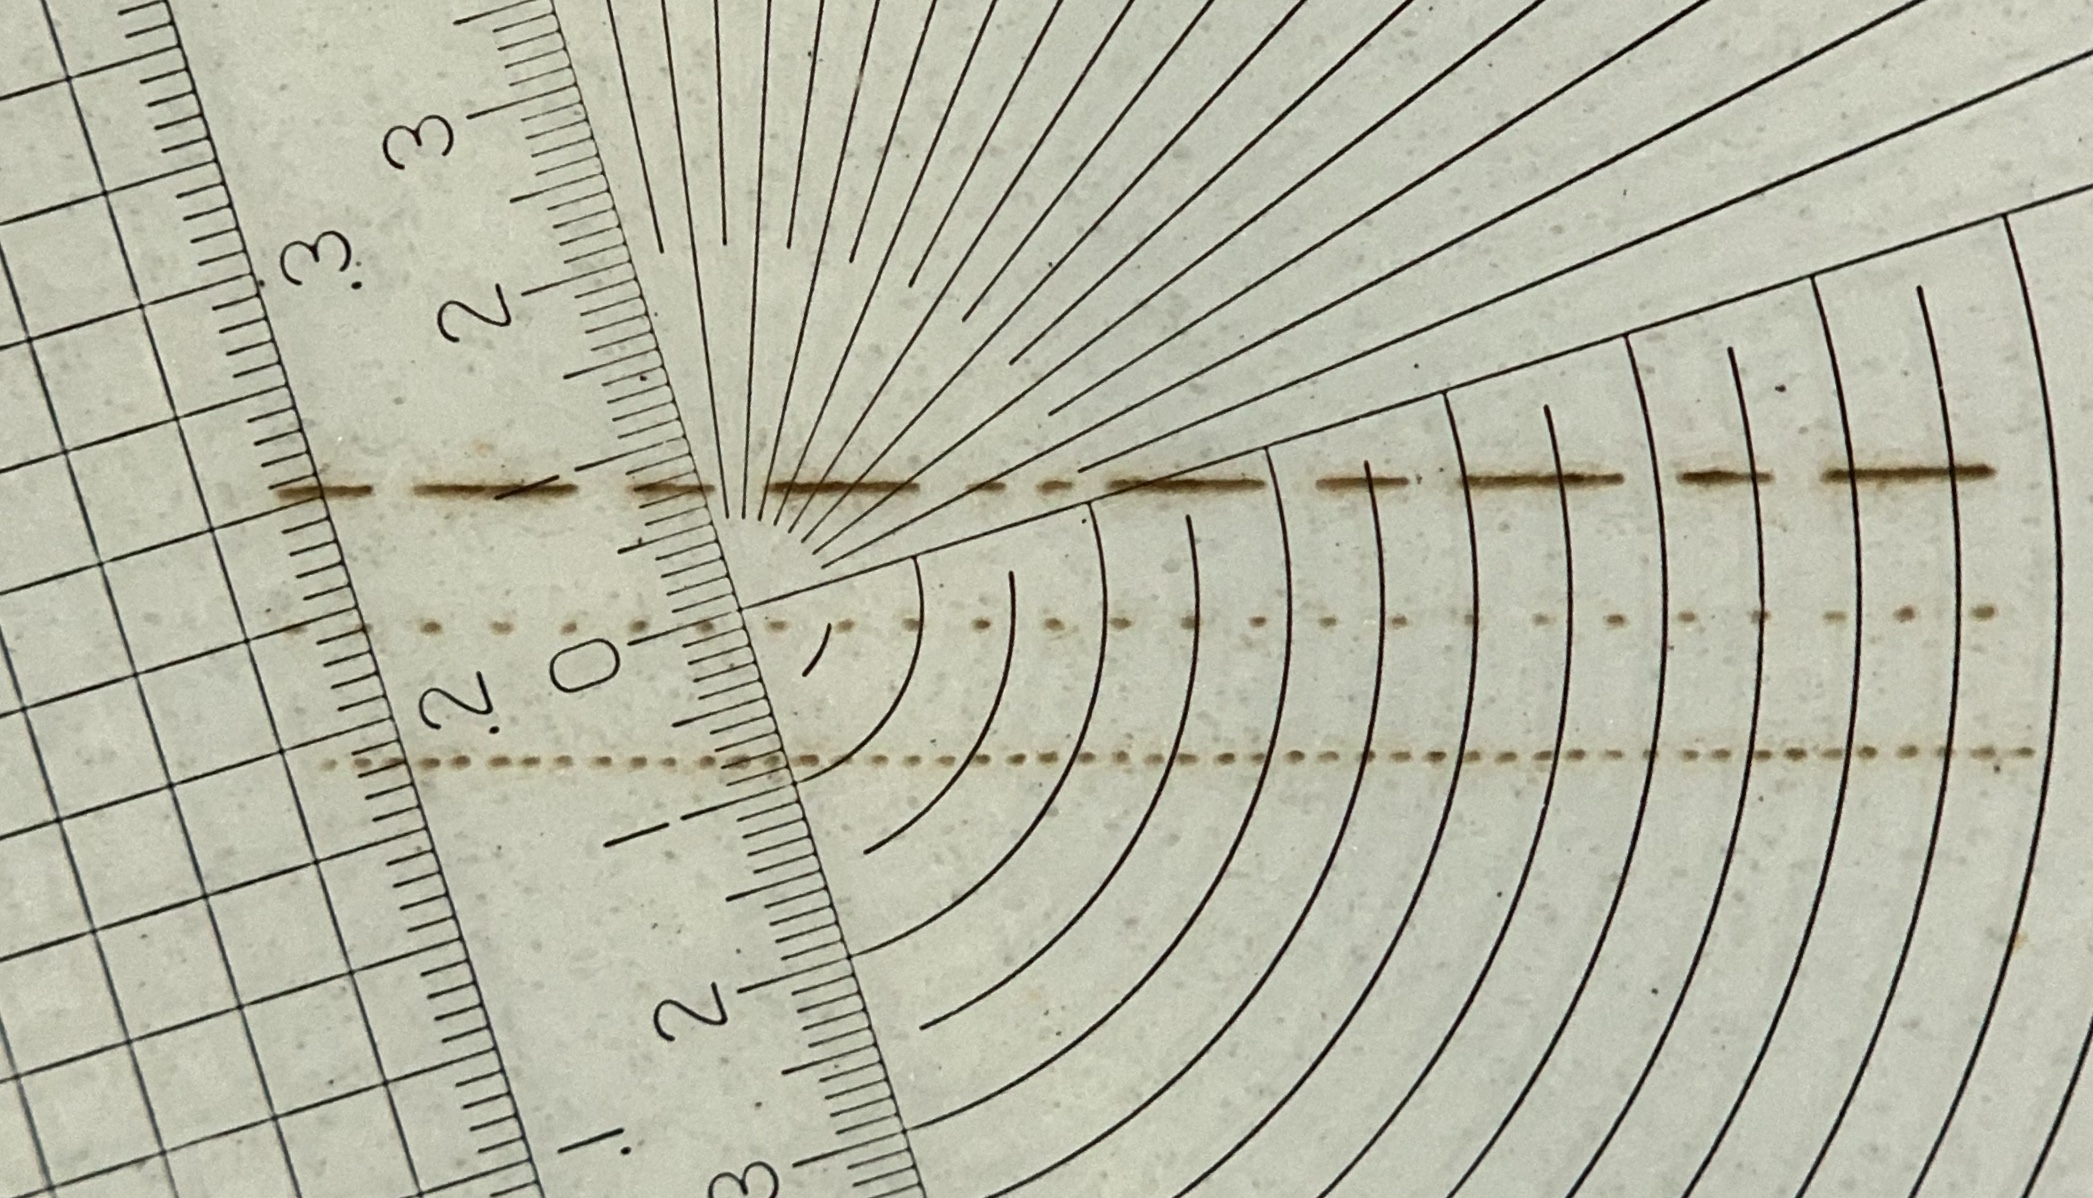
Here are two of my dots tests below.
Look at the bottom row of dots in each image. In the first image, the bottom row of dots are touching each other. In the second, you could easily fit another dot in between each of the dots. These images were taken with my iphone just a few minutes ago through a 10x magnifier.
As I explained earlier, the bottom row of this pattern is made up of .1mm pixels/dots alternating white and black. What you’re trying to determine here is what dot size your laser is capable of making with the particular speed, power, material, and lens you are using.
So on the first image you can see the dots just touch each other. If you know you have alternating white and black pixels each .1mm apart and yet the dots are touching, then the laser is putting down dots that are .2mm in size. Make sense? I was actually able to get them a little smaller than .2mm but the photo I posted above was a dot pattern where the lens of the laser was very slightly out of focus. On the 2nd image, the dots look almost evenly spaced. Maybe even more white space between the dots than the size of the dots. I’d wager that the size of those dots in the second image is probably about .09mm.
Why do we care? When you go to engrave an image you are going to choose one of the dither patterns. I’m partial to stucki and jarvis for doing continuous tone photos. Load up the image of your dog, choose jarvis or stucki, go to the preview, and zoom in REAL close. Notice that you see no gray. All you’re seeing is a pattern of black dots and dashes in that preview. That’s what dithering does. It takes your continuous grayscale photo and converts it into a series of black dots and dashes. Why? Because that’s all the laser can do (if we’re not talking about actual 3d engraving here). The laser scans back and forth and turns the laser on where it needs a dot or a dash and turns it off where there is white space. Your eye is fooled into seeing the gray tones based on the density of the dots in a given area.
But here’s the important part. There are two settings, DPI and interval. They represent the same thing in different ways. Change one and the other changes. There are 25.4mm in an inch. The interval is the distance your laser head moves each time it goes to burn another row of dots/dashes. So if our interval is set to .1mm then the DPI is going to be 254 because 25.4/.1=254. Set your interval to .2mm and the DPI is going to be 127.
So, if you look at the first image I posted, I estimate the dots to be .2mm in diameter. If I go tell light burn to use .1mm interval or 254 DPI, then each time it lays down a line of dots/dashes they are .2mm tall but I’m only moving the laser head .1mm. So the top half of my first row is going to get overburned by the next row. If I have .2mm dots then theoretically the highest DPI I can use is 127 without getting overburn. If you want to use 254 DPI then you need to be capable of putting down dots that are .1mm in diameter.
You can guess at the DPI or interval to use or you can estimate your dot size and arrive at it empirically.
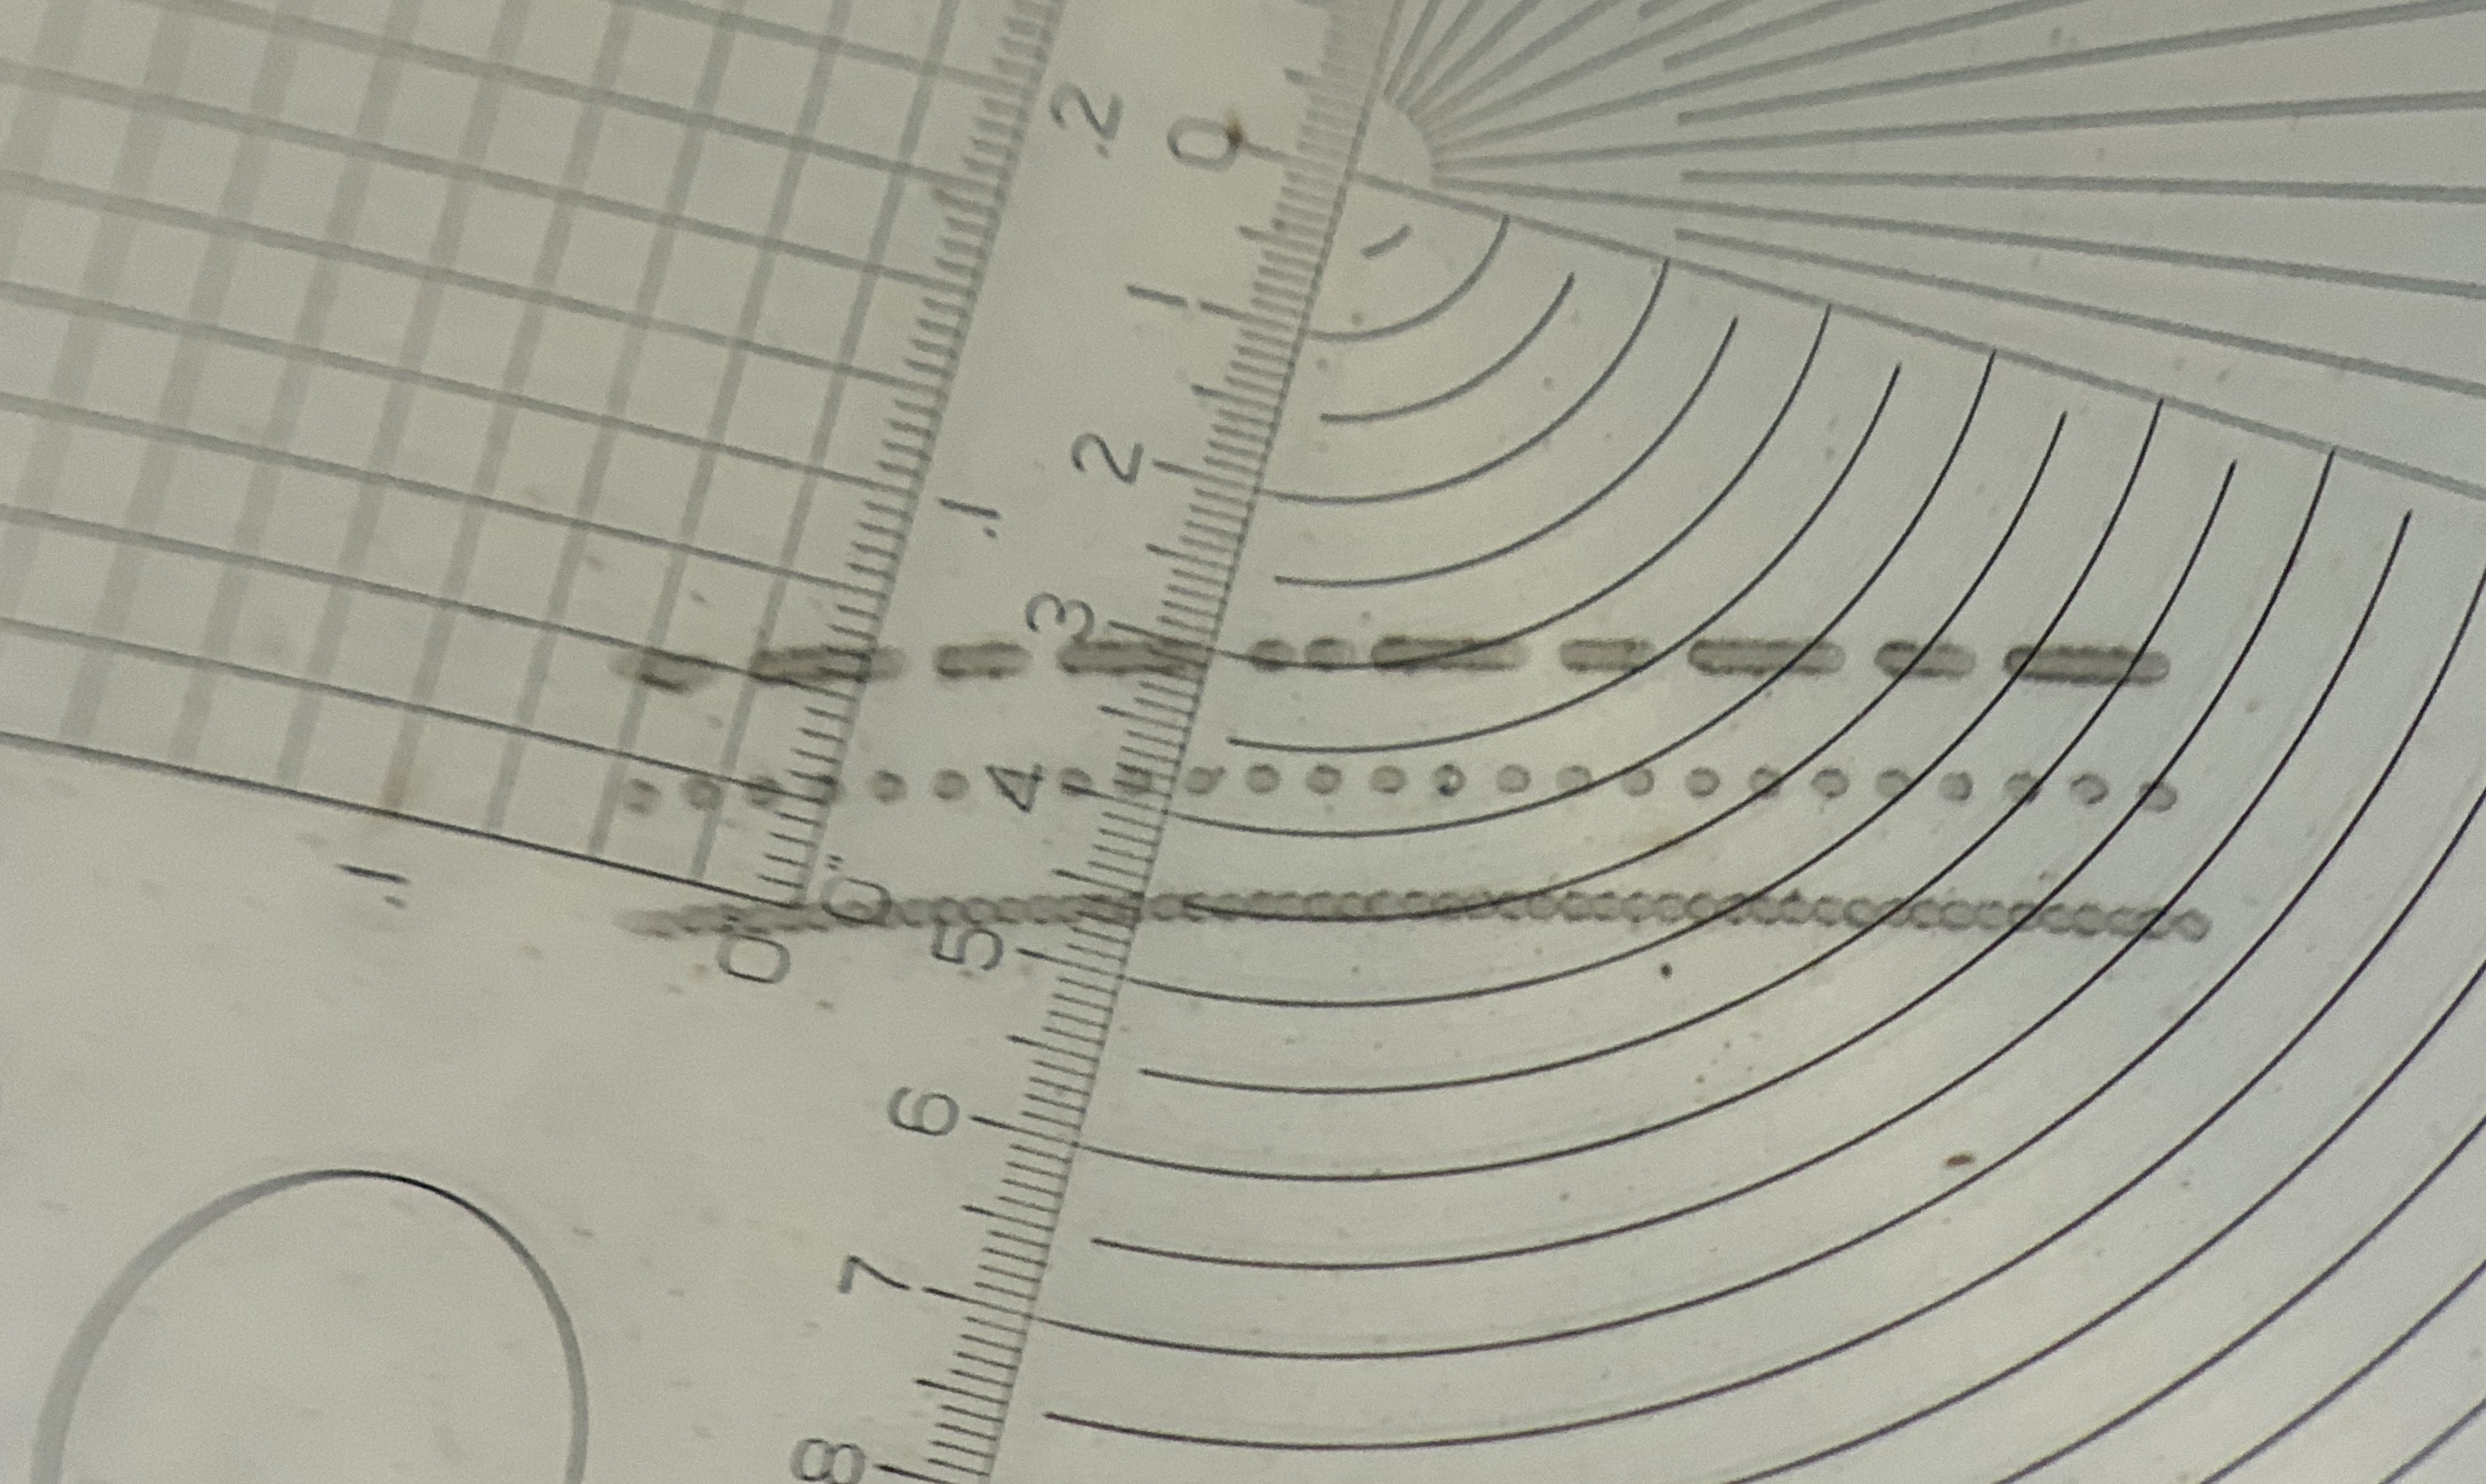
OK, now we’re getting somewhere. Your bottom line doesn’t look like dots at all. Looks like a continuous line. Couple of things I’d note about that image The second line is a .1mm dot followed by .3mm of white space. So dot to dot is .5mm. Your goal is to get your 3rd line looking like your second to the extent that it’s possible. I’d say currently your dots are something like .3mm. With .3mm dots the best DPI you could do is about 85.
Two observations about your image. 1) it looks like you have air assist on. Turn it off. 2) I don’t think you’ve got your focus as good as it can be.
Do you have z height controlled by LB?
ok… I’ll turn off light assist.
I don’t think (can’t be sure) if Z height is controlled by LB…I’ve never messed with it. The guy from factory set things up… right now it’s on 3000.0
How do you currently adjust the height of your bed? What kind of controller do you have? How are you determining your focus height?
I use this panel, but have only manually adjusted x and y
through this controller
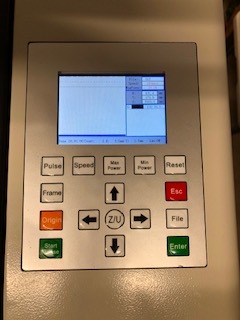
So how do you move your bed up and down? Press the Z/U button then press the right and left arrow buttons and see if your bed moves.
sorry my training on this has virtually been lacking… just bare basics