Right…that is how l move the bed
OK, so if you press Z/U then the left and right arrows your bed does move up and down?
yes, that is correct
Go to Edit>Device Settings
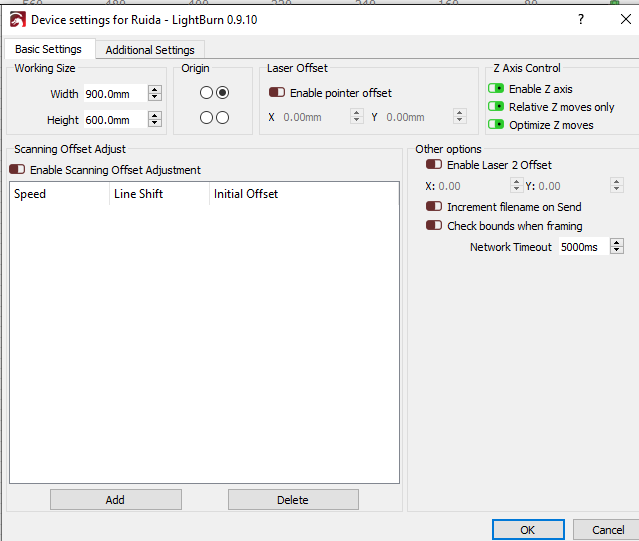
Make sure all the items under Z Axis Control are turned on/green.
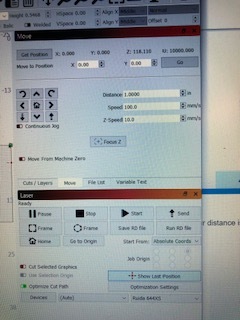
After that go to your Move tab.
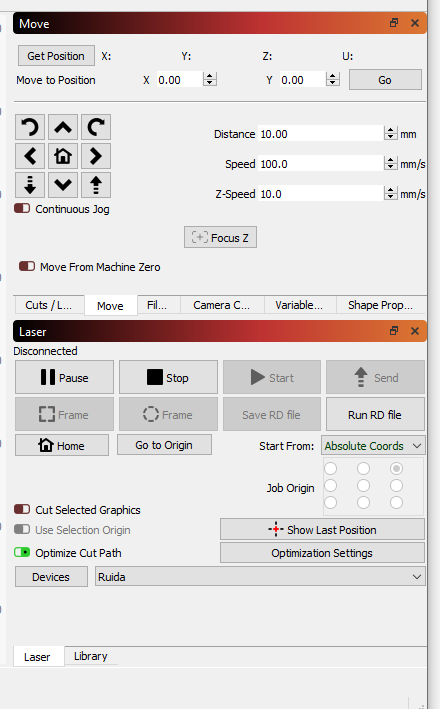
Click “Get Position” and make a note of what the value for Z is. In the distance field put in 1.00. Click the down arrow in the lower left of the grid. Did your Z move down 1mm?
Well that was interesting…like I said… a factory guy set this up remotely over the phone.
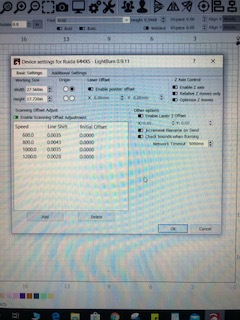
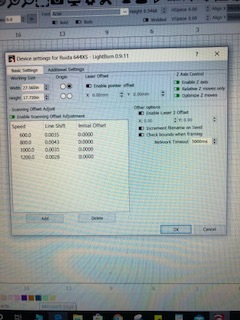
Here’s what it looked like…
here’s what it looks like now…
See my last post above, 2nd portion, about trying to move the bed with LB.
I put the settings in…no movement…however, I notice in YOUR screenshot that your distance is mm…MINE says in.
Hmmm… I’m not a LB expert here. My next step was to have you run a focus test that automatically moves the bed incrementally to figure out the best focus. But I’m puzzled that you’re able to move the Z height with the controller yet can’t move it in LB even though you’ve enabled the options to do so. And yes, odd that it’s in inches. I’m sure that’s set somewhere in the settings but I don’t know where.
How have you been setting your focus?
Correction…I can move the “X” and “Y” … I have never been able to move “Z”
And even with those Z options now green you can’t use the up and down arrows to move the Z? Maybe try putting .1 in the distance since you’re in inches instead of mm.
That didn’t move it either… however, there is a button that says FOCUS Z… when I pushed that there was movement in the table. I never pushed it before… didn’t even realize what Z was for until now… where do you want me to send the check? 
Ok, if clicking the focus button moves the Z then the jog buttons should definitely work. You’re hitting the arrows at the bottom left and right of the grid, correct? Not the chevron in the bottom middle.
yes, that is correct
OK, I’m going to have to step back and let someone with more experience with the LB software get you sorted on why your Z jogging isn’t working and getting your units set to mm instead of inches. You can still try the focus test and see if it works…
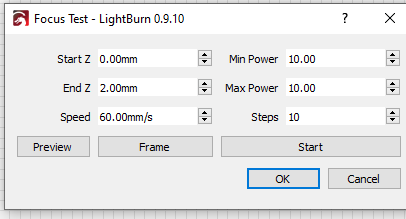
Go to Tools>Focus Test. You’ll get the dialog above but probably in inches instead of mm. If it’s in inches, set start Z to 0, end Z to .25, steps to 5, and use whatever power and speed you were using for the dot test. Load up some scrap wood of the same thickness and hit start. It should burn a series of lines and move the Z with each new line.
The line labeled 0 is your current Z position. It should then move down .05" five times. See if one of those lines isn’t thinner/better focused than the first line.
Thanks for all your help… much appreciated…I think I may put a call into the Retailer tomorrow…Have a good evening.
No problem. Hopefully one of the LB guys can get you sorted on the other stuff.
It looks like you have an Aeon machine, which means it has auto-focus. If it’s set up properly you should be ok, but you might need to tweak it a little, depending.
When you put a sheet of material in, you should set the focus to the correct height before you run a job (if you don’t know what that height is, you should have been given a focus blank to use for setting the height, or you can run what’s called a Ramp Test to figure out where the best focus distance is for your machine - https://lasergods.com/glossary/ramp-test/ )
Inches or mm is fine, and it is a setting you can change if you go to Edit > Settings in the menus.
I’m going to suggest trying something a little different:
In the settings for the image, change the Image Mode to Halftone, set the DPI value to 600, and set the Cells per Inch setting to 85. Set the speed to 300mm/sec, and the power to 12%.
Normally you wouldn’t go nearly that high with DPI, but with Halftone you actually want some overlap because of the way the system works. If you are using one of the normal dither modes, like Dither, Jarvis, or Stucki, keep the DPI setting around 200 to 300.
I’m suggesting Halftone because it’s designed to be significantly more forgiving than most of the other image modes. You’ll get a bit of visible patterning in the result, but the shading and overall image quality is pretty good.
It’s also worth making sure your original image has good contrast and uses most of the overall brightness range available. If your image is really dim, really bright, or very “muted”, it’s harder to get a good result. You can select the image, then right-click and choose ‘Show Properties’ and adjust contrast and brightness in LightBurn if you need to.
There are also a pair of settings called ‘Enhance Radius’ and ‘Enhance Amount’. Setting either of these to zero disables the edge enhancement. I recommend trying a radius of 4, and an amount of 150 as a general starting point - it’ll help the edge detail pop a little better. You can also try setting the ‘Gamma’ value to 0.8, instead of 1.0, which will pull the mid-tones up a little.
Playing with any of the image controls will change the image in LightBurn as you watch, so you can see the effect. Give those settings a try and see what you end up with.
2 Likes
Quote “I need to Master the technique of engraving pictures on wood and anodized metal. (I think I’m ok on leather tests I’ve been doing… for now)”
Laur, with respect, doing photos well takes a ton of experience. And time. Lightburn makes it easier than most other programs, but it’s not feasible or realistic to get the laser, and get reliably good at pictures within just a week of getting the laser!
There are SO many areas to be fine-tuned, like Travis has tried to show you above- gettng to know your machine and its settings comes first. Learning to focus it is 2nd. Learning about about what dot size it can produce is 3rd. Learning power and speed settings for optimal burn, and not wasting time is next. Learning too edit pictures, perhaps in Photoshop, to make them better for detail in the areas needed is another skill.
Then lasering anodised aluminium is another thng that can be quite a trial to get dialled n right. Even the colour of the anodising coating makes a huge difference. The more you practise, the more you’ll learn that the laser heats the aluminium, and can warp it out of focus, sometimes such that it can hit the head and ruin the picture.
Like it or not, you need to crawl before walking, and walk before running… I hope you enjoy the learning curve, because it all adds up to necessary experience. 
There are no great short-cuts, as you’ve seen. The more you learn the more you’ll realise how much there is to learn!
Pictures in timber can be a trial, as the extra burning tends to mean that the pic won’t be as sharp, for instance as if it was on a tile or hard surface that can hold a tinier dot than burned wood can hold.
2 Likes
You assume I measured. ![]()
I added about a teaspoon to a 3 oz spray bottle 3/4 filled with water, let it fully dissolve, then misted it onto the wood to saturate the surface and let it dry. No proper scientific testing was done.