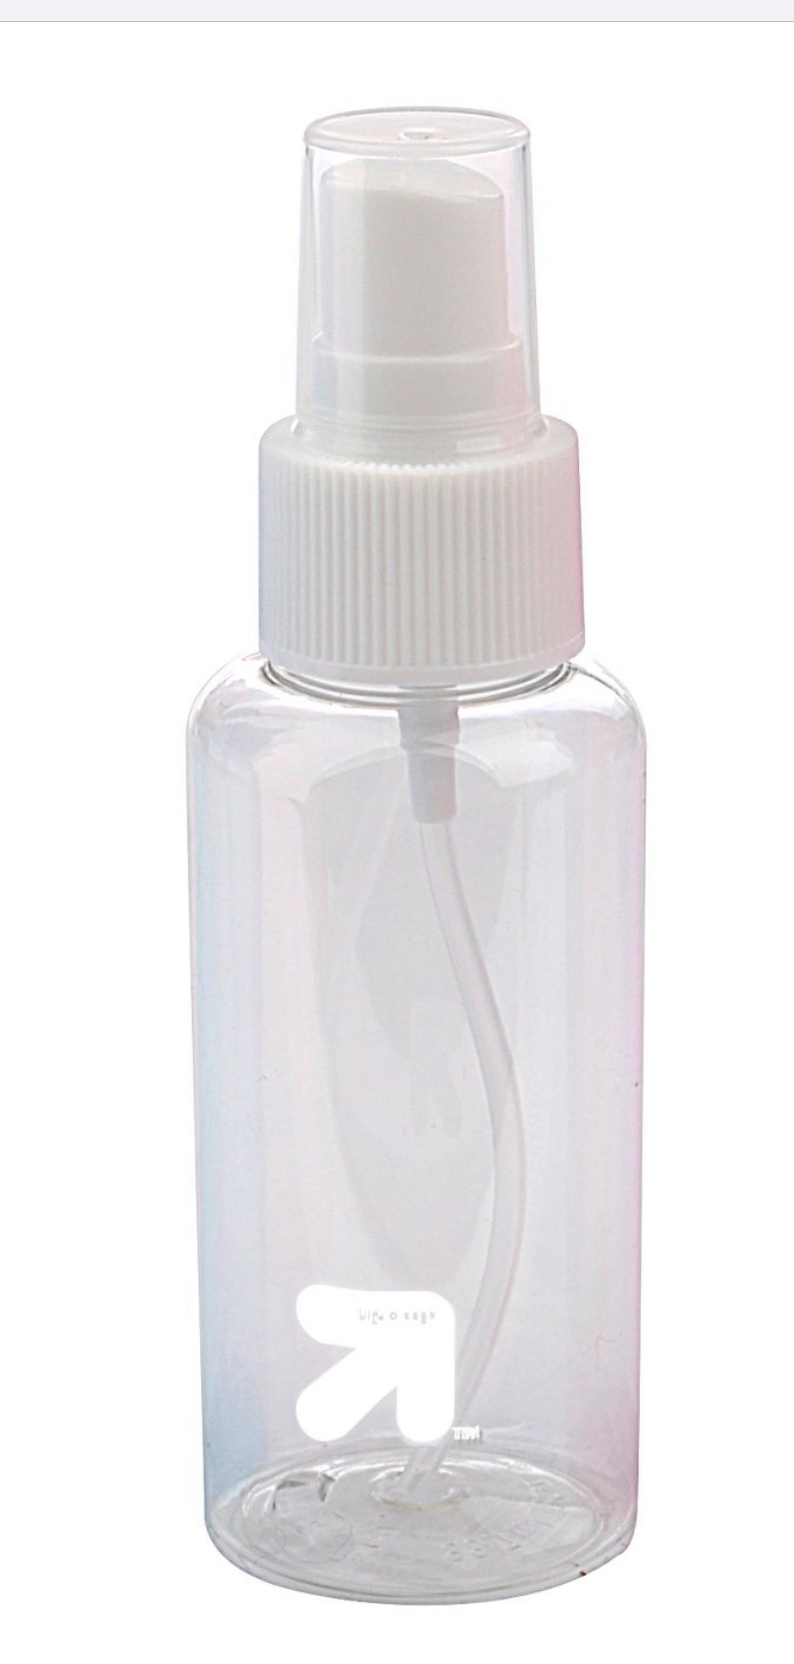
I could eye ball and try to experiment “a bit” however the key to your formula decipher for which I am truly great full for lies in the baby spray bottle. Because the concentration is far greater in the baby bottle then the regular spray bottle we all know.
“I need to Master the technique of engraving pictures on wood and anodized metal"
Of course when I wrote that, I didn’t mean all at one time, neither did I mean I mean to master it immediately which is absurdly impossible anyway. As you may have noticed, there wasn’t even a sample pic or an attempt to engrave any anodized metal. I meant that as a future statement … on the other hand, I was having an extreme problem trying to dial in any engraving on just a simple piece of them precut wood.
quote=“Stewey, post:60, topic:14041”]
Like it or not, you need to crawl before walking, and walk before running… I hope you enjoy the learning curve, because it all adds up to necessary experience.
[/quote]
Yes, I expect the learning curve, and welcome it wholeheartedly. Thank goodness this forum is here with such experienced people. Through this forum and the excellent supportive / patient help through the members that contribute their comments, along with the informative video’s, this site is invaluable to me.
So I have yet to be able to apply the suggestions of Oz, but I look forward to doing that soon and will keep up (the crawling phase) to learning/testing/honing so that I can accomplish work I’m proud.
I can tell a 2oz bottle from a 3oz bottle and I know that Target carries them in colors and I figured you were a Plain no nonsense kinnda guy and not a pink bottle dude
Select the image, then right-click and choose ‘Show Properties’. That will open the Shape Properties window, which is where you find any settings that are specific to a shape or object.
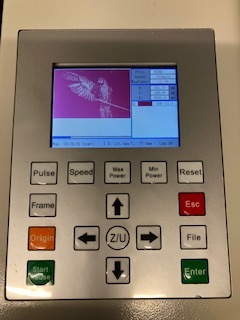
The factory rep did call - he checked / verified machine settings -
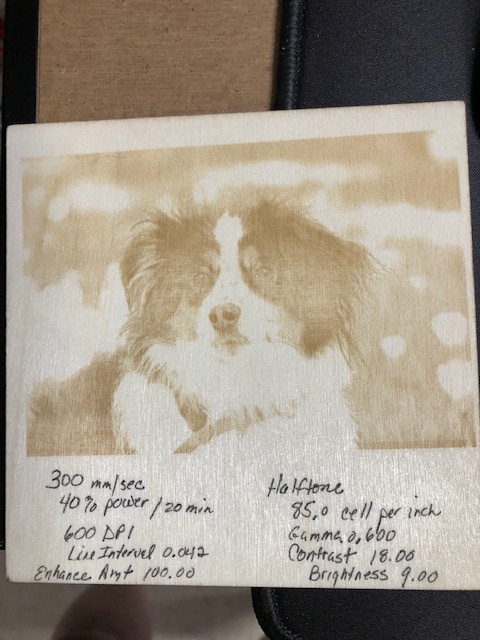
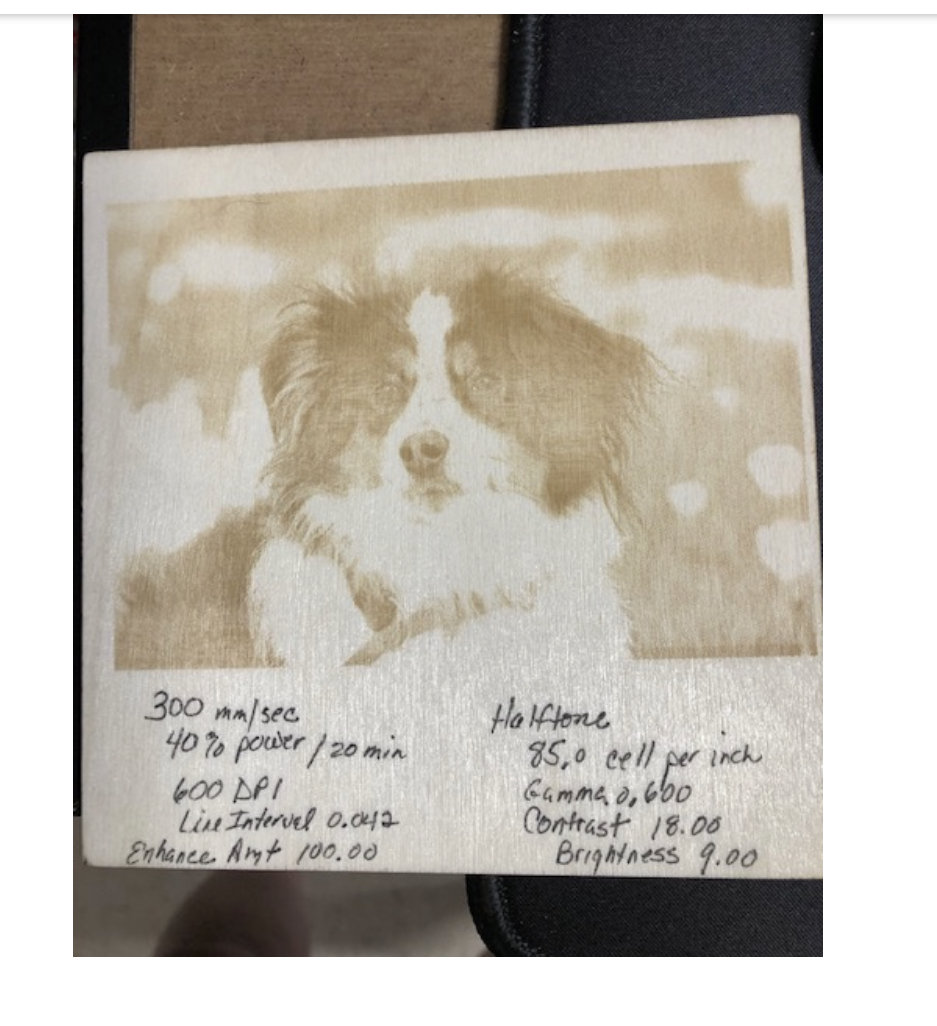
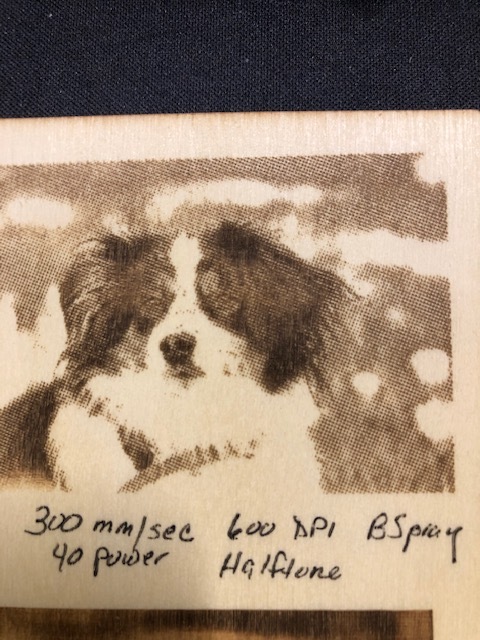
He didn’t quite understand your formula - he remoted in and set the following settings which produced this results with Grayscale / different power and speed…
I went back to your suggested Halftone and tested with an increase to power to 40/20(min), DPI still at 600, 300 mm/sec…same gamma, brightness, etc used that rep set. The results speak POSITIVE for using the Halftone. Much better eye and nose definition.
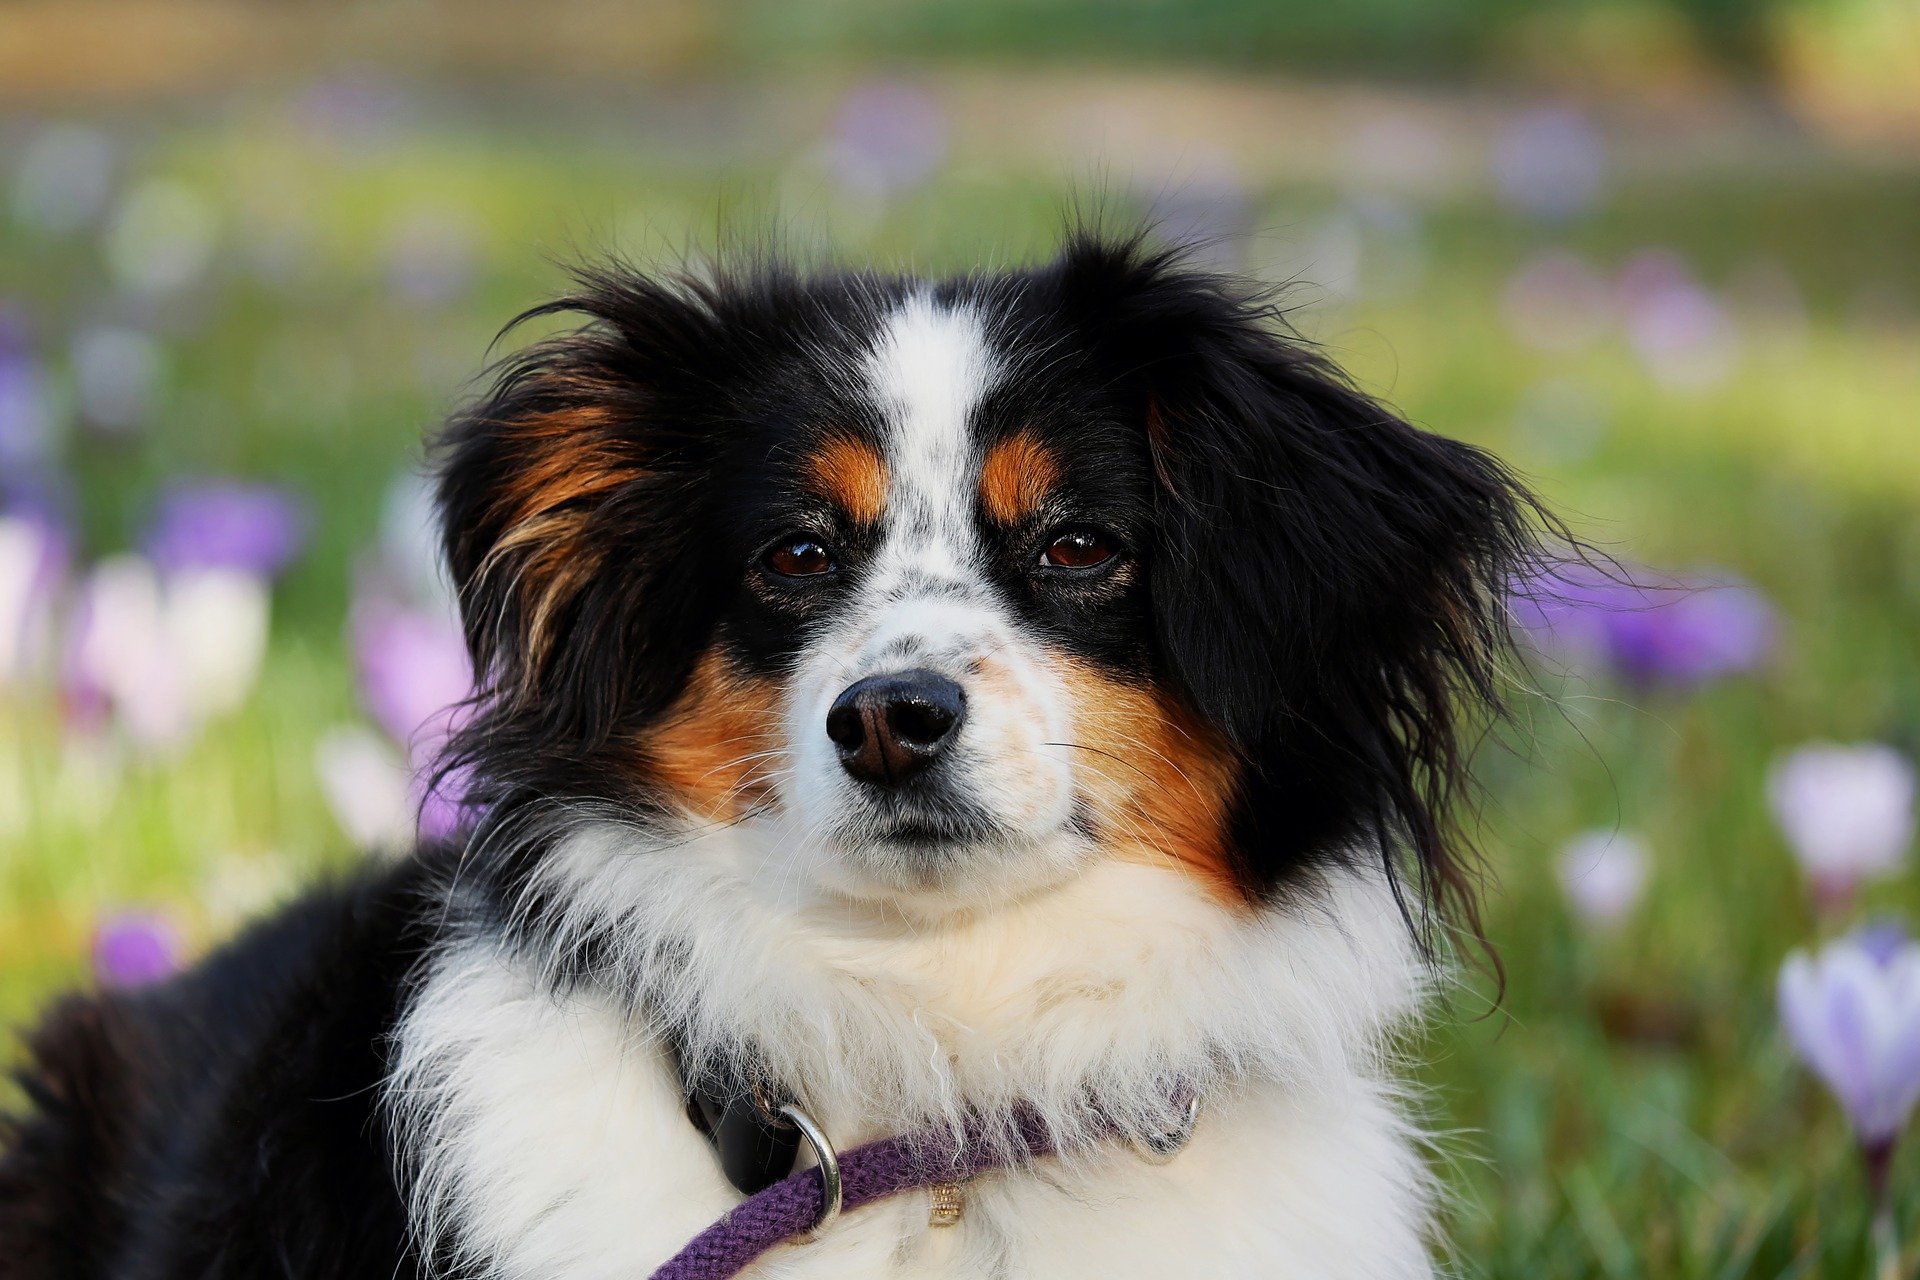
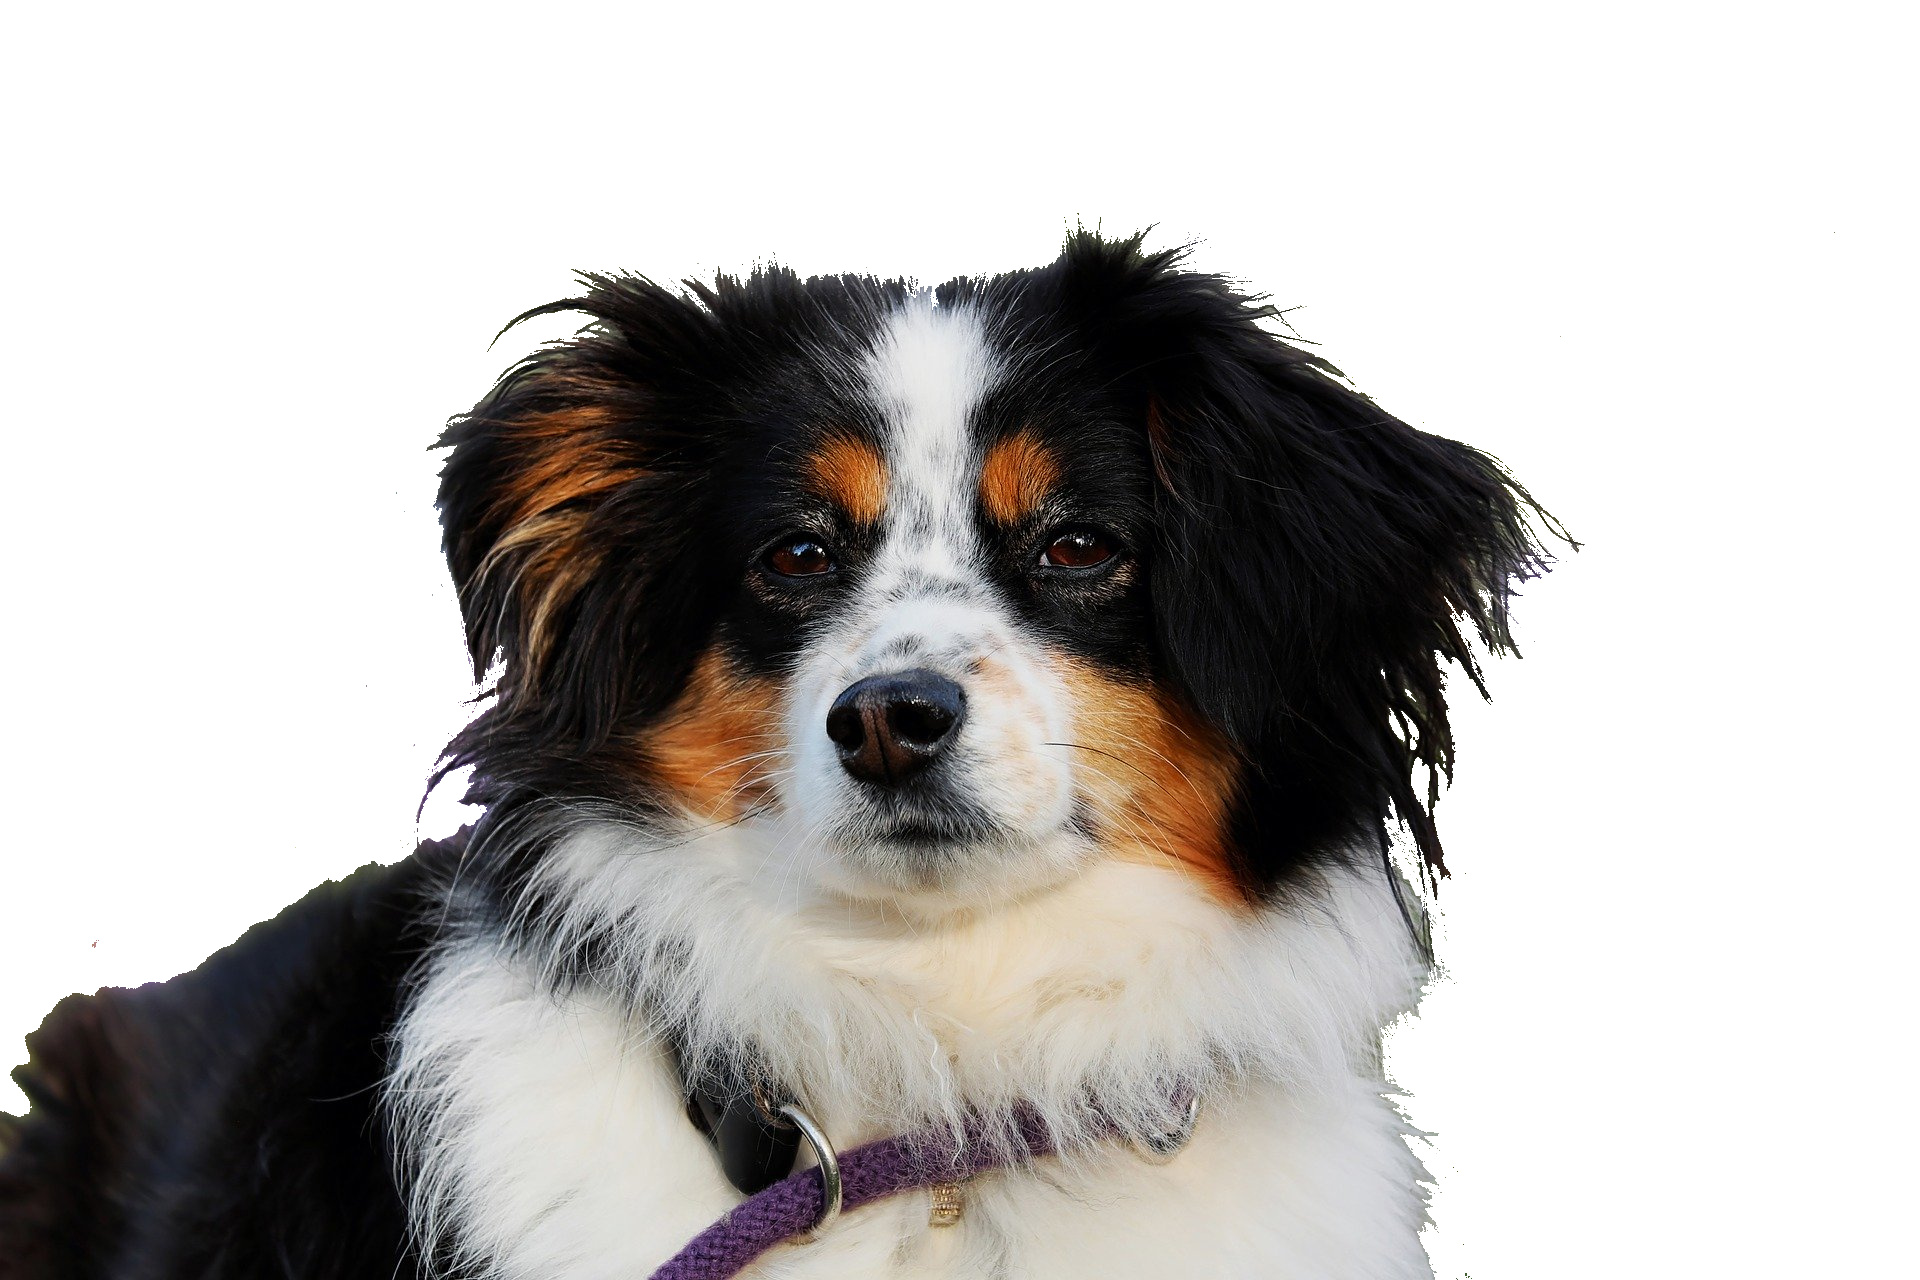
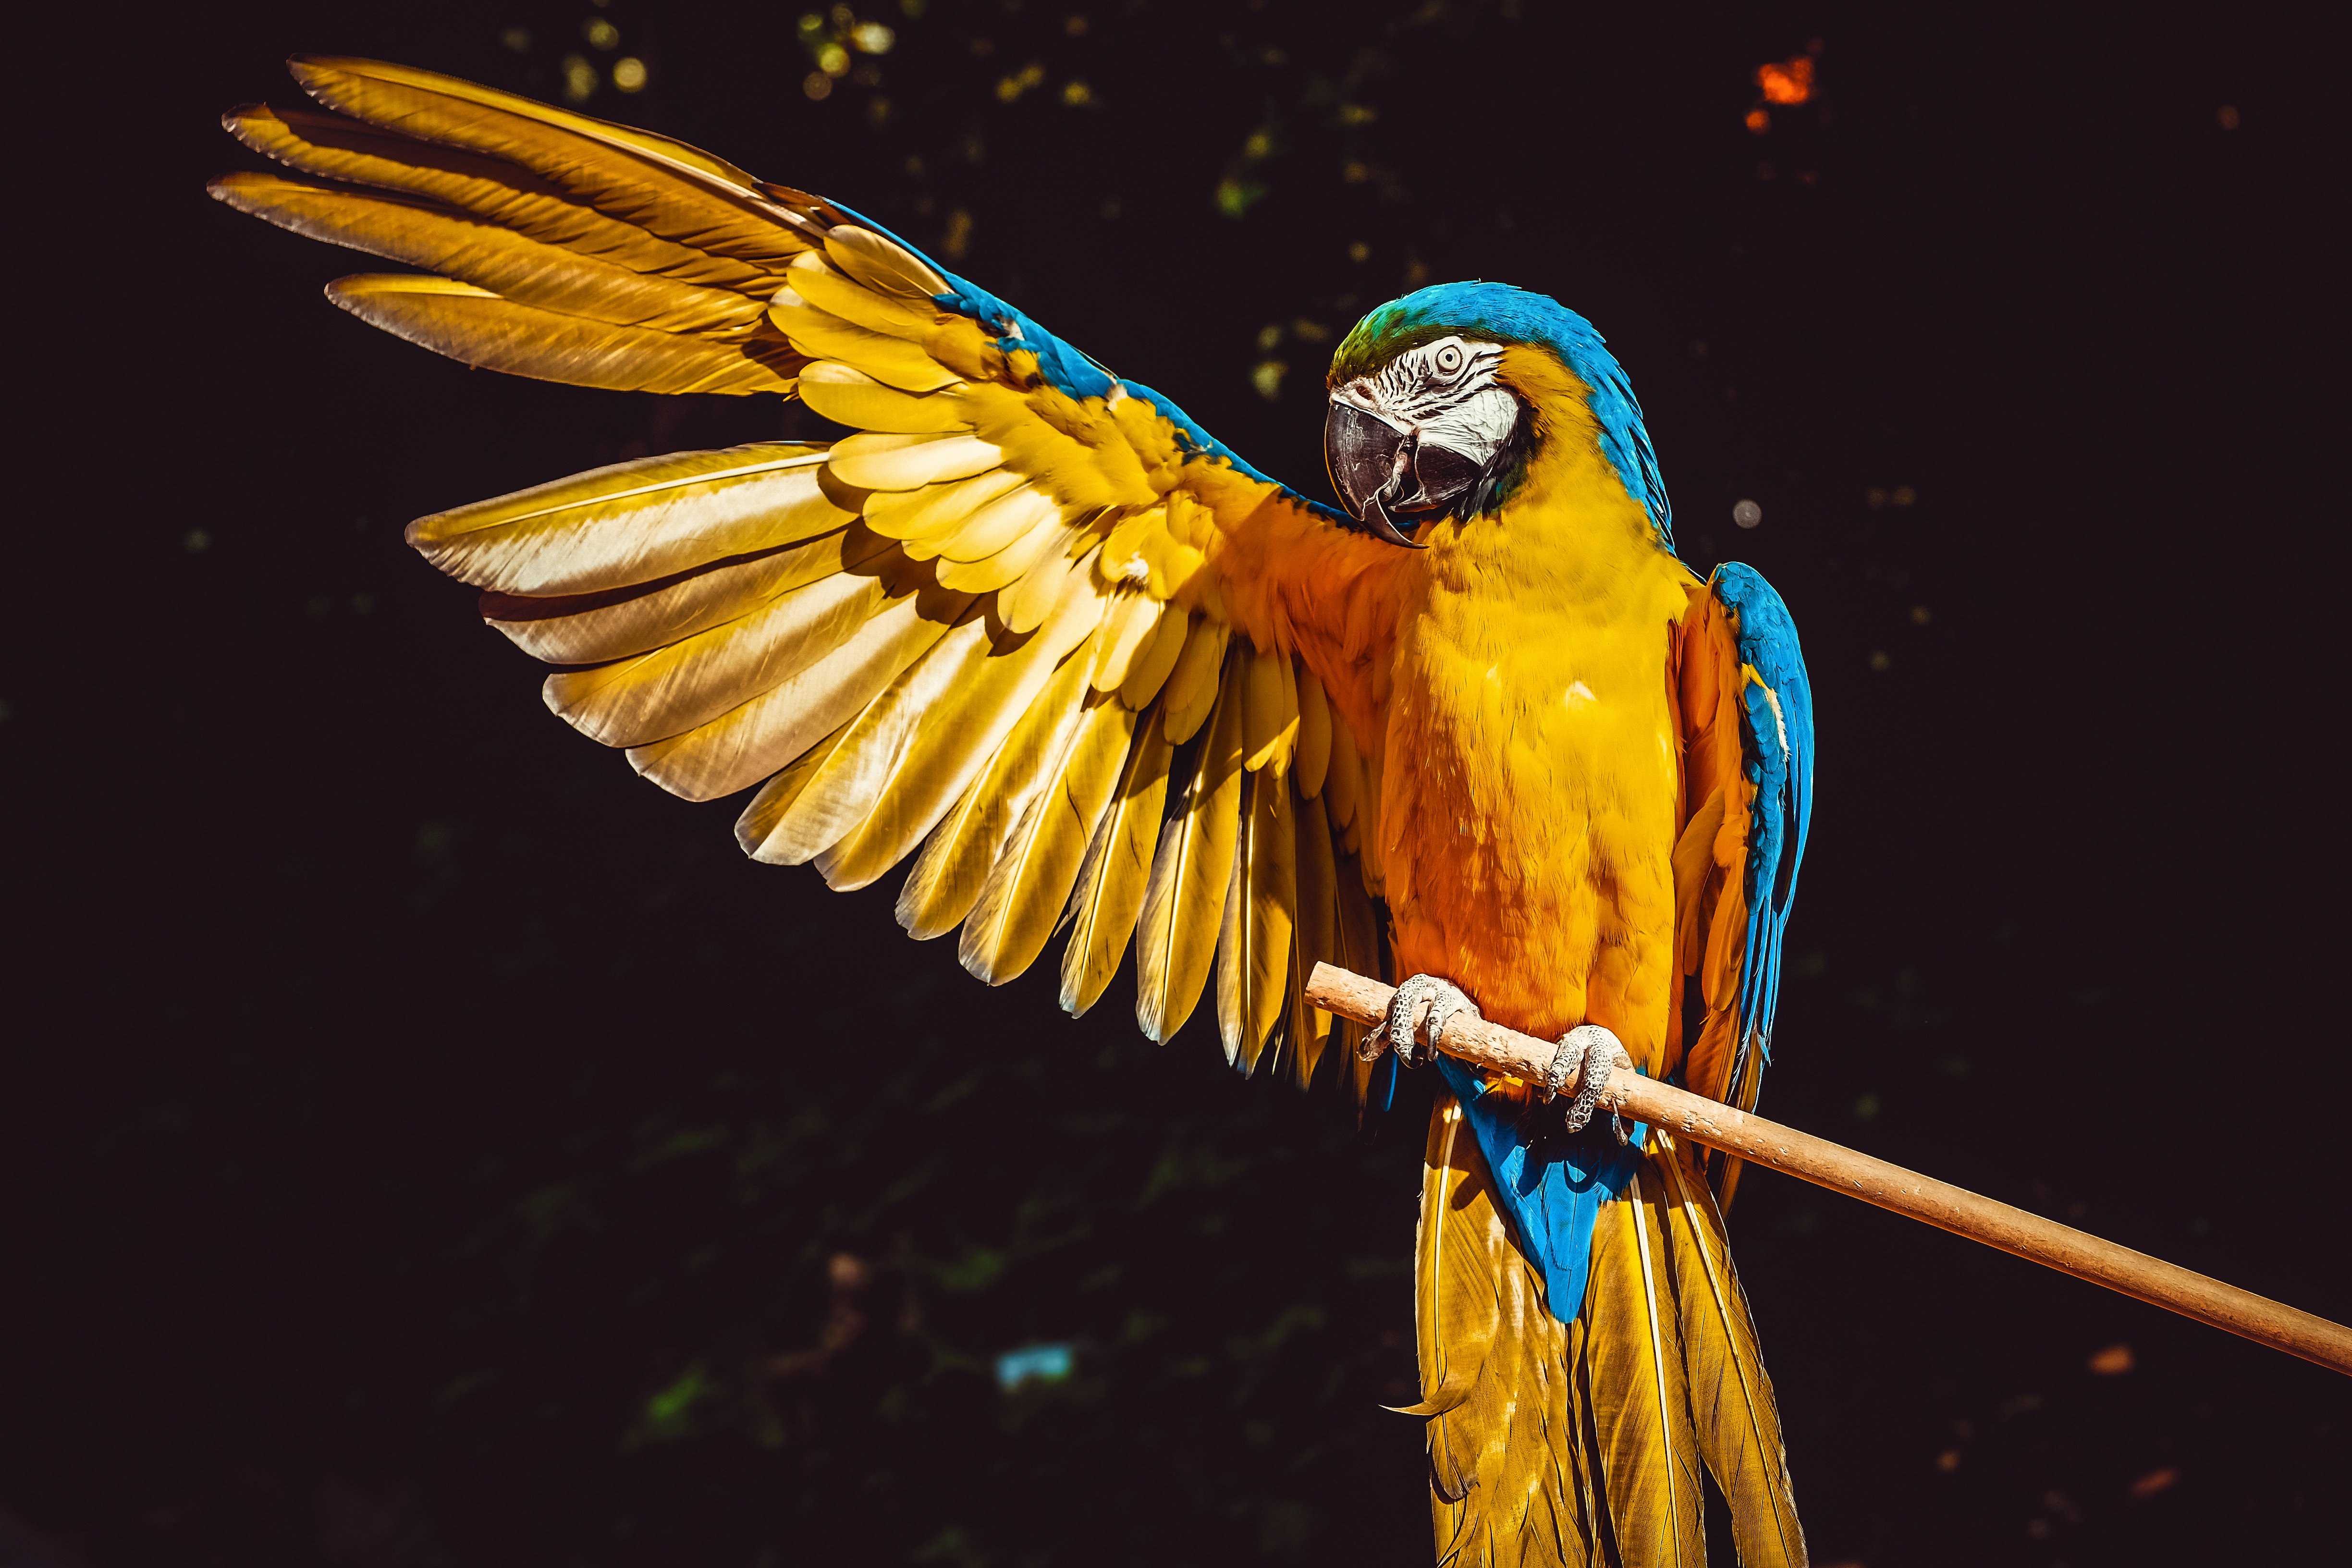
@CustomCut Images such as this beautiful pet portrait reproduce far better on wood if you subtract the busy background around the pet leaving a clean contrast.
The out of focus background works great in the color composition not so much in the lasered engraving
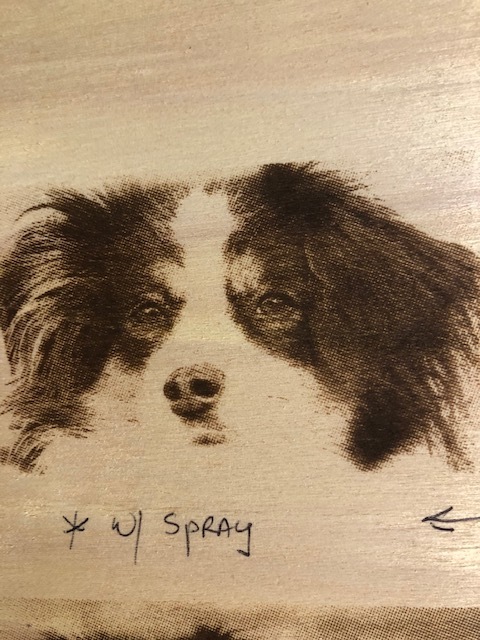
@Sasquatch and I agree - I’m sticking with LB- Oz suggestion… the next thing I tried for test was to use the Baking Soda Spray (same settings). Black pops a bit more, but now I need to smooth it out. At least this is progress…
It’s not perfect (I need better shading around his chin and jaw, but his eyes look great. I fix one/lose the other. Anyway… huge improvement from where I started… again thanks.
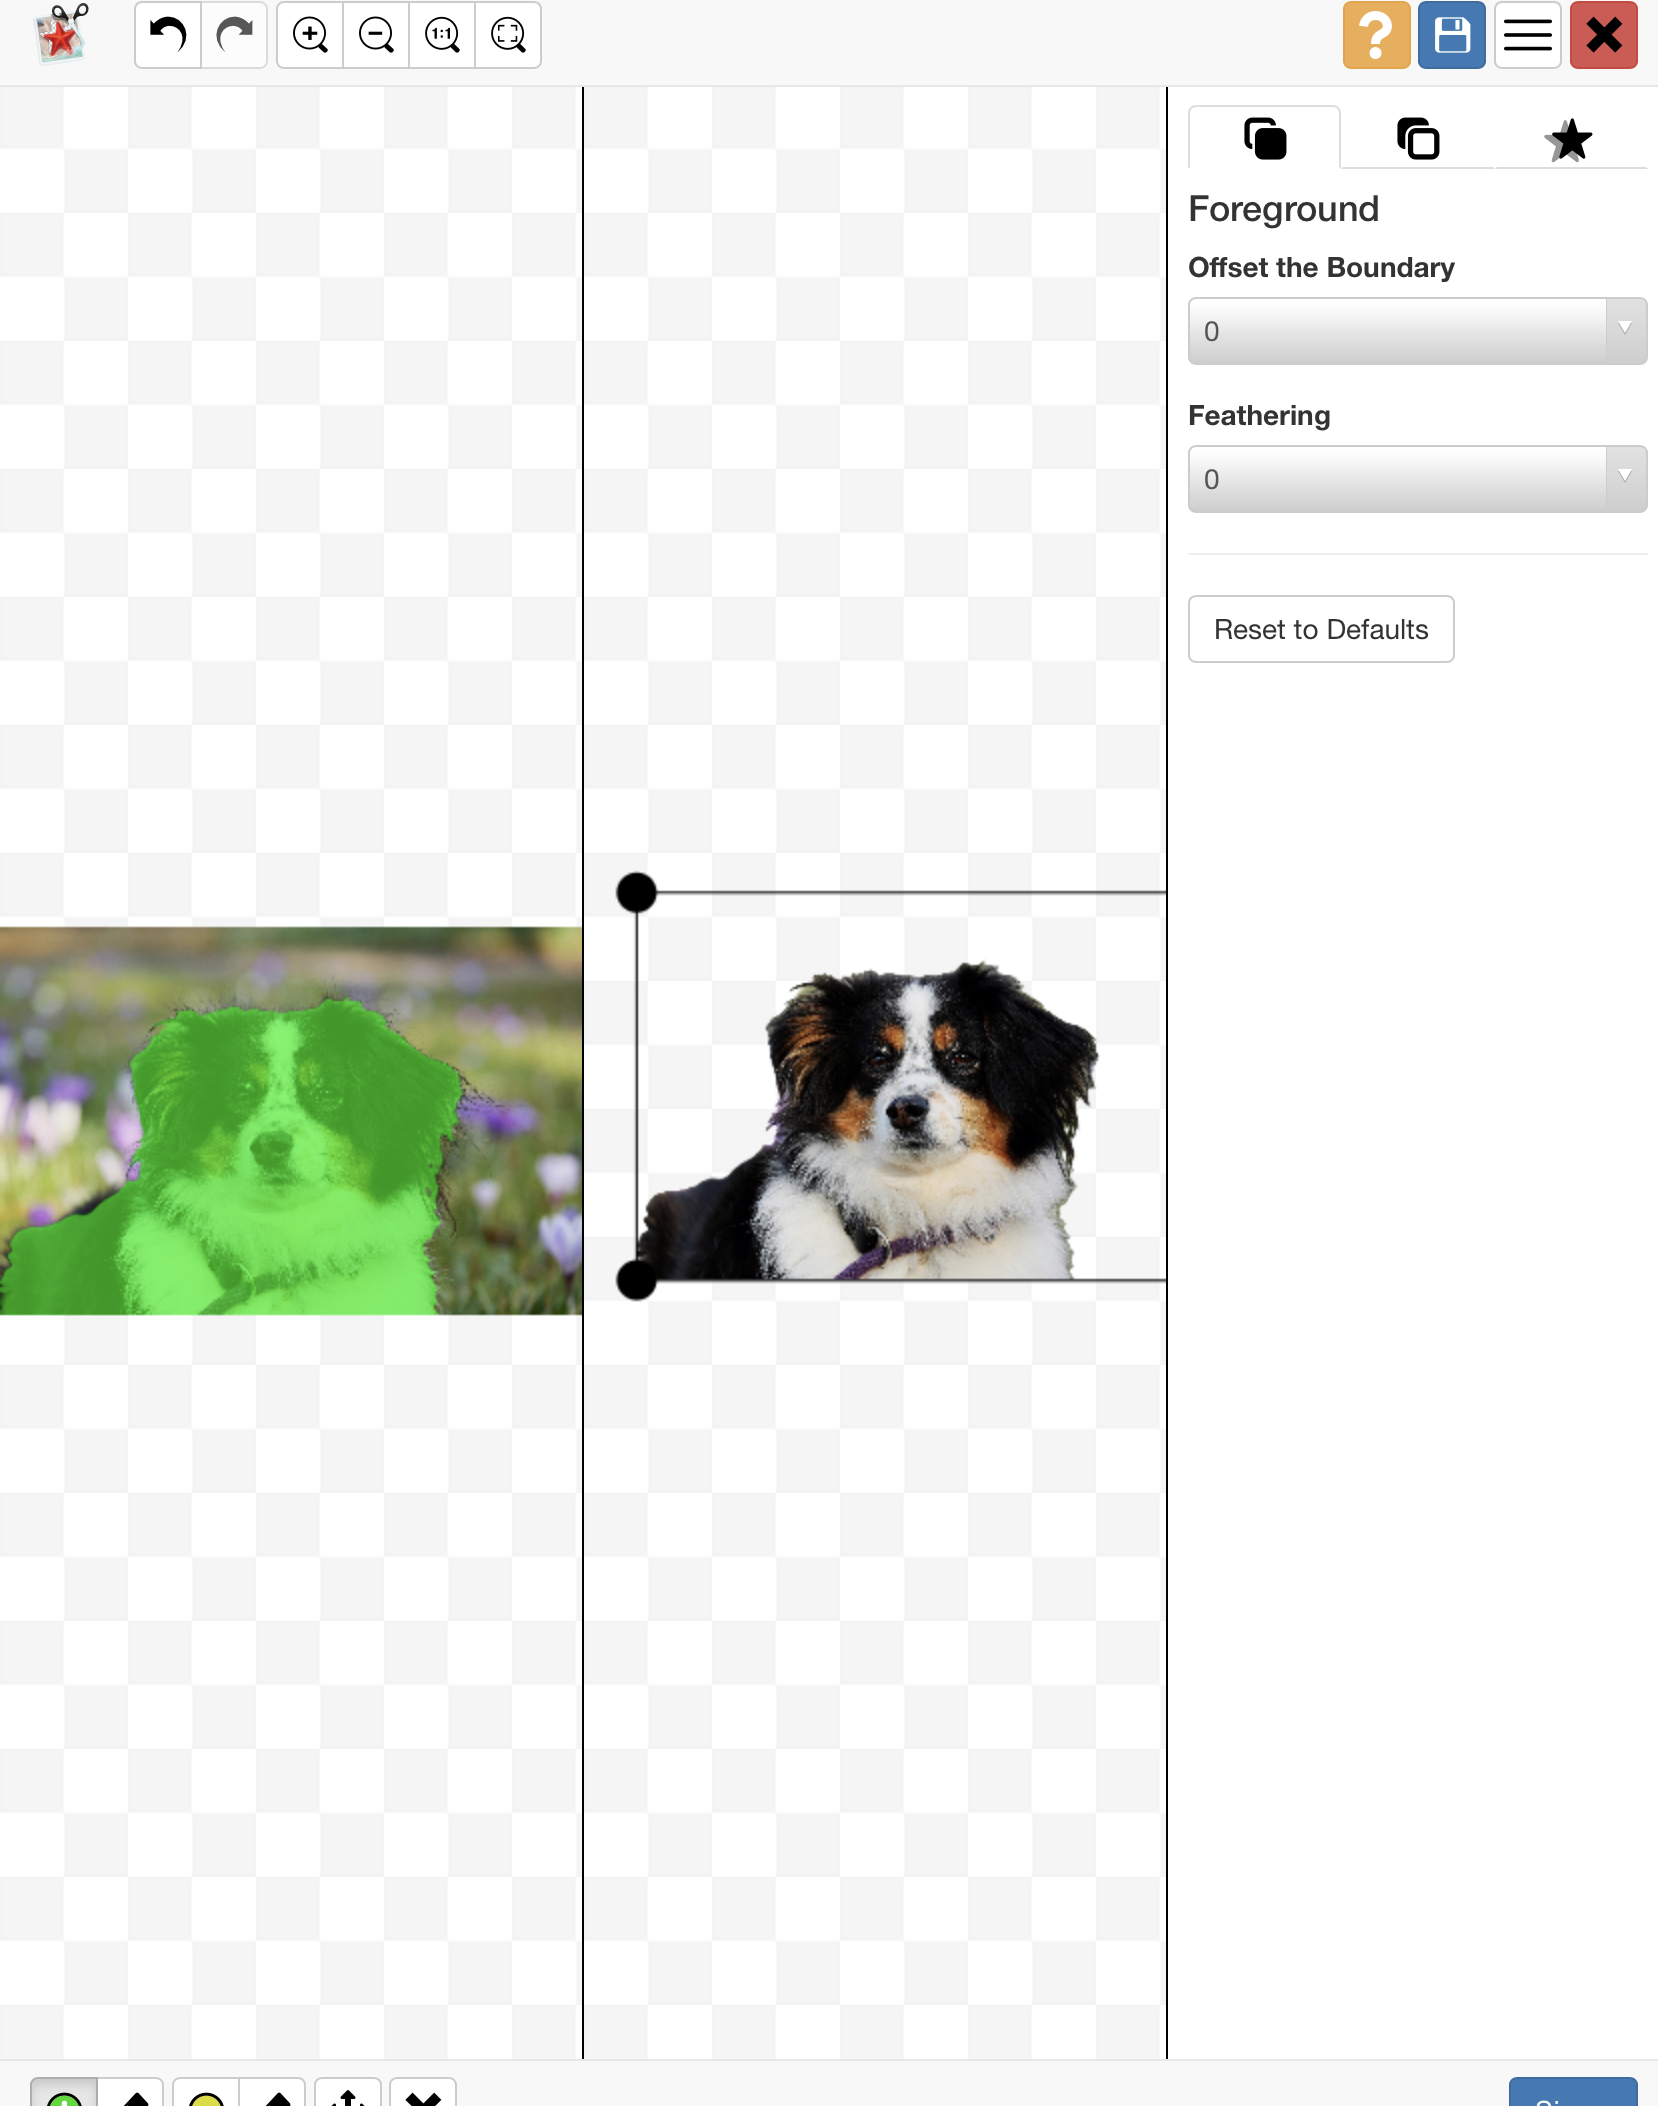
@Sasquatch Is there a way to cut out of eliminate background in Lightburn? I don’t have photoshop and have messed around with the free photo editor GIMP… but haven’t successfully done it right yet. If doable in LB, I would love to know how. Thanks.
I don’t think Lightburn has such advanced photo editing yet.
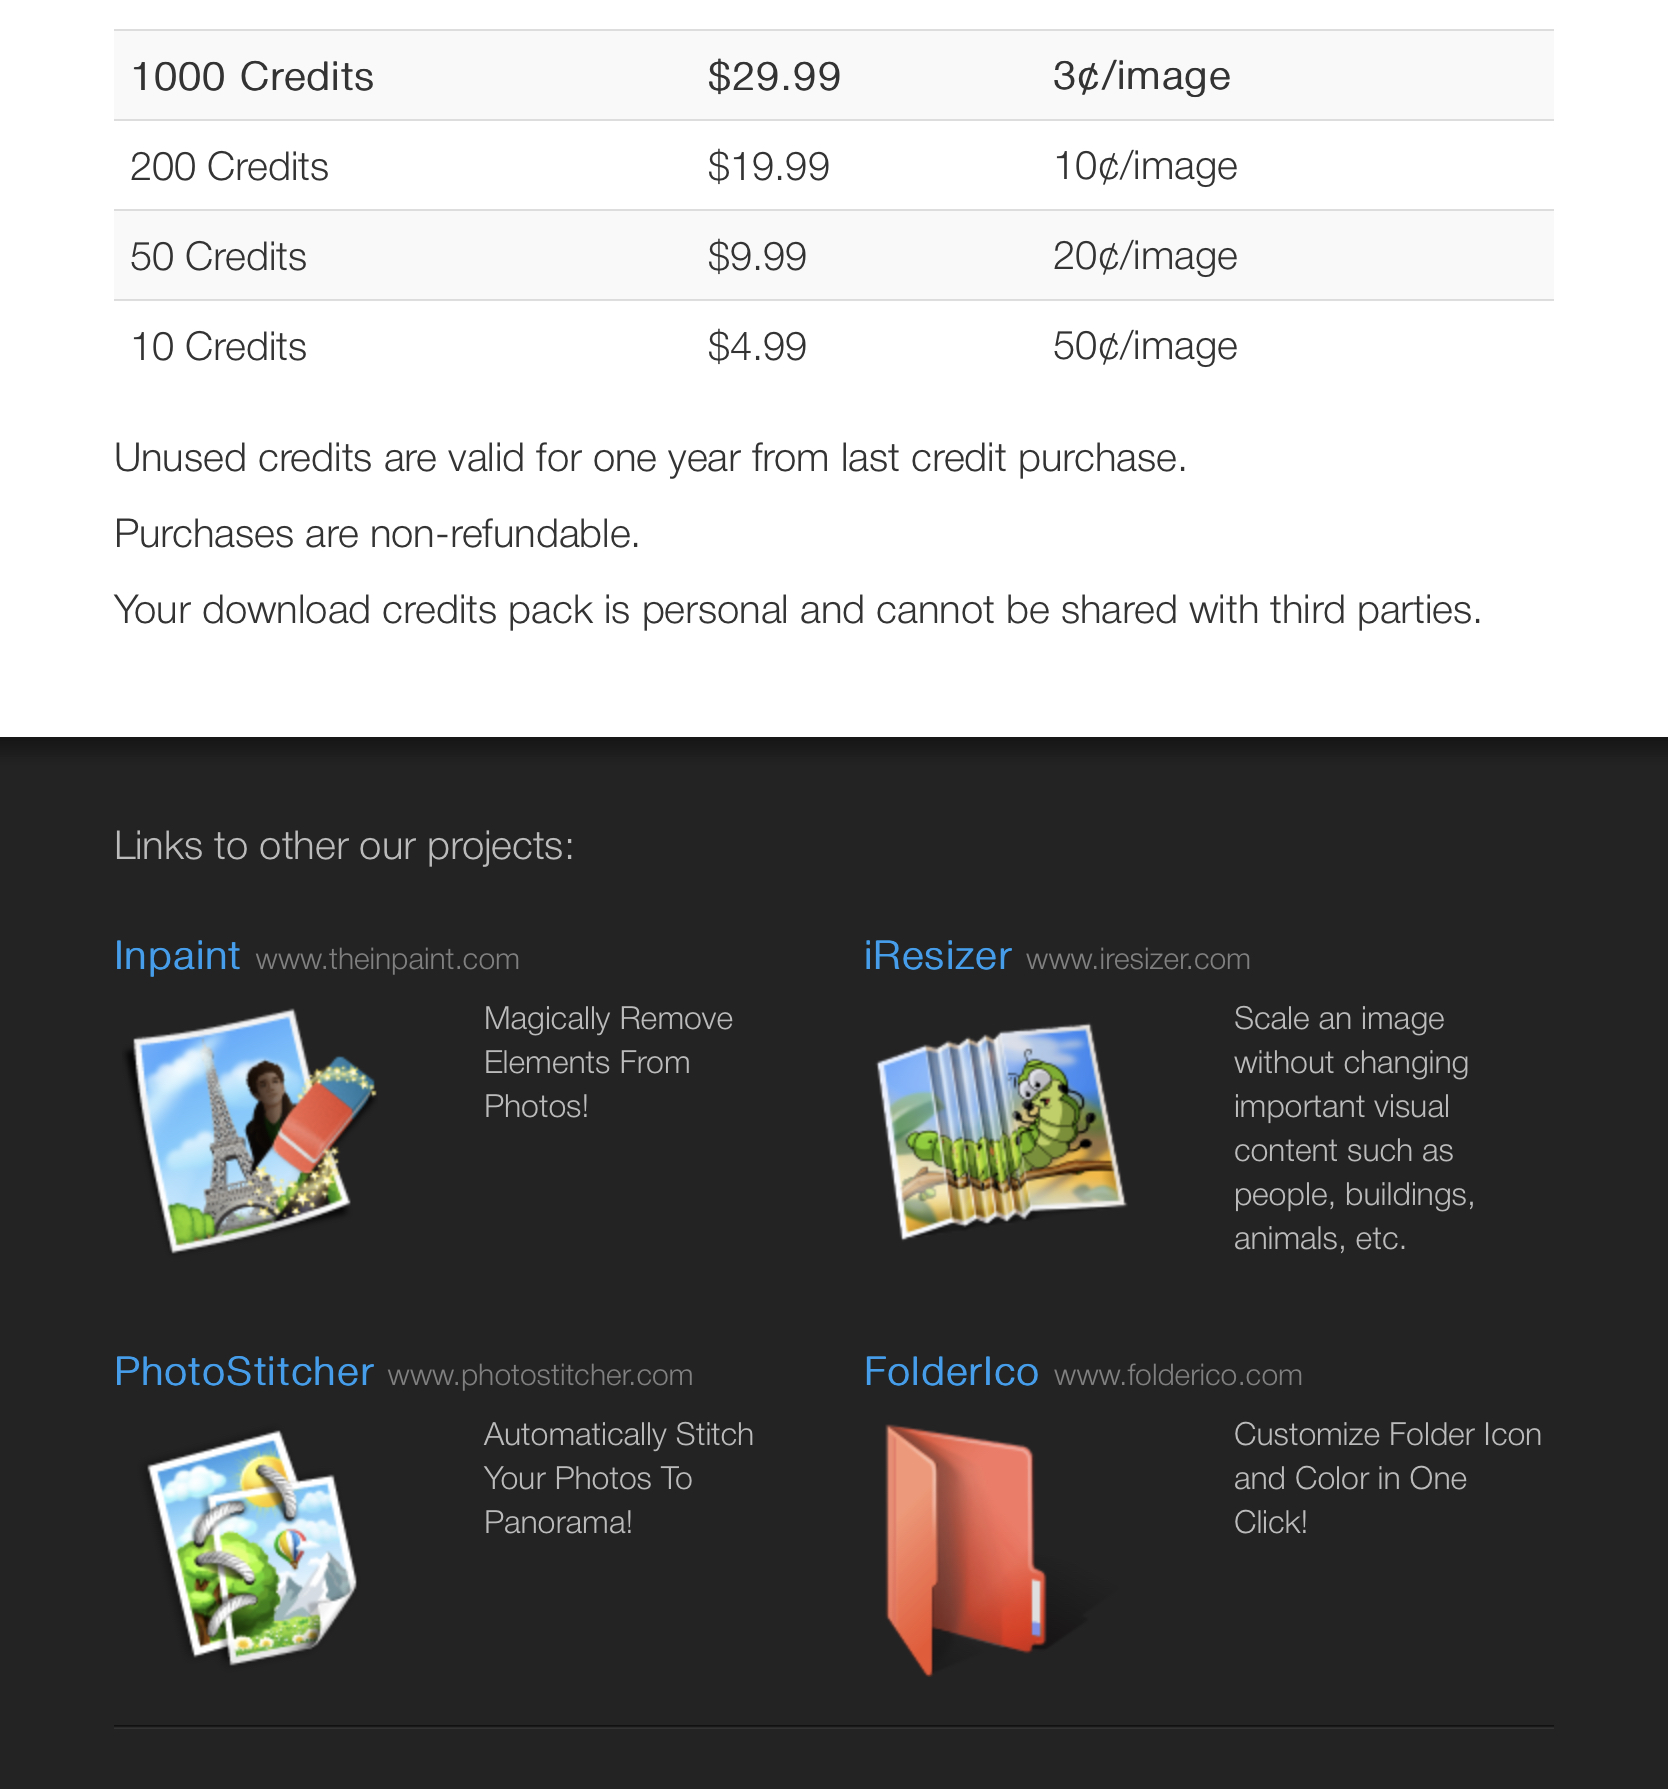
Removing backgrounds can be kind of tedious and time consuming, especially where there’s hair or fur involved that has wispy bits that extend into the background. The more particular you are the longer it takes.
I use GIMP for my photo editing and by using the Select By Color tool and the Eraser, I got rid of most of the dogs background in about 3 minutes.
It’s still pretty dirty especially around that ear on the right, but like I said, it was a 3 minute job.
In GIMP try messing around with the Select by Color tool (and the delete key) and play with threshold slider to experiment with how close colors have to be to the selected color to be included.
And the Eraser tool is good too for just manually getting rid of stuff.


 ![IMG_4475|240x320]