Hi Everyone,
I am quite new to the laser scene having purchased a machine last June. Up until December everything was working fine but then noticed fine detail on engravings had become fuzzy and not crisp.
I had a go at aligning mirrors and cleaning them along with the focus lense.
Did another test but still no joy.
I read about the laser could be hitting the inside of the cone on exit so have drilled out the cone at the bottom so the hole is slightly bigger.
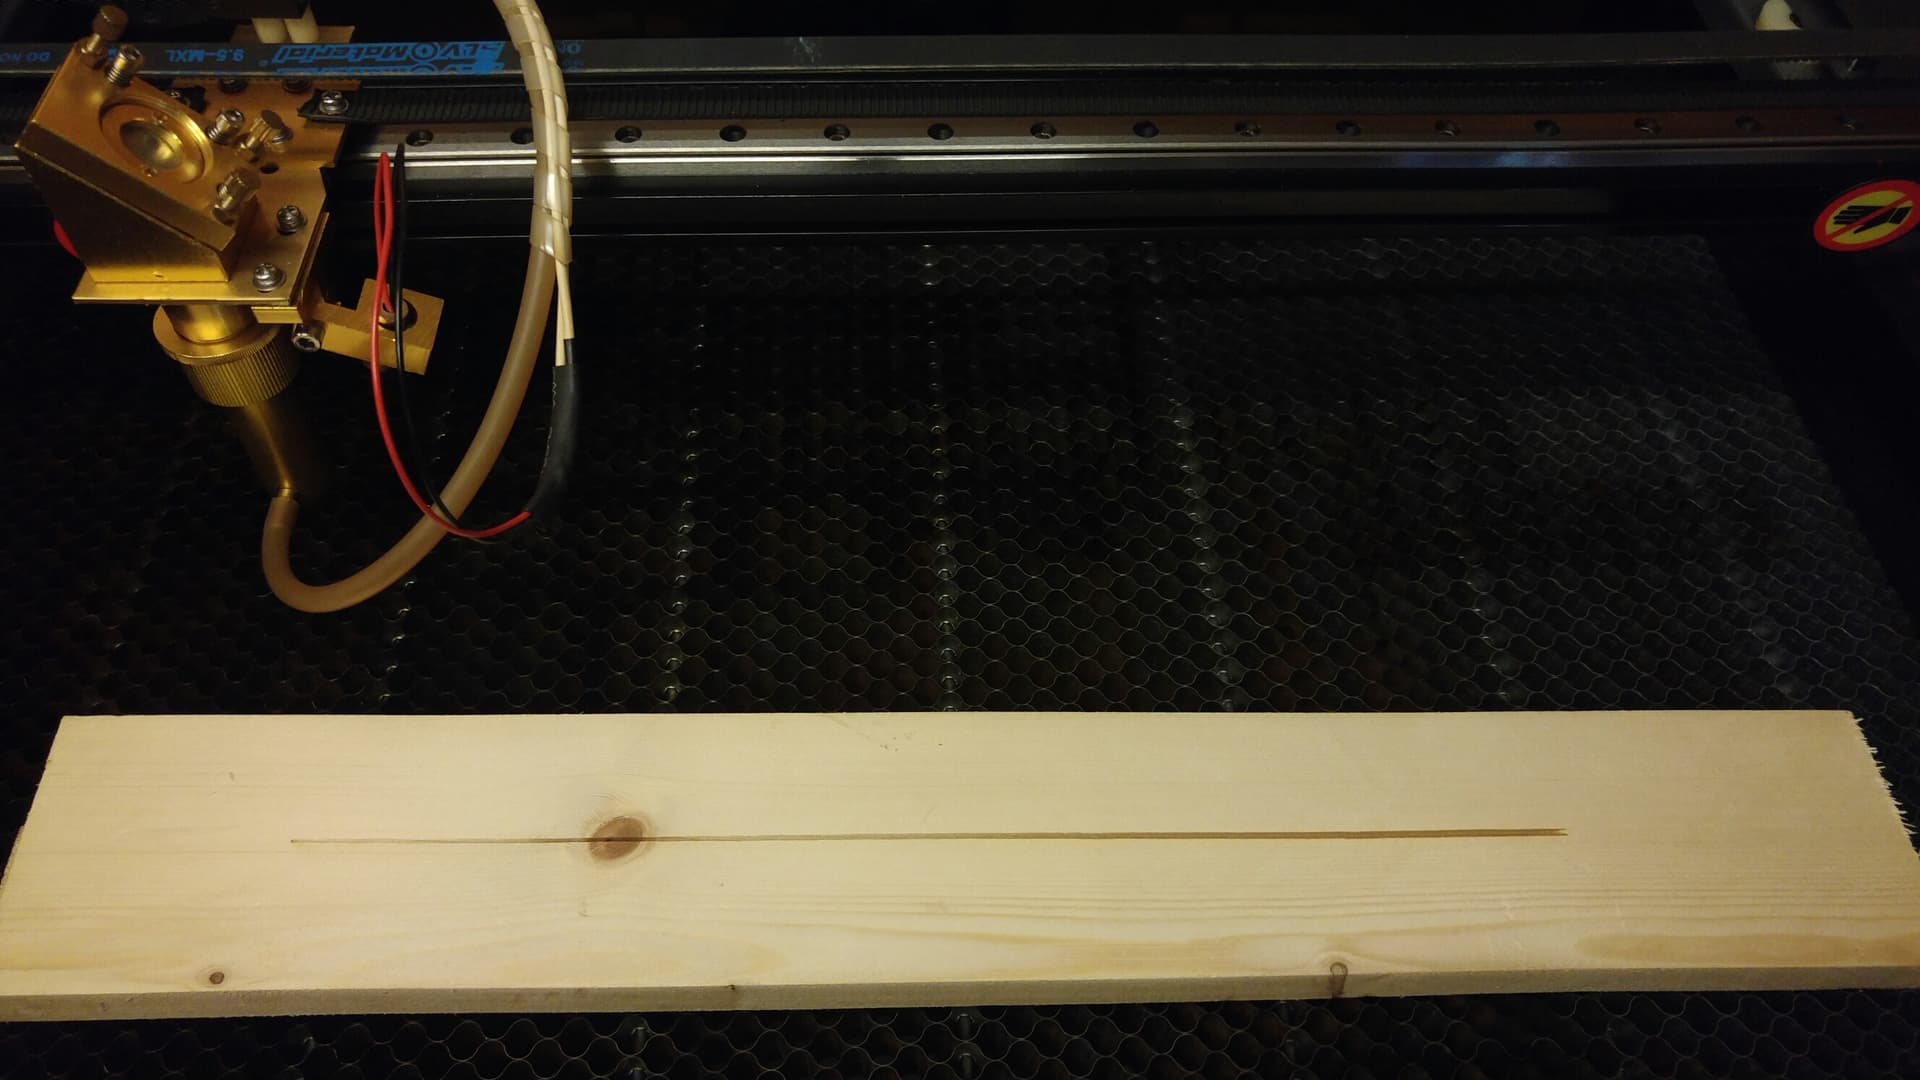
I purchased a new 2 inch lense and have installed it. When I did the ramp test to set the focus I had the oddest result. The line started of thin on the left at the closest point to the nozzle then went wider and wider to where it finished on the right.
When I have performed this test before it usually starts off with a line closest to the nozzle starting from the left then gets thinner in the middle and then wider again to the stop at the right.
Engraving is so bad with big broad thick lines even at 15 percent power.
Does anyone know what could be wrong?
If you require any pictures etc then please let me know.
Thanks
It sounds like you’ve had a different lens to start with. How far is your nozzle from the material on the left when you start your focus test?
Hi Bernd,
Thankyou for replying,
The nozzle is virtually touching the material on the left.
Is the lens in the nozzle or mounted “higher” up in the nozzle tube ?, sure you have not got a 2.5 "lens?
oops, I mean 1.5 "lens which has something with 38mm focus distance
Sorry for late reply, please see pictures attached.
The lense should be a 2inch at least that is what it says on the tin.
I also purchased a 1.5 inch lense but have not tried that yet.
Is there some kind of test i could do like reset lightburn etc?
The ramp test was done with the raised piece starting at the left.

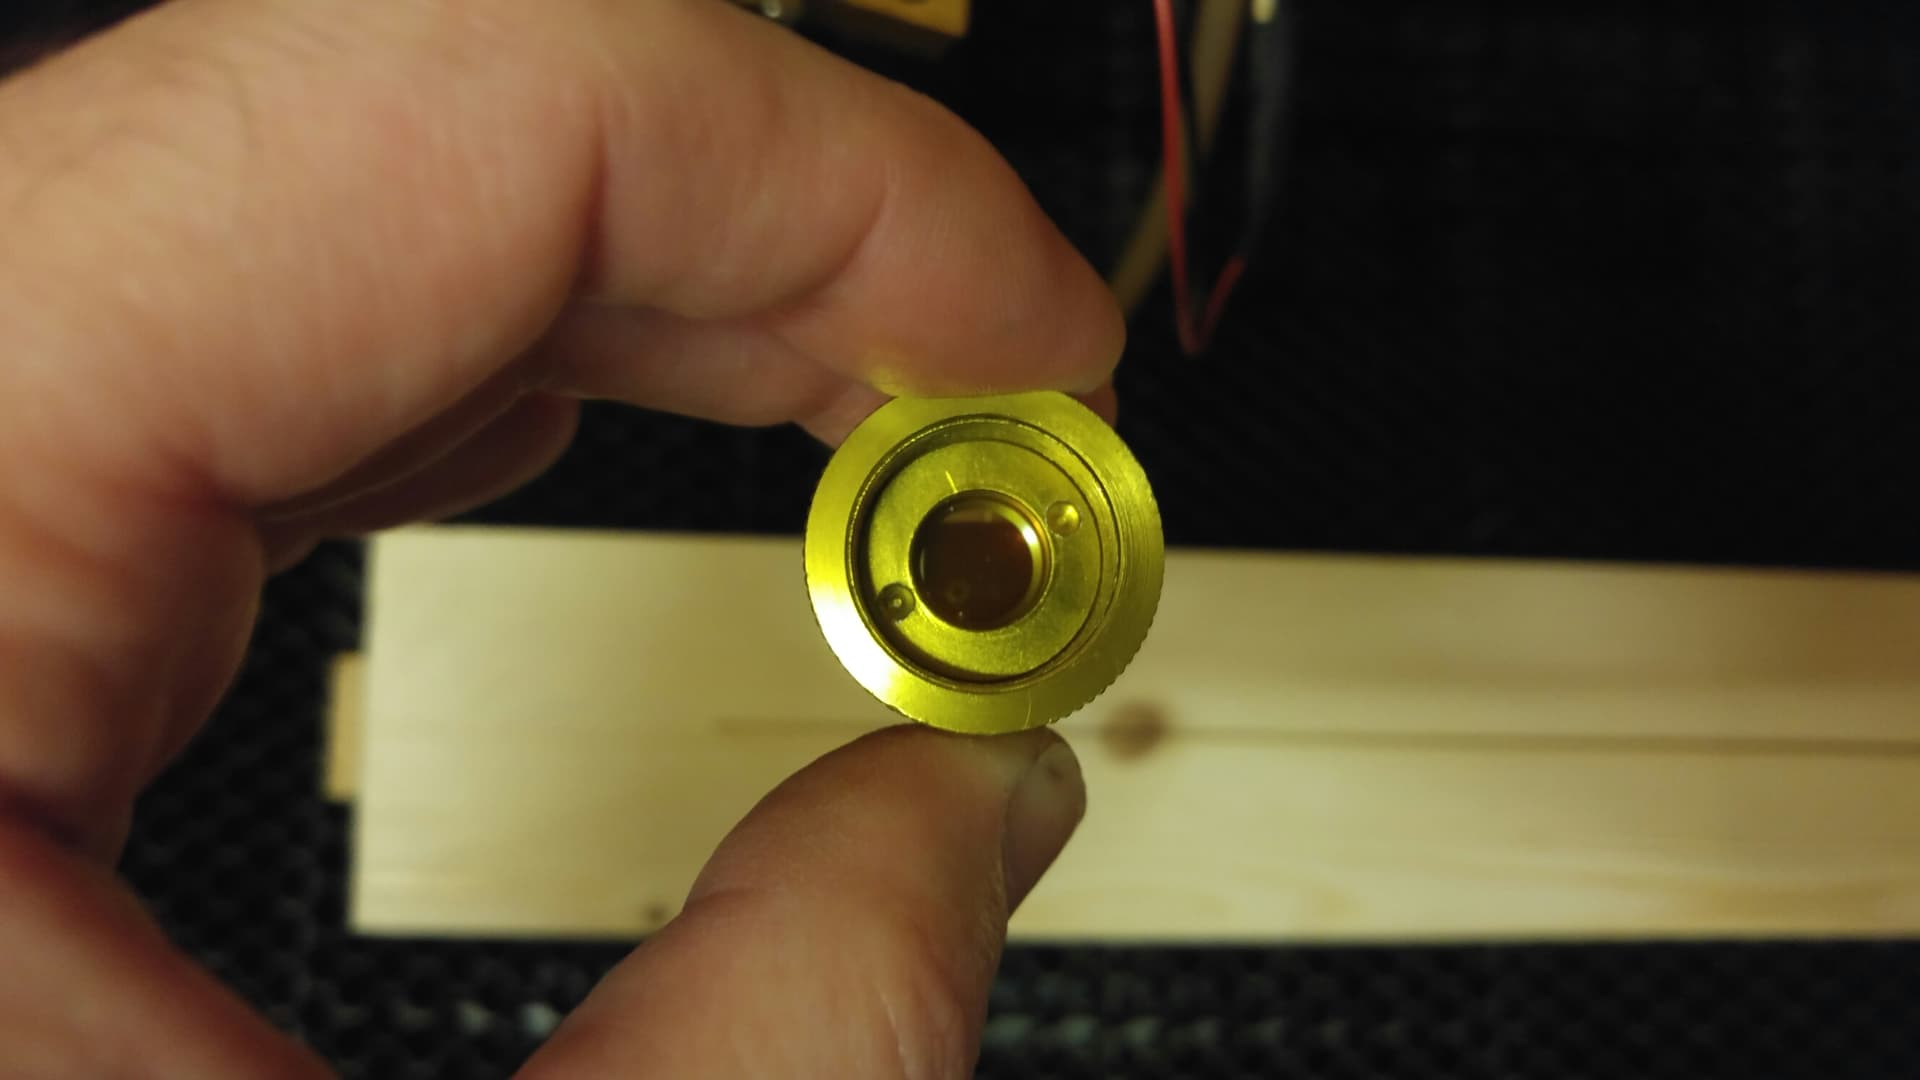


The lense sits in the top section of the nozzle. I have inserted the lense with the curved side face up and the flatter side facing down towards the bed of the machine
Does the top ring that sits above the thread have to be in a certain position or can it be tightened all the way to the top and then the cone screwed up to a tight fit against it?

In the picture it looks like the distance from the lens through the tube down to the surface of your sample item is longer than the 50.8mm, how far is this nozzle, approx?
The one you have in your hand looks like a 2.5 “or 3” lens holder
Sorry about the long wait inbetween replies I have no internet in the workshop and have to go back and fourth from the house.
So this is the measurement I took.
I burned a test ring using the original plastic focus setter that came with the machine.
As you can see the ring is very wide and completely out of focus.
So I went with the 2 inch lense and 1.5 inch as these supposedly give the crispest engrave. I am running a 100 watt laser by the way.
When they refer to the inch size of the lense what does this represent? Is it that the lense should sit 2.5 inches from the cone where it is seated to the surface of the material being cut?
Sorry for the newbie questions?

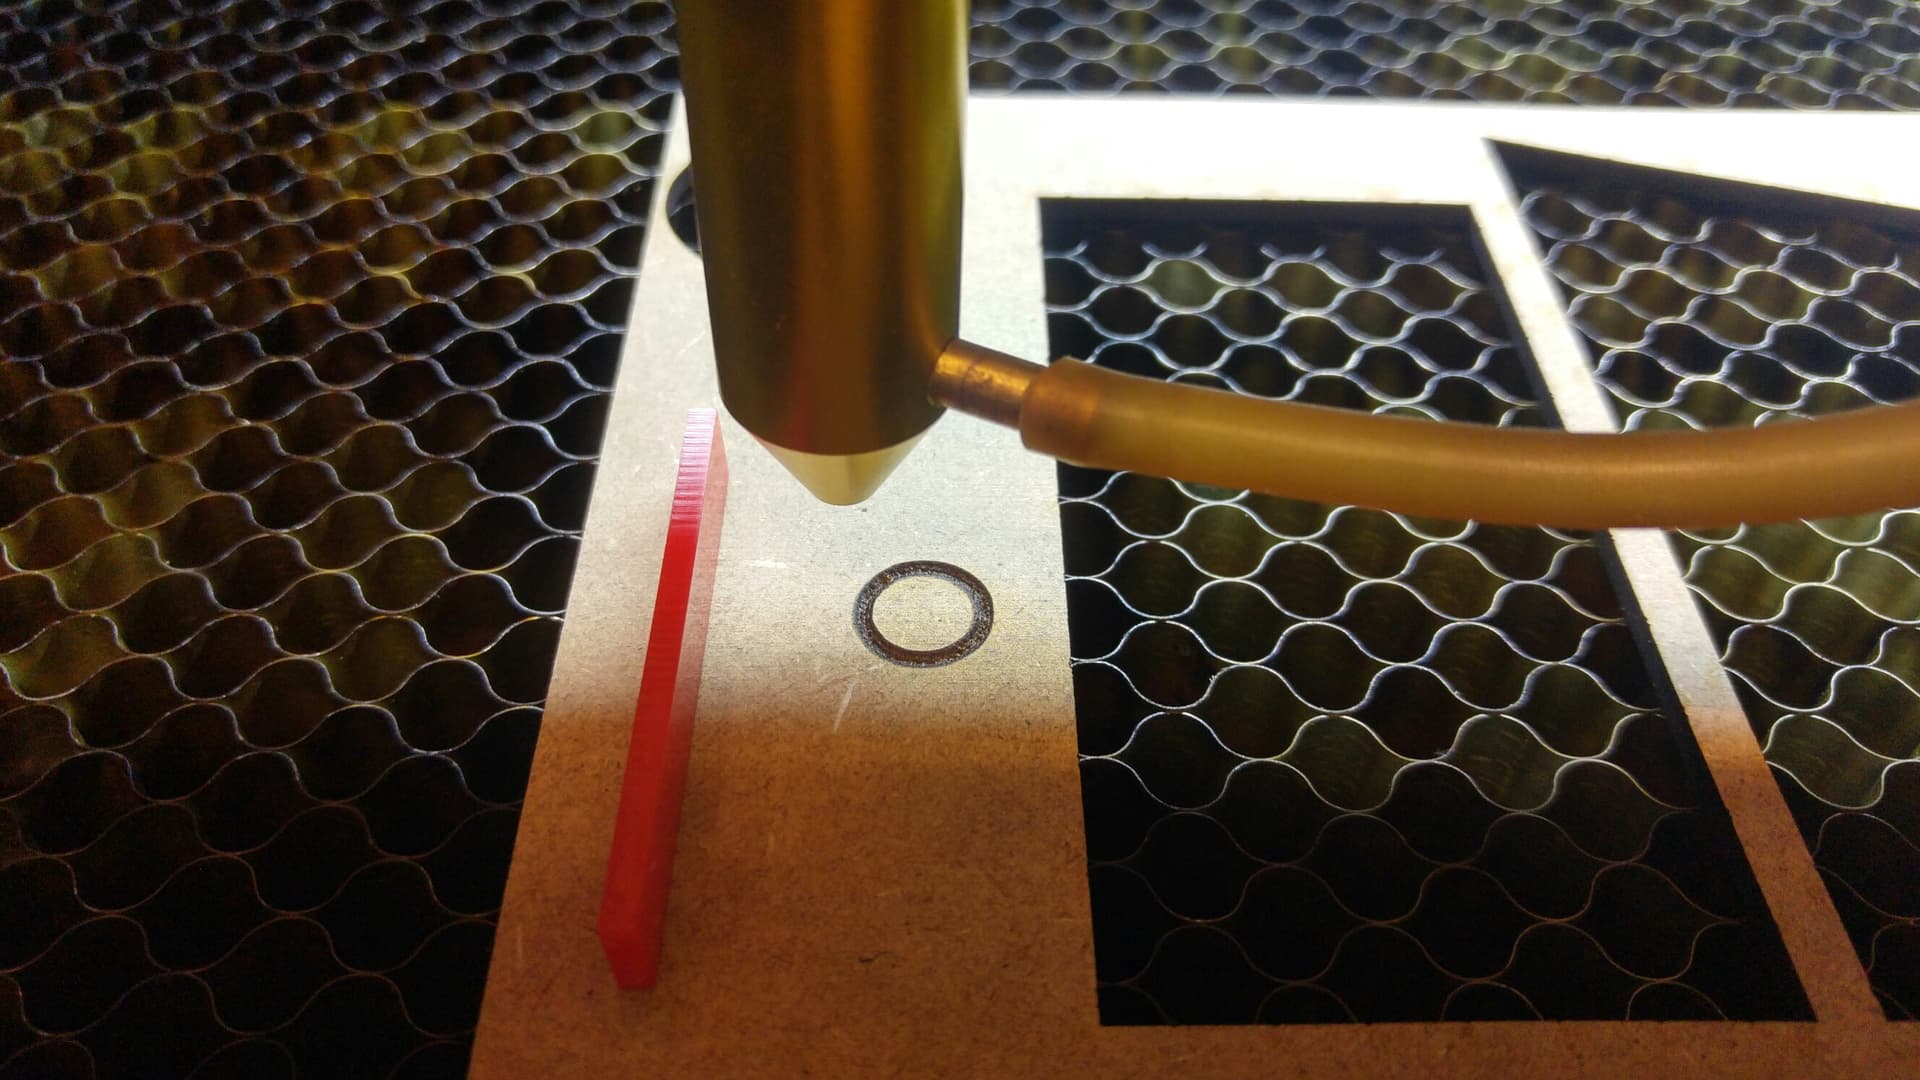
So in my case should the lense sit 2 inches away from the surface of the material roughly? then do the ramp test to fine tune it?
From the measurement the lense is sitting roughly 2.5 inches away from the surface of the material. Do I need to bring the cone down so that it is sitting closer to 2 inches for it to work better?

It is a 2,5"lens distance you show in picture
From the upper edge of the lens to the surface material, there should be 50.8 mm if you have fitted a 2 "lens
Thanks Bernd,
I hope there is enough thread on the barrel to lower it that far. I will go and adjust and then do another test.
No I do not think it is possible, the distance is too far. If you take the old lens and position it between your fingers under a lamp, you change the distance to the table top until you get the smallest spot, the distance you can measure with your ruler. Then you can check what kind of lens the original was.
Have you checked the rails and trucks for parallelism with the bed. The picture appears as if the laser is going out of focus as it travels to the right. Since precision is paramount in laser engraving, I suggest you attach a dial indicator, to the truck, or carriage, whatever you wish to call it and move it manually from left to right. You will need to lay a very flat surface on the bed and make sure it makes full contact with the bed. (We don’t want to have the surface contributing to the problem). Adjust the surface gauge to show a number above zero and make a note of the value selected. This procedure allows you to measure deviations in either direction, up or down. Using a ruler, even a machinist’s precision scale, is not good enough. Don’t waste your time even thinking about it. When you’re satisfied with whatever solution you choose to correct the problem left to right, continue your effort across the entire bed. It will be well worth the effort. Good Luck!