Hello People of the LightBurn Community,
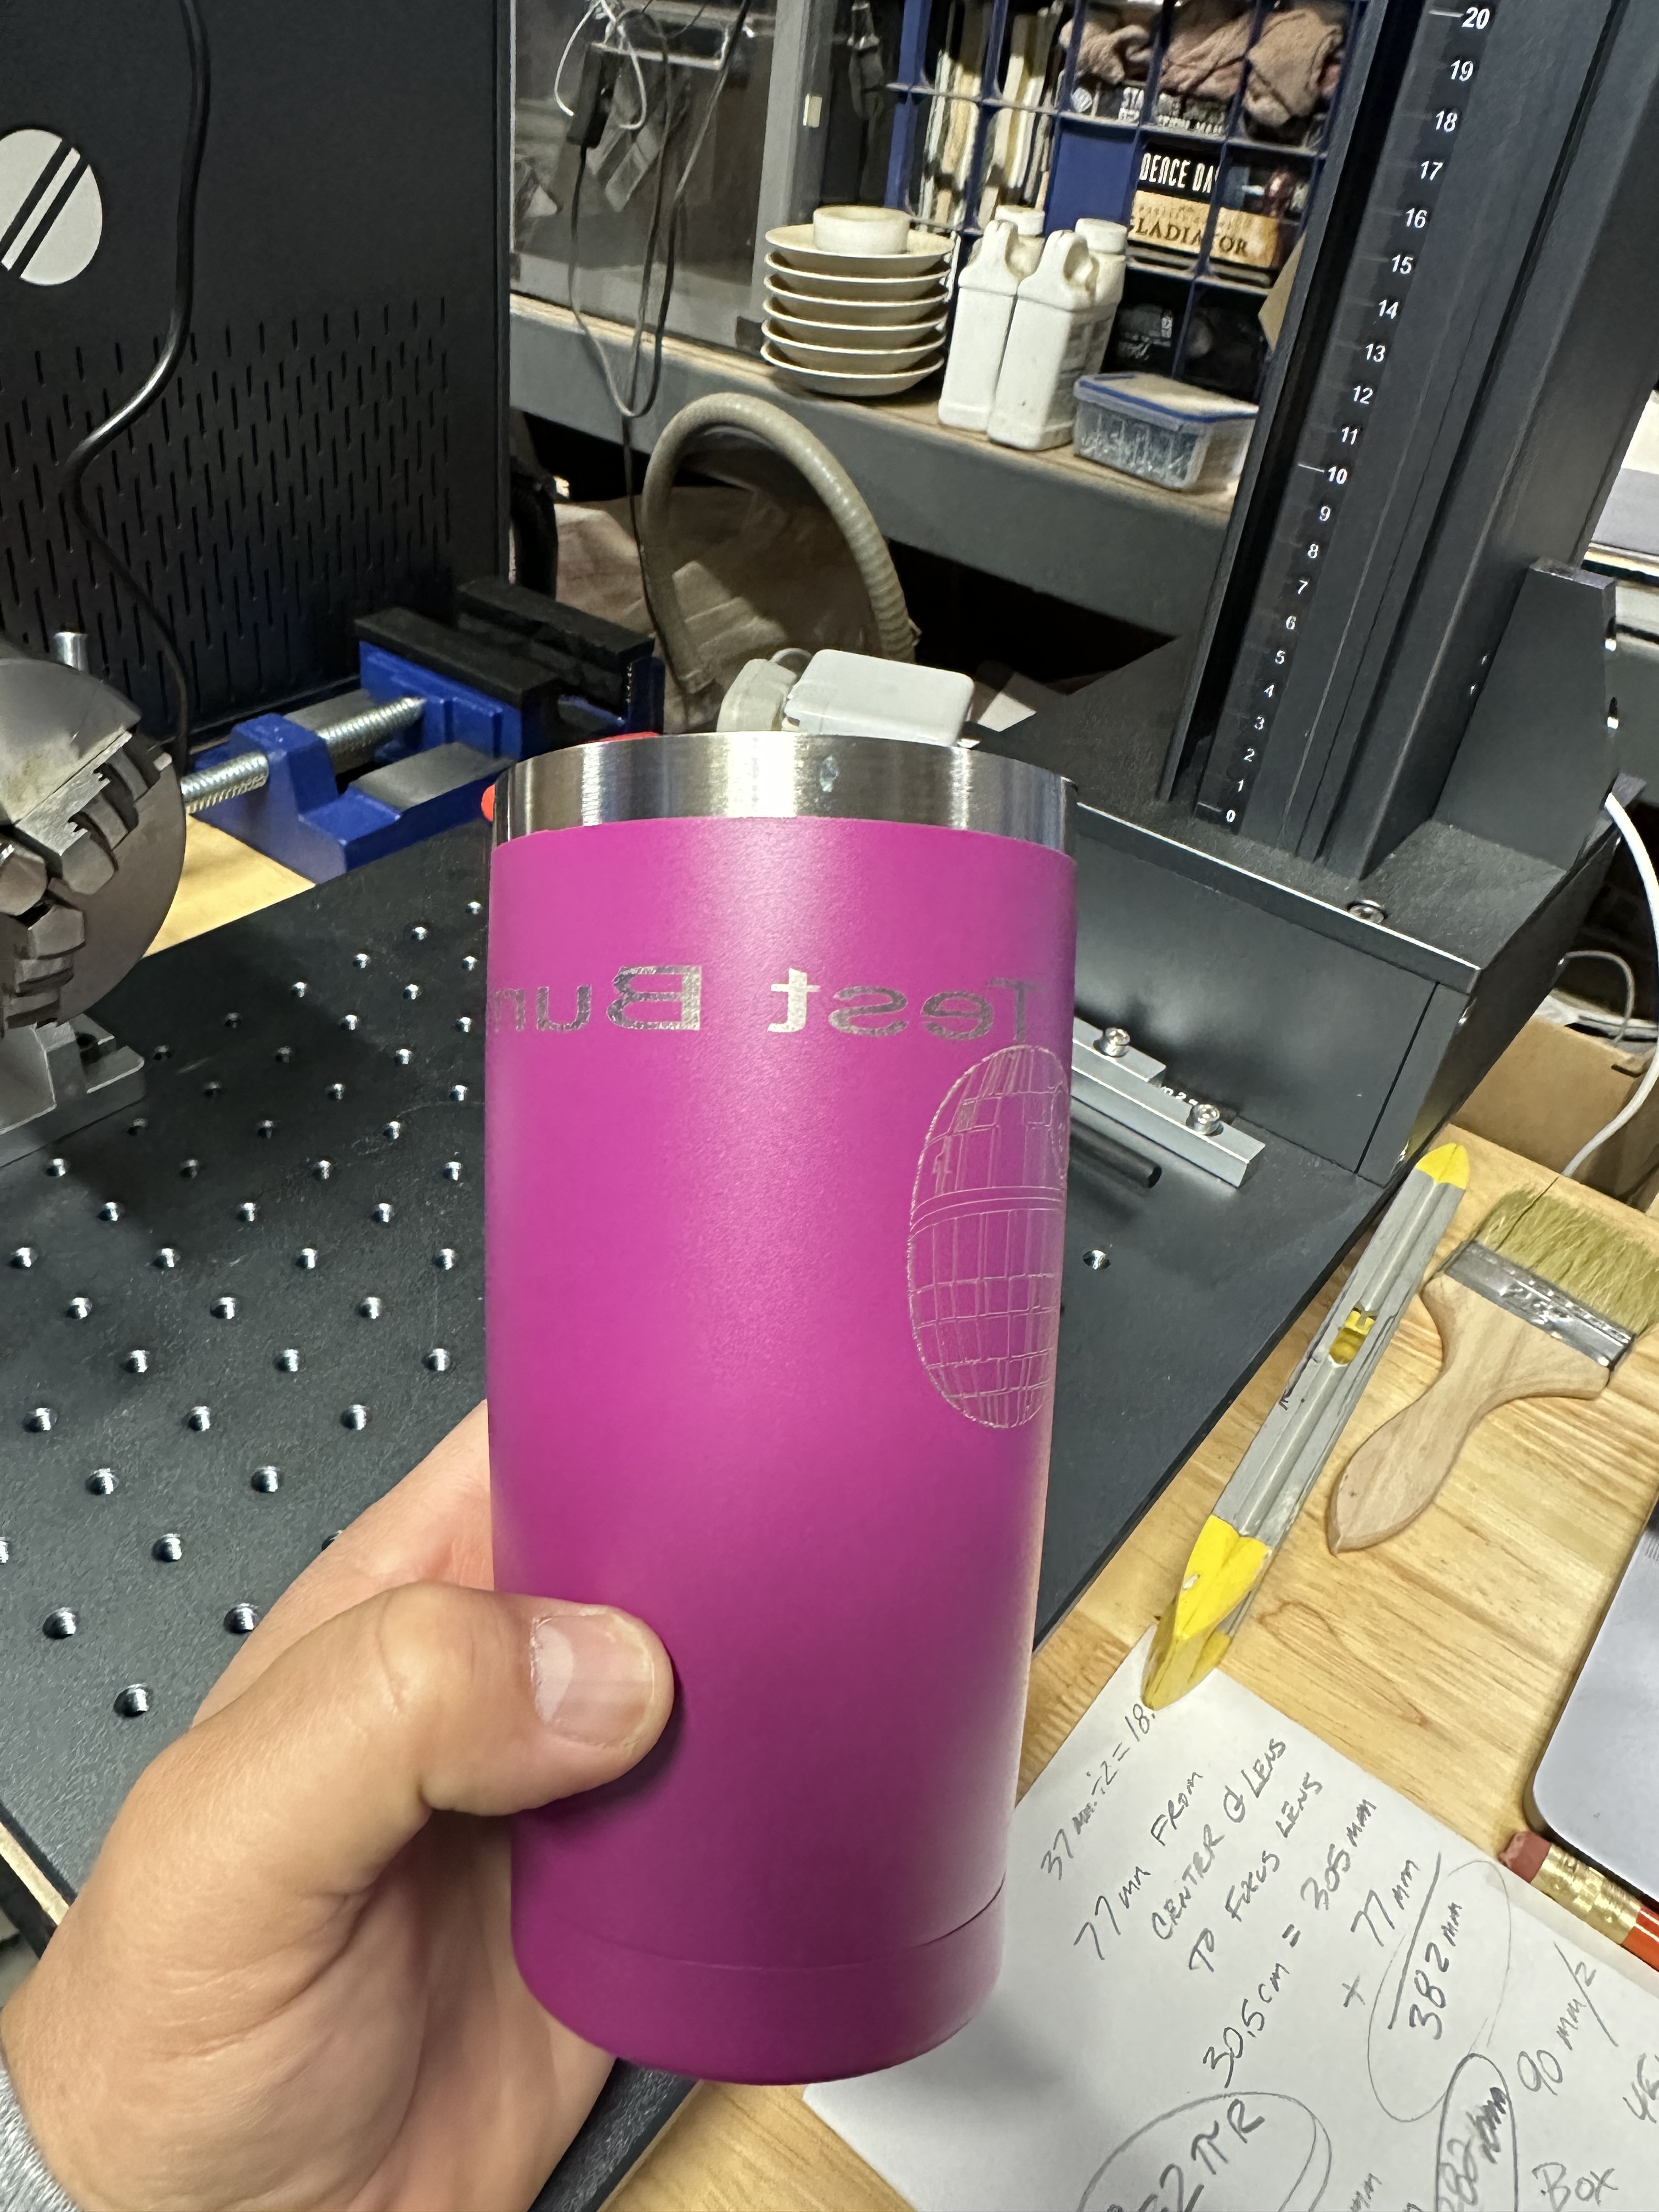
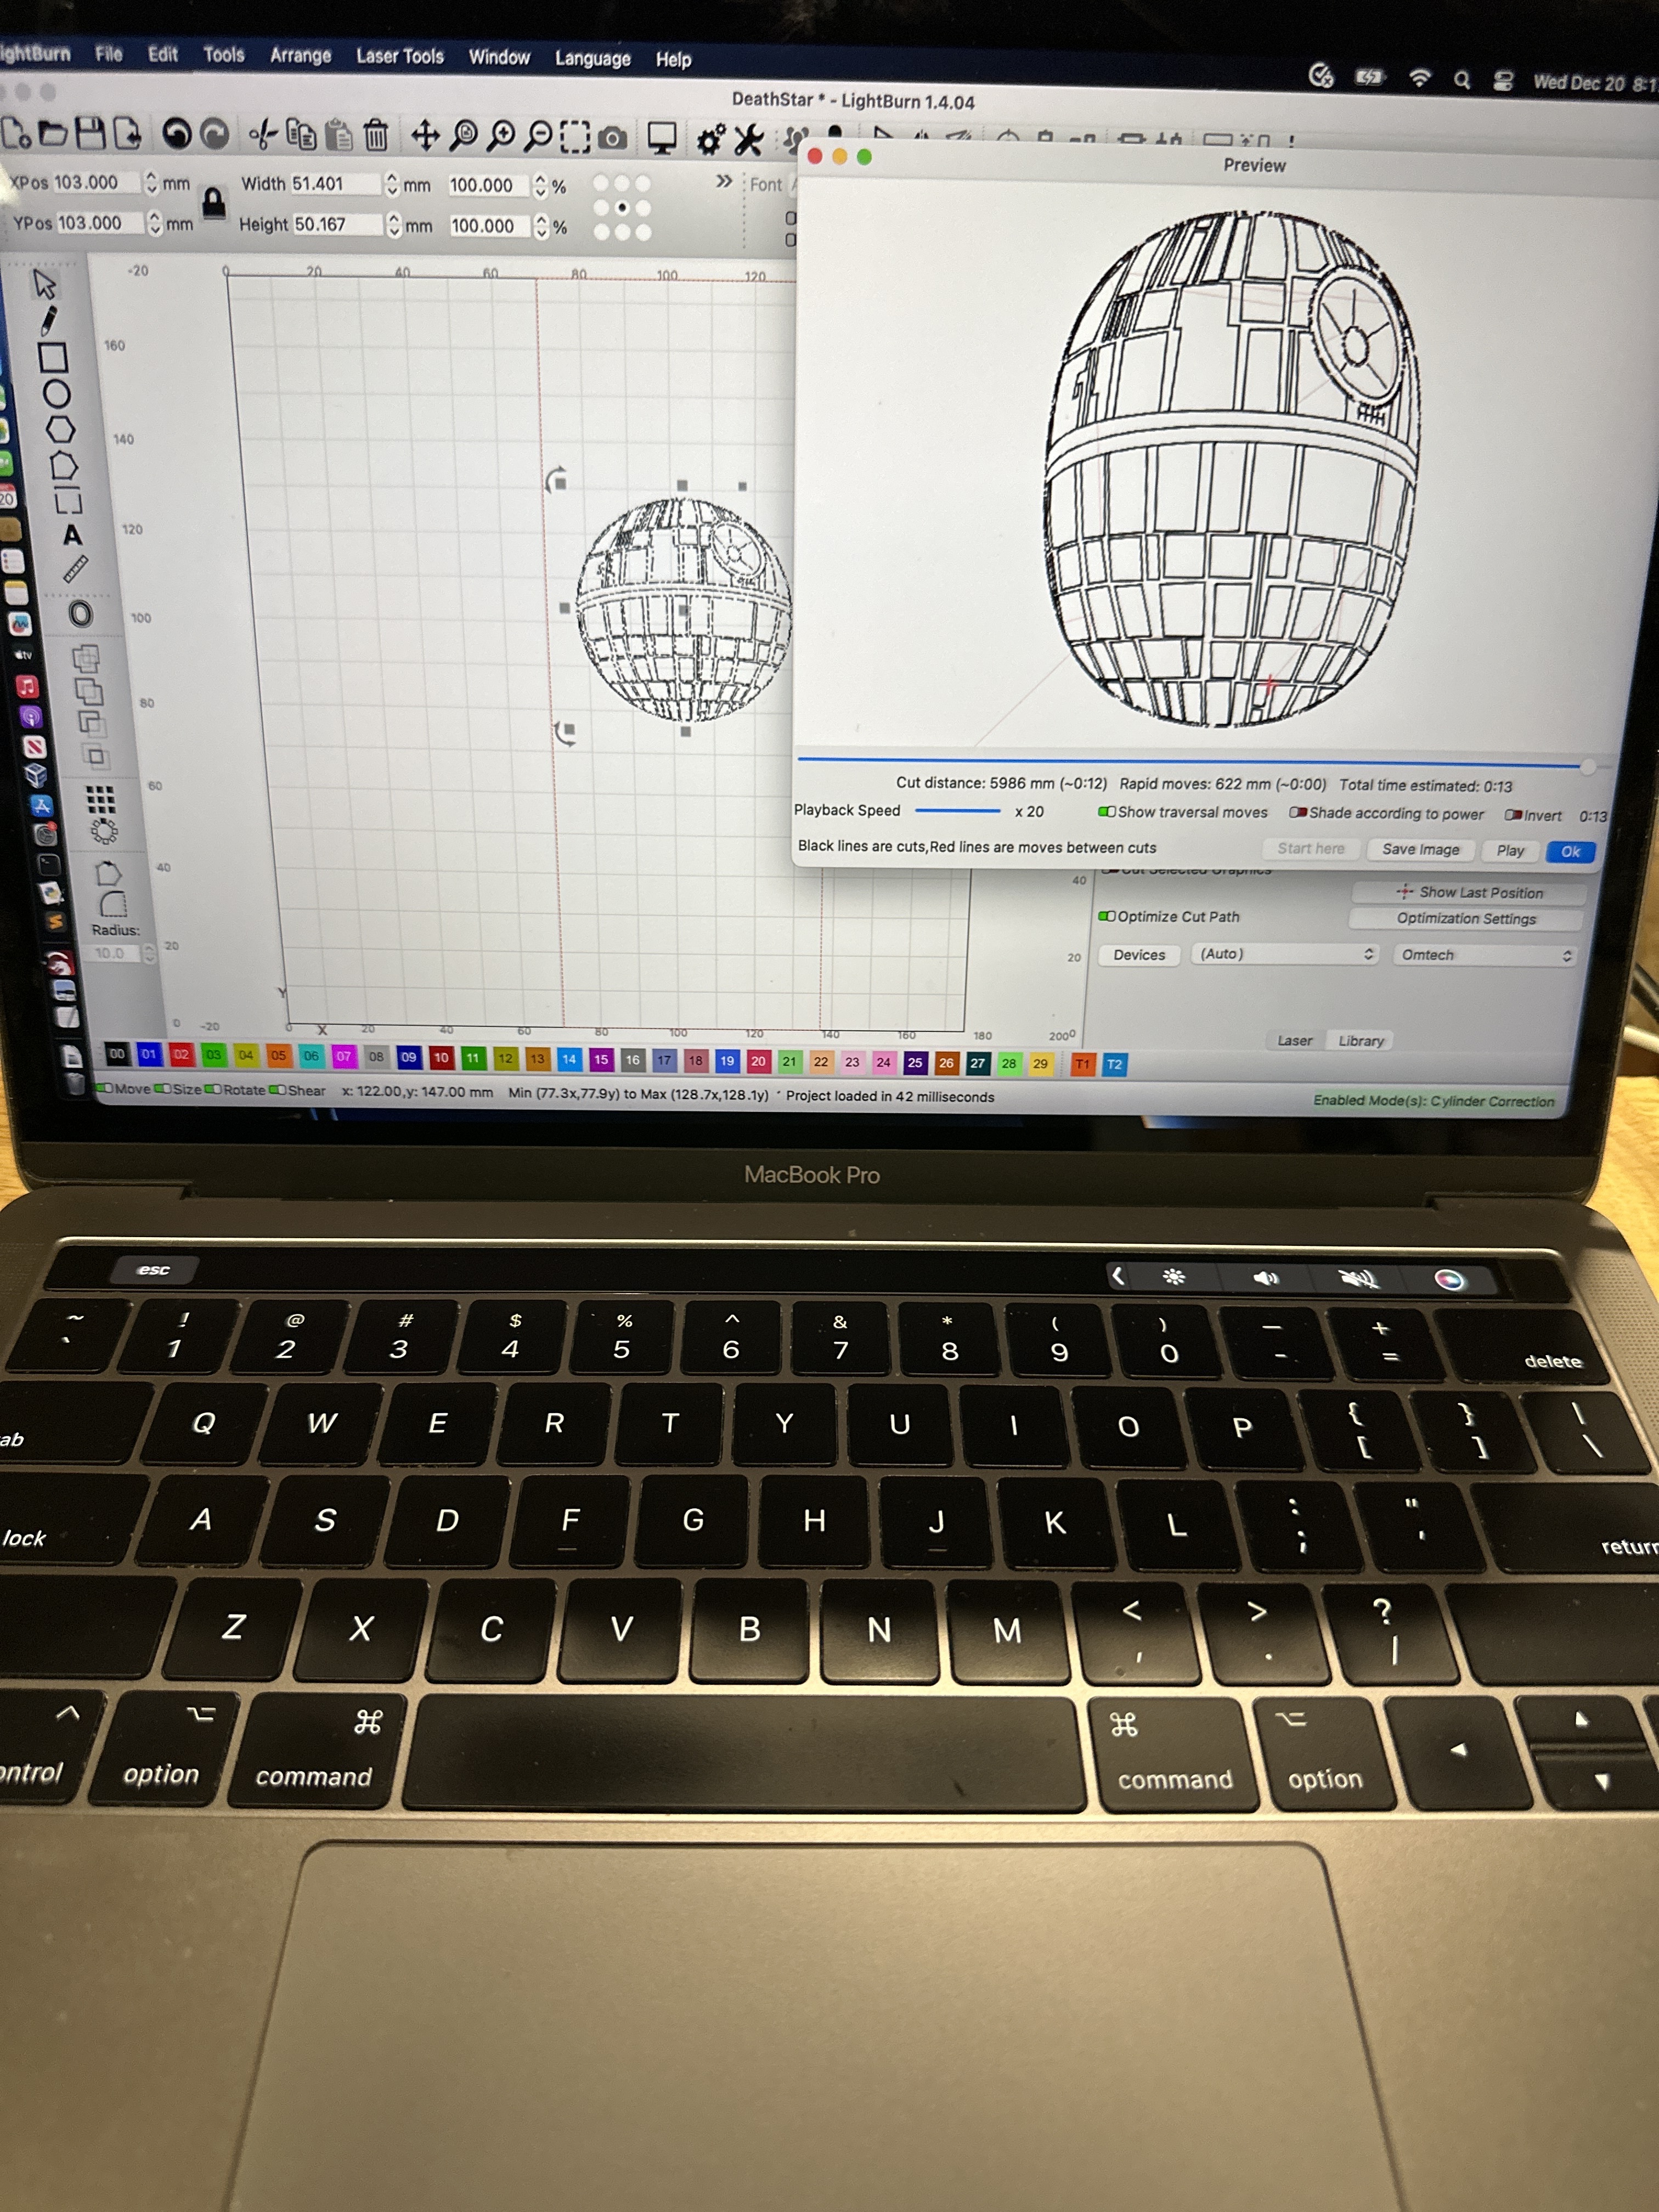
I’m having issues with the “cylinder correction setup” tool. I have my image laid out within the etching boundaries and it looks good.
My mirror distance, object diameter and all other settings look good. When I start the laser, it obviously etches exactly as shown in the “preview”. What is causing the perfect circle to be etched in an oblong fashion? Any and all comments are well. I am a fiber laser noob, so take it easy on me. Thanks in advance for the help!


Cylinder Correction is meant to be used if you are not using a rotary. So i don’t think it will help with your issue here.
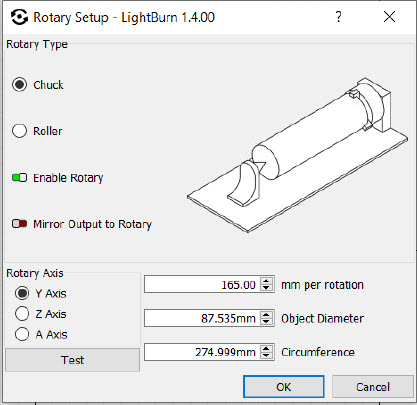
Check your settings in Laser Tools Rotary Setup
Make sure rotary is set to Chuck
Enter your setting in mm per rotation. Mine is 165 but yours may be different
Then do a test.
The rotary should move in one direction then the opposite direction
And it should end up where it started.
I use a sharpie to put a mark on the rotary top center to see where it started
It should end up in the same place as it started
Then enter the circumference of your mug.
Set your start from to “Current Position”
Then manually move the laser head to the start point and do a frame.
Adjust as necessary until you get the frame in the correct position
This is the process i use and my mugs have always looked correct. Although i don’t think i have done anything with circles. ![]()
If everything looks correct and you are still having issues check out the video below on how to correct your issue
Check this video and see if it helps

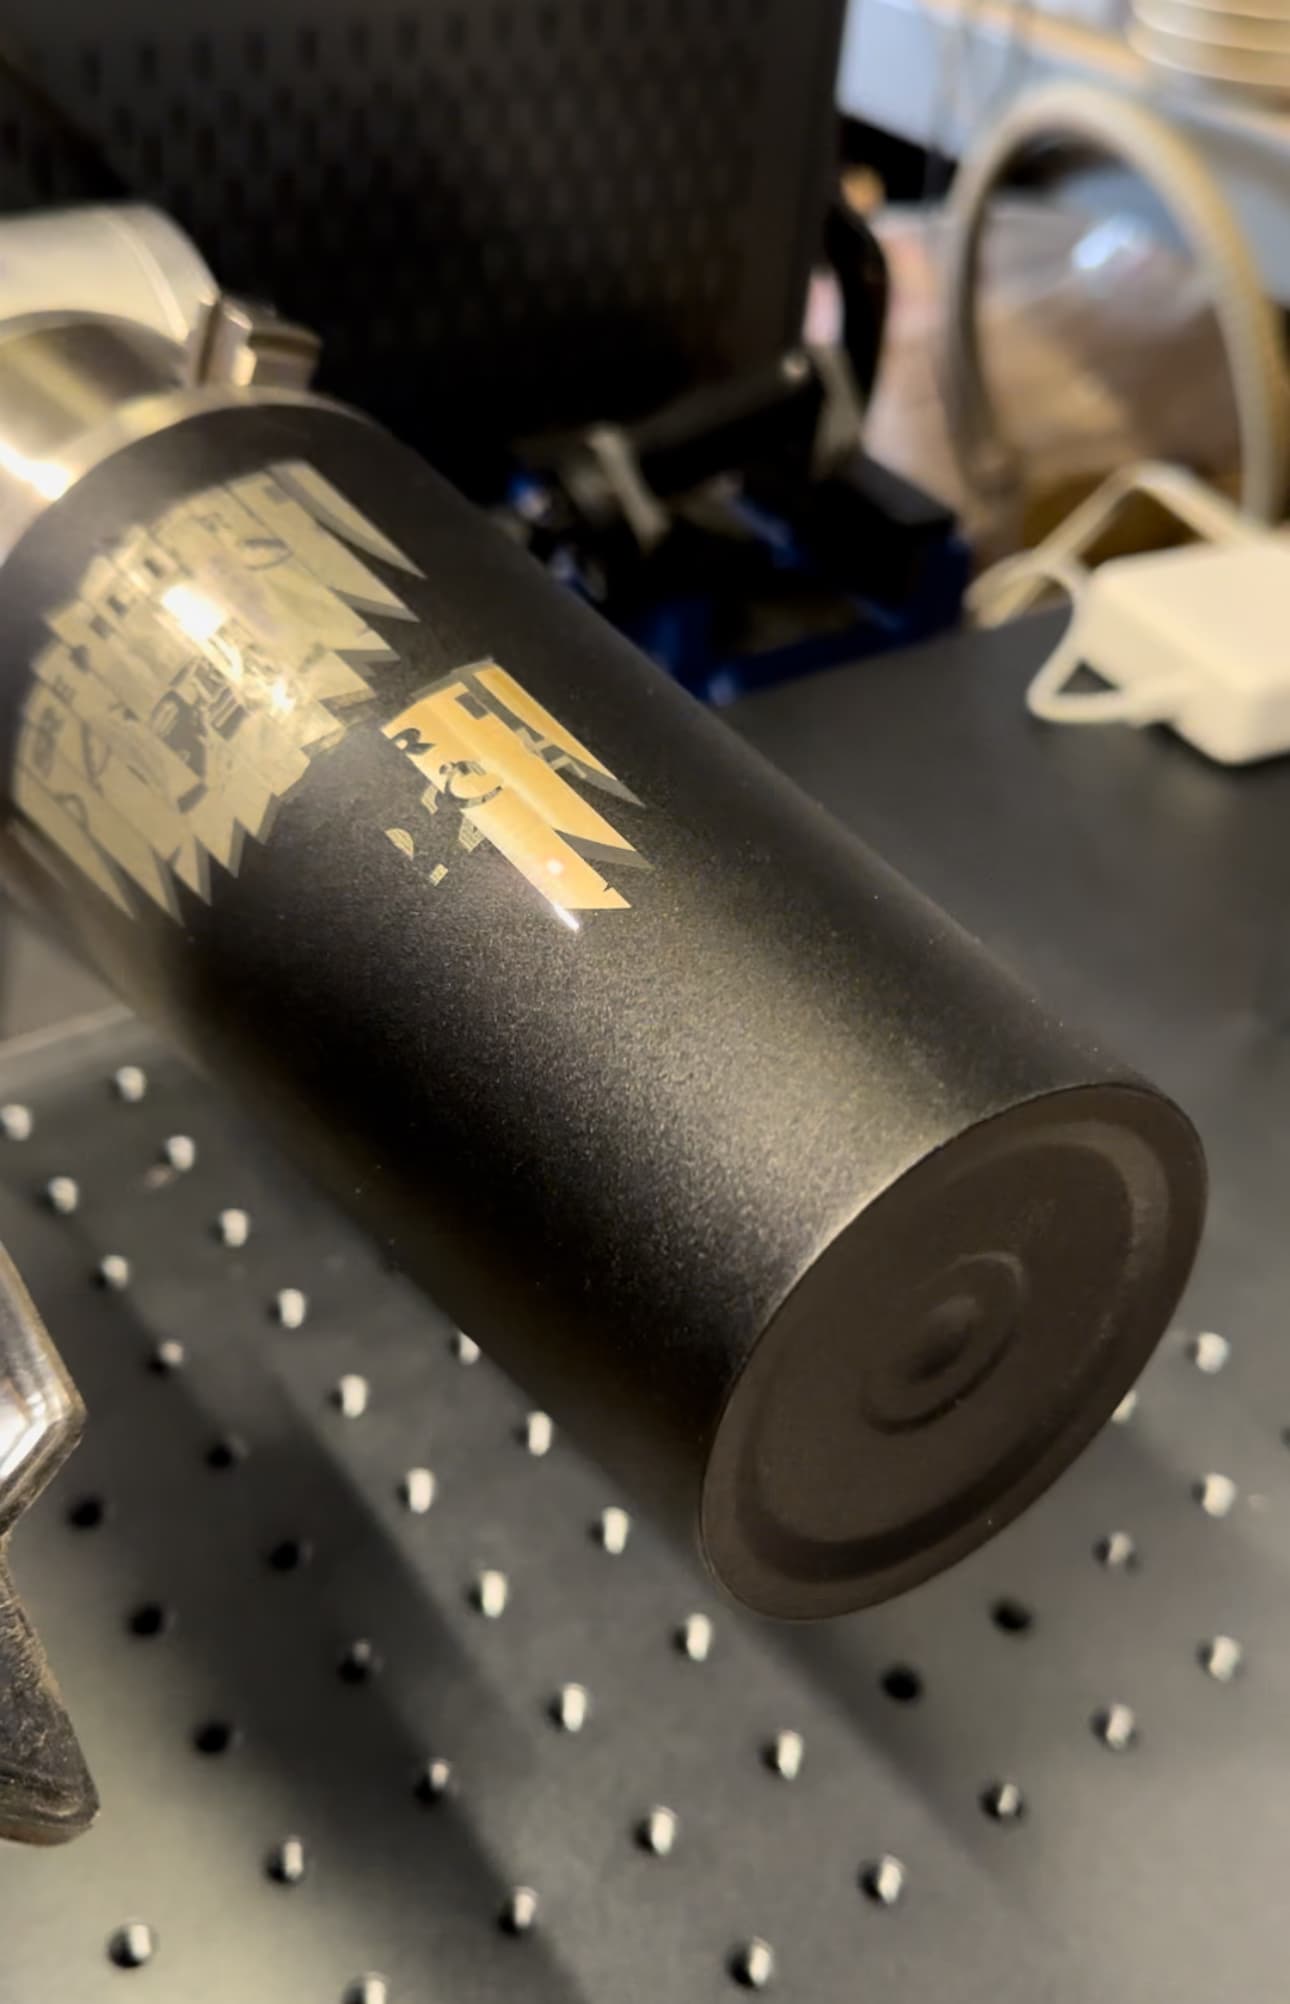
Thanks baric1317 for the help. I will give it a try. I was only trying this method because I have a rotary tool and my results are even worse than this. Here are some pictures of my messy rotary tool work. This is really frustrating. =(

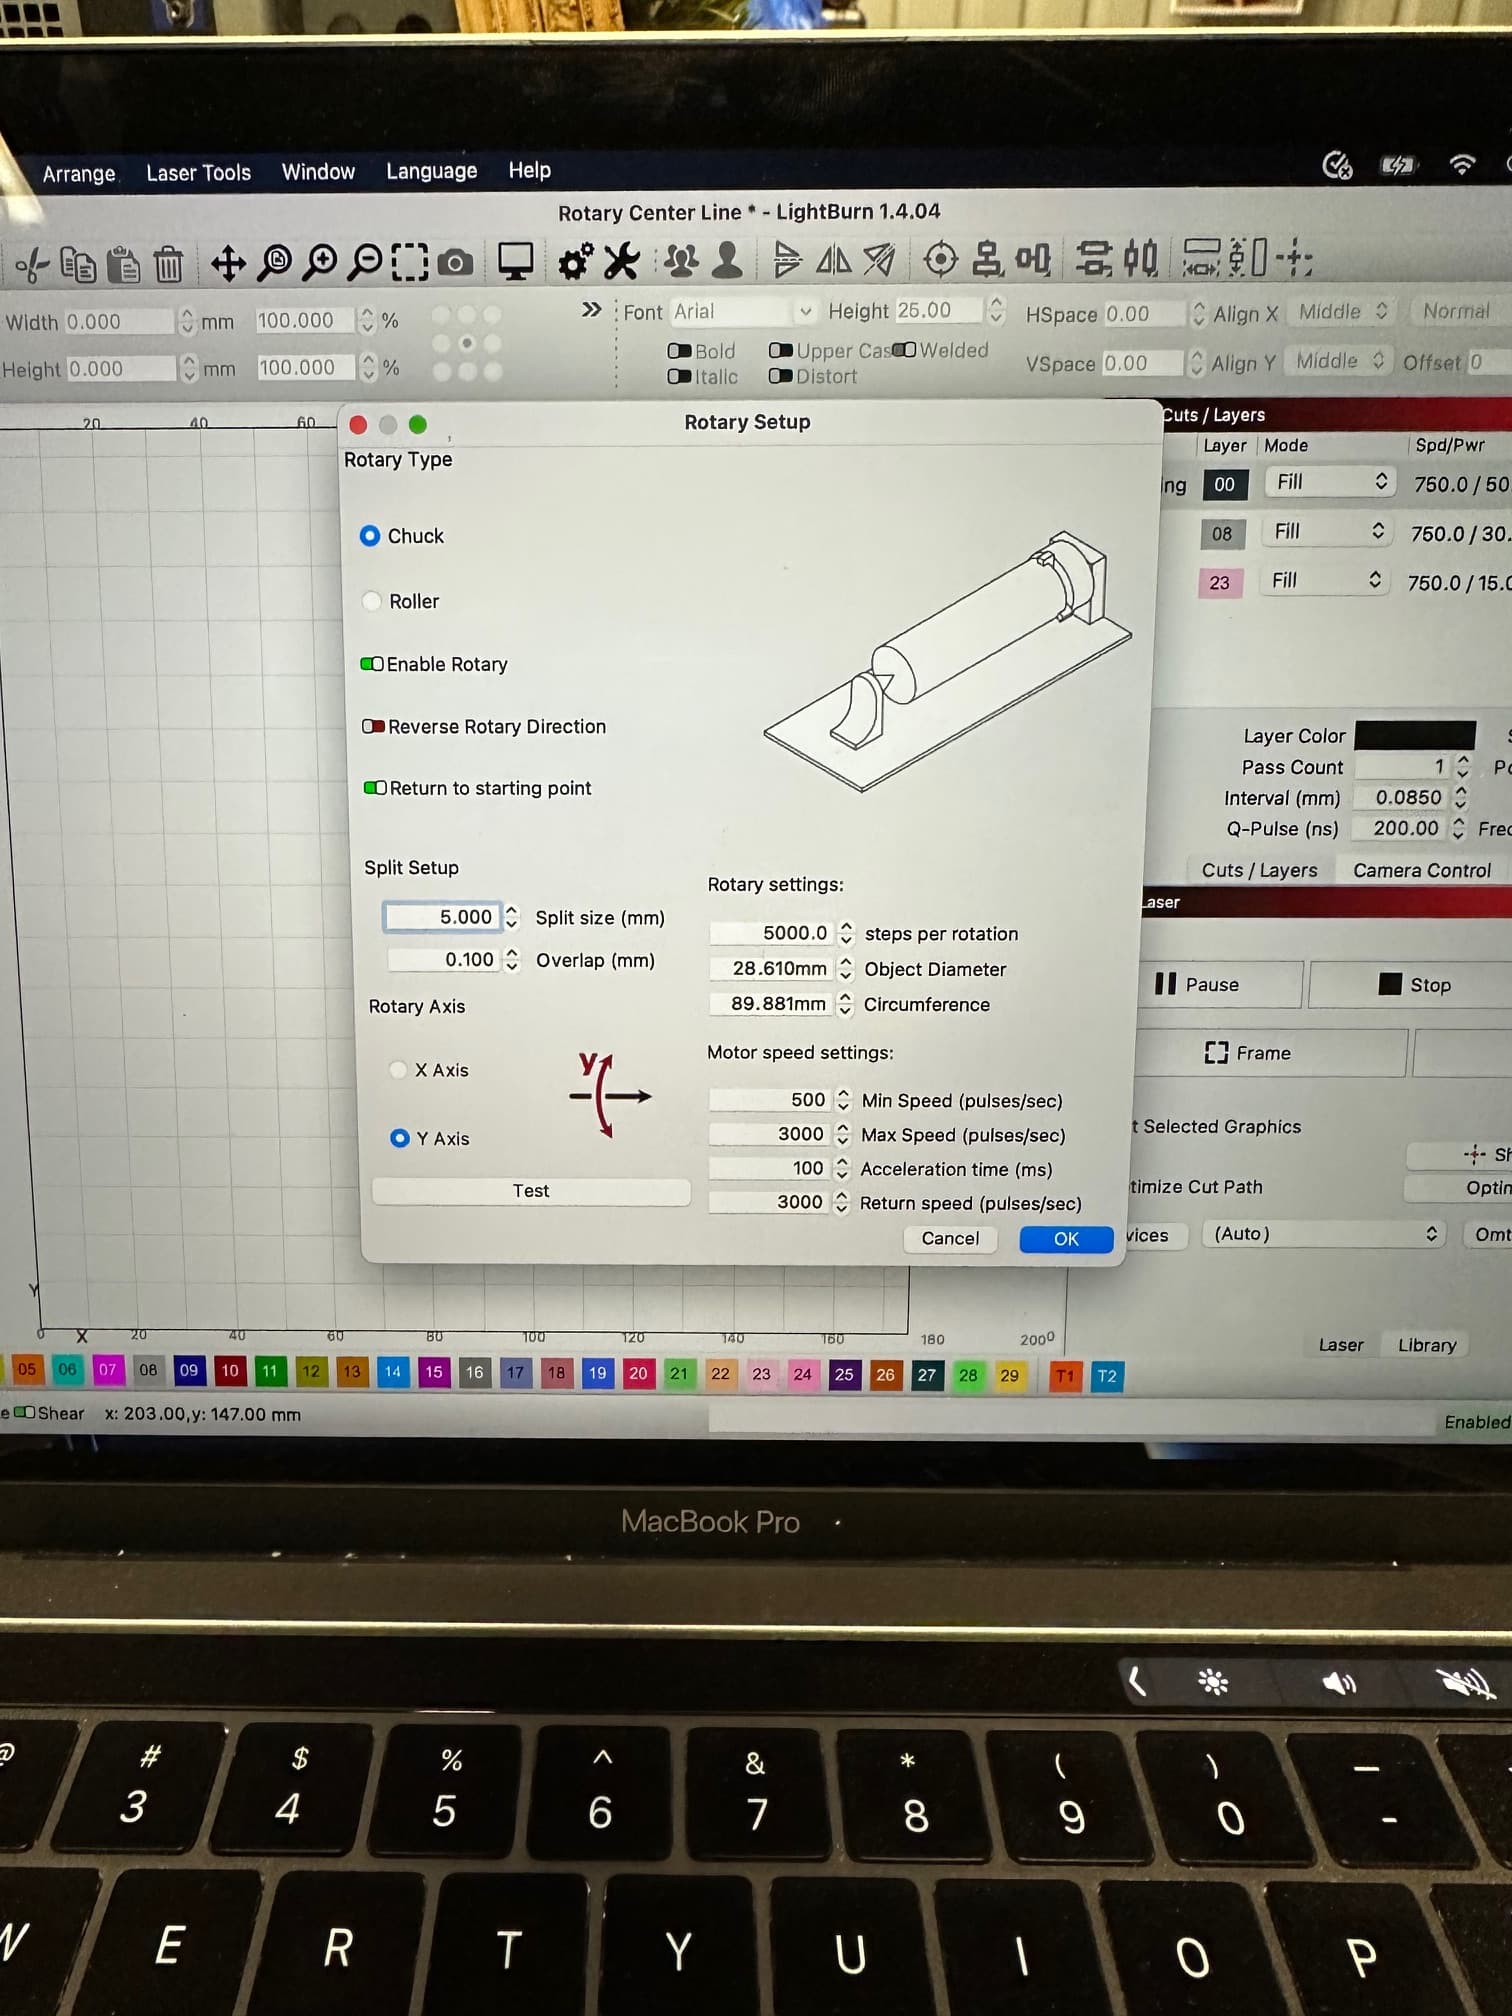
It shows you have 5000 steps per rotation. that doesn’t look even close to the correct value
Yes, I corrected it and made it 12800…and the problem still persists. I just want to make a darn personal tumbler! LOL
When you do the test from the Rotary Tools Setup does the rotary turn in both directions and end up exactly where it started. What model of rotary chuck are you using. 12800 still seems way to high.
Try putting your mug into the rotary. Put a little piece of tape or a mark exactly on the top (0 Degrees) of the mug then run the test. The mug should end up with the mark or tape exactly on the top where it started from
Your screen looks a little different from mine. I dont know what Split Size is for. I dont have that on my screen. Also your screen says steps per rotation and mine says mm per rotation. Maybe your using a diferent version of Lightburn
Heres what my screen looks like
I think your diameter was wrong on your first photo, just comparing it to the hole spacing on your table.
I think Albroswift is correct. I missed the setting for circumference. Correct the steps for rotation so the tumbler makes one complete rotation in each direction and returns to the exact starting point when you do the test from the Laser Tools Rotary Setup. . Then correct the circumference setting. Mine ended up being around 275 mm for a 30oz tumbler . Yours should be somewhere around that.
I believe this is correct… I had to ask Cloud Ray as my rotary was never setup by them…
Take a couple minutes and read the documentation on a galvo rotary… it will clear this up.
I use a split size based on a multiple of the interval. If you make it equal to the interval, it will run slower, but should still work.
I also use no overlap…
When I’m setting up a rotary, I tape the object up with black masking tape. Lower the power and I can see the results on the object… Once it’s marking correctly on the object, I peel off the tape… I don’t damage the mug.
@Albroswift is probably right here… My D80 rotary chuck has a diameter of 80mm, hence the D80 name, similar in diameter to his mug.
Good luck
![]()
Maybe I’m confused, I didn’t think the OP was using the rotary on the first post, they were using cylinder correction. Can only use one or the other, rotary has to be “Off” when using cylinder.
Maybe I need to join you… I didn’t think he was originally using a rotary, but it’s clearly chucked up in a rotary…
Maybe I just diverged from the original thread too far ?
![]()
Very first image laying on the table. Chucked up image further down was showing how not to configure rotary!
I check with the manufacture, Omtech, and they told me the proper setting is 12,800. I did test the rotation and it does go 360 degrees and back to its origin.
@baricl1317 Yup, I pulled a bone head move! My calculated circumference is WRONG. I will recalculate and try it again. Thanks for the help everyone. I will up date y’all one way or another.
@Albroswift, sorry for the confusion…I was not using the rotary on the first image. I’m trying any and all methods to squeeze a tumbler out of this machine.
How much you can wrap your fiber around the object and remain in focus is really based on your lens length. Longer lens, more depth of field or focus area.
My F254mm is about 3.5mm focus depth and the F420mm is just over 9mm. Comparably the F100mm is about 0.5mm ![]()
With a rotary you can do the whole thing, I’d suggest you learn to use it…
We can help you… most of these machines come with a rotary so many of us with fiber machines have a rotary.
I also had to request the steps/rotation from OMTech… they didn’t setup the rotary or give any indication of it’s steps/rotation…
Don’t calculate it, measure the diameter and let Lightburn do the calculations…
Have fun
![]()
If the curve allows cylinder correction to work, it will do a nicer job then the rotary, but like noted above, rotary more versatile.
Agreed, Measure the diameter of the tumbler.
Well, it’s official. It was definitely an ID10T error. I was able to get some text to print on a tumbler, although it was etched slow and backwards. Any suggestions on how to speed up the process and fix the reverse text issue? Here are my current settings. Thanks @baricl1317 @Albroswift @jkwilborn !!