I want to produce, using laser cutter a bumpy pattern (for tactile area on map for blind children).
My plan is to make raster image (I am not expecting problems here), cut it to the needed area (specified by SVG) and use raster engraving to reproduce this 3D effect.
Main blocker right now is that I produce pattern in raster rectangles, while I want to apply it to a specific shape.
Is there a way to produce intersection of SVG shape and raster image? One workaround would be to apply raster pattern to entire plywood and then cut shapes from it, but that would be massive waste of materials, laser equipment and time.
It would need to be (obviously) accepted by LightBurn, preferably such intersection would be possible to apply automatically.
I want to have specific shapes with such pattern. Not entirely sure how to achieve
(1) production of such pattern using laser cutter on plywood
(2) applying it only to selected shapes
I tried some solutions, without a success.
For example hack used in http://www.boogdesign.com/examples/svg/path-pattern-fill.svg to restric raster pattern to specific shapes is not supported by LightBurn (I modified this example to inline raster as base64 - displayed fine, raster disappeared on import to LightBurn).
Trying to envision and having a difficult time seeing this in my minds eye. It might help if you can provide an example of what the finished “…a bumpy pattern (for tactile area on map…” you are wanting to produce.
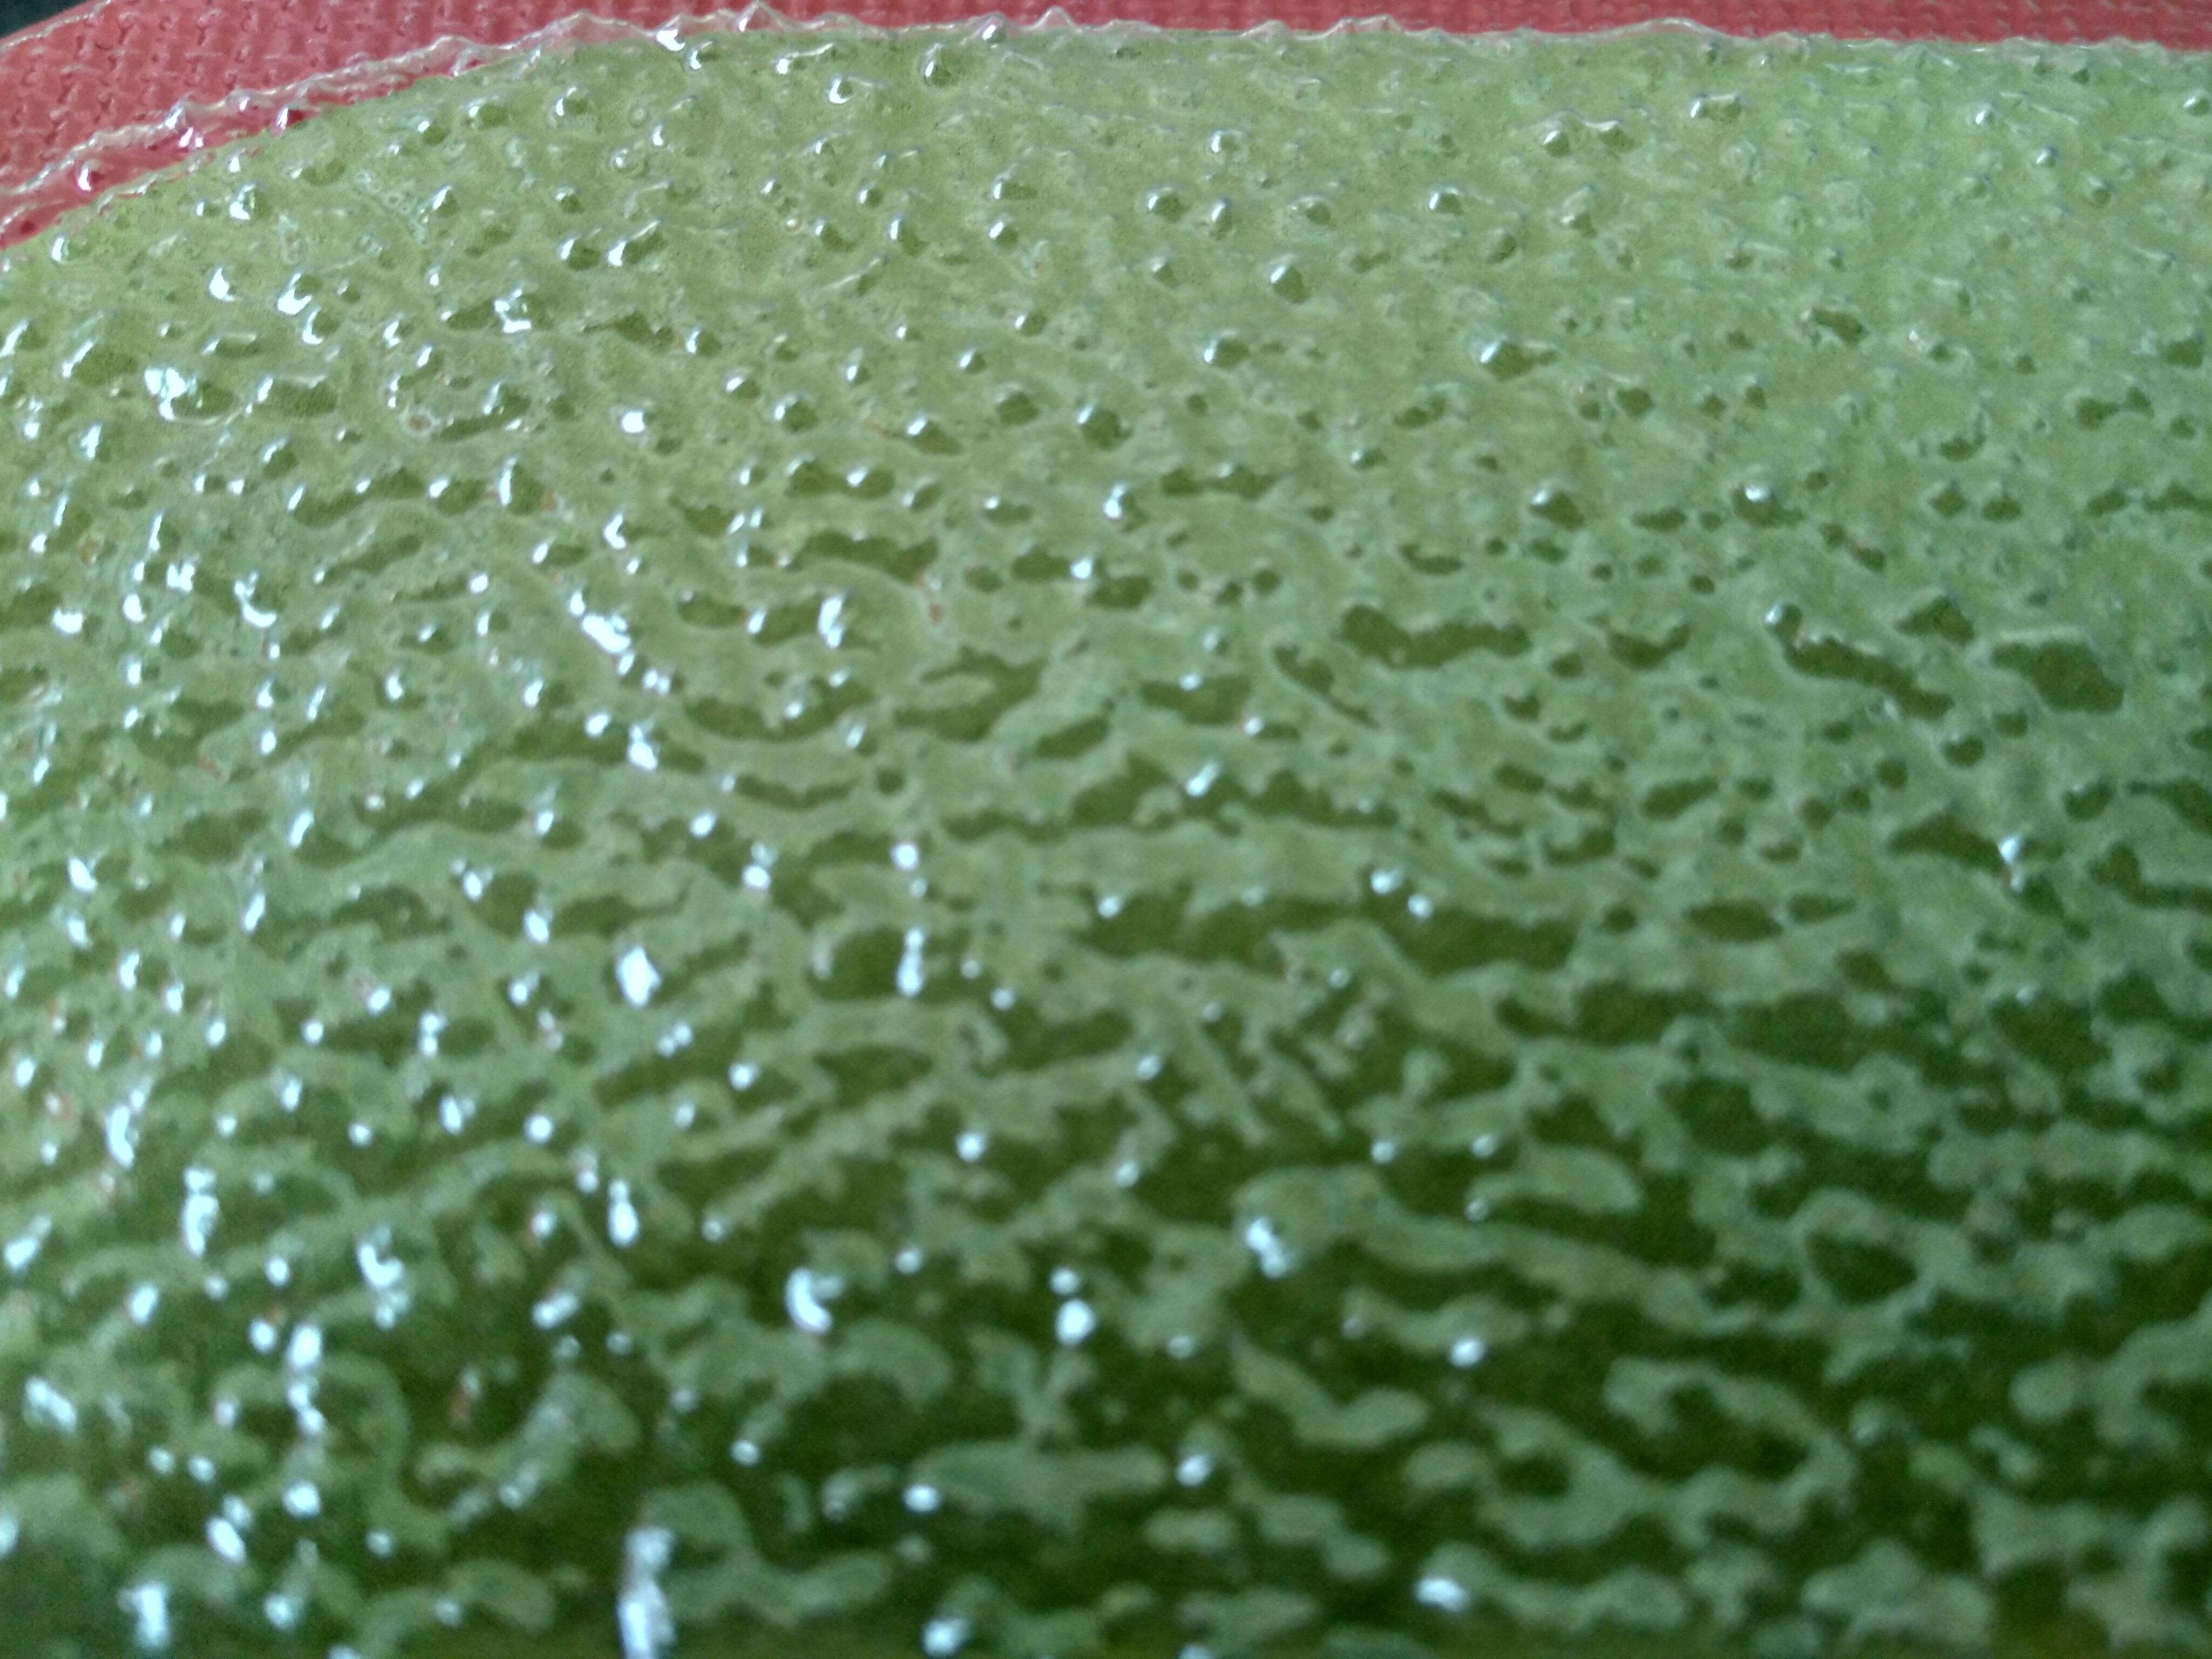
Plywood area with 3D pattern exactly like one on photo - where it is on a plastic surface.
Great! That would solve big part of my problem.
But I tried
opening raster image
opening raster image and selecting raster element
opening vector image
opening vector image and selecting vector element
opening vector image and selecting vector element after changing vector setting to fill
opening vector (layer set to fill) and raster image and selecting both
In all cases it is grayed out in edit menu and I am unable to use it. Is it maybe intentional in demo version? Or not supported on Linux? Or broken in “LightBurn 0.9.20, built nie 2020-12-20 @ 01:42”?
Opening this attached file shows complaint about “Could not find font ‘Arial’ installed on this system.” but depicts exactly what I want to attempt.
BTW, is it also possible to achieve this effect without manual work in LightBurn? My original plan was to generate SVG (or other file format) available for immediate import into LightBurn or other laser software.
Now looking at attached file again I see that I need to import vector image as “tool” layer, not as “fill” or “line”!
Now I need to figure out how to convert shape to tool, and later how can I setup SVG so lightburn on opening it will select layer as tool and use “apply mask to image” without need to do it manually.
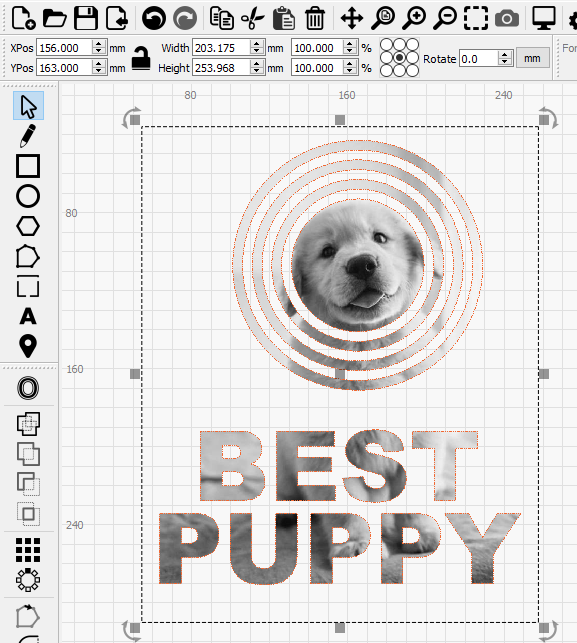
At the simplest this is the same as doing a basic crop to the image, but you can go so much further than that with masking.
For example, you can mask an image using mutliple shapes.
Note: When using multiple shapes to mask an image, all shapes must be on the same cut/tool layer and those shapes must be grouped together. Otherwise the Apply Mask to Image option will not be available.