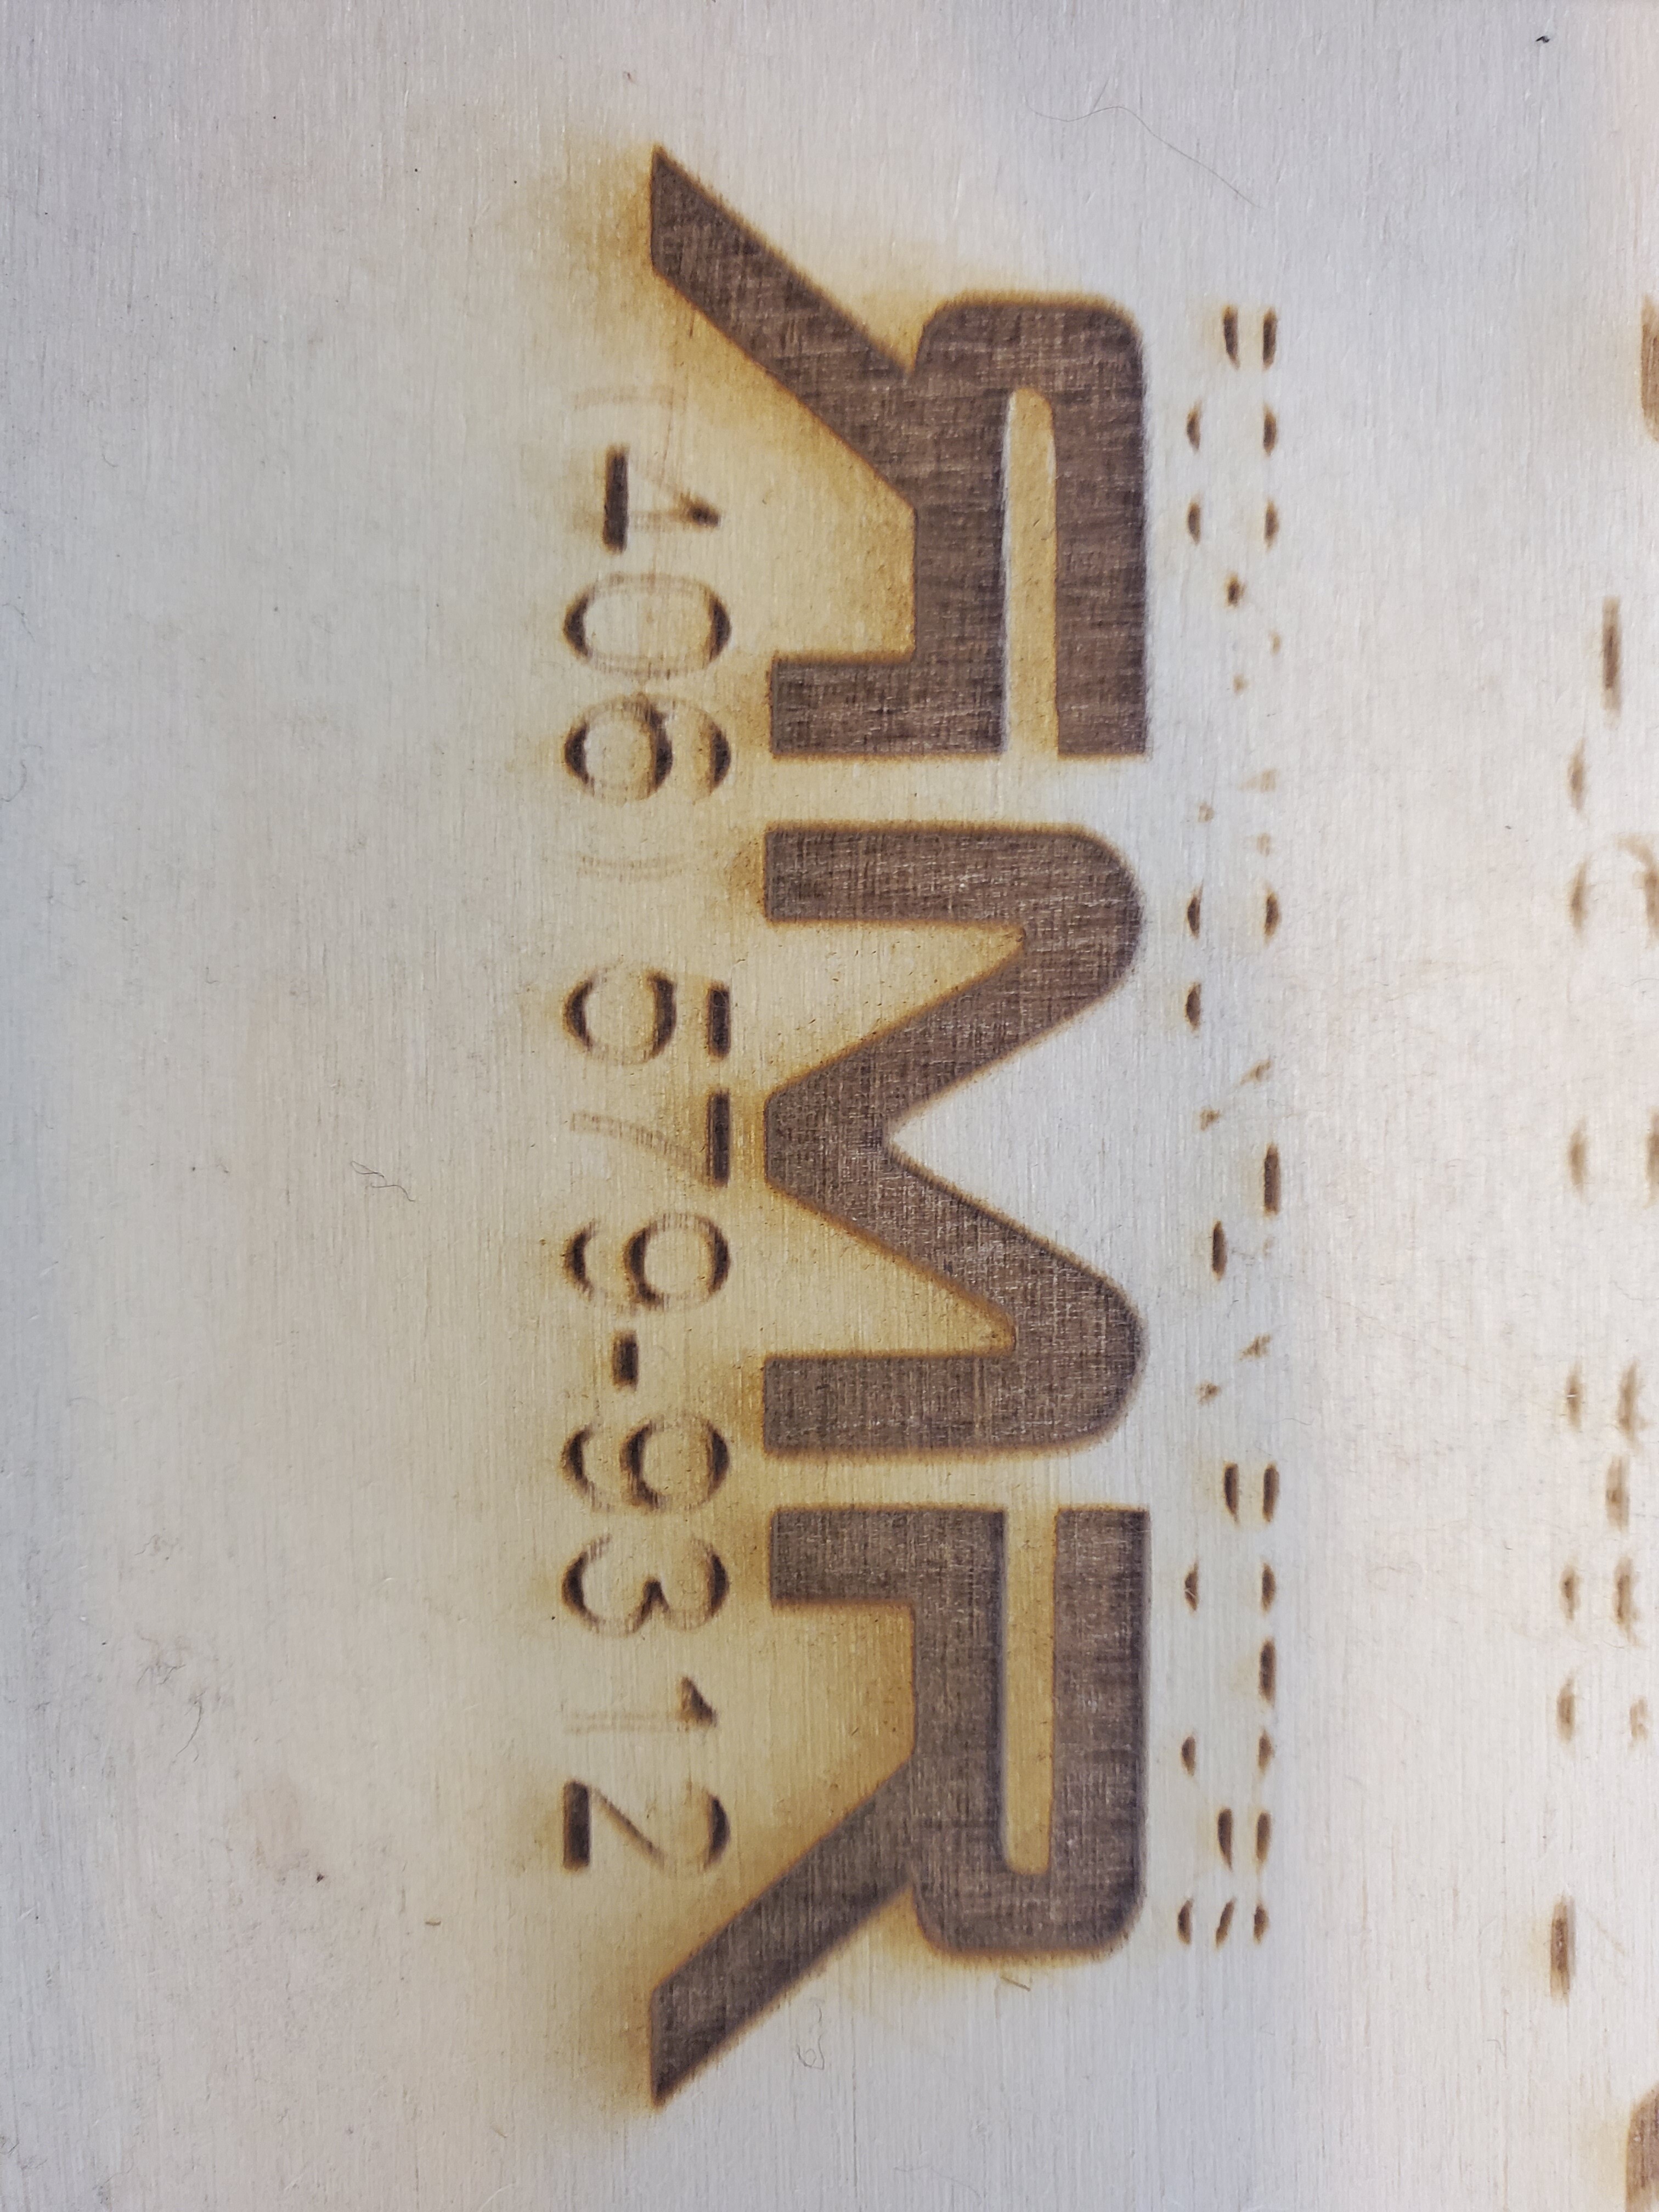
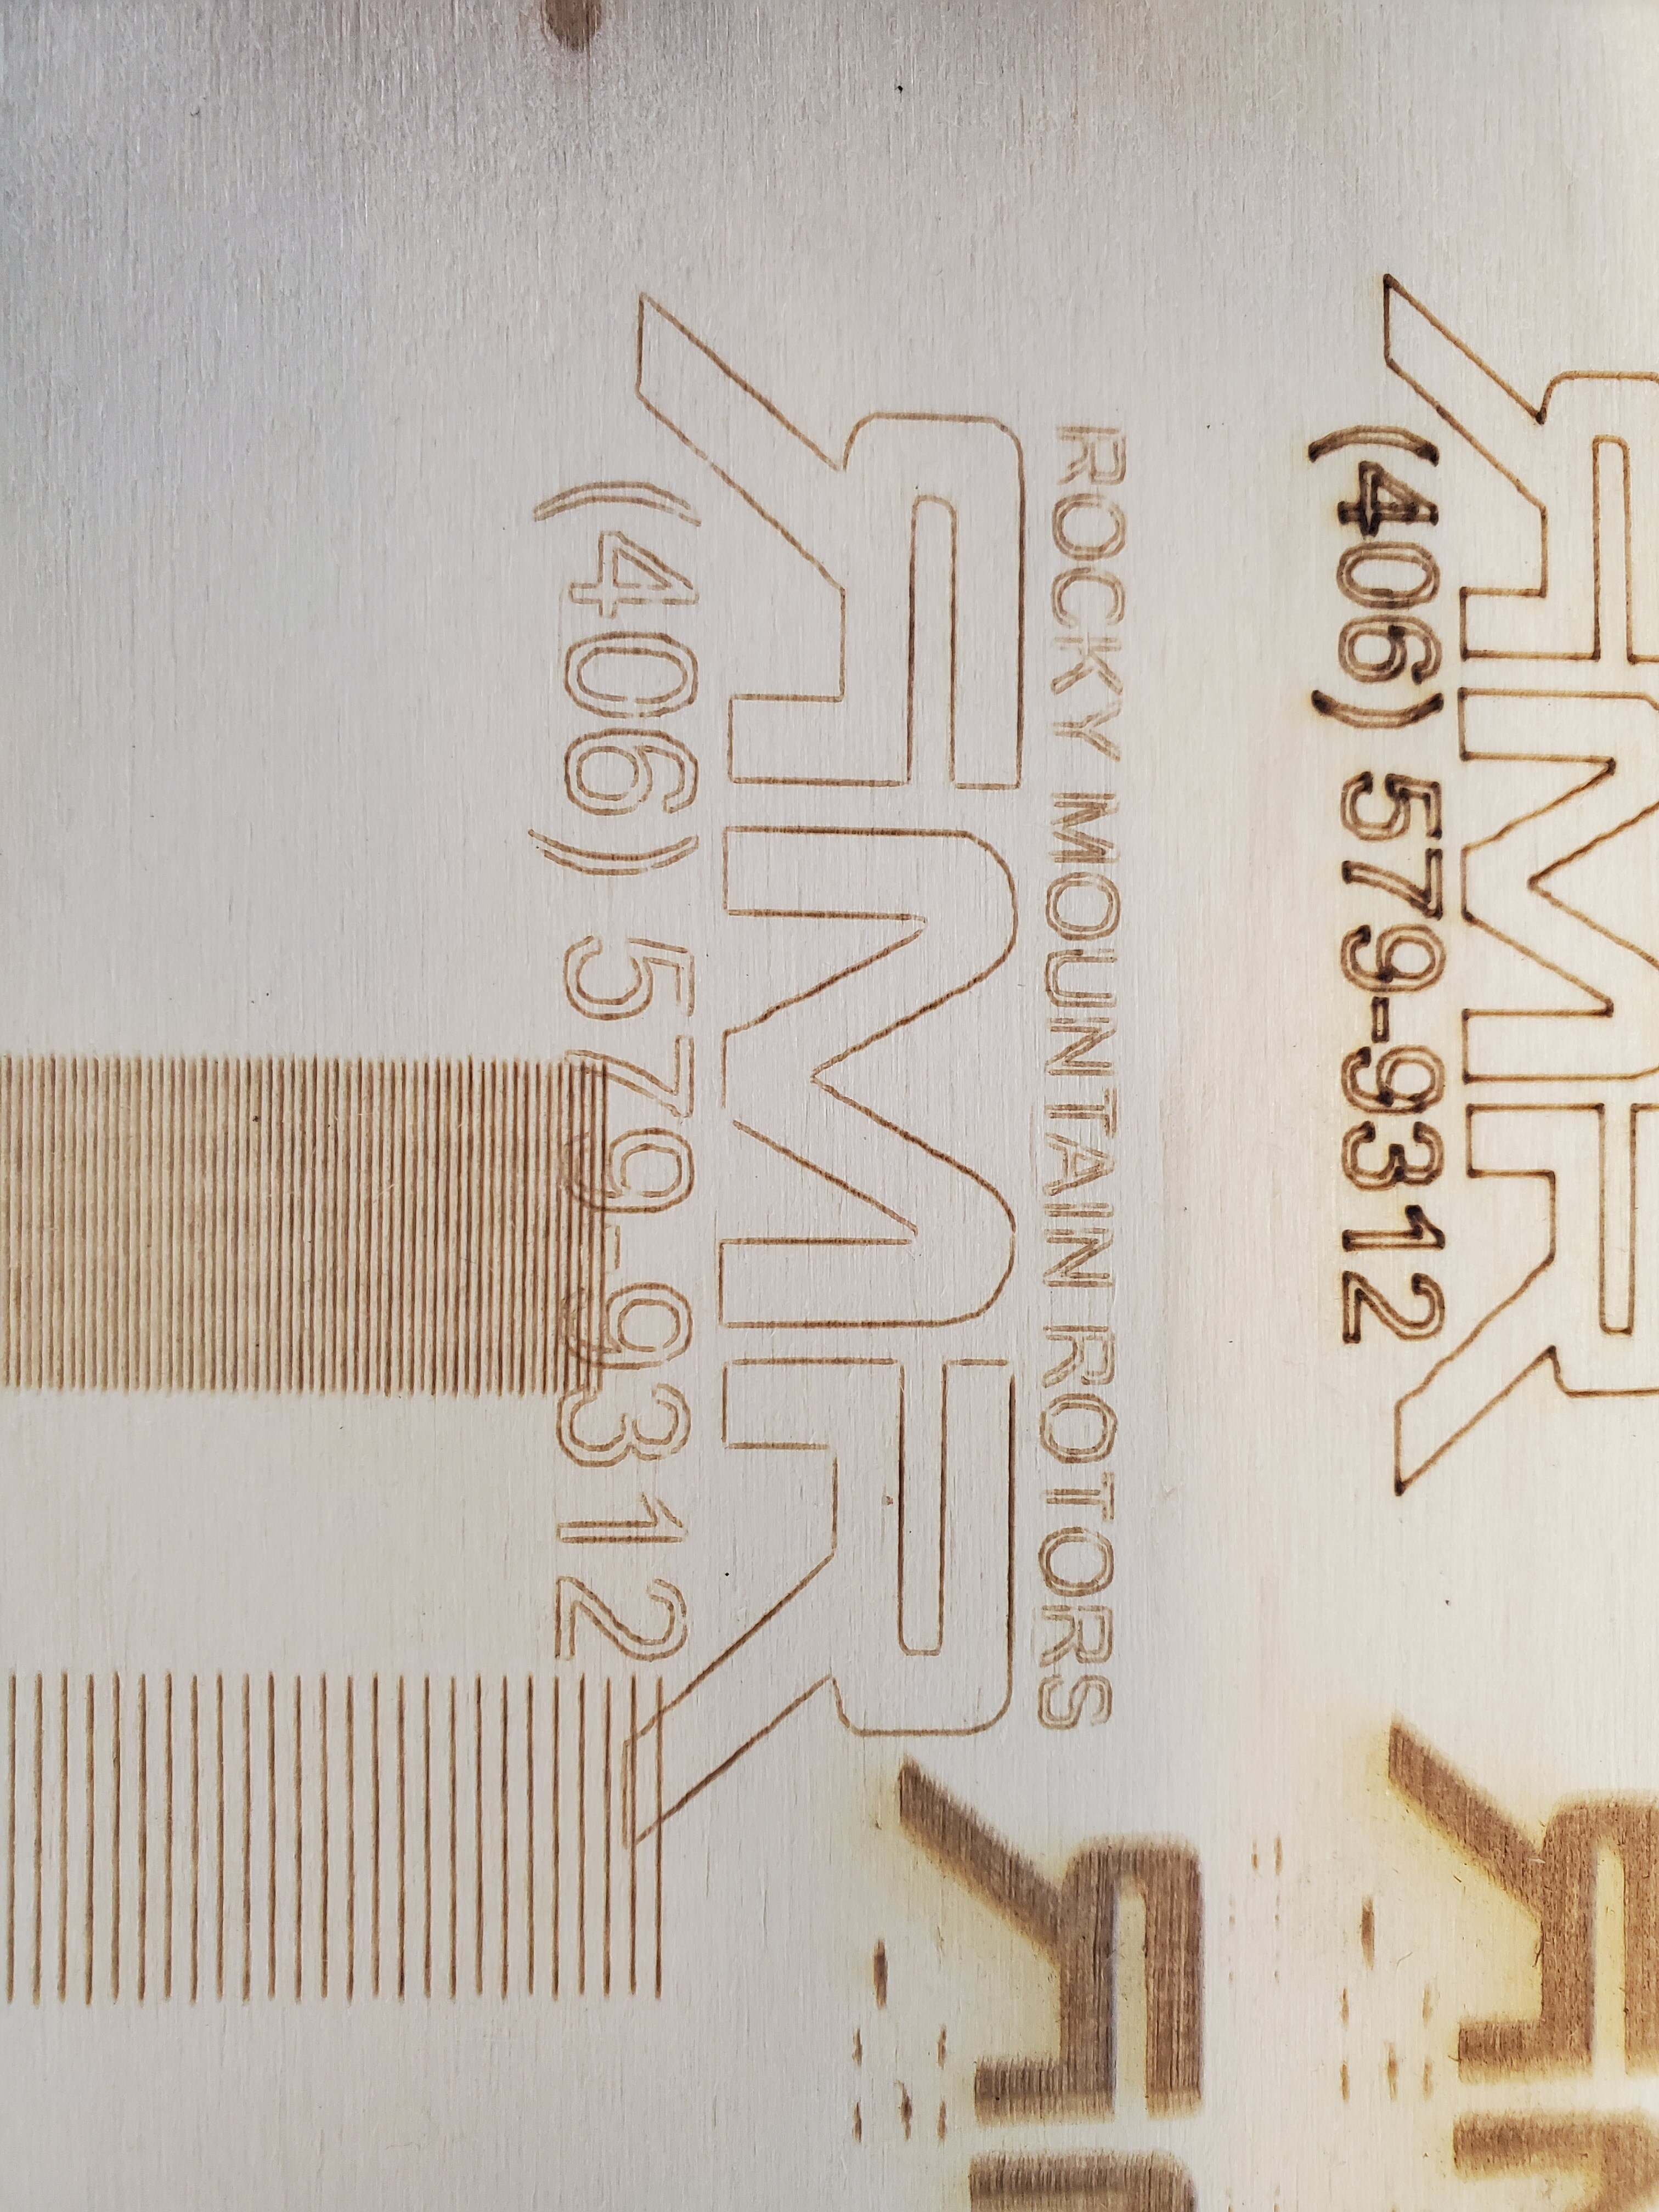
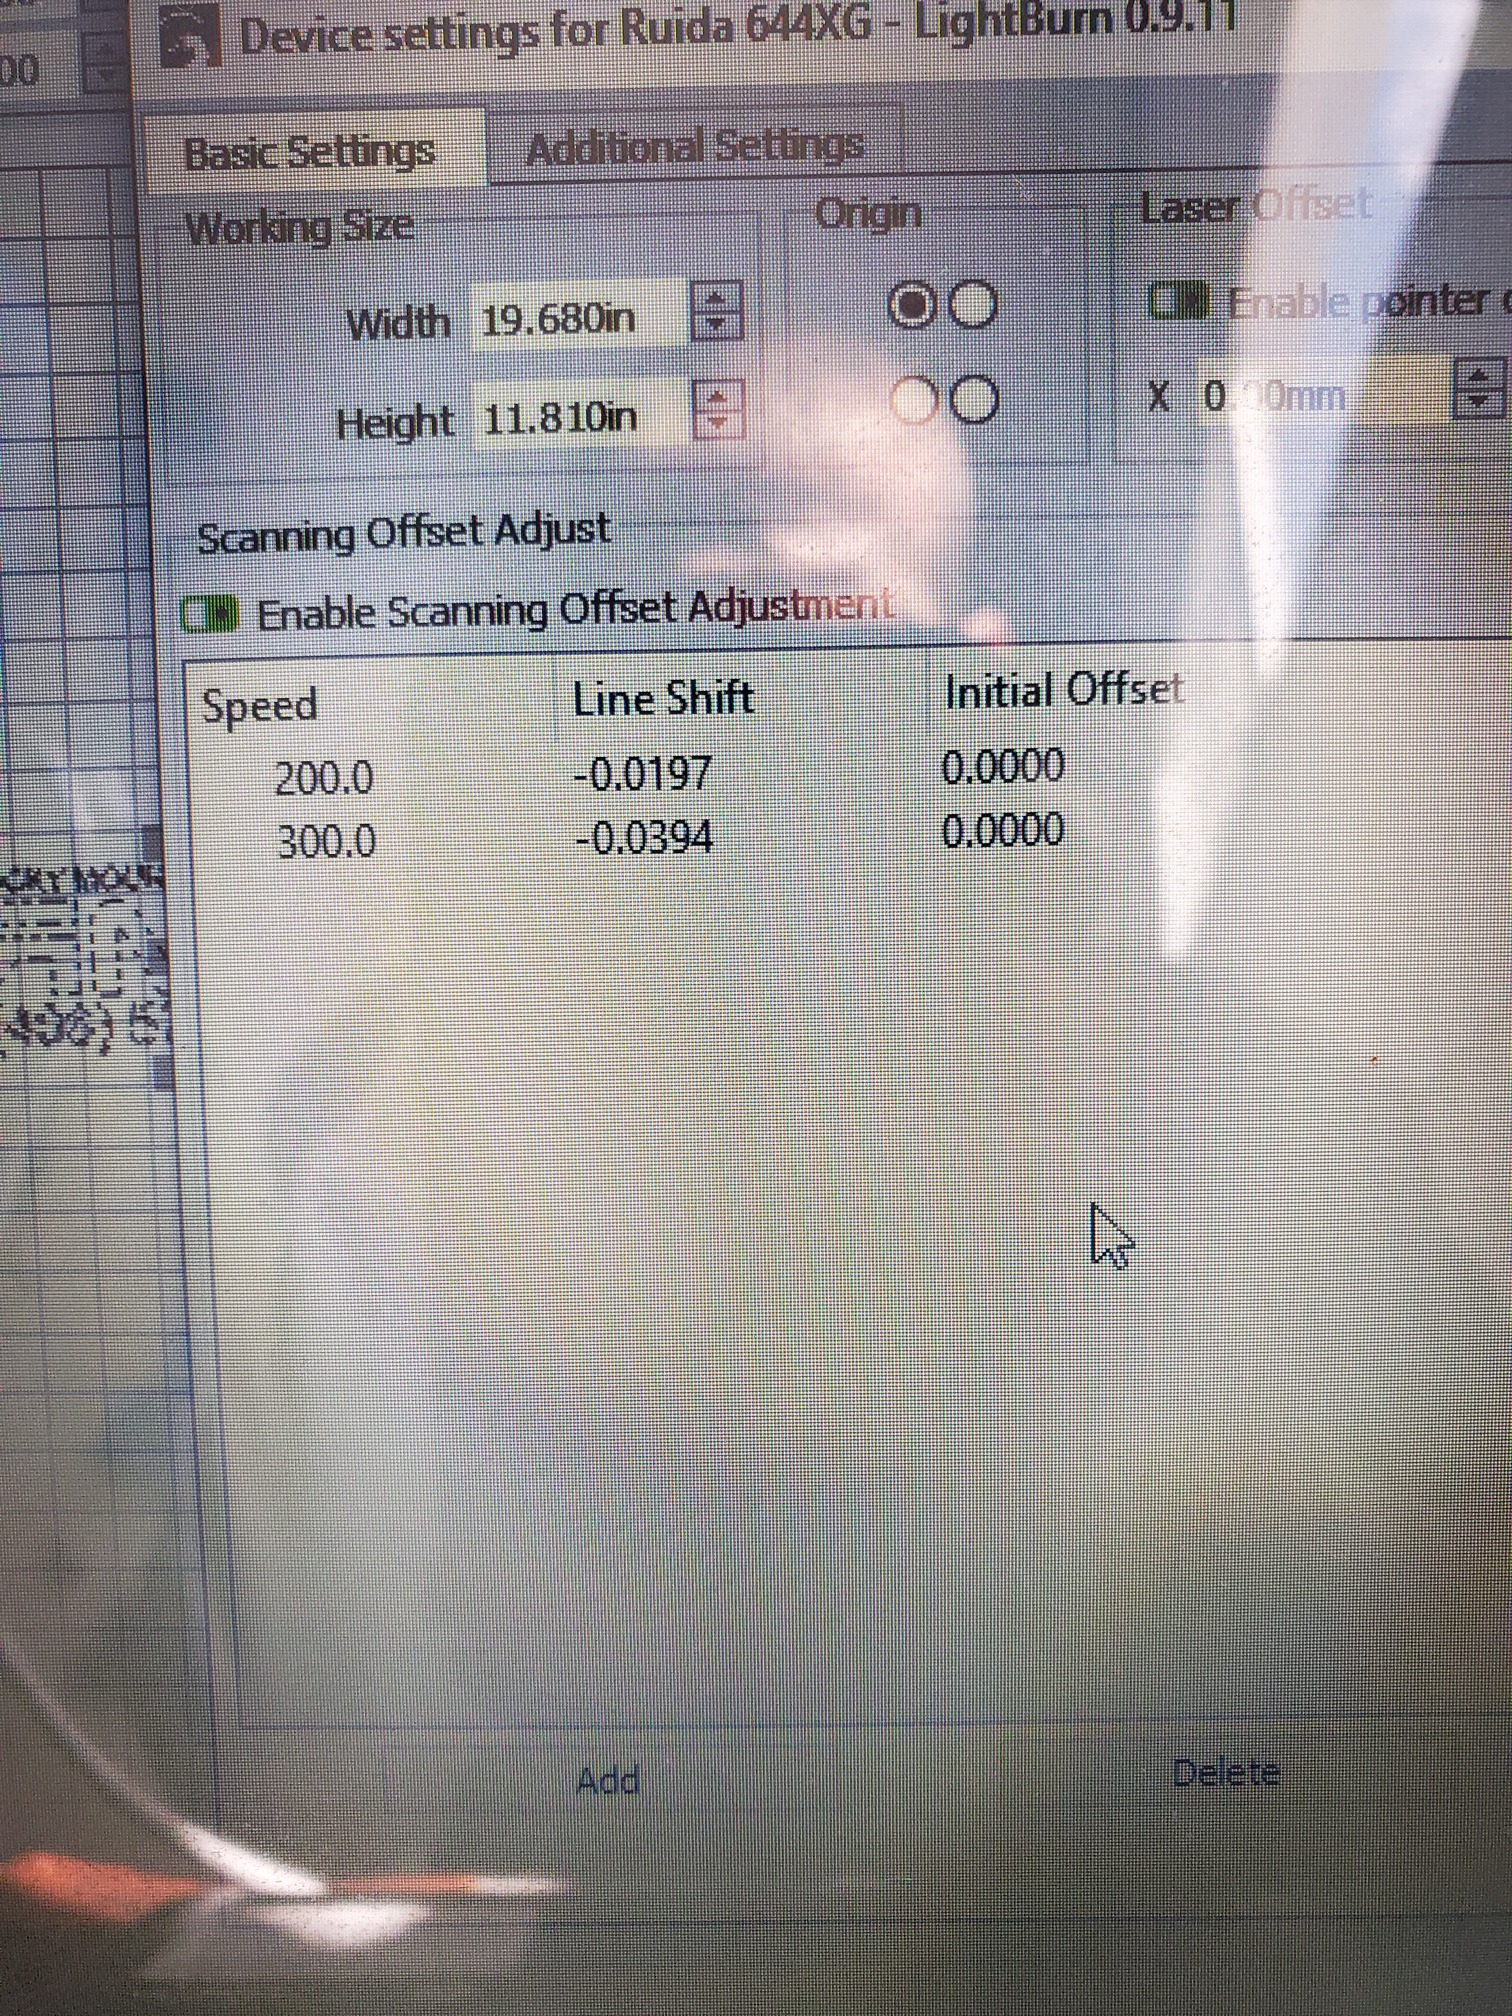
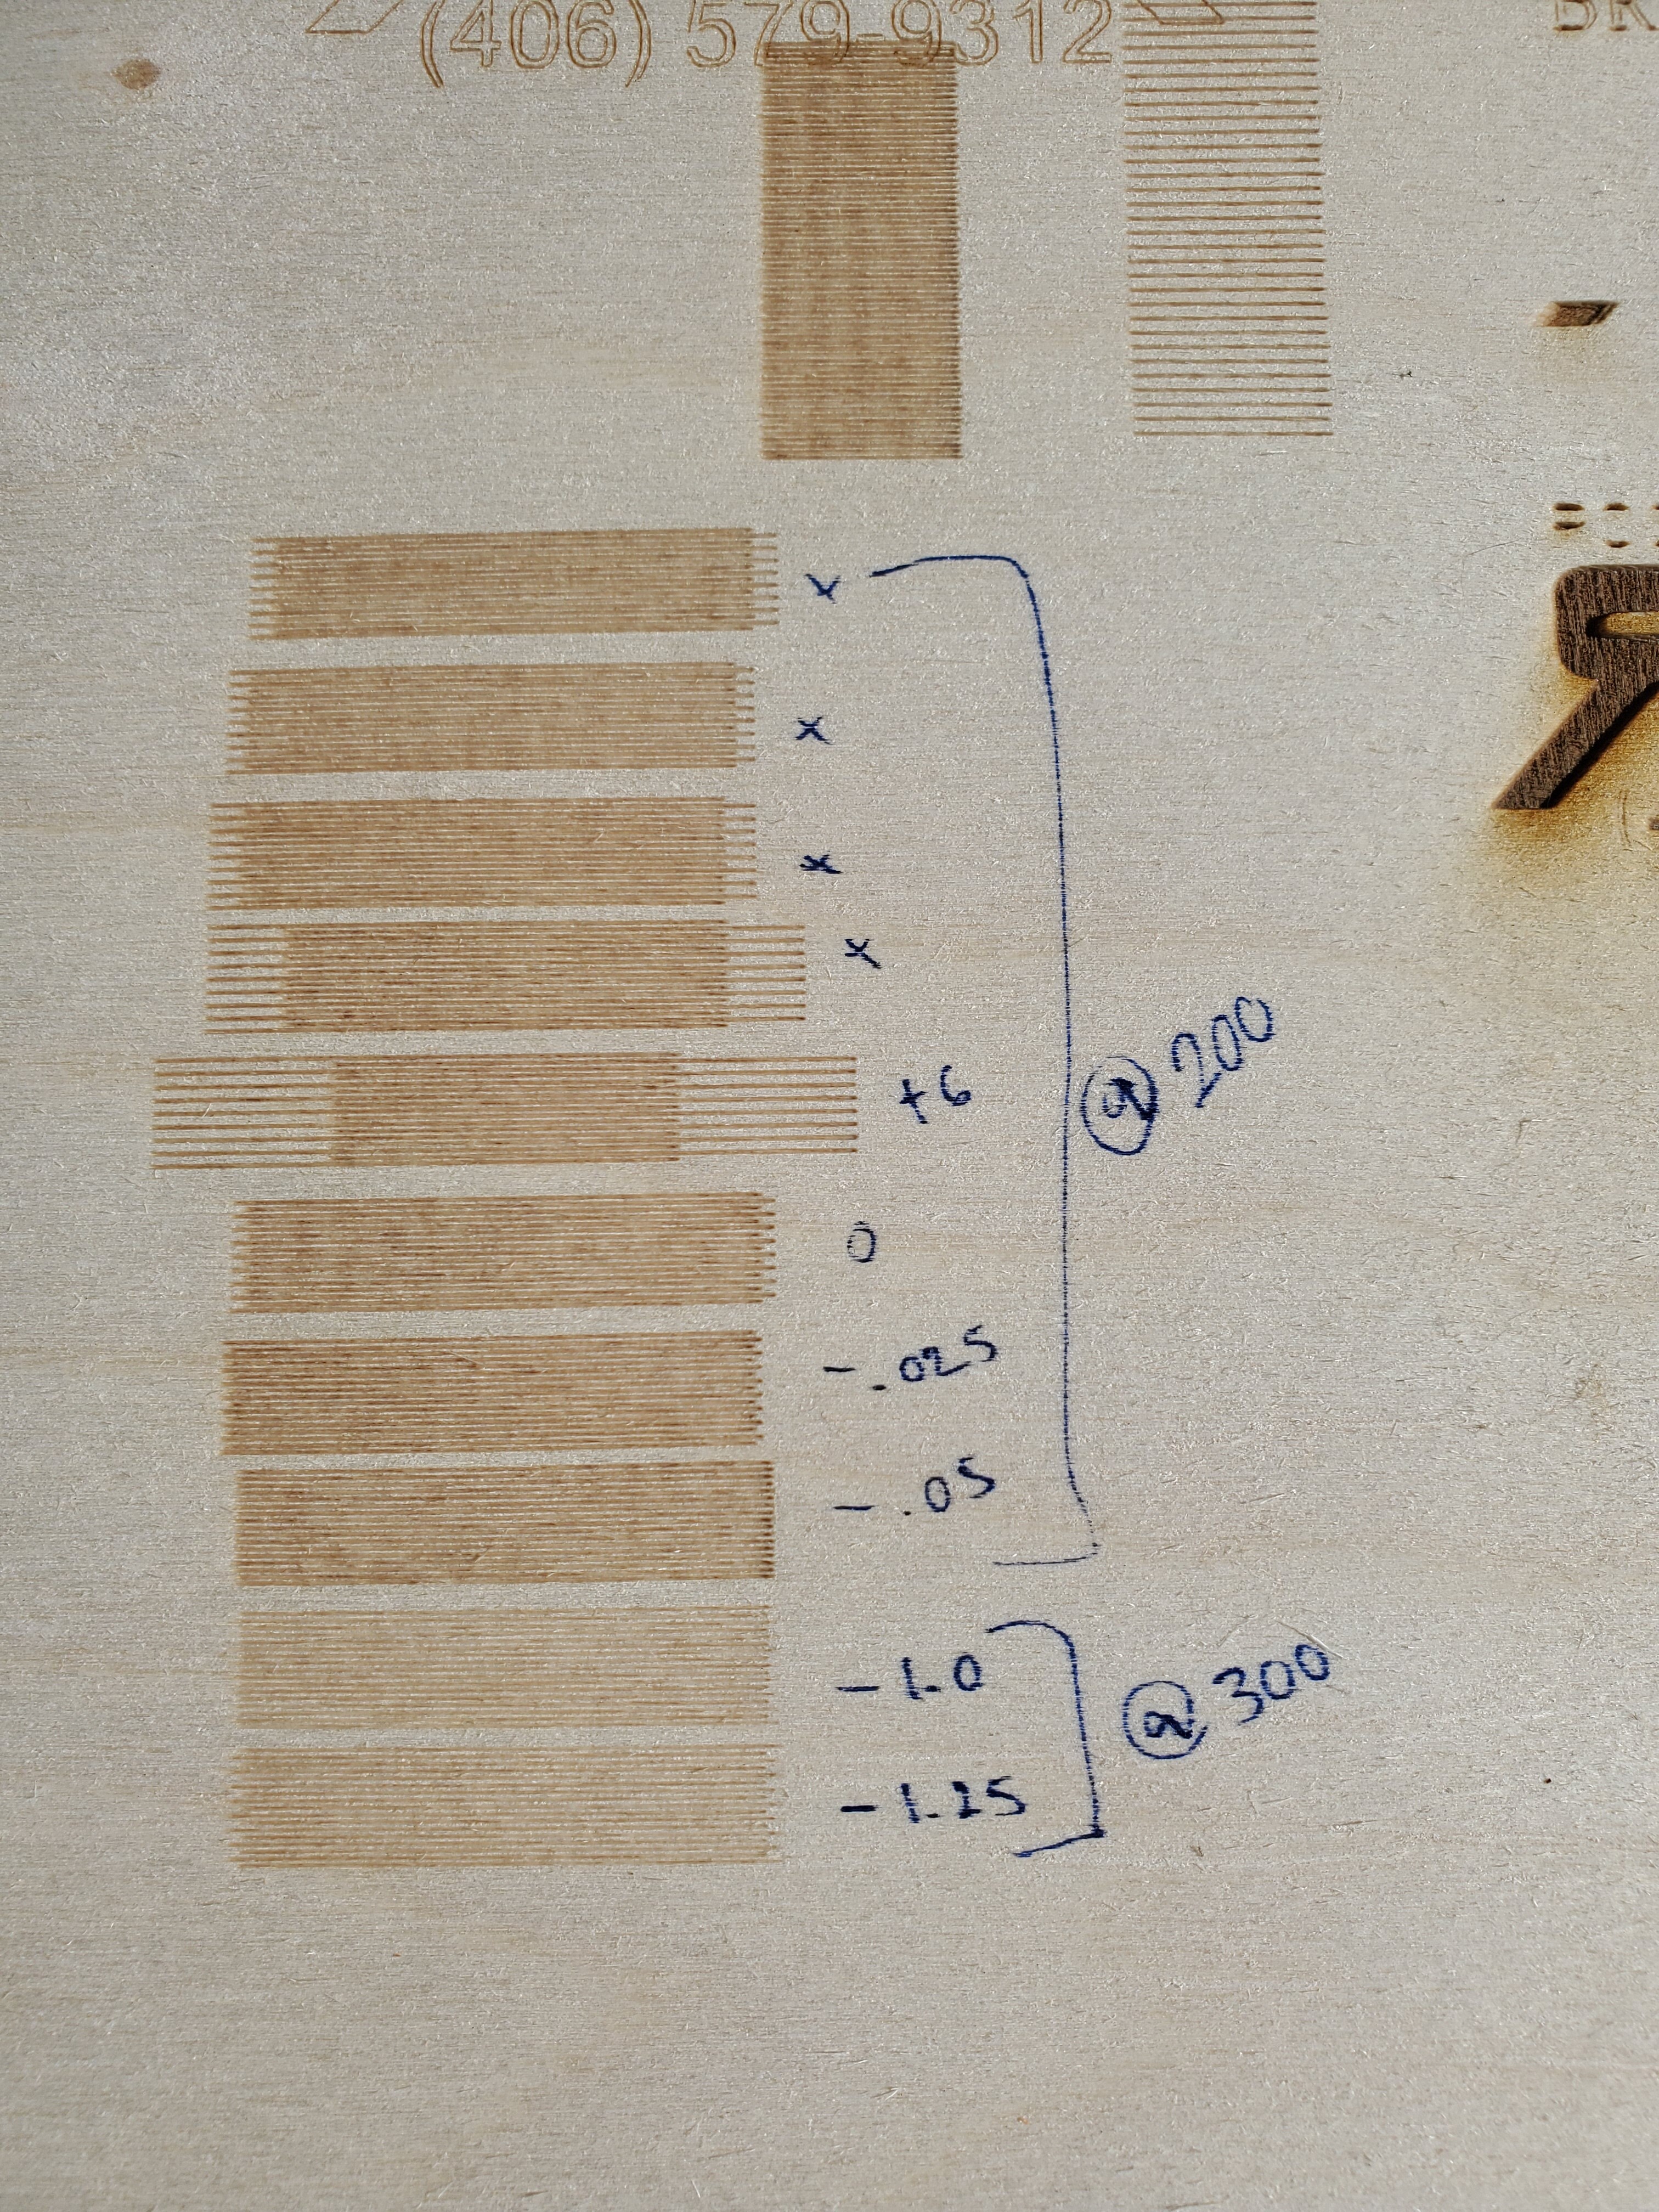
Ok i lowered my min power that made a huge difference thank you for that ive been struggling with that issue for a awhile. Now onto the other issues. I do have scanning offset enabled and slowed it down to 200 @-0.0394 I was running 300 @0.0197. The pictures will show that even with better offset at slower speeds we are still missing some of the fill in the number and name above.
Do you only have one entry in your offset table? I believe that you need at least 2 accurately measured entries so LB can extrapolated the correct offset for other speeds.
I measured the required offset for 4 different speeds on mine.
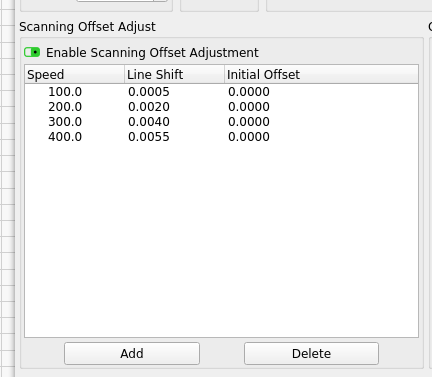
This is what I have set at the moment and it seems to be better for sure but still not getting everything filled in properly.
Negative numbers? I don’t think that works. And 20 & 40 thousandths of an inch is REALLY a lot.
I think you need to do the scan offset test again and measure carefully because those look wrong.
See if this is helpful:
Hank i want to take a second to also say thank you for the assistance I’ve been pulling my hair out trying to figure this Out! Your help is greatly appreciated!
I’m not sure what to think about that. Someone smarter than me will have to comment on that one.
I’ve always just measured the offset between 2 adjacent lines and divided by 2 to get the offset for a particular speed. And I’ve always ended up with a positive number…
Now I’m curious what “typical numbers” other folks are using.
So this is your “no offset” scan, right?
Just to make sure I’m picturing this right, which corner did the laser start from. (which line scanned first and in what direction)

Yes that is 0 offset and it starts bottom left moves to right and then up.
Hmm. Well this confuses me more but explains the need for negative offset numbers.
I’m used to seeing a delay that makes the beginning of a line start too late, so the beginning of the line would be inset relative to the ends of the lines on either side of it.
If you started from the left, then your first line appears to start too early or else the ends of the adjacent lines end too early? That’s backwards from what I expect and I’m not sure how that could be. I think I’m in over me head here…
So, you’ve scanned a rectangle to get those lines. Can you duplicate that rectangle to another layer and set it to draw a line at low power to give a “reference square” to see where the scanned stuff ends up relative to the real edge of the rectangle? (With no offsets entered)
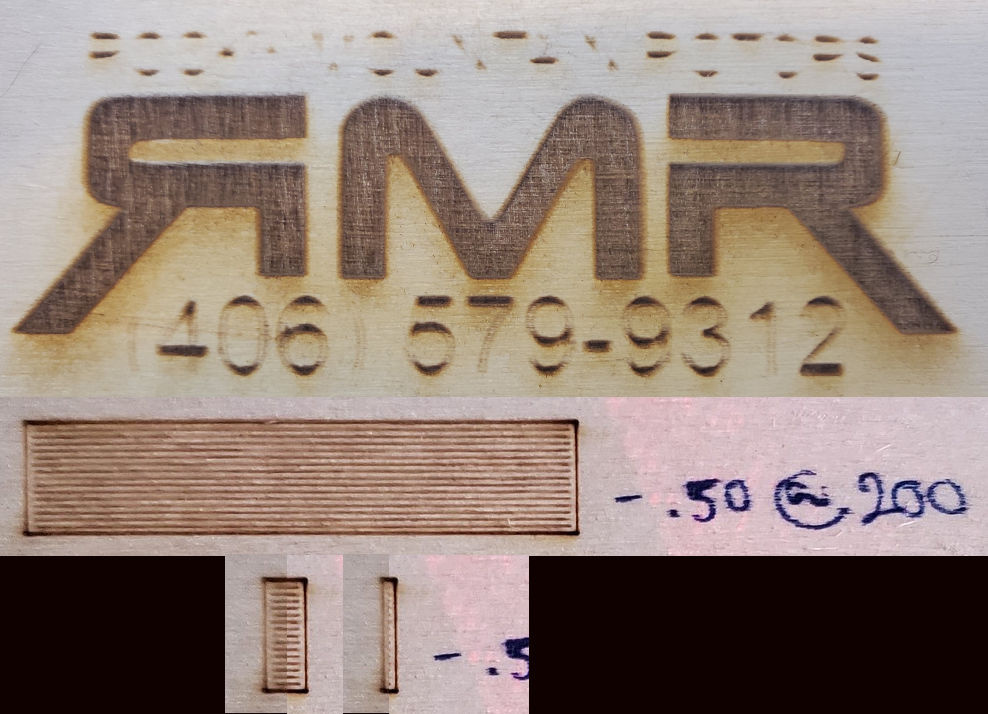
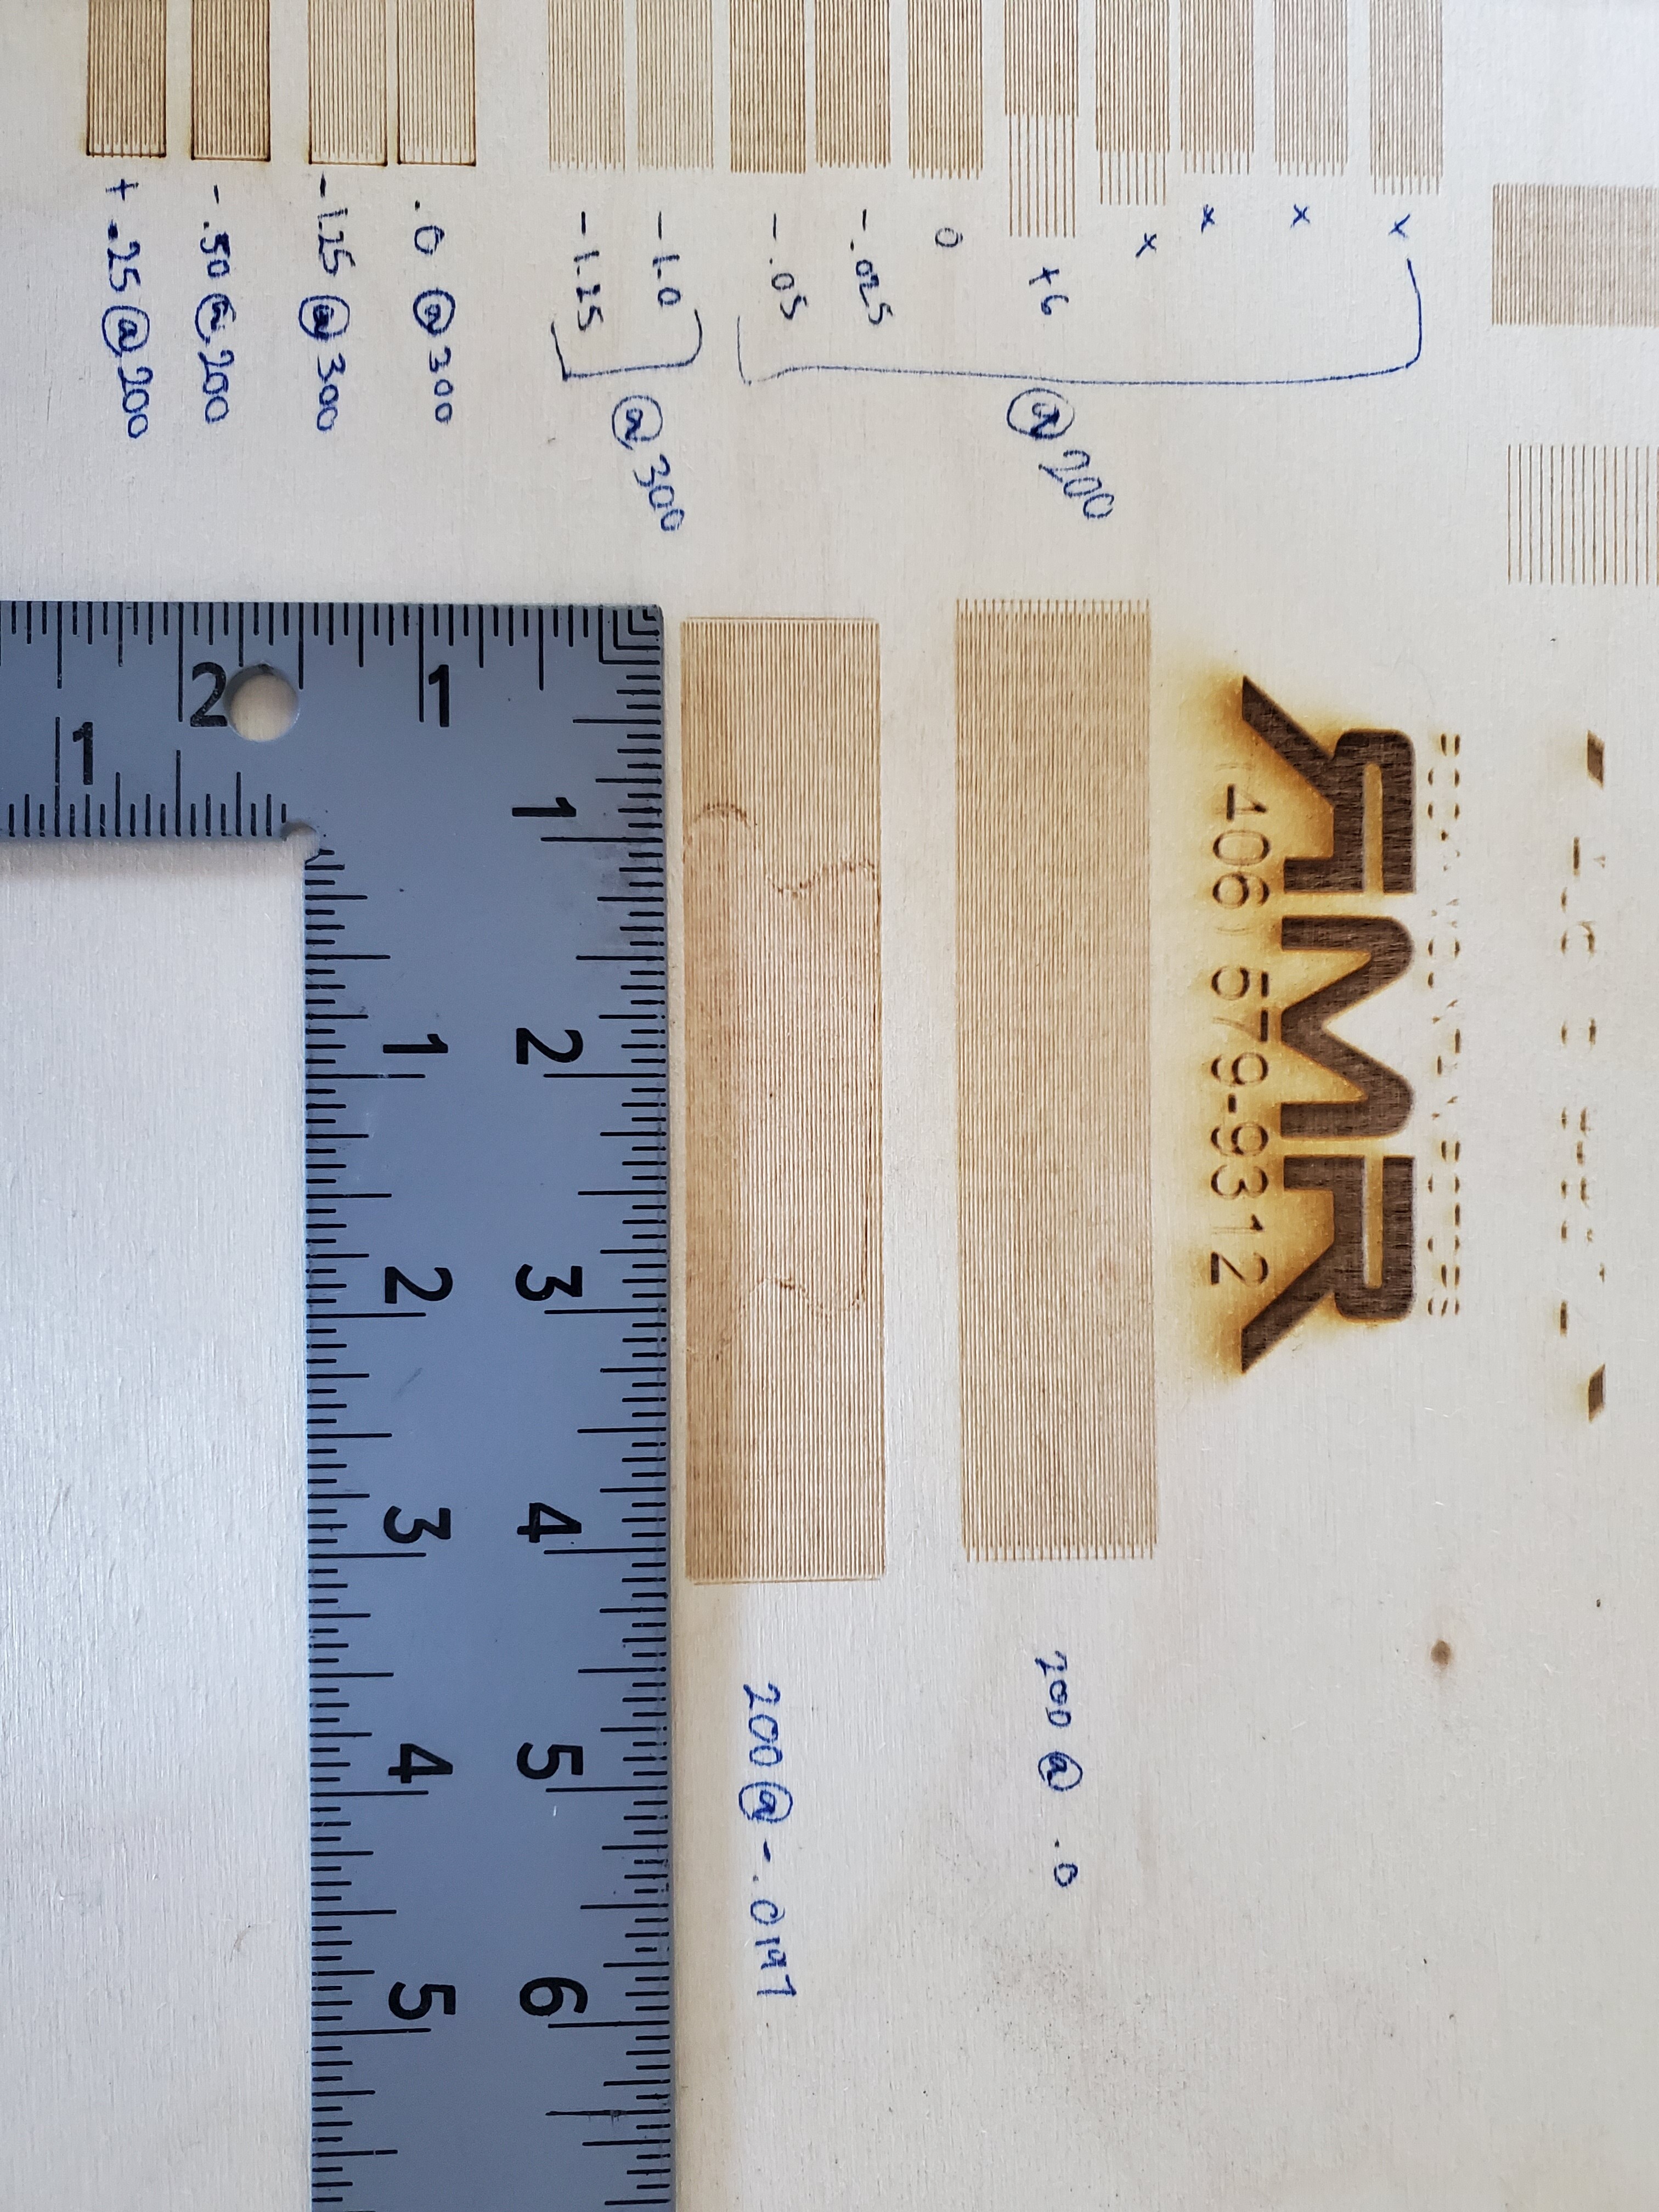
Hank here is a what I think you where asking for other then the outer border is darker then I wanted it.
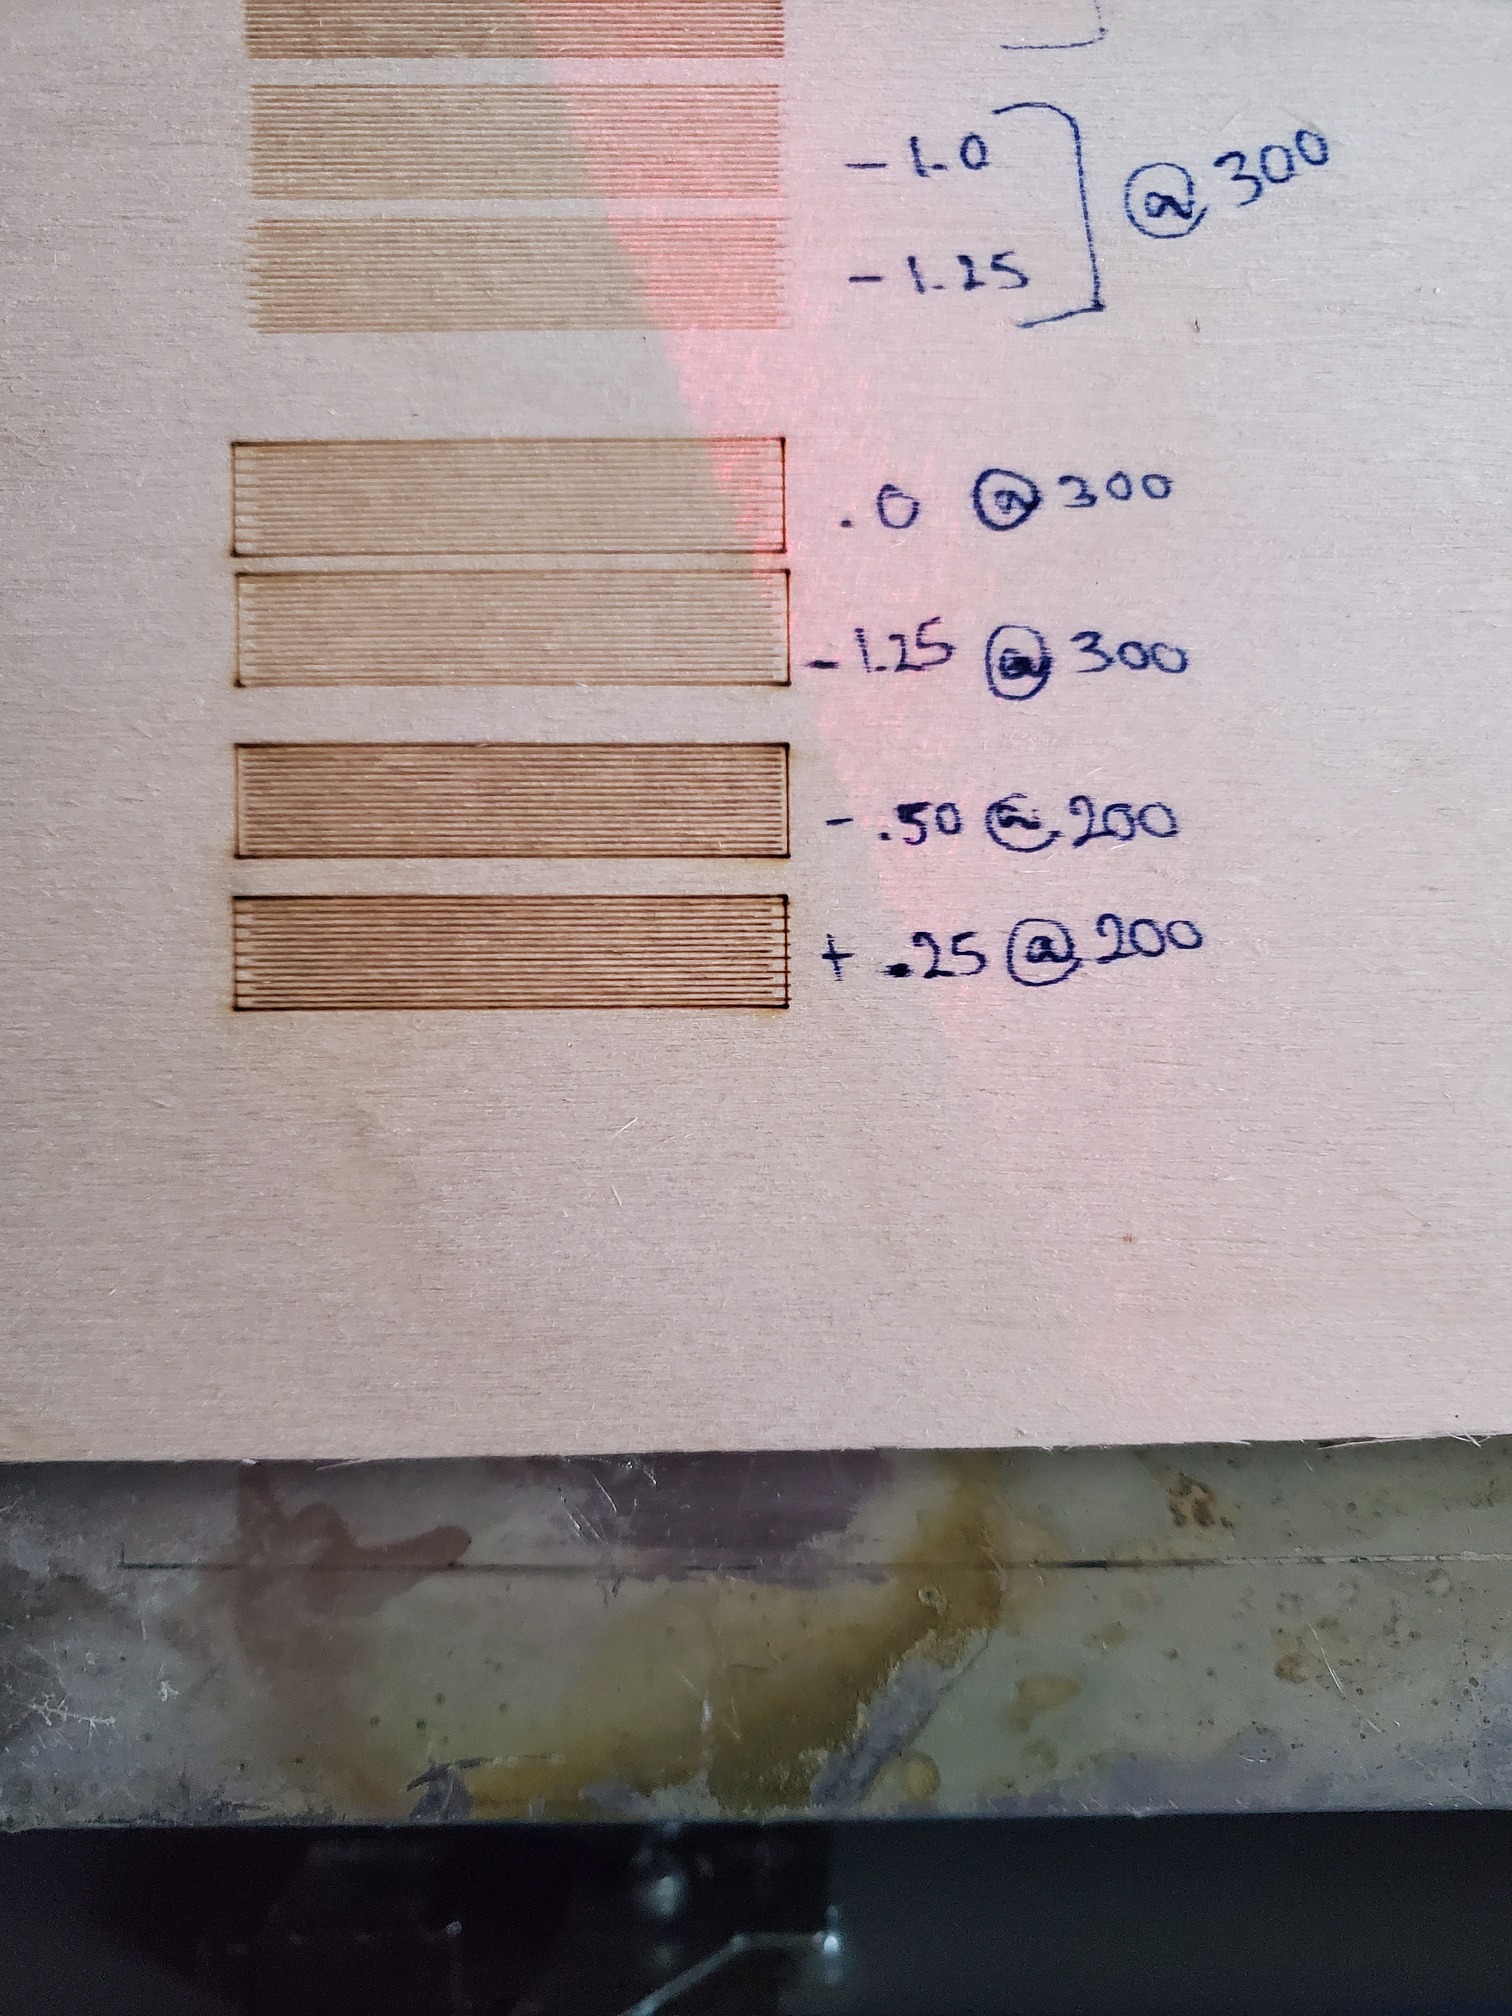
I used a few different offsets to give you a good idea of what going on.

OK, so which end of which line did the scan start from? The offsets on these scanned lines are mirrored from the last photo so I assume the scan started on the other side?
.
.

What’s up with this? Is the outline box the same size as the scanned box? The scan lines are even, but look how far short they are with meeting up with the edge of the box.
Lets go back to the beginning. The original power supply died and you replaced it.
Everything worked fine before the PS change?
Did you also have similar results on the scan offset test with the old PS, with similar (negative) numbers?
I wish someone with more know-how would step in here.
From the top lol power supply died i replaced and went to go engrave some leather and got terrible results. At that point I had changed nothing other then the power supply. I did a little home work and figured out the offset was some how off so I started playing with those. Prior to the power supply going bad I never messed with the offset at all and never had any issues. I think the offset is only part of the problem because I’m still not getting a lot of fill in places. This is once again a consistent problem making me think its a settings issue not a hardware issue but I dont have a hole lot of experience with lasers or computers for that matter so I could be very wrong on the matter. I love the software and the machine has been great up to this point. I just don’t know what else to try and change at this point to even go in the right direction.
I don’t know of it’s a scan offset problem or a hardware problem, but I think it’s related to the “missing” bits of your small text. Look at your phone number. In the wide places where the laser is on for a while, it’s mostly fine. In the narrow (mostly vertical) places where the laser is on only a brief time it’s very faint…
So look how short your scan is in your test. Those scan lines should reach all the way to the border.
It clearly misses out on some time at the beginning and end of each line. Now shorten those on times a bunch until the “missing” part becomes a big percentage of the total on time and it starts looking like your narrow bits of text.
I have to wonder about that new power supply. If it wasn’t too expensive and you need the machine badly it might be worth picking up another to try.
Have you looked at the overscanning setting in LB. I had similar problems when using low acceleration settings. Setting over scanning to ON at the default 2.5% made all the difference. Access via the layer control with type set to FILL.
Cheers
David
He has a Ruida controller. Overscanning is taken care of internally and not user adjustable.
To me this looks like the new power supply is bad. It’s firing late, or not at all for the short segments. I can’t say for certain that’s what this is, but you shouldn’t have gaps on either side of a properly aligned Fill + Line shape the way you do here:

I bought a 2.nd hand machine approx 6y old. (80-90W Reci tube) and experience same problem on short segments. Bought a new HV-PSU still same issue as old HV-PSU. My guess is the tube somehow has a “slower reaction” time. If i look at my engravings under magnification glass, it’s clear to see how the power increases (shallow to deep cut) over 0.5mm-ish. It cuts 6mm birch no problem, long segments no problems. The money is not for a new 90W Reci so fo now I live with it :-/ But following if you get a resolution…
So I was thinking maybe my stepper motor was not set up right and that was causing the short lines but I just checked all the measurements and its spot on. I also blew up the test and it seems to have better talorance idk.
Once again I want to thank everyone for helping and sharing your knowledge. Its not fixed but you guys at least give me a little hope I can get it fixed so thank you.
This topic was automatically closed 30 days after the last reply. New replies are no longer allowed.