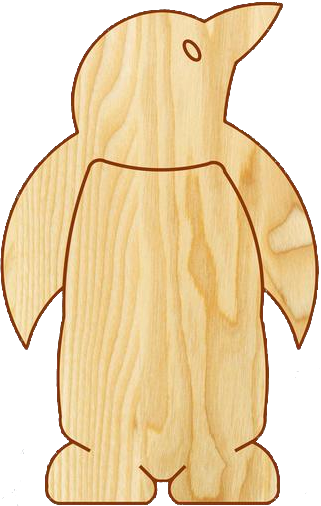
I imported many .png images and converted to .lbrn2 images, cut, and am pretty happy with all but one. The image was much to large. I had been resizing my images in Word, saving as .png image and converting to. .lbrn2 image. I just did same to the large image below but won’t know until I go to Makerspace tomorrow if I did it correctly. The must be an easier way? OMG, just figured out I can upload images! Penquin.lbrn2 (22.4 KB)
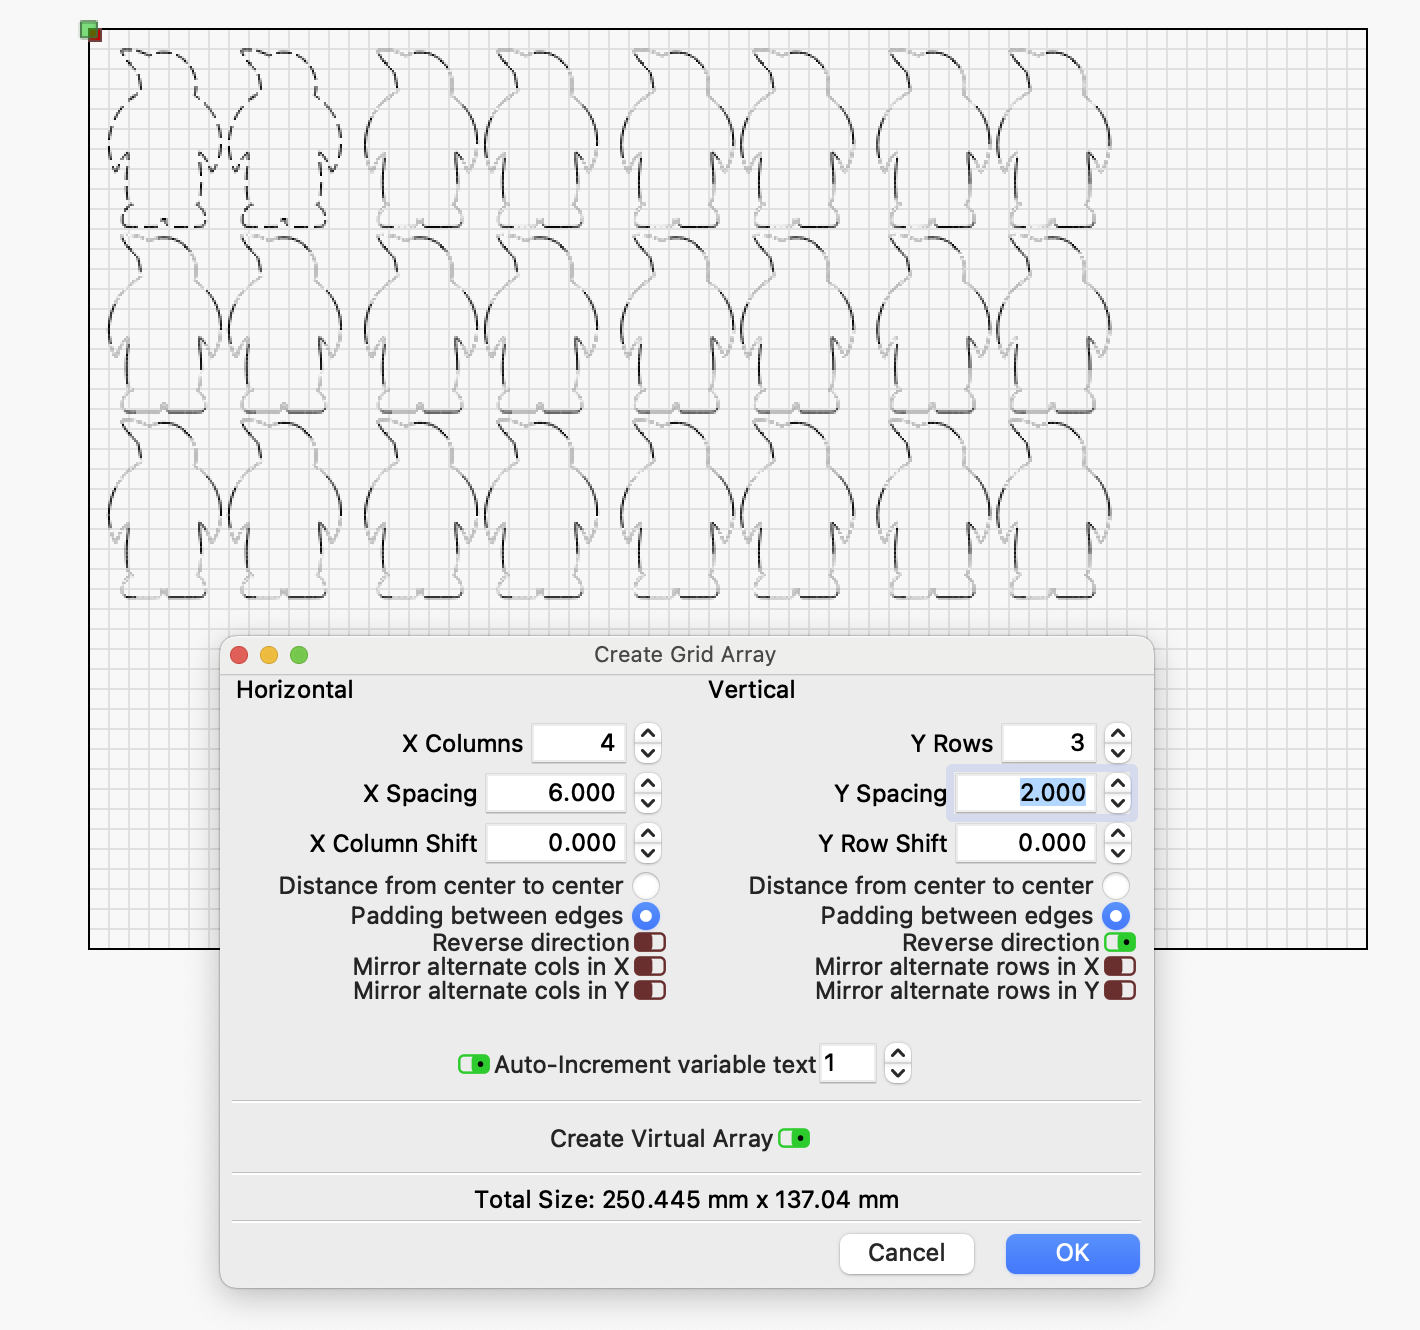
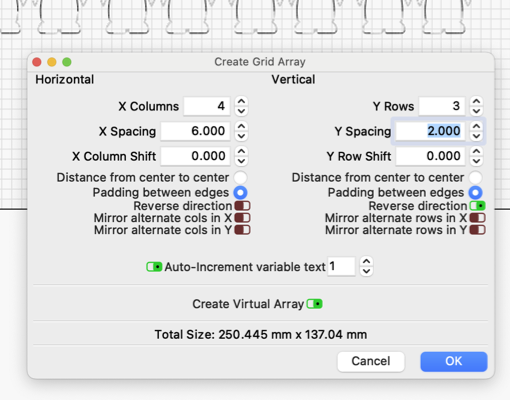
Also I would like to cut 2 to 3 different in one row, and in the 2nd row 2 to 3 different images?
Thanks for looking, Lucie
Luci, if I have understood you correctly, you will change the size of your penguin, let’s say by 50%, is that correct?
If it is then it is very easy in LightBurn. You mark your item and lock the aspect ratio (small padlock), now you can change the dimensions directly or per percent (right next to the length and height settings.
Now you can arrange your figures with the array tool. You pick up (import) the other elements and place them optimally in a line and get the multiple options with the array tool.
You can connect several files / elements from different files in a LightBurn file and export them afterwards in the desired format as one file.
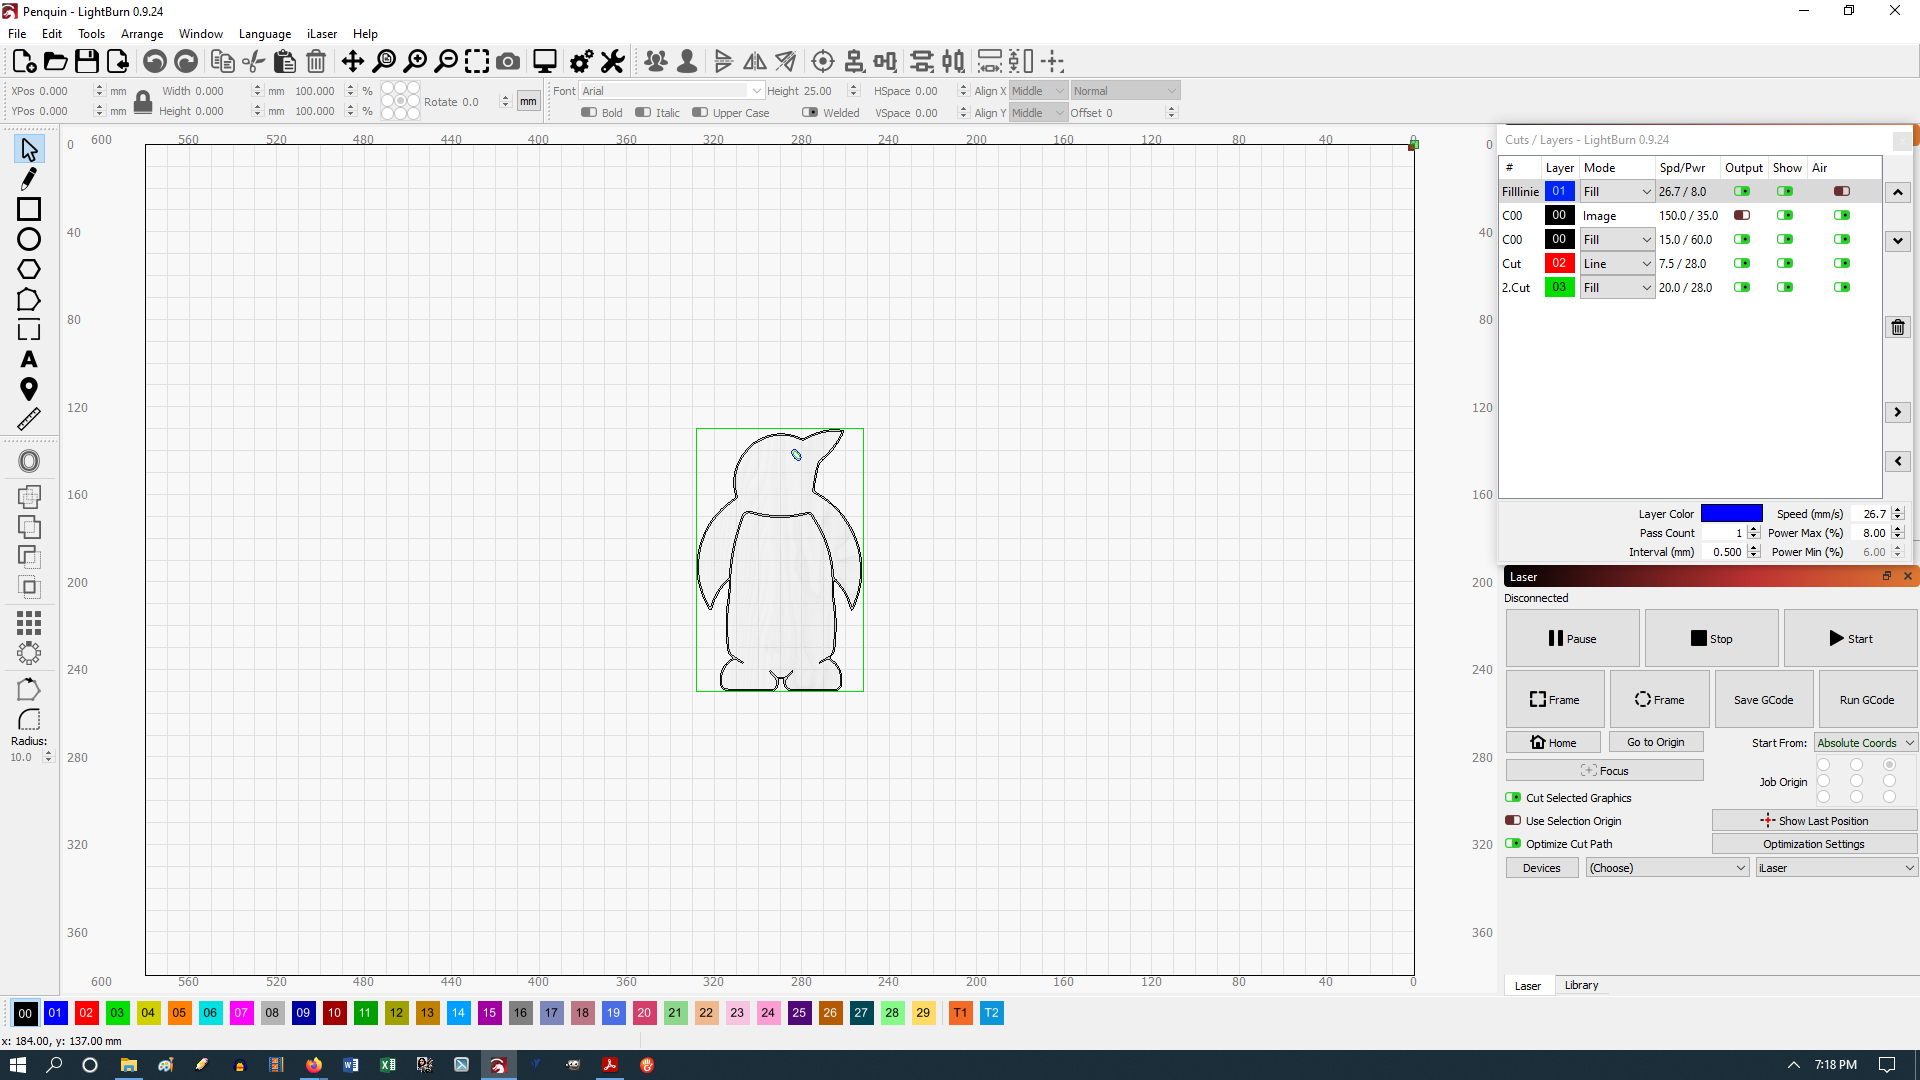
Bernd, thanks sooooo much. I have one more question and I think I will be able to do everything I want. I want to etch out lines inside image and cut outside. Penquin.lbrn2 (210.1 KB)
I “cleaned” your pingo a bit and removed some double lines. i have made 3 “editions” hope there is something in between you can use. If you then look at the different line properties you can easily figure out how I made them. If there’s anything else or my suggestion is not good enough, just report back.
note, you can not use my power and speed settings, I have taken them completely randomly
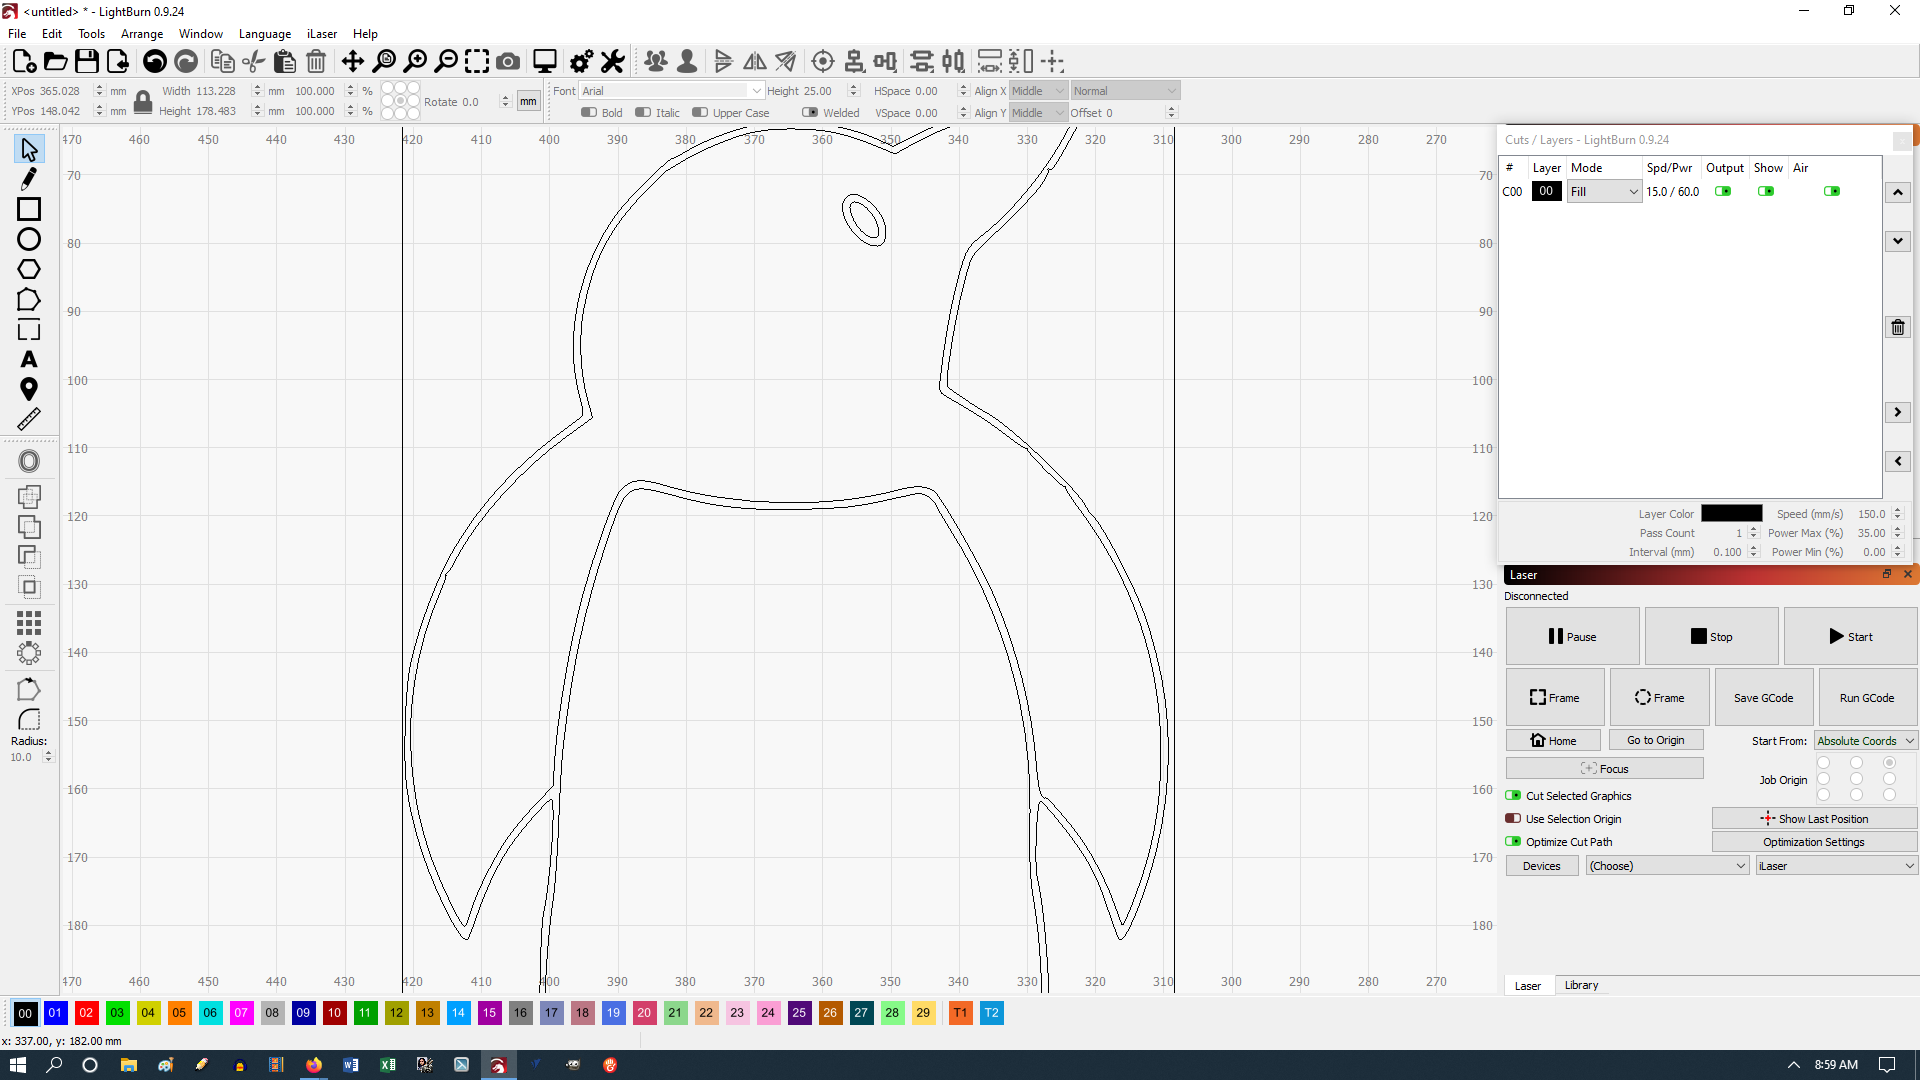
OMG, I think I got it. I am not sure of what Optimization setting should be? OMG, never too old to learn; thanks so much for your help. Here is what I got, can you tell if it will work?
what does it look like in the preview window ?, should you use that frame around? i’m on a little journey therefore there are delays in my answers, sorry
I don’t have a laser, I am using one at Makerspace. I have been able to remove the frame after much trial and error but it comes back. I have a way of making mountains out of molehills and I see lots of mountains on the horizen.
I am not understanding what you are referring to in this response. What is the context of this response?
or
Please be verbose in responding, so this conversation can be understood by folks that read later. We are trying to address several issues here - it has become confusing, even to me.
I changed the size of the image, saved and closed the file. When I went back to it, the image was too large and I had to resize it a second time. I will try again tomorrow. Your video is truly appreciated. Lucie
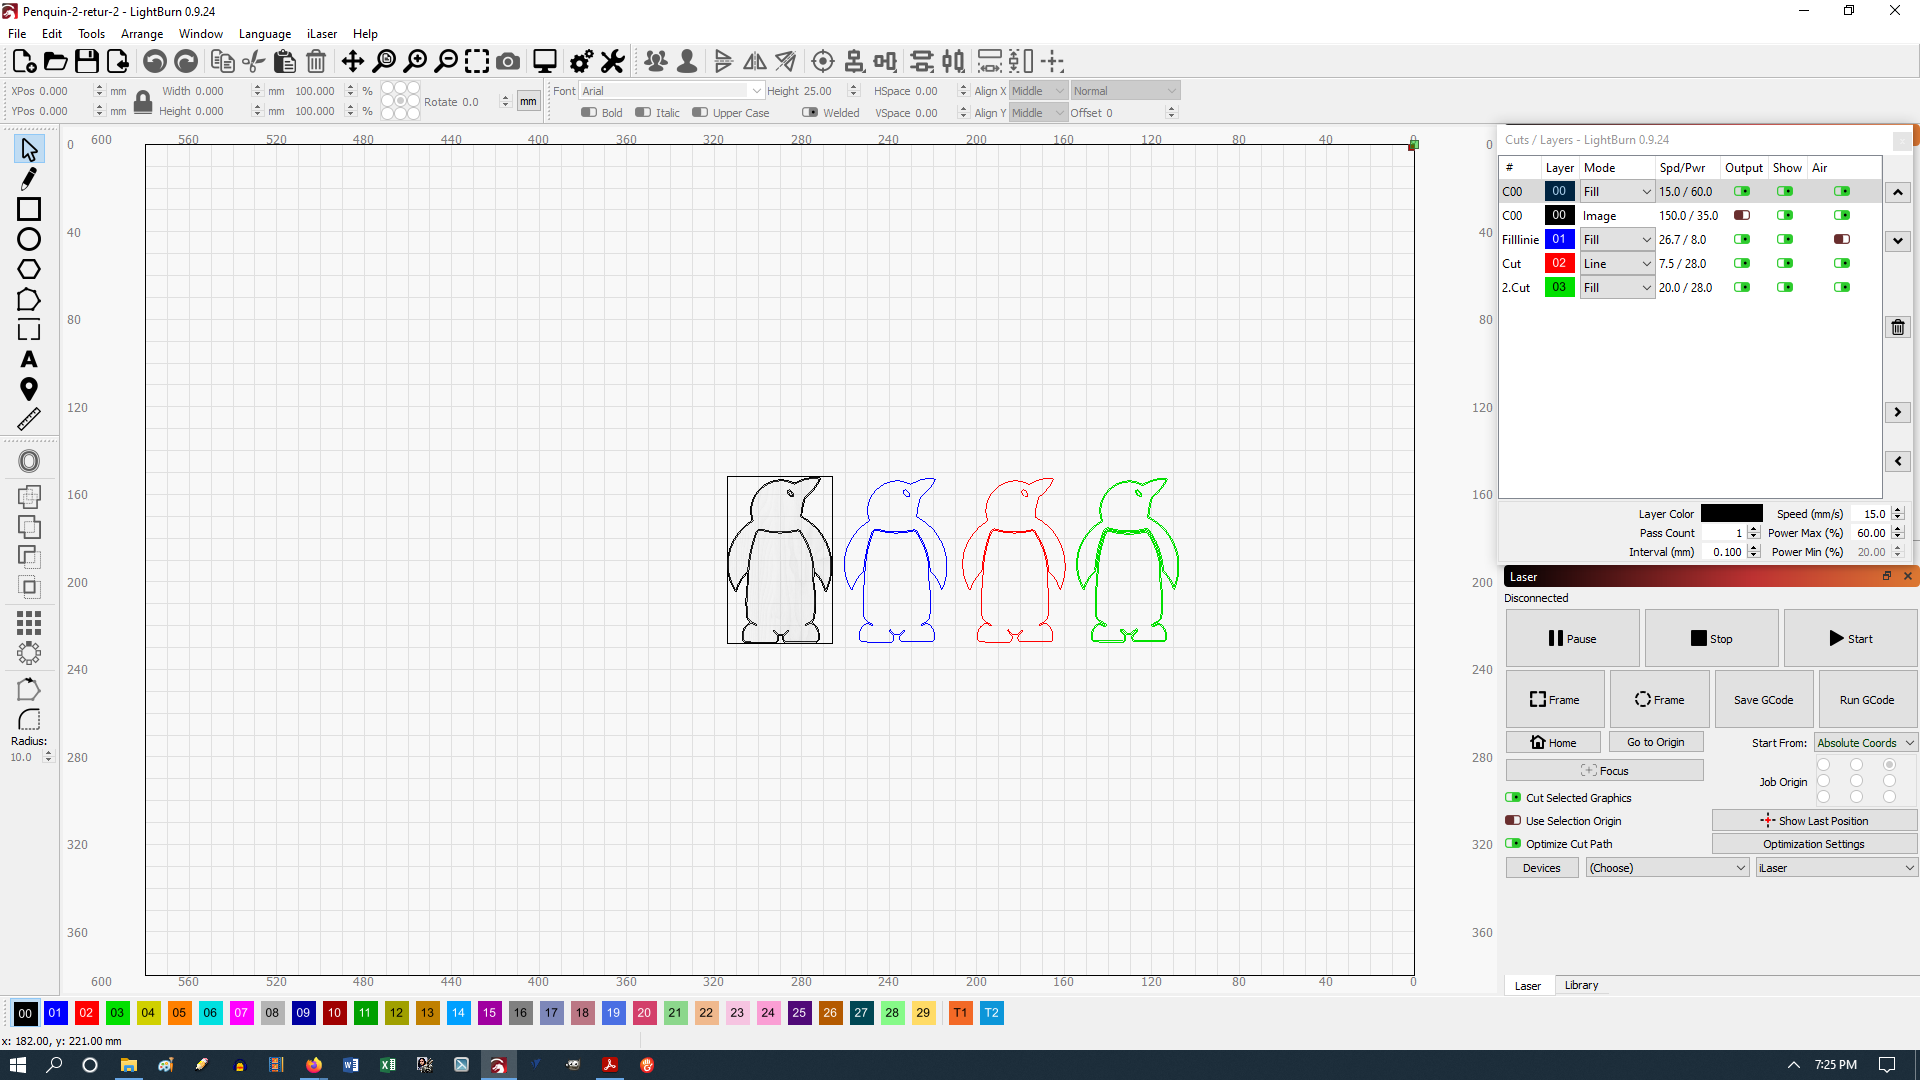
“my” penguins are just an example of the various line and fill options that I I will show you. They are simply duplicated and moved and then I changed the line / fill option.
If you use the blue pingo for example and delete everything else, place the blue pingo at your starting point on the “material / workbed” and use Rik`s suggestion, you will get the desired result (on the same layer).
Change dimensions of objects, here it is also Rick who shows how you can do it. Make a few simple test objects and try it, “usually” the changes are saved.
Hope this helps you further in the project.
Lucie, try to see in LightBurn`s very nice documentation and the many good videos, they have always been a great tool for me. It is meant as an extra help, we will of course always help each other next to the documentation.
PS. If you would like an example from me so you can explore it , then write how big and how many penguins you want. Then I will quickly do it for you.
Went to bed early and wanting to give your instructions, and Rik’s, a try. I am trying to teach my 74 year old younger sister about the computer, starting with File Manager. She is teaching me how to drive again, after not having driven for 30+years. We are a bit overwhelmed, but having ever so much fun learning. We just figured out settings for Cut and successfully cut out images on 1/4" wood, up a notch from the chip board we were playing with. I am going to play around with my penguin a bit before going to Makerspace. this morning. I will start a New Topic when I bump into the next mountain. Thanks soooooo much!
Previously I played around, ungrouping, creating lines with different colors, and Image (when in Preview mode), didn’t get it right. Also,laser did not start cut inside “eye” first.
Here is what I wound up with a couple of days ago. Penquin.lbrn (314.9 KB)


 , then write how big and how many penguins you want. Then I will quickly do it for you.