Lucie, you’re on the right track.
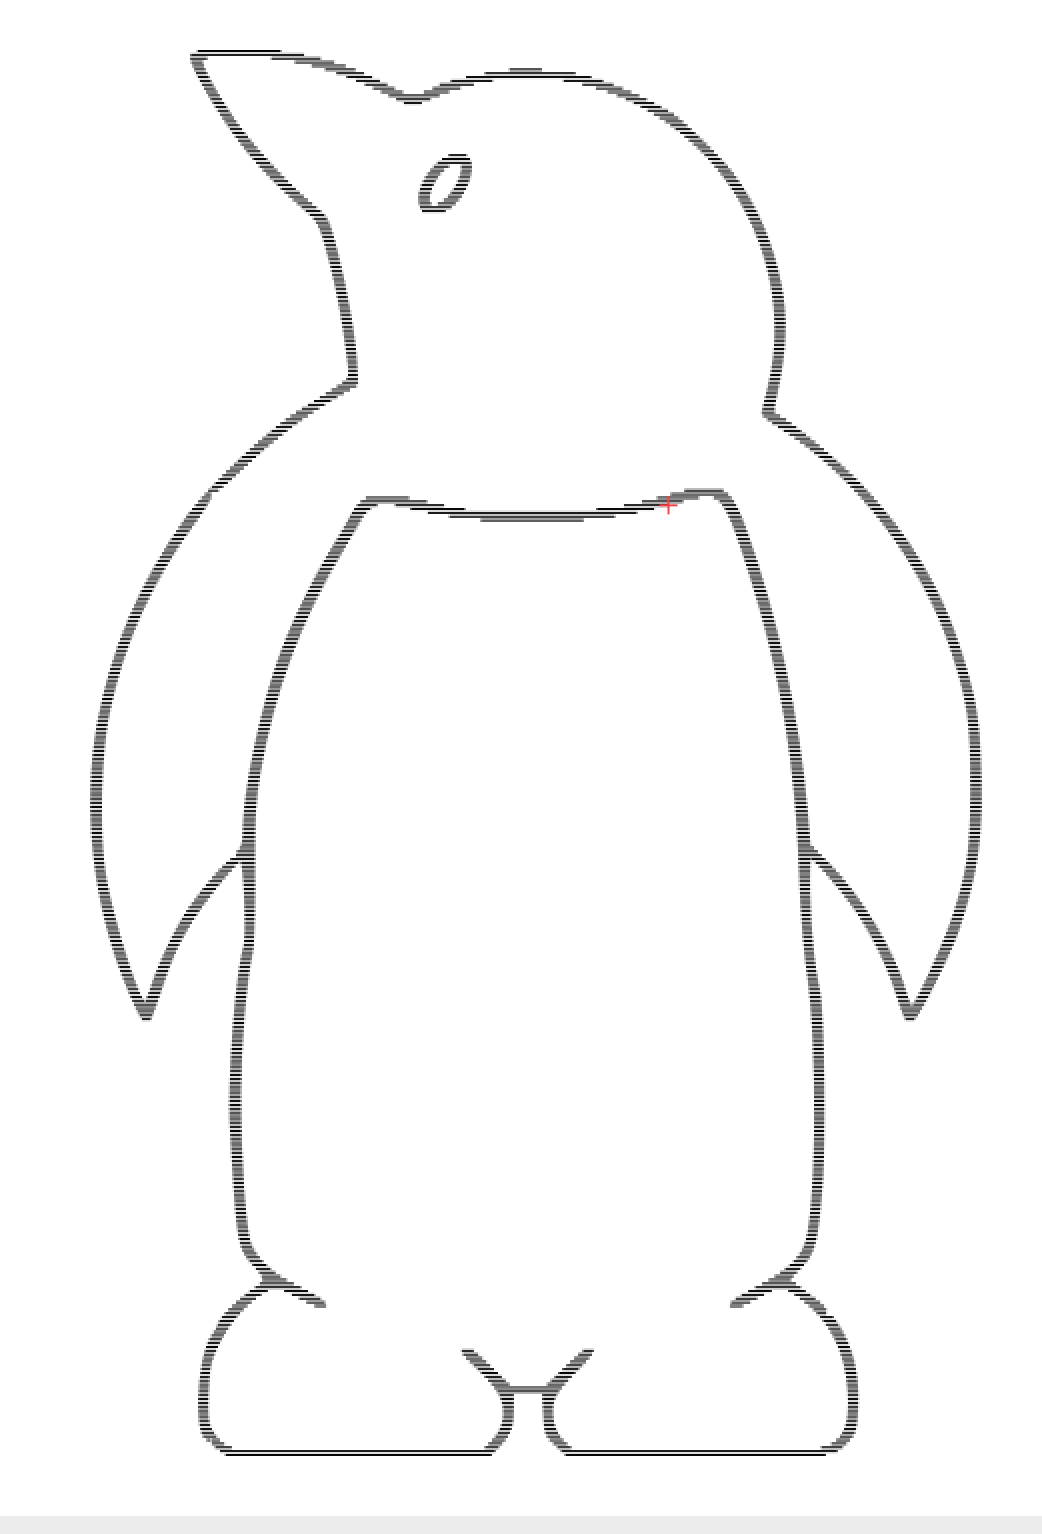
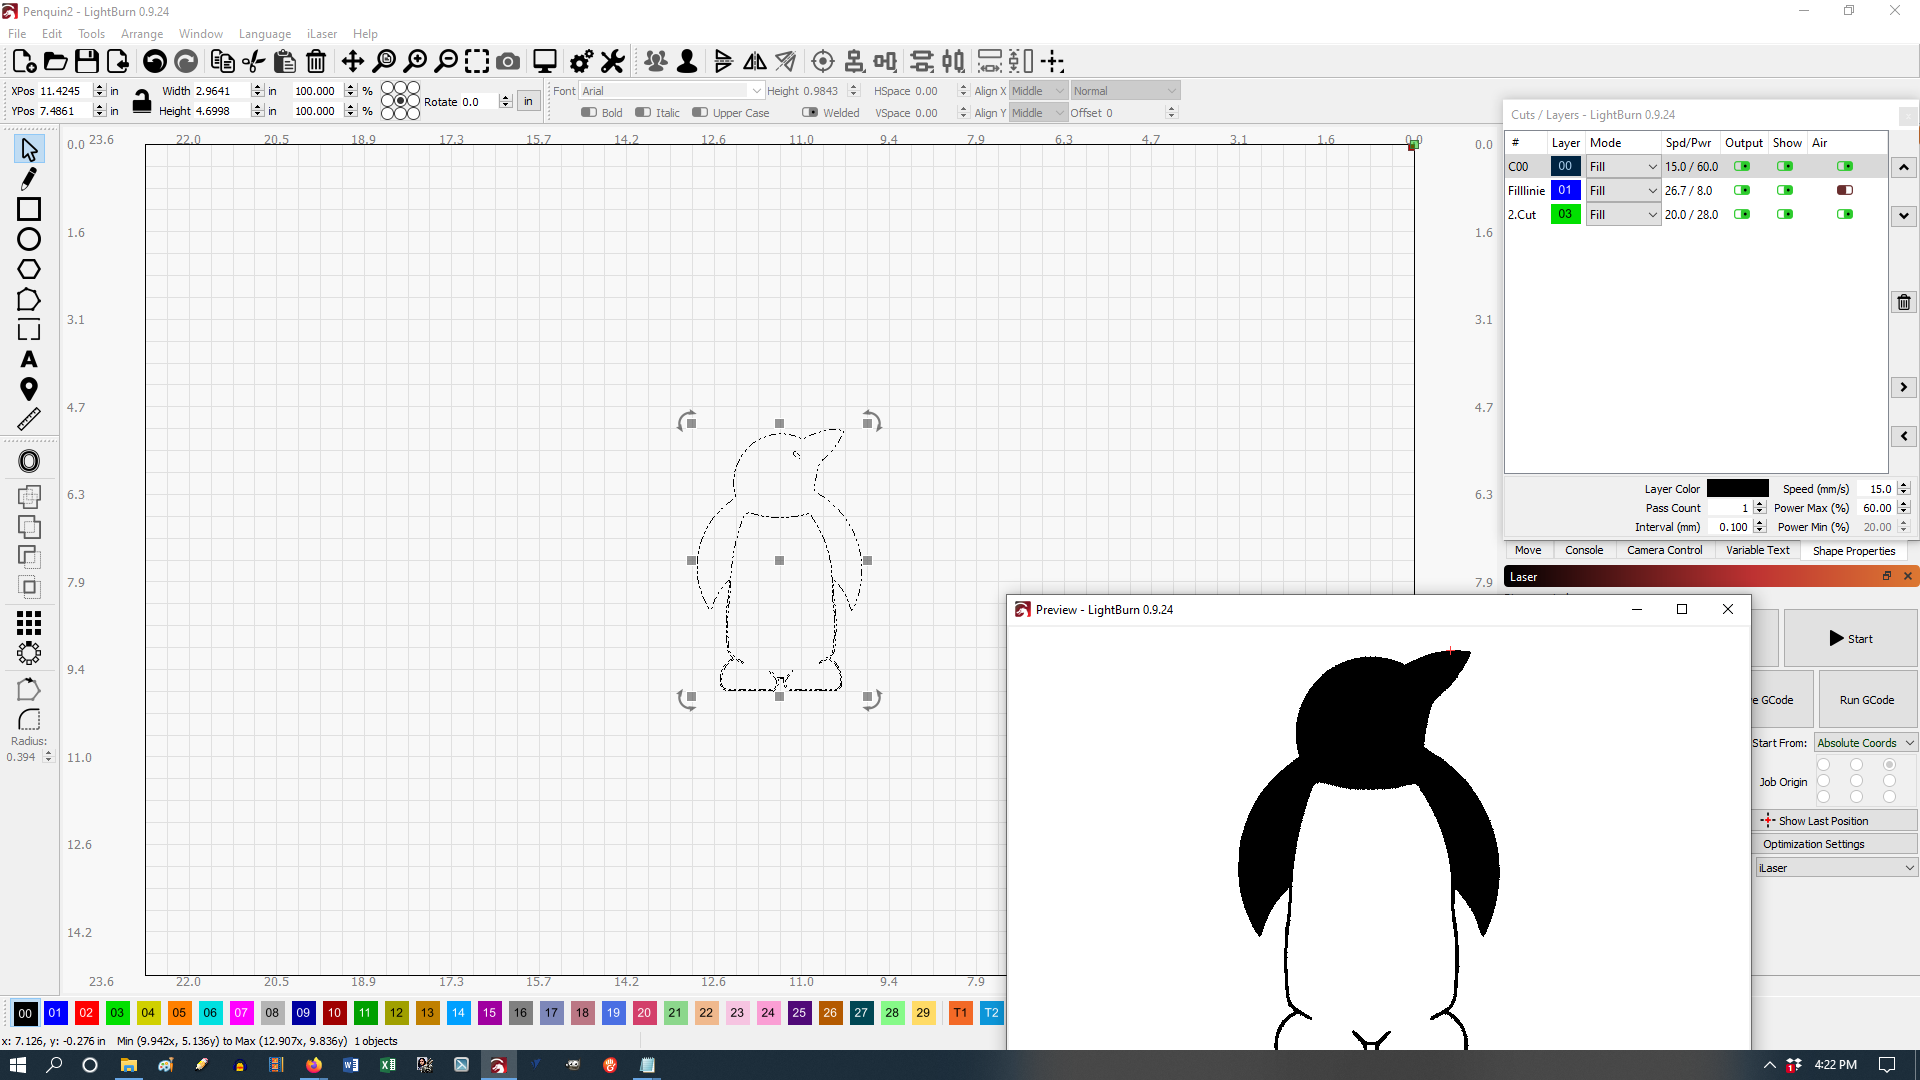
As your scanned / traced image is now, there are 2 lines all the way (except the frame). This is due to the fact that only a few programs can do something called centerline tracing and is reasonably complicated to get implanted in LightBurn. But no problem anyway, we are happy with what we have.
You only need a single layer, unless you want to use the penguin for several different tasks. But then they should preferably not lie on top of each other.
I have deleted all your layers except the one I want to work with.
As your penguin is now you can use it to “Fill” and everything between the 2 lines will be filled, but because you have this frame around, the areas will be interpreted in a slightly different way. In fact, just like a “negative”. Try looking in the preview window. The result you will be able to “use” as an engraving.
If you select everything but not the frame after you have ungrouped it, you will be able to engrave your pingo as a “positive” drawing, everything between the lines is filled in - with the Fill function. If you use Line property, the result looks different and you can not use it as it is to cut out your Penguin because you have several loose parts that make up your pingo.
I make a part2 right away where we cut our Penguin out of cardboard so to speak.
To be able to cut out the Penguin, we have to ungroup the drawing and delete the frame.
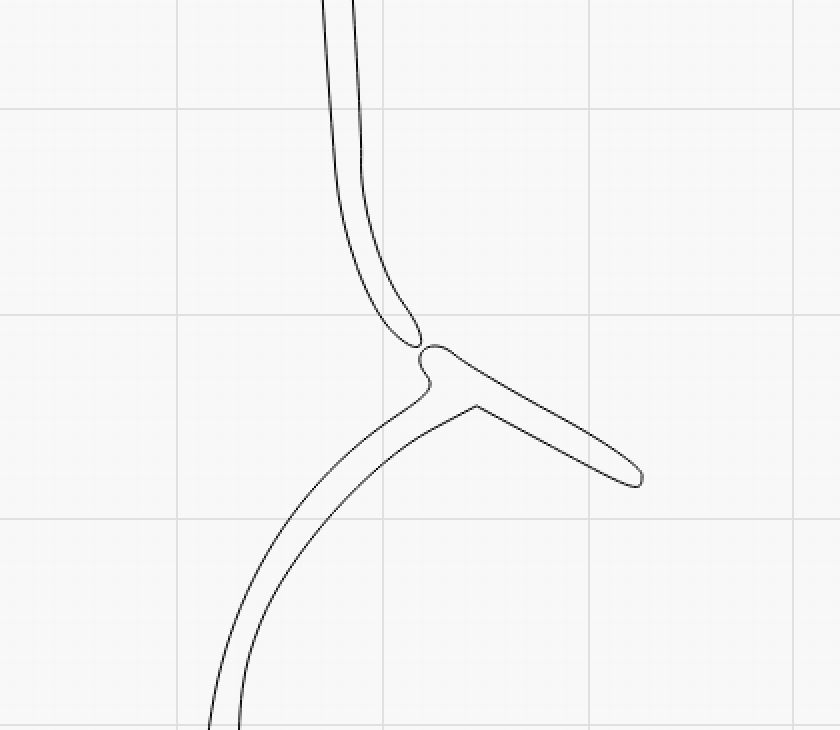
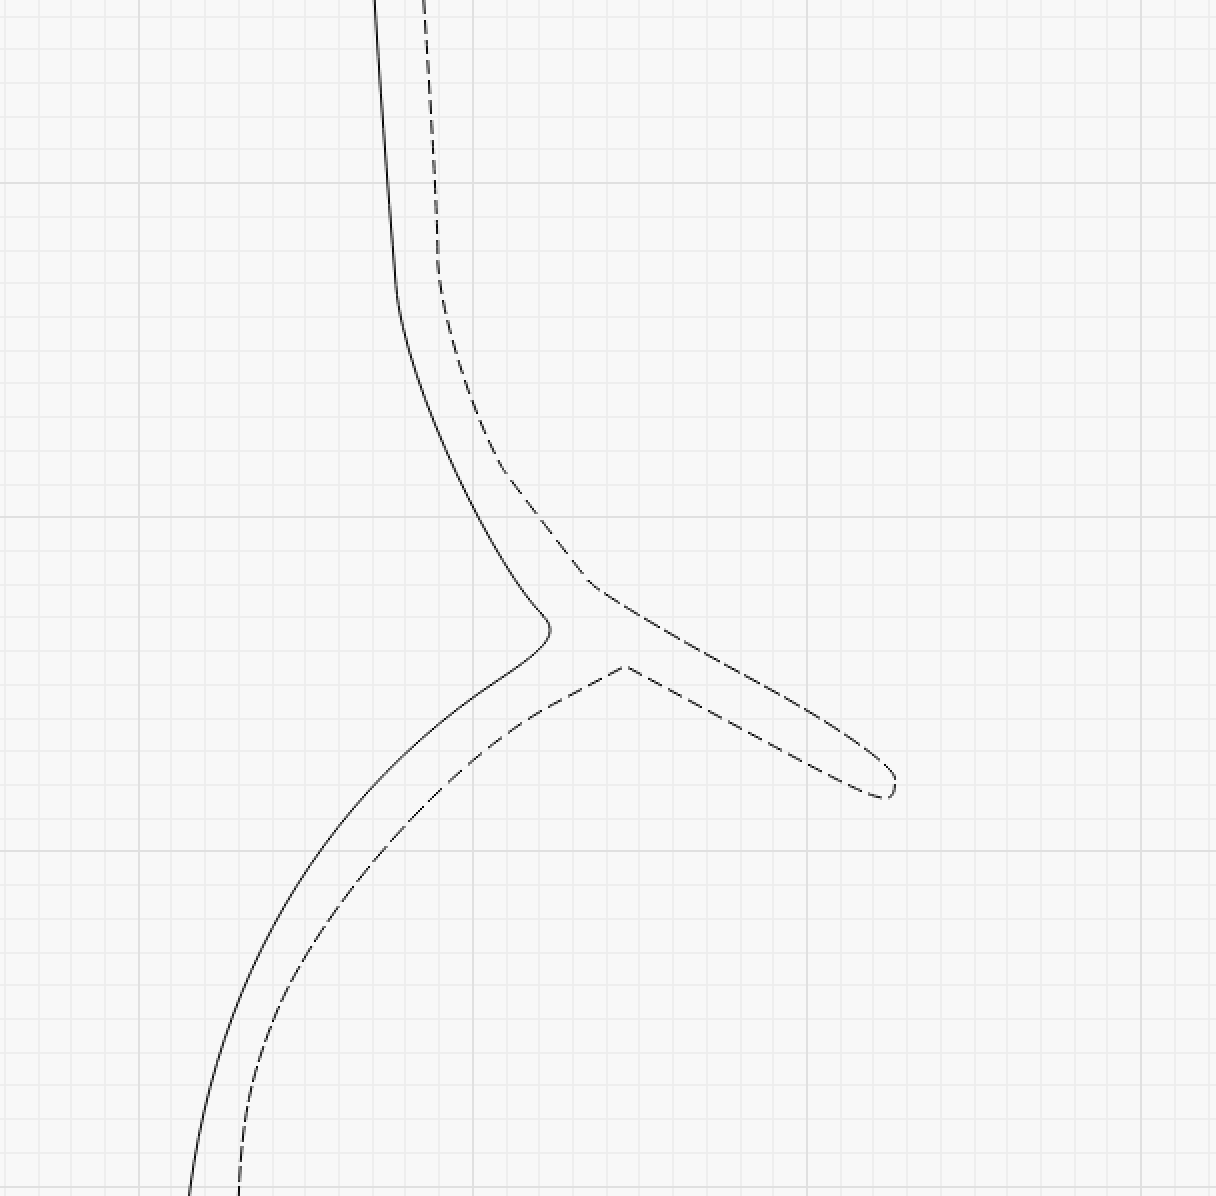
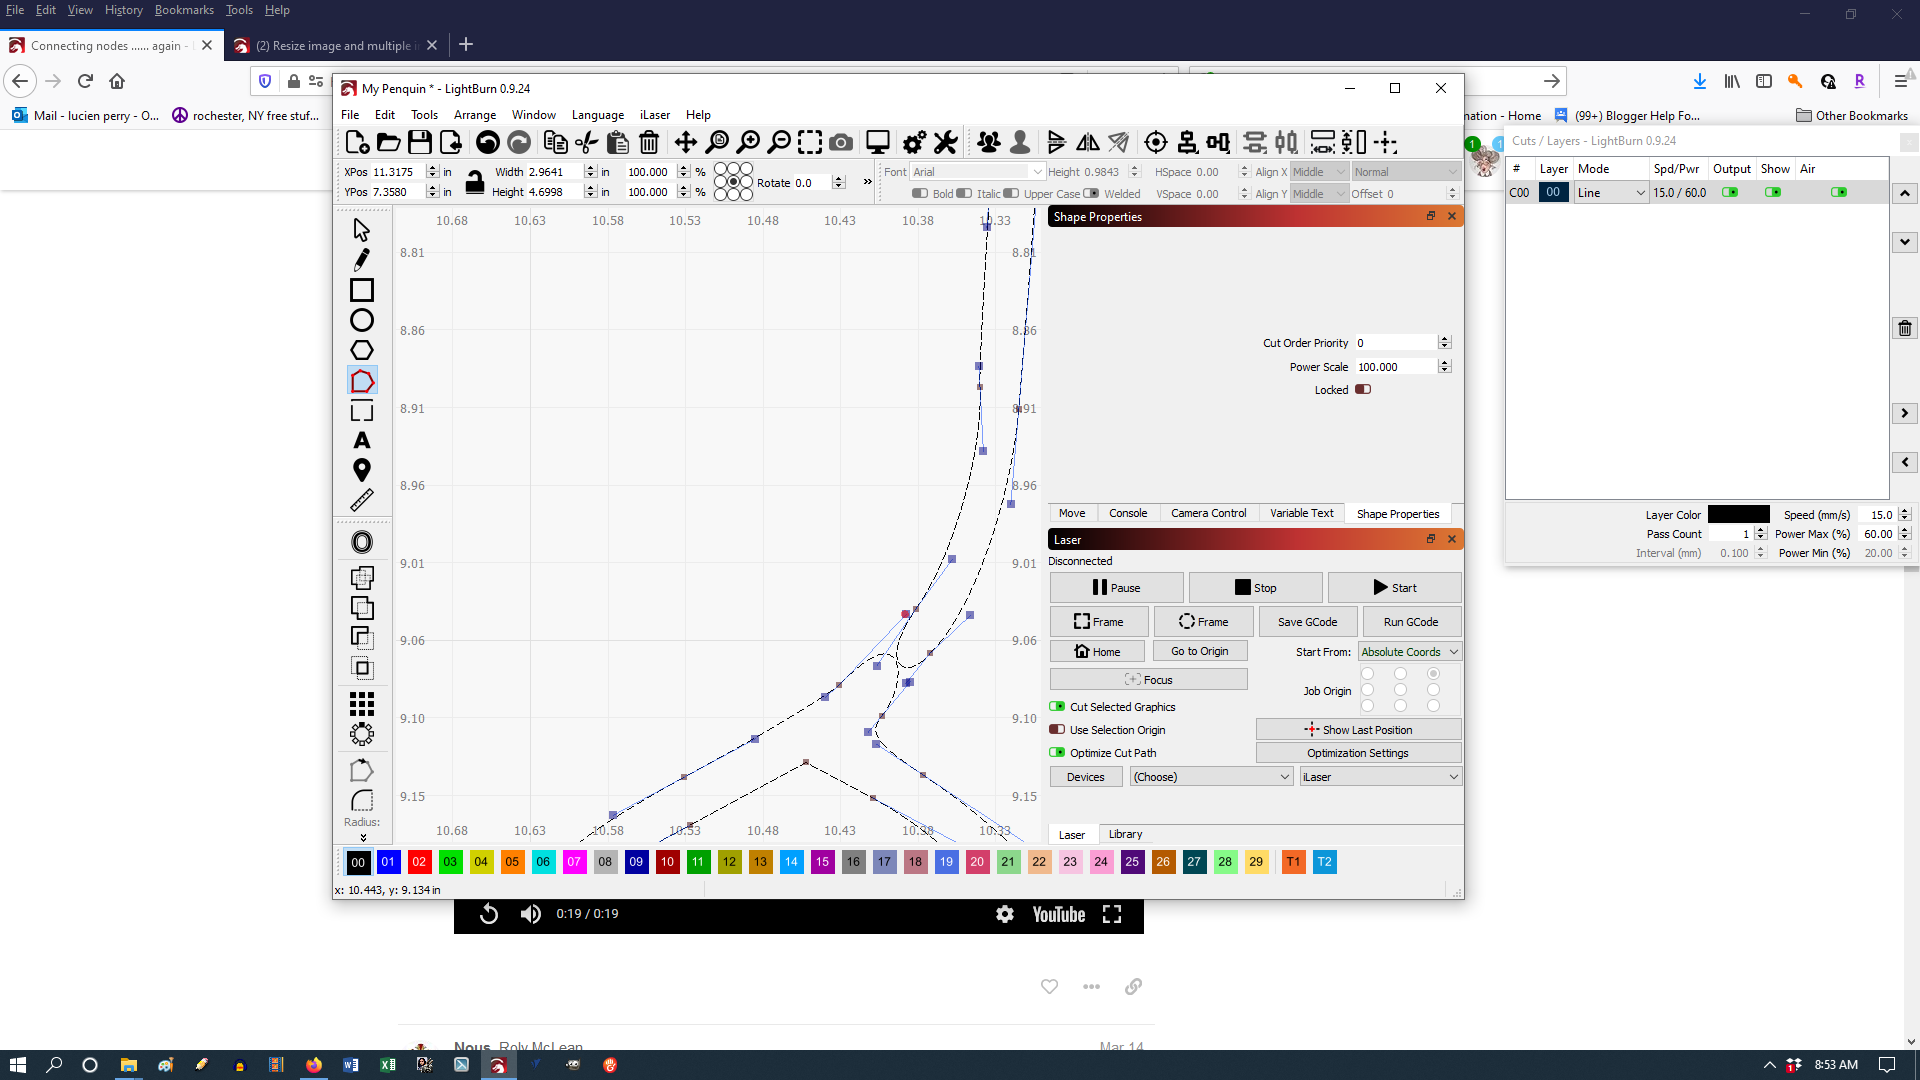
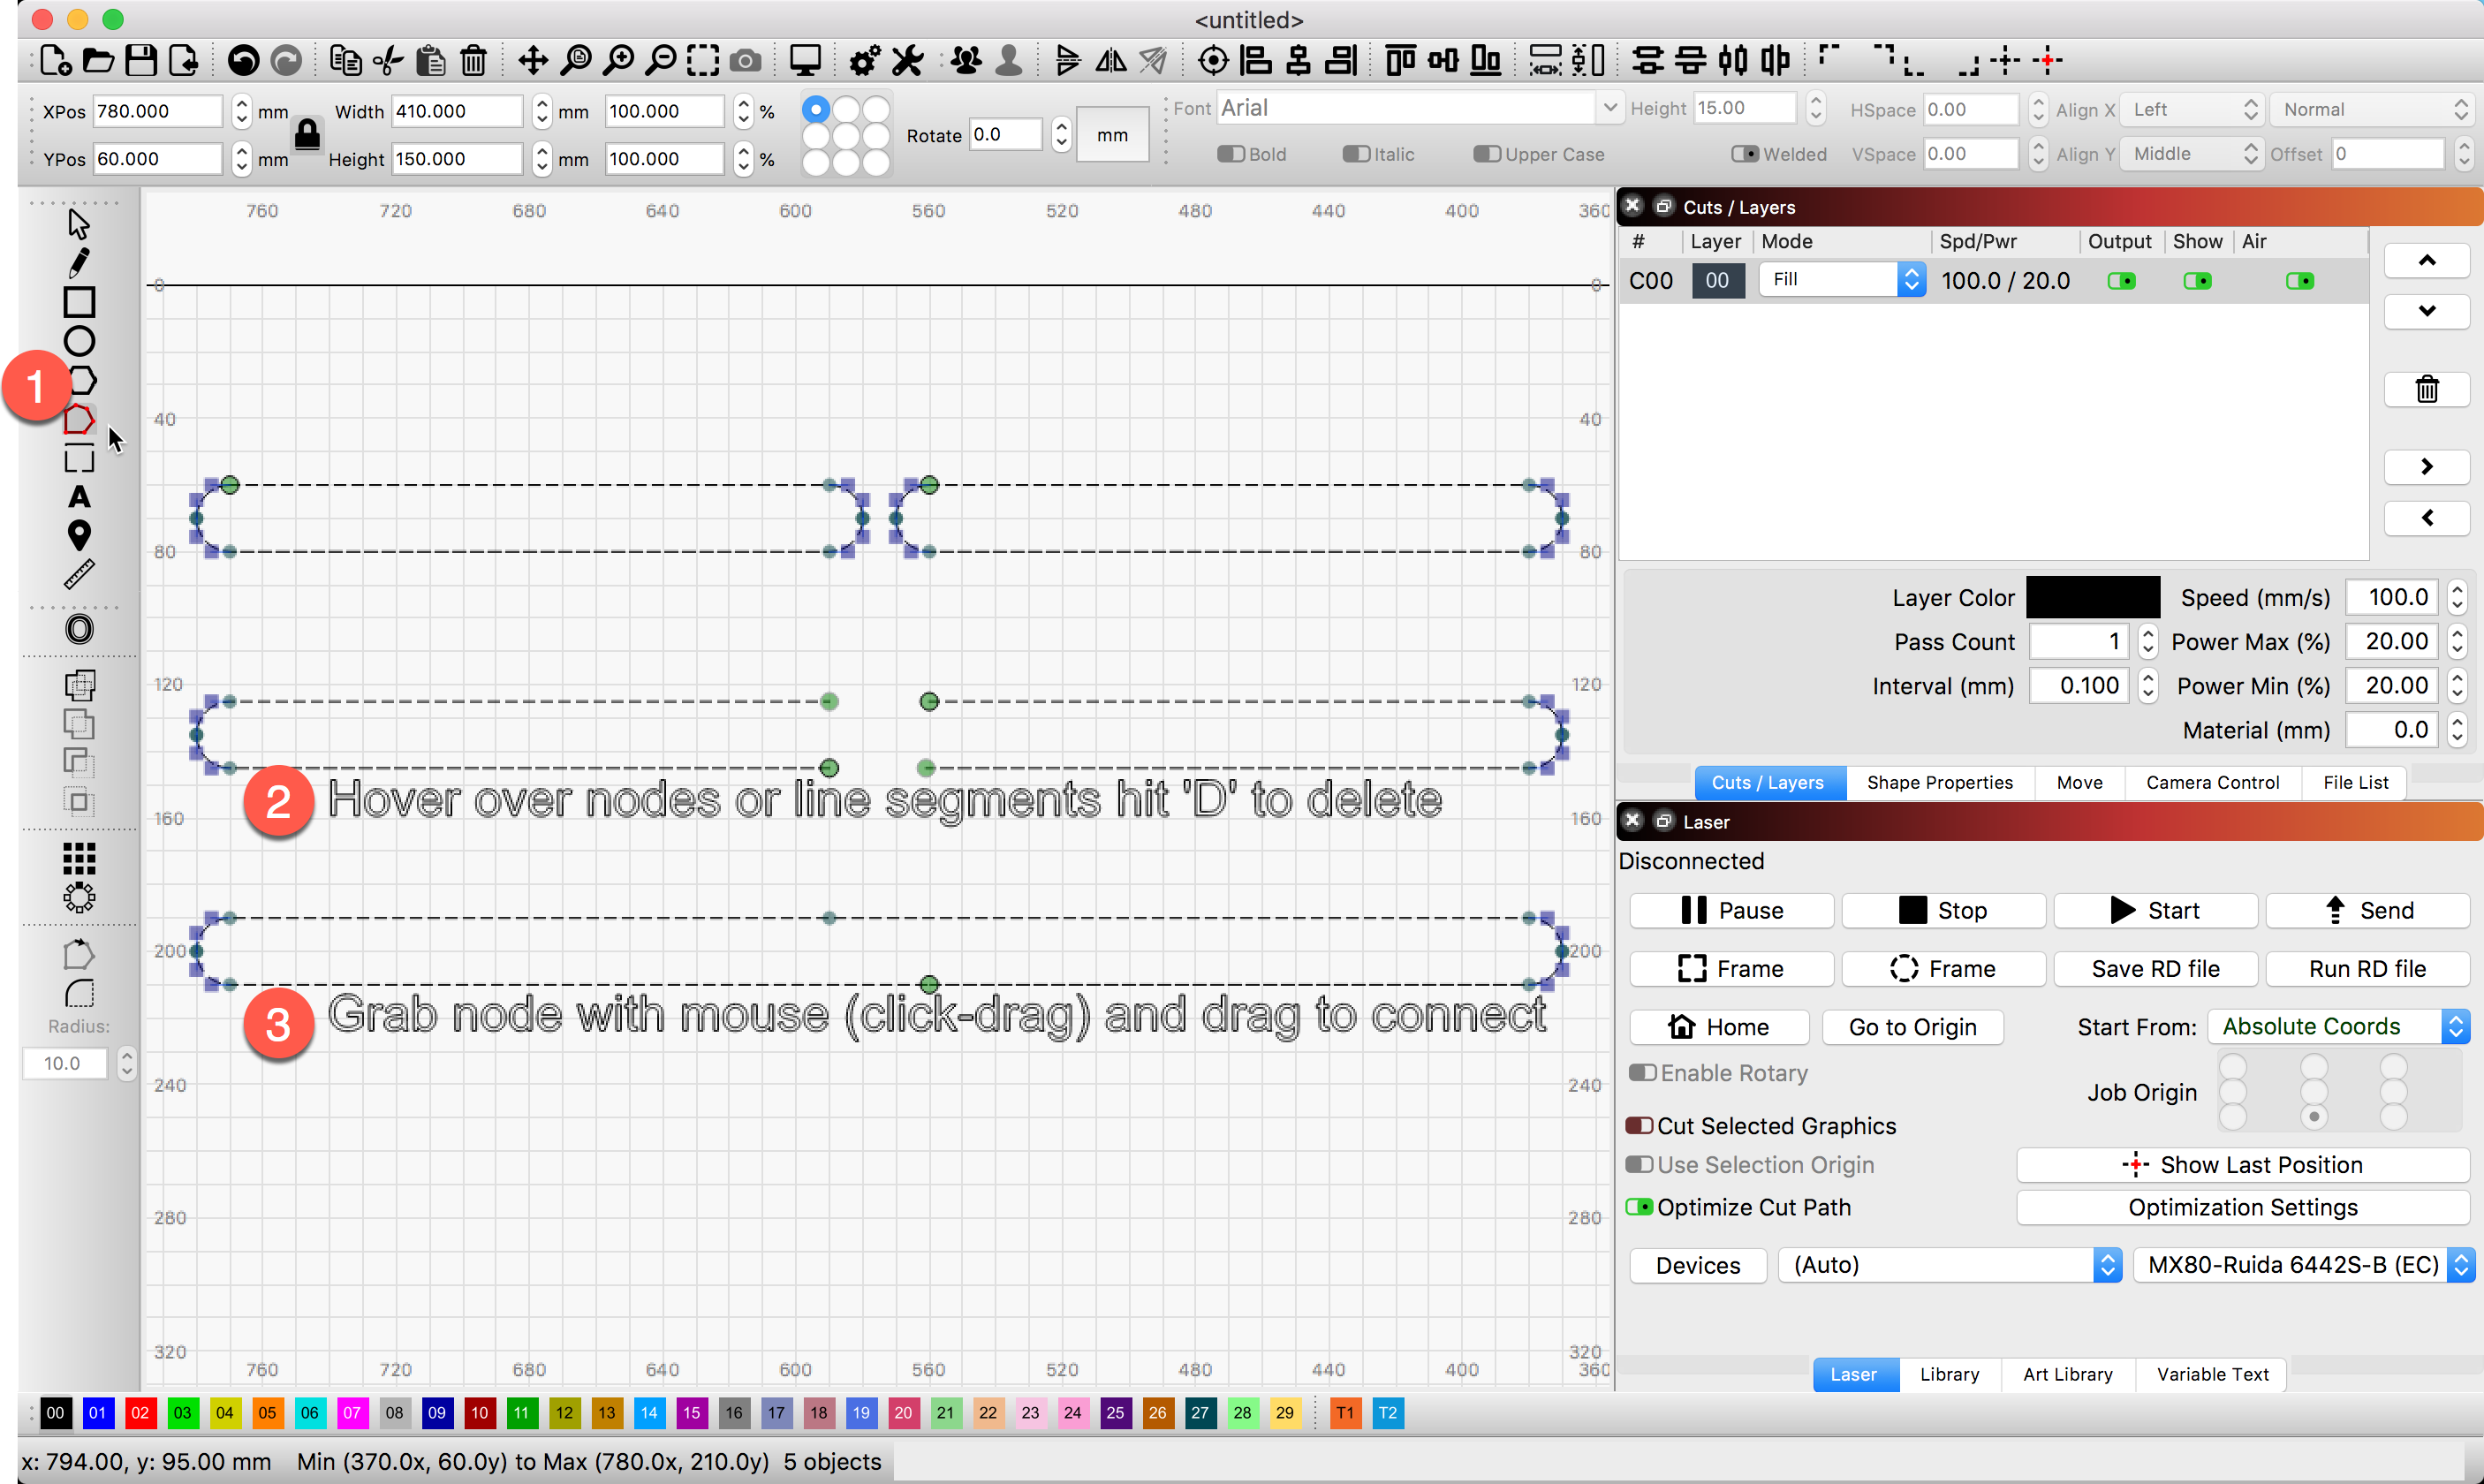
To be able to separate the lines, we must first repair a small error in the drawing, look at the section before and after. We achieve this with the Edit Nodes function.
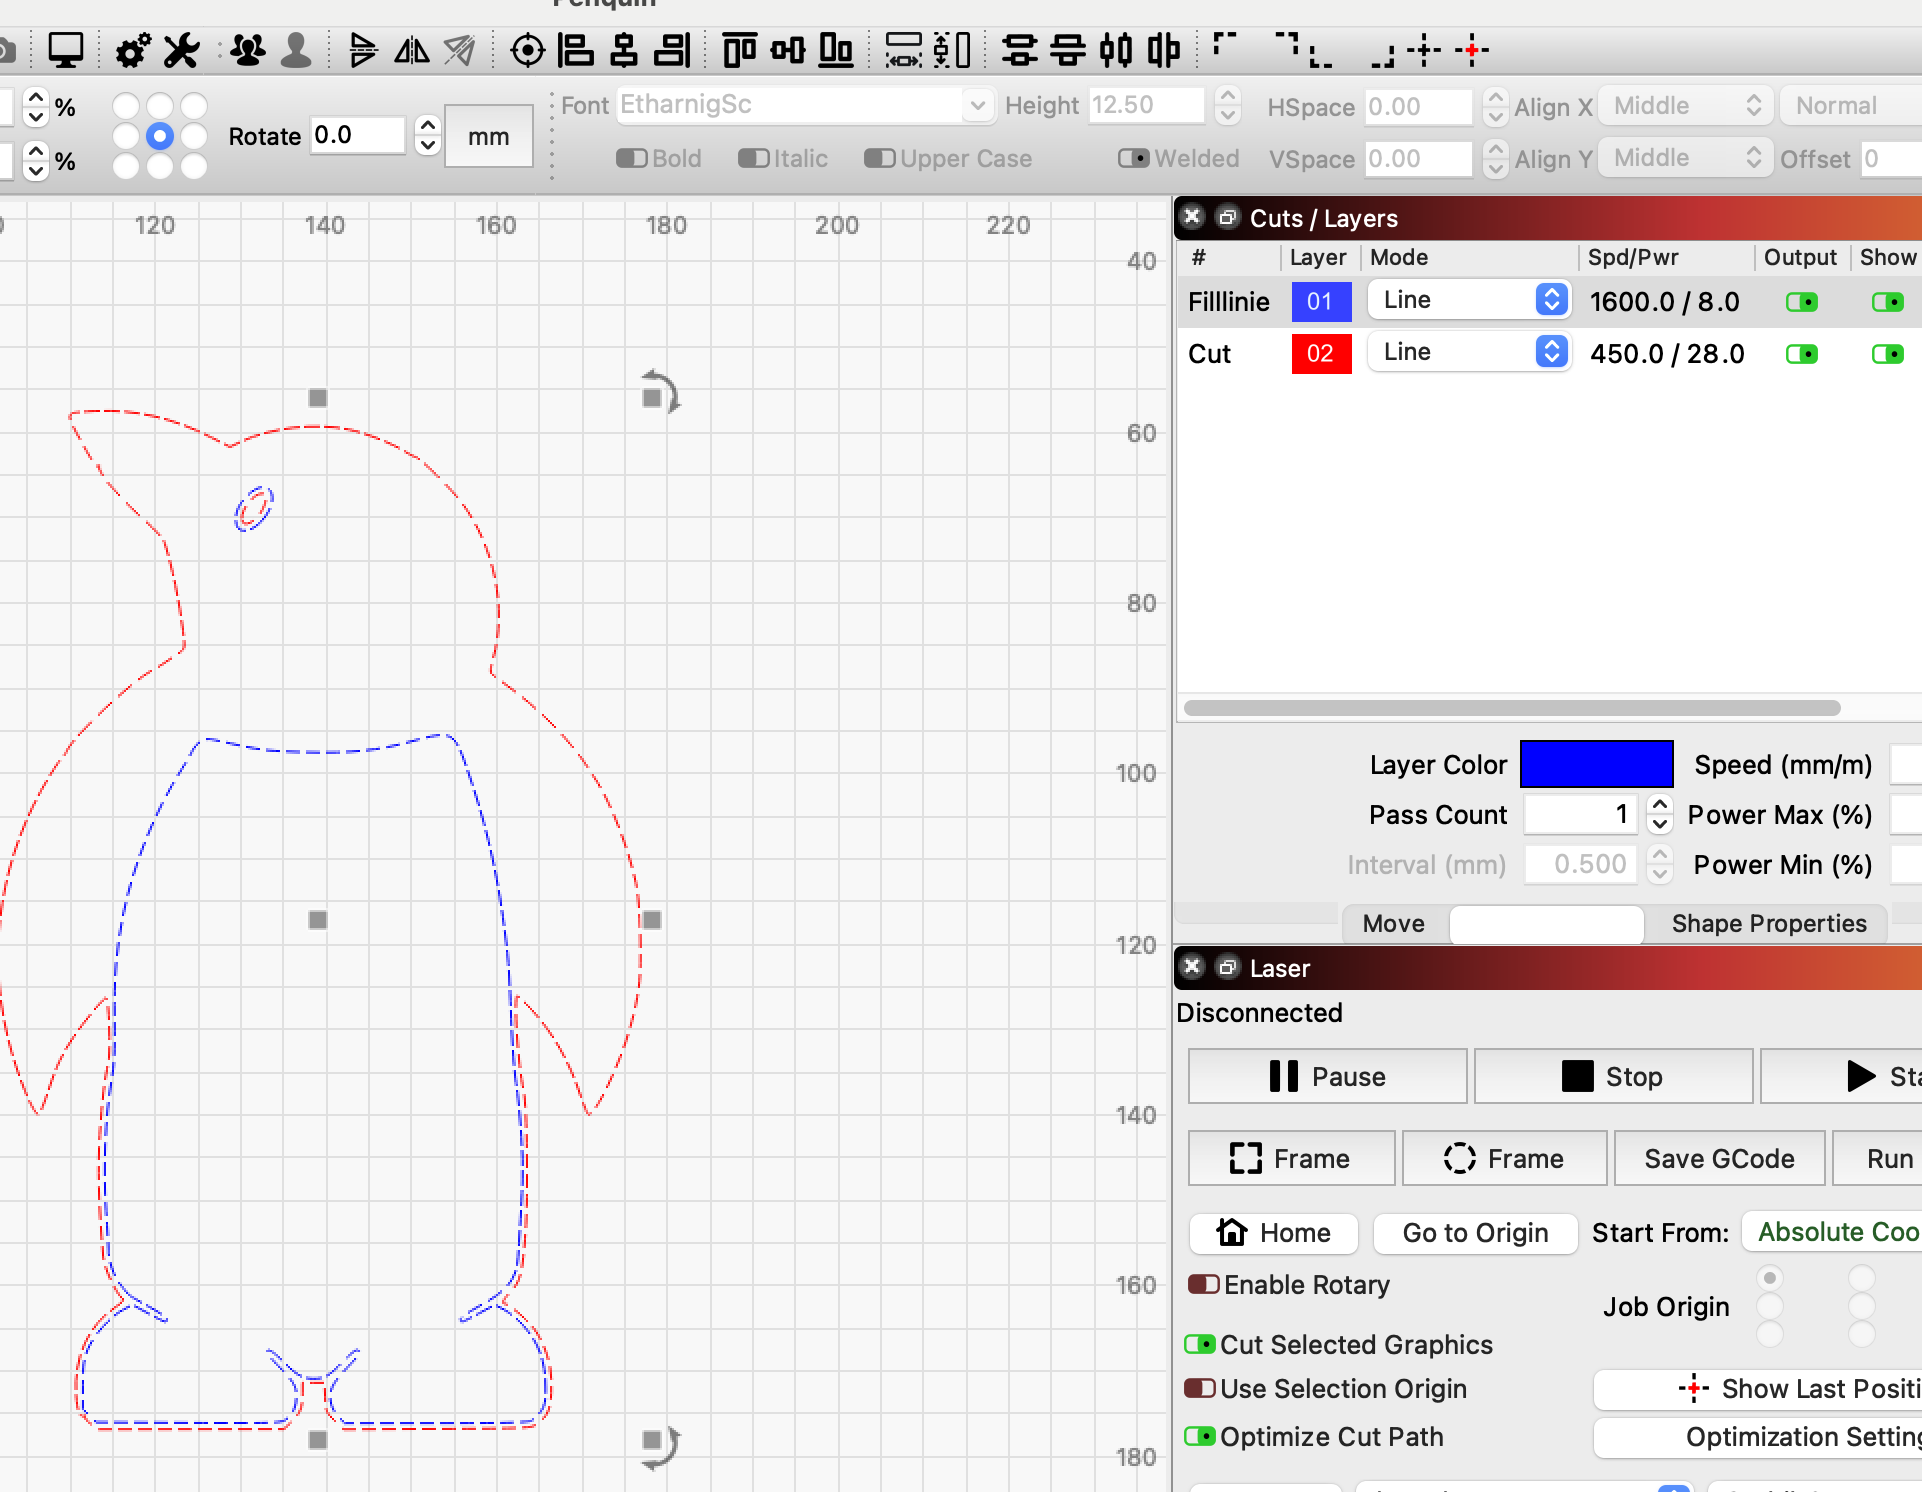
Now we set the outer line (red) for cutting and the blue for engraving.
If you set the blue layer to Fill you will get a different result, but it will still be cut out correctly.
Remember to put a mark in “cut inner shapes first”.
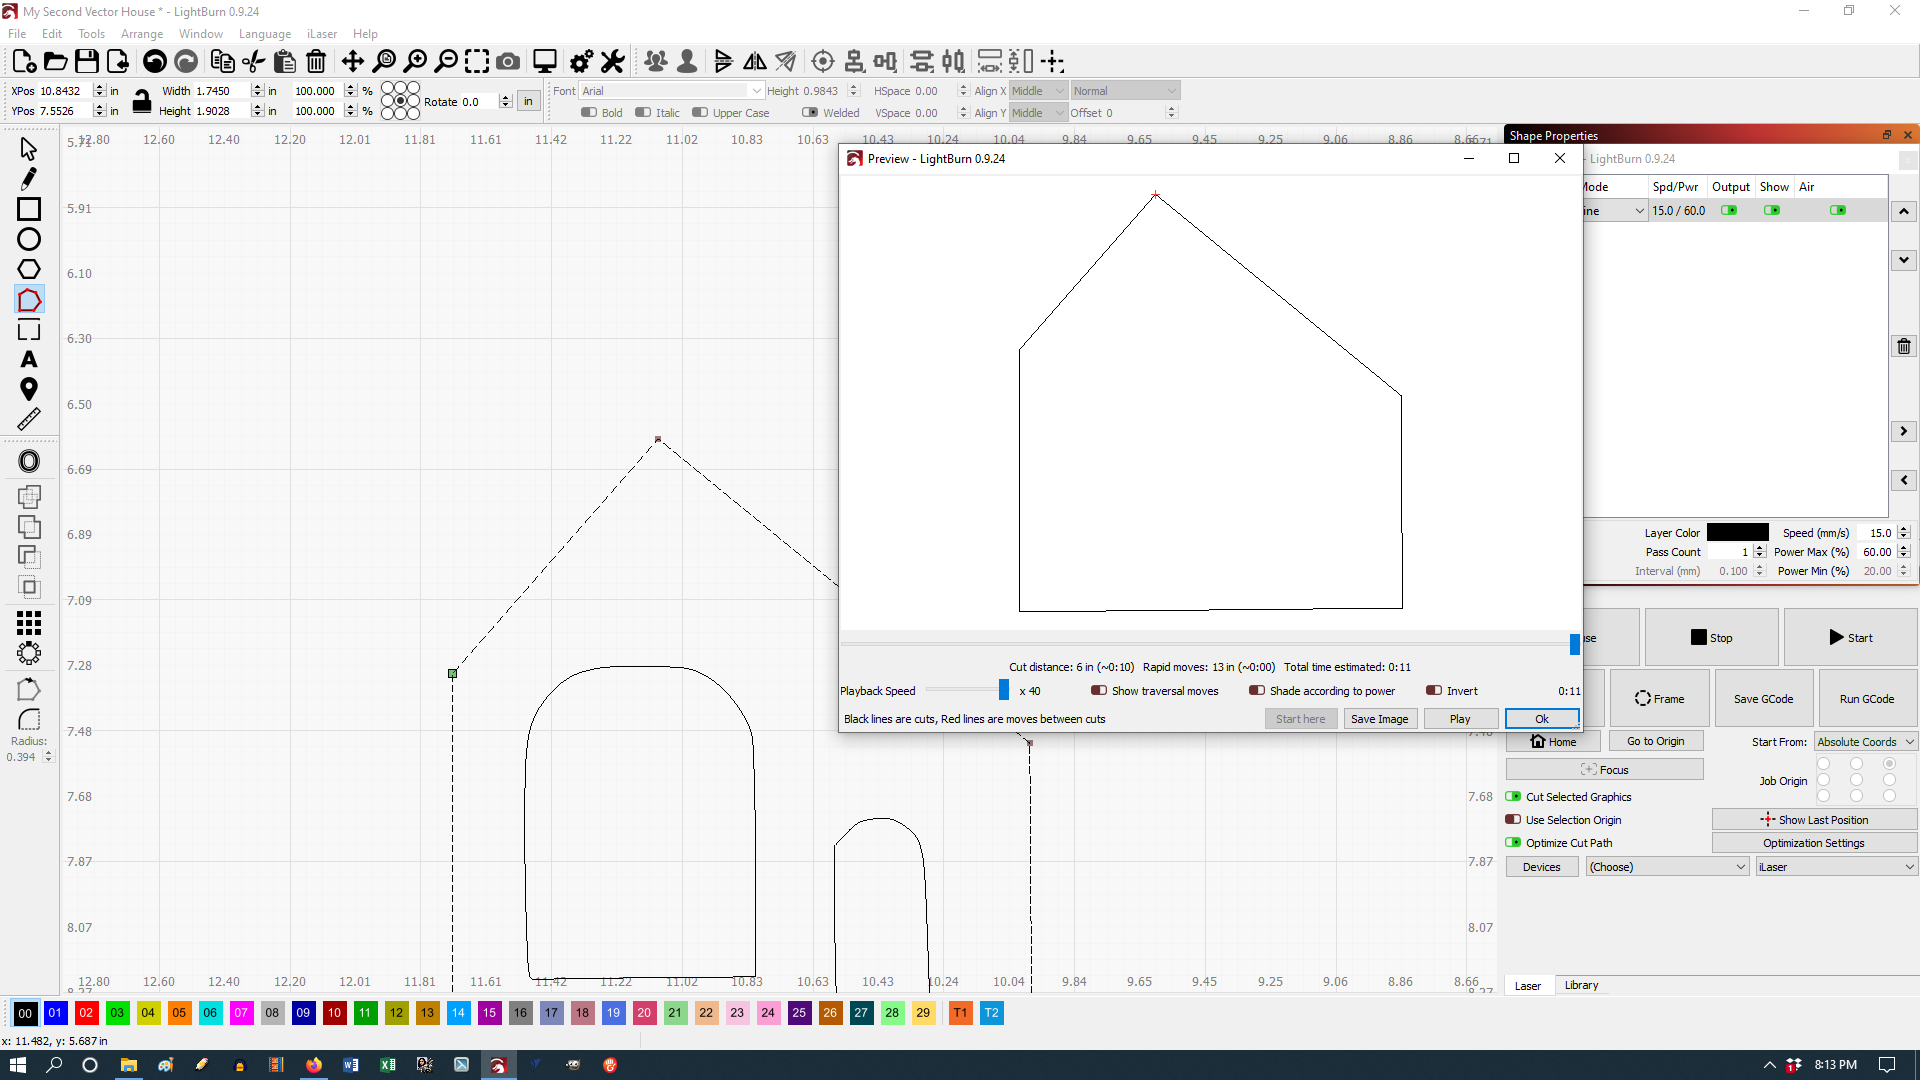
I am going to skip over this for the moment. I am working on a House image and need to straighten the edges. I don’t know where I save my Lightburn documentation…or if I even remembered to save it. I remember being able to do this in Photoshop but was a few year ago. Tomorrow we are going to cut templates for Houses.
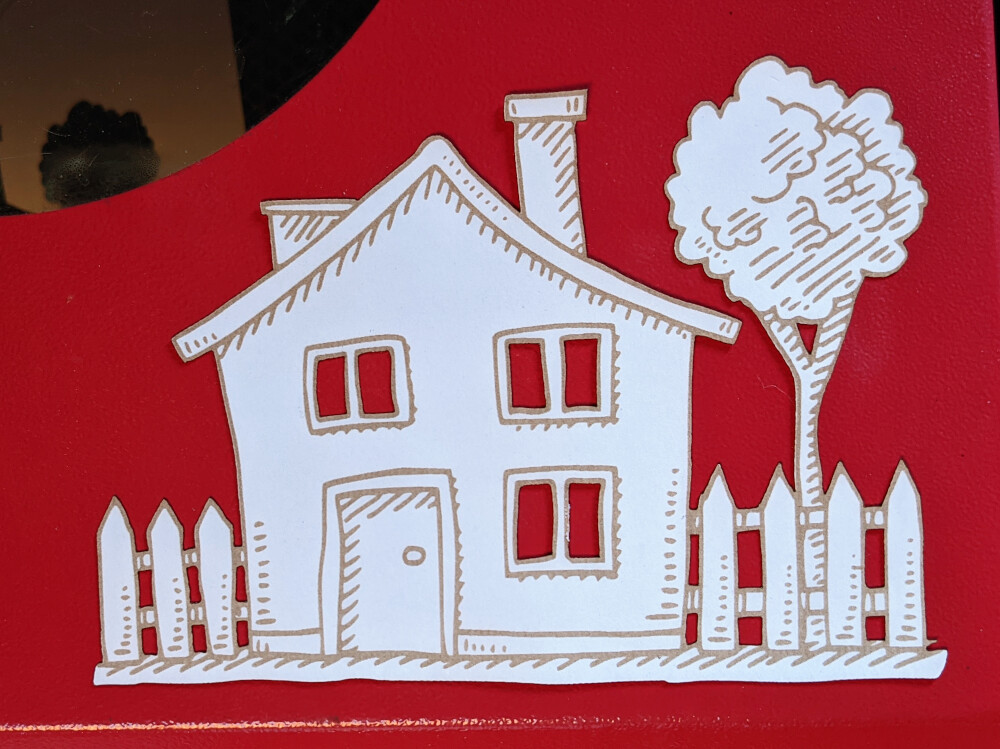
Found it, thanks. Also learned F1 will open Hot Keys. I didn’t know how to articulate what I was wanting so I played around deleting Nodes. I only have 30 days trial on Lightburn software; I really should start at beginning but no time before next two workshops. I don’t need the doors, just need a template to make mini houses for grand kids.
Oh golly, I have six or more images ready to cut. I am beginning to be able to remove the image and manipulate the lines. Next the video on arrays looks interesting. Will play with that tomorrow morning before we go to Makerspace. So much fun!
Hank, just noticed your file. I will have so much fun with this. I like to sew Quiet books out of felt, doing one as we speak for a baby shower. I will incorporate it into one of my pages! Thank youuuuu! Lucie
Yes, that in the picture, that is the “problem”. You have to learn a little about edit nodes, as I said, there is a very nice description in docs and there is also a fantastic explanatory video especially for edit nodes. When you have just the most important things in place, then it goes strong for you. And of course we are there too.
Looks like you are still mid-editing on another post. This is why you see “+ Open Draft” and not the option to start a new post. Complete (post, save, or delete) this draft and you should then see the option to start a new topic.
I have looked at that same video but all I can do is bump the two ends together. I just figured out how to dock panels, that alone was driving me nuts.
You may need to 'I’nsert new node(s) along the current path, prior to deleting segments, to provide easy reconnection while maintaining the existing shape. Node Editing - LightBurn Software Documentation